Lists and Procedures
Sublists
When you are writing lists and procedures, you may find that you want to have a series of substeps inside a main step. For example, you might have a procedure with step-by-step instructions, and inside step 2 you want to have a bullet list of the options a user can choose from.
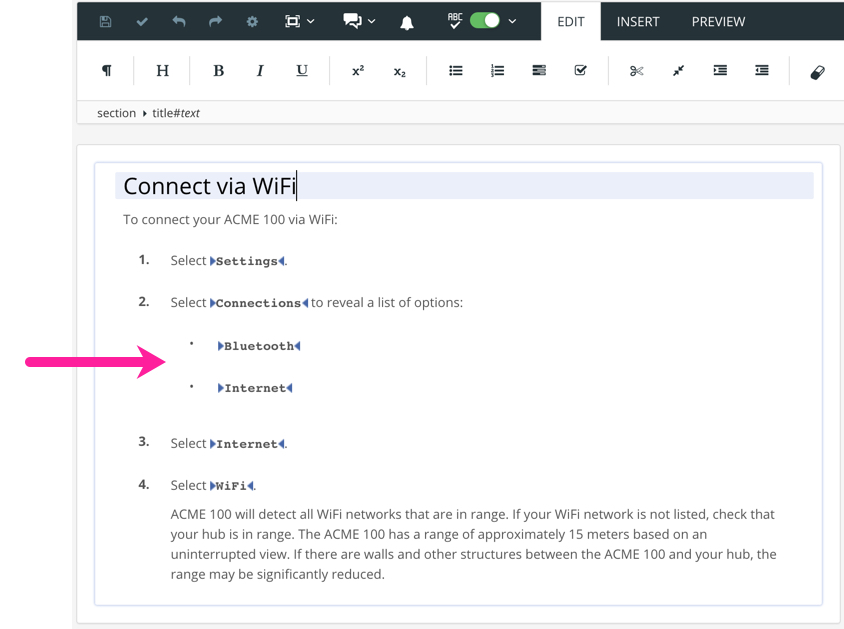
To create these "indent" lists, you can use the Indent option on the toolbar. Alternatively, you can use the element context menu to add the relevant elements.
The following sections explain how to work with indented sublists:
Create an Indented Sublist
To indent list items or steps:
Create your main list or procedure. When you get to the position where you want to add an indented list, add the first
steporlistitemas though it were part of your main list.
Select the
listitemorstepthat is going to be in your indent list. Then select the Indent icon on the toolbar. Paligo indents the step. For most of the list types, the indented step is now part of another sublist. Procedures are slightly different as they become steps inside asubstepselement.
To continue the sublist, select the end of the the sublist
steporlistitemand press Enter. Paligo will create extra indented listitems/steps for you.Add content to the sublist in the same way that you would add content to the main list.
To exit the sublist and return to the main list, position the cursor after the last step in the sublist and outside the sublist structure. Then press Enter to display the Element Context Menu. Select the option for the next type of
listitemorstepin the main list.
Select Save.

Convert a Sublist into a Different Type of List
If you want to change the type of sublist:
Select a
listitem/stepin your sublist.Look at the element structure menu.
There is a main list element (1) and a sublist element (2).
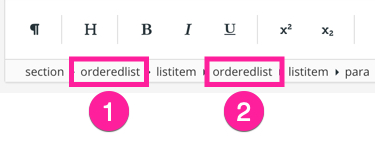
The name of the sublist element will vary, depending on the type of the main list. For example, for an
orderedlist, the sublist is anotherorderedlist, but for procedures, the sublist is calledsubsteps.Select the element for the sublist and then select Go to element.
Select the toolbar icon for the type of list you want, such as an itemized list. At the prompt, confirm that you want to change the type of list.
Convert a Sublist into Items in the Main List
To convert a sublist into listitems/steps in the main list:
Select any
step/listitemin the sublist.Select the Outdent toolbar icon.

Alternatively, you can use the keyboard shortcut.
For Mac OS it is:
Option ⌥ Shift ⇧ T
For Windows it is:
Alt Shift T
Outdent a Sublist
To convert a sublist into listitems/steps in the main list:
Select any
step/listitemin the sublist.Select the Outdent toolbar icon.
Alternatively, you can use the keyboard shortcut.
For Mac OS it is:
Option ⌥ Shift ⇧ T
For Windows it is:
Alt Shift T
Add Multi-Level Numbering
By using the two attributes inheritnum="inherit" and numeration="arabic" on your sublists, you enable multi-level numbering (like 1.1 and 1.1.1) for your PDF output.

Three important things:
This feature only works for ordered lists, not procedures. To learn the difference, see Lists and Procedures.
The attributes are only added to the sublists, not the main list.
You need to preview the topic as PDF to see the correct numbering.
Below, we add two sublists and enable the multi-level numbering for them:
Position the cursor inside the top-level ordered list to add a sublist.

Press Alt + Enter ⏎ (Windows) or Command ⌘ + Enter ⏎ (Mac) to display the Element Context Menu.
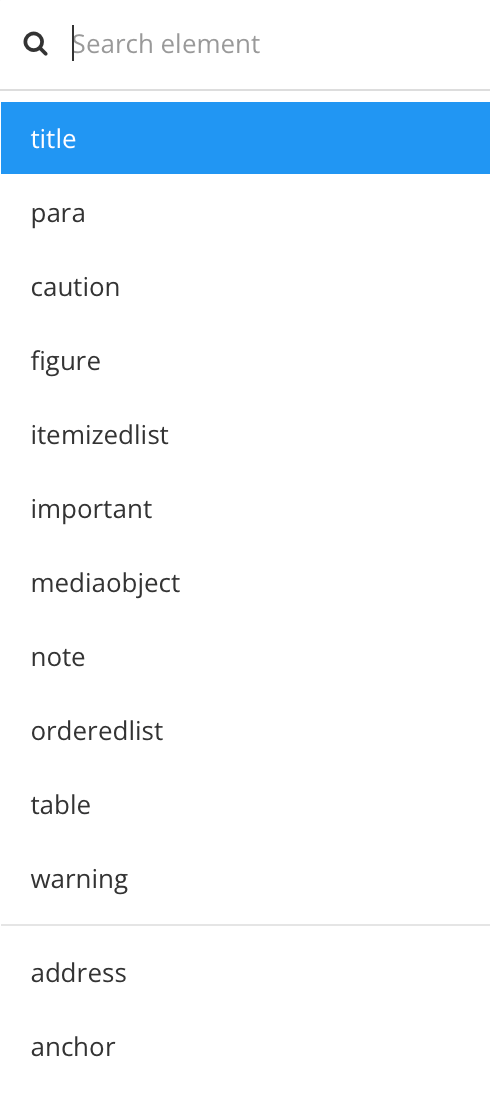
Select orderedlist from the menu to add a sublist.
Select the ordered list in the Element Structure Menu.

Select Go to element.
Add these attributes in the Element Attributes Panel:
inheritnumand set the value toinheritnumerationand set the value toarabic
This will create a second level (1.1) in the ordered list.

Position the cursor inside the second-level sublist.
Repeat step 2 to 6 to add and enable the numbering for a third level (1.1.1) in the ordered list.

Select Save.