Merge a Publication Branch
You can use Paligo's merge feature to combine content from two different branched versions of a publication. This is useful in many different scenarios, but is commonly used when you have an existing "live" publication and you need to work on some updates separately.
In this situation, you publish the "Live" publication and create the "In progress" branch (see Create a Publication Branch). This makes it possible to work on updating the "In progress" branch. When the update is ready to be published, you merge it with the "Live" version, to create one up-to-date version and then publish it.
Note
If a branched publication contains subpublications, and these subpublications have been branched as well, the subpublications each need to be merged separately. Merging the parent publication does not automatically merge the subpublications.
Make sure that the "Live" version and the branch are checked in and have the status Work in progress.
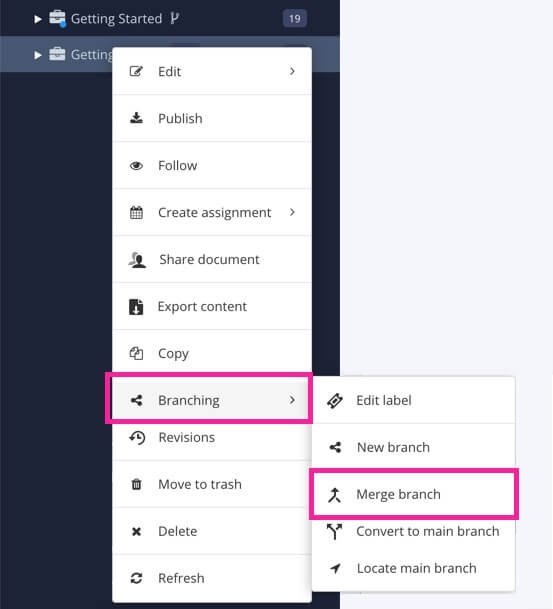
Select the Dotted menu (...) for the "merge from" branch in Content Manager.
Select Branching and choose Merge Branch.
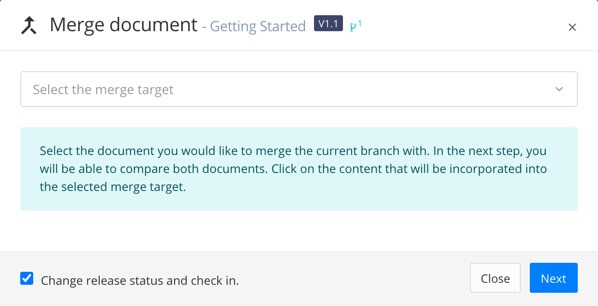
Select the Merge target from the menu. This can either be the main publication or other publication created from the same branch.
Tip
By using the checkbox Change release status and check in, Paligo will automatically change the release status of the topic or publication and check it in.
Select Next.
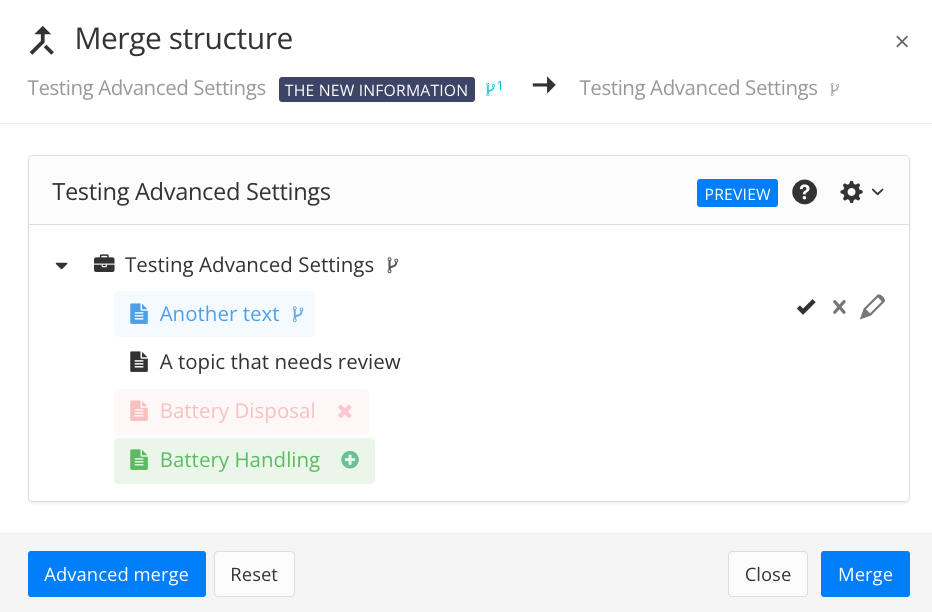
Paligo displays a Preview (Simple Merge) of what the "Merge target" will look like after the merge has taken place. Color highlights show the changes:
Red - This content will be deleted from the "Merge target".
Blue - This content will be updated with content from the "Merge from" branch that is different to the content in the "Merge target".
Green - This content will be added to the "Merge target". It only exists in the "Merge from" branch at the moment.
Note
The Preview is the same in both Simple Merge and Advanced Merge. You can toggle between Simple Merge and Advanced Merge with the button in the lower left corner. Depending on which view that is activated, the button name switches between Simple Merge and Advanced Merge.
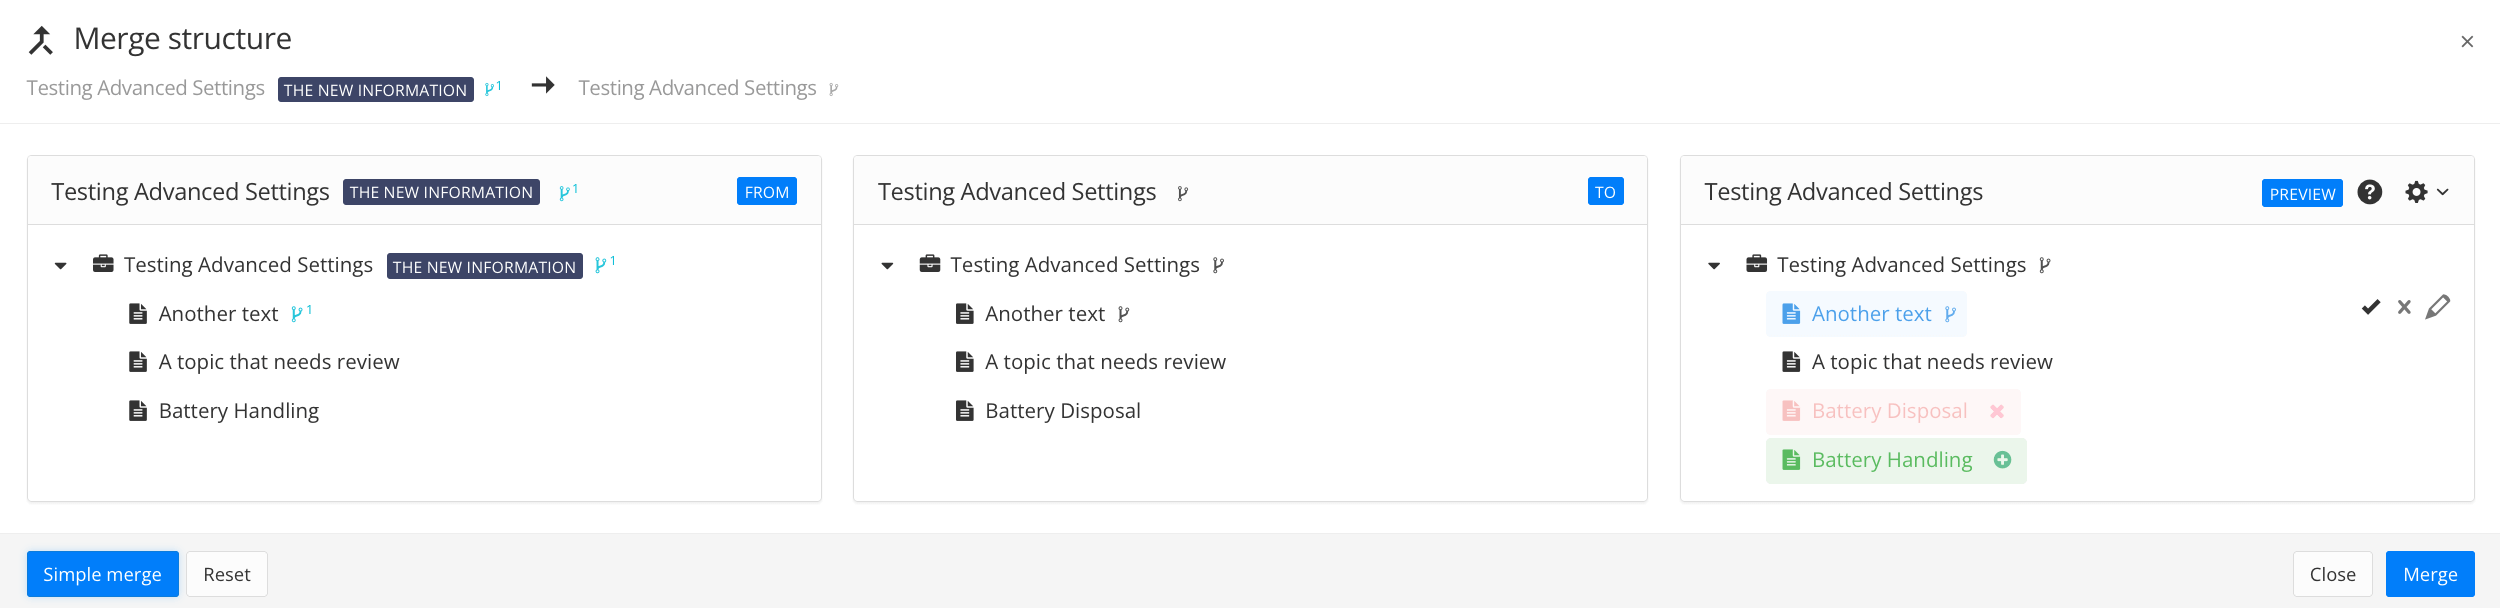
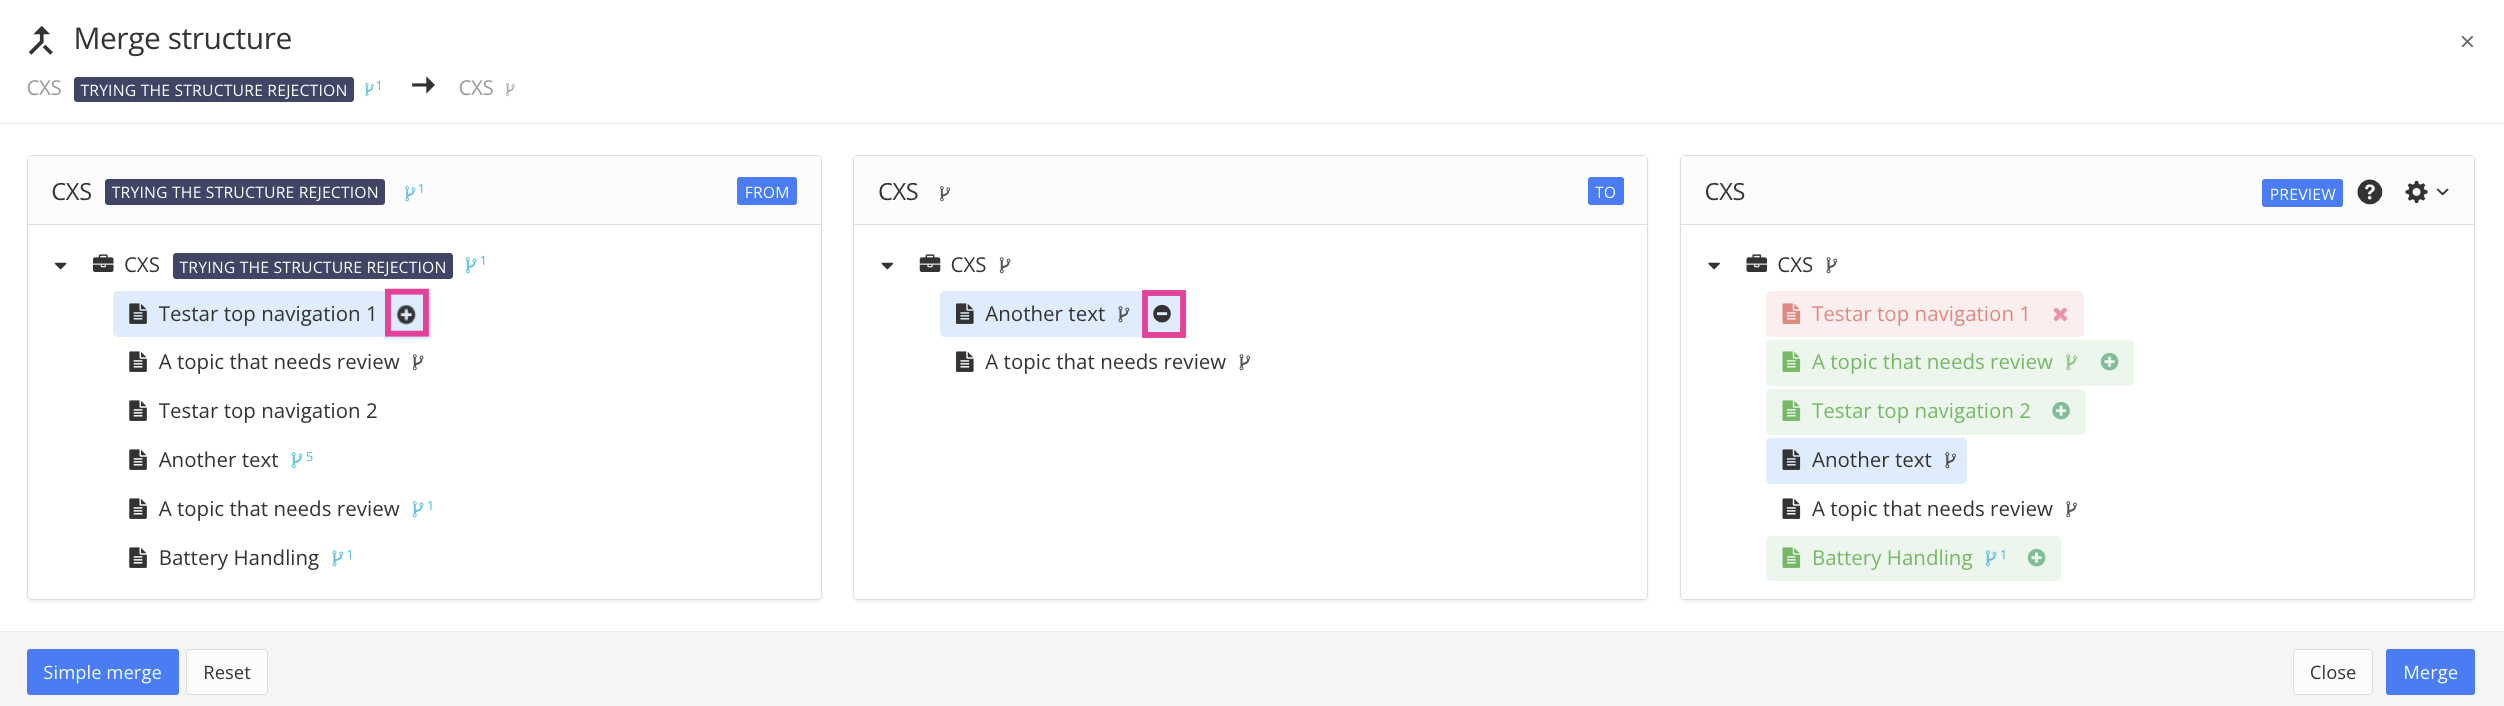
The advanced merge has three columns:
Left column shows the content in the "Merge from" branch in its current state.
Middle column shows the content in the "Merge target" branch in its current state.
Right column (same as Simple Merge) shows a Preview of the "Merge Target" branch if the merge is done.
Use the Preview column to control which changes that will be applied to the "Merge target". When you choose which content you want to merge, the preview is instantly updated.
 Restore a deleted topic by selecting the red topic. It will be marked as "added" (green).
 Remove an added topic by selecting the Green topic. It will be marked as "deleted" (red).
 Accept topic changes by selecting the Checkmark to the right of the blue topic. The changes will be merged into the "Merge target".
 Reject topic changes by selecting the Cross to the right of blue topic. The changes will not be merged into the "Merge target".
 View the topic changes and accept or reject them individually by selecting the Pen to the right of the blue topic . This opens the Merge document dialog that highlights the content changes and makes it possible to choose what to include or exclude from the merge.
Tip
This can also be done from the Merge to and Merge from columns in the Advanced Merge. By hovering over content in these columns, you can Add (+) and Remove (-) content.
Select the Pen to view the changes individually.
Important
If the Publication Topic has been updated, it will be highlighted in blue and the pen will appear to the right of the publication icon.

To merge these changes into the merge target, you have to select the pen and choose merge to accept them. Otherwise these changes will not be seen as accepted for the merge.

Choose what to include or exclude from the merge.

Accept the change by leaving it highlighted.
Reject the change by selecting the text fragment. It is possible to toggle the change on and off.
Do nothing if you only want to view the changes. You can close the window by selecting the X in the top right corner.
Select the Preview button in the lower right corner to see how the changes affect the content.
Select Merge to save the changes and return to the Preview (Simple Merge).
Note
It is possible to return and redo the changes again by selecting the Pen.
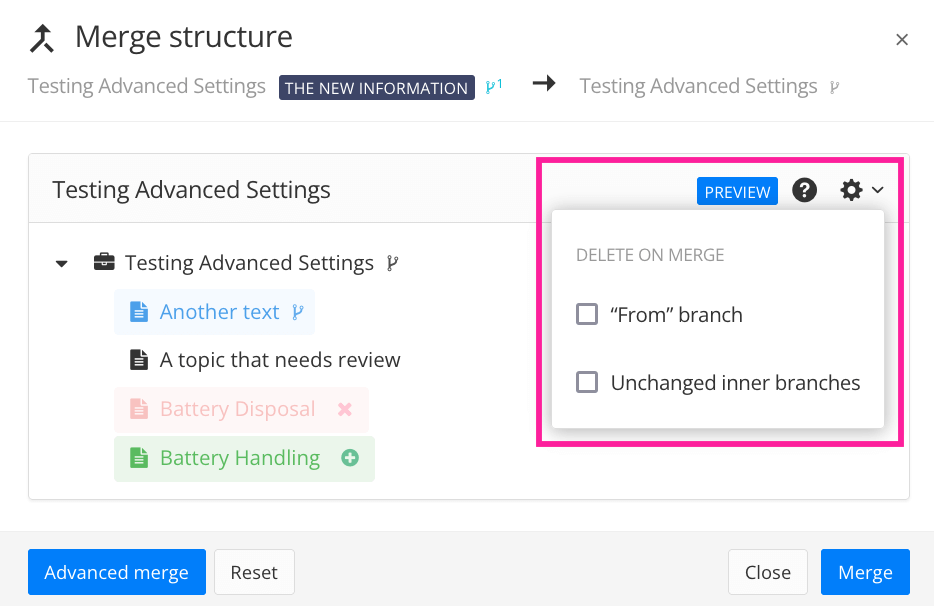
Select Settings in the top right corner.

Use the checkboxes to decide what happens with the branches after the merge is done:
Check the "From" branch box to delete the "Merge from" branch.
Check the Unchanged inner branches box to delete any reused topics or publications that are identical in the "Merge From" branch and the "Merge To" branch.
Clear the boxes if you want to keep the "From" branch and / or the unchanged inner branches.
Select Merge to complete the merge process.