
Glossary Topic

Abstract

How to make a glossary topic in Paligo.

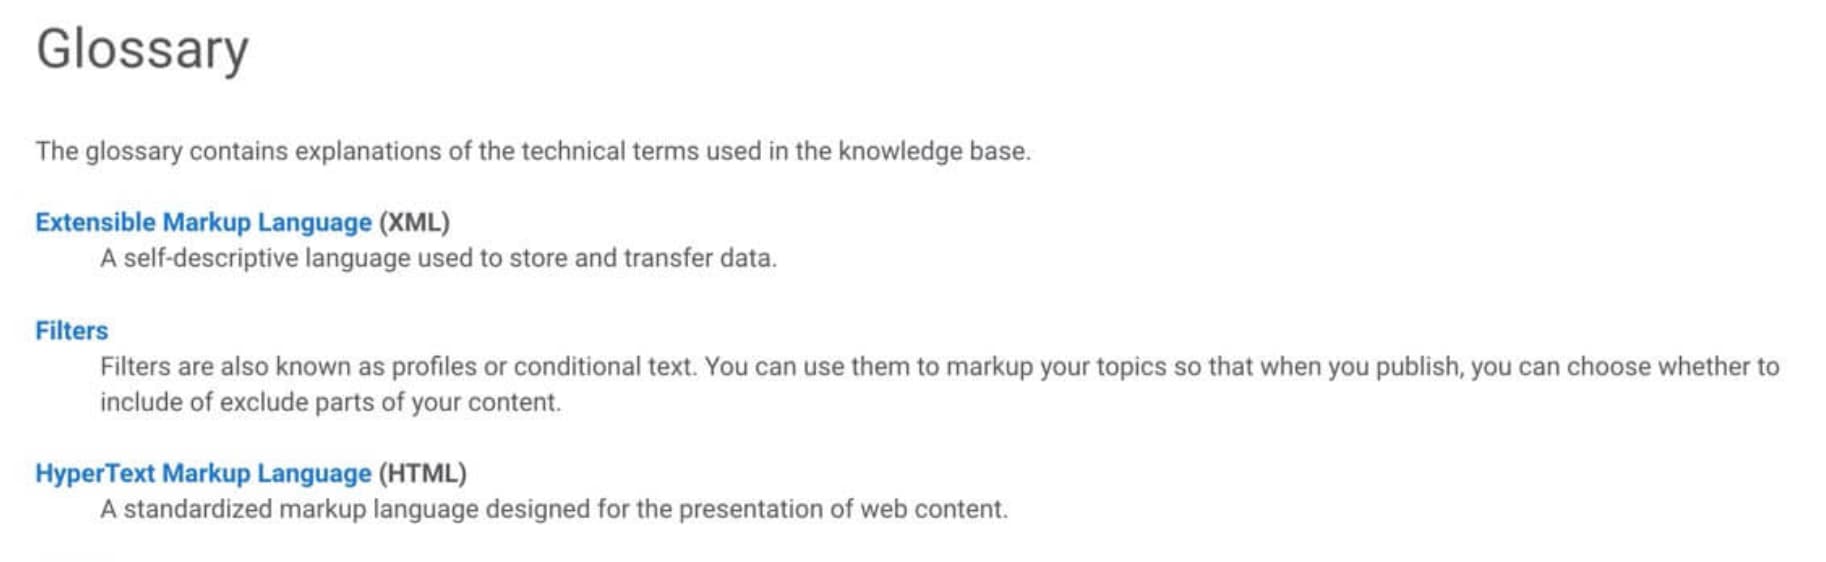
Technical documentation often includes a glossary, where technical terms are listed alphabetically with a brief explanation. They act as a quick reference for terms that may not be commonly understood outside of your organization or industry.

Glossary_Image_small.jpg

When you are Create a Glossary Topic, you should consider whether you want to use a Glossary Title. You can also Sort Glossary Alphabetically so that the entries appear in alphabetical order.

Add your glossary topic to a publication in the same way as you would add any other topic to a publication. Typically, the Glossary topic is placed at the end of the publication.

  • If you want terms in your glossary to reference other terms in your glossary, you can use "See" Glossary Reference and "See Also" Glossary Reference links. These need to be set up in the glossary topic.

  • If you are publishing to PDF, you can set the glossary to Filter Out Unused Glossary Terms. This is useful when you have a single glossary topic that you reuse in several different publications.

  • If you are publishing to an HTML5 help center, you can choose to use Glossary Popovers that appear when you hover the cursor over the term.

  • If you want your topics to contain hyperlinks to the explanations in the glossary, you need to add Glossary References. Alternatively, you can use the glossary topic without any references in your content. This will give you the glossary topic and the definitions you add, but there will be no links from your topics to your glossary.

When you publish your content, the glossary is included. It contains a list of the glossary terms you have defined. If you have included references to the glossary in your content, those references appear as links. There are also popovers that appear if you publish to a HTML5 help center.

To create a glossary for your publication, a glossary element must be added to a topic. When added, Paligo adds the basic structure that is required for a glossary. Some of the elements are optional and can be deleted if not needed. The use of glossterm in topics allows you to change the formatting of terms in the publication and generates a link to the corresponding definitions on the glossary page.

Consider how you want the glossary to appear in the published output:

  • Glossary as a topic with the glossary entries to follow it.

    This is the most common approach for glossaries. To set this up, use "Glossary" as the topic's title. When you add a glossary element, it has its own title. You can delete the glossary's title element, so that only the topic's title is used.

  • Glossary as a subsection with the glossary entries to follow it.

    To create this, give the topic the title that you want to use. When you add the glossary element, it has its own title. You can set the glossary title to "Glossary" or any other name that you want.

A topic with Glossary as its title. It contains a glossary element and inside that there are some glossary definitions.
A topic called "Reference" and it contains a glossary. The glossary has its own title, which is labelled "Glossary".

Tip

If you want to sort the glossary entries in alphabetical order, see Sort Glossary Alphabetically.

You can also add references, so that the terms in your topics contain links to the explanations in your glossary, see Glossary References.

  1. Create a new topic or open an existing topic.

  2. Position the cursor at a valid position for the glossary element.

    For example, after the topic title, but before the first para element.

    Glossary topic open in Paligo editor. An arrow points to the cursor which is positioned below the Glossary title element but above the first para element.
  3. Press Alt + Enter ⏎ (Windows) or Command ⌘ + Enter ⏎ (Mac) to display the Element Context Menu.

    Element context menu shows a search field and a list of elements that are valid at the current position.
  4. Enter Glossary and select it from the menu.

    Paligo adds the basic structure for a glossary.

    A glossary entry, with para, gloss term, acronym, and glossterm elements.
  5. Add a glossary title and an introduction text in the para(both elements are optional).

  6. Add the glossterm (the name of the term).

  7. Add an acronym for the glossary term (optional).

    For example, if the glossary term is Extensible Markup Language, you could add the acronym XML.

    <glossentry>
        <glossterm>Extensible Markup Language</glossterm>
        <acronym>XML</acronym>
        <glossdef><para>A self-descriptive language used to store and transfer data.</para></glossdef></glossentry>
  8. Add a glossdef that explains what the term means.

  9. Use the Element Context Menu to add one glossentry per glossary term.

    Glossary_Example_small.png
  10. Select Save. Save icon.

  11. Add your glossary topic to your publication, see Add Content to a Publication.

When you have created a glossary topic that contains the glossary terms and definitions, you can reference those terms in your topics. For example, if you have a glossary definition of "XML", you can reference it when you mention "XML" in your content. In your published output, the reference guides the reader to the glossary (PDF) or displays the definition (HTML).

Example of a glossary shown as a hover pop-up when published to HTML

Example of a hover popover showing a glossary definition in HTML output.

There are several types of glossary reference that you can use:

You can associate terms in your topics with definitions in a glossary. If the term in your topic is an exact match for the term in the glossary, follow the steps below. This approach is suitable for content that is in a single language and content that is going to be translated.

  1. Open the topic that will reference a term in your glossary.

  2. Highlight the text that you want to reference the term in the glossary. This text has to be an exact match of the text for a glossary term in your glossary topic.

    Some text with the term XML highlighted.
  3. Use the Element Context Menu to add the glossterm element.

    The Paligo editor shows the element context menu being used to add the glossterm element
    The Paligo editor shows that the glossterm element is selected. In the content, the term XML is shown in italic to show that it links to a glossary term.
  4. Select Save. Save icon.

When you publish, Paligo will automatically detect the references in your content and will match them to the terms in your glossary.

Note

As long as your term in the topic text and the glossary term are the same, you can use this technique for as many languages as you need. Because in the underlying XML, the code will be <glossterm>text-term<glossterm>, where text-term is the word you want to use.

As long as the text-term exists in the glossary for the same language, it will work. For example, if you have an English topic with <glossterm>valve</glossterm>, your English glossary needs to contain a glossary term called "valve", and in the French version, your topic would contain <glossterm>vanne</glossterm> and the French glossary would need a term called "vanne".

In a topic, you may have text that needs to refer to the glossary, but it does not match the glossary term. For example, you could have "configurable" in your topic, but you want it to reference a "Configure" glossary term.

There are two different ways to create this type of glossary reference:

  • Reference Glossary Entry by XML ID - If you have translations or are going to translate your content in the future, you should use references by xml:id.

  • Reference with Baseform and Term Name - This is only suitable if your content is only going to be written and published in one language. If you have translations, this technique will only work on the source language.

Reference Glossary Entry by XML ID

If you are going to translate your content, you will most likely want to refer to glossary terms that are also translated. For example, if you have English and French content, you probably want the French topics to reference French glossary terms. To do this, use an xml:id reference.

With an xml:id reference, the underlying code is the same for all language versions. So if you have a glossary entry with an xml:id of N5f84b058951b3 in your English content, that same id is also used for the glossary entry in any other languages.

If you used a baseform reference instead, the glossary term would only work for one language. This is because the baseform term is language-specific. For example, let's say you have English content and you use baseform: valve for a glossary reference. Paligo will look for valve in the English glossary, and will find it (assuming it exists). But for the French glossary, Paligo will still look for baseform:valve, and valve will not exist in the French glossary as it is translated to vanne.

Tip

You can use xml:id references for content in a single language too. This is a good idea if you do not translate your content now, but may need to translate it in the future.

To use the xml:id to reference a glossary entry:

  1. Open your glossary topic. This is the topic that contains your glossary and the entries and definitions.

  2. Select a glossentry element. Check that it does not have an xml:id entry in the Element attributes section. If it does, check the other glossentry elements too. If they all have xml:ids, ignore step 3 and continue from step 4. If any glossentry does not have an xml:id, you will need to add one (see step 3).

    Element attributes panel showing glossentry with an xml:id
  3. Select the glossentry element on the Element Structure Menu and then select Generate ID. This gives the glossentry a unique ID (xml:id).

    Glossentry element selected in the element structure menu. The generate ID option is highlighted.

    When all of the glossentry elements have an xml:id, you can reference them from your topics.

    Tip

    You can manually change an xml:id to something that is more meaningful, if you wish. This can make it easier to work with xml:ids for glossary references.

    When changing an xml:id, there are some rules to follow:

    • The xml:id must start with a letter

    • There is a 36 character limit

    • You cannot use spaces, so use an underscore instead. For example, glid valve is not allowed, but you could use glid_valve.

    It is a good idea to have a consistent xml:id naming strategy for your glossary entries.

  4. Open a topic and select the text that you want to reference a glossary term.

    Some text with the term XML highlighted.
  5. Use the element context menu to apply the glossterm element.

    The Paligo editor shows the element context menu being used to add the glossterm element
    The Paligo editor shows that the glossterm element is selected. In the content, the term XML is shown in italic to show that it links to a glossary term.
  6. Select the glossterm element and then add the linkend attribute in the Element attributes section.

    The element attributes section shows the glossterm element is selected. It has been given the linkend attribute.
  7. Set the value of the linkend attribute to match the xml:id of the glossary entry you want to reference.

    The element attributes section shows the glossterm element is selected. It has been given the linkend attribute. The linkend attribute has a reference as its value.
  8. Repeat steps 4 to 7 inclusive for each reference.

  9. Select Save. Save icon.

When you publish, Paligo will automatically detect the references in your content and will match them to the terms in your glossary.

Reference with Baseform and Term Name

One way to reference a glossary term that does not match the text in your content is to use the baseform attribute. But this is only suitable if you write and publish your content in a single language.

Important

If you have translations or are going to translate your content, use the xml:id to reference your glossary.

To use the baseform attribute to reference a glossary term that does not match the text in your content:

  1. Open a topic and select the text that you want to reference a glossary term.

  2. Use the Element Context Menu to add the glossterm element.

    To find out more about using the Element Context Menu to add content, see About Authoring.

  3. Select the glossterm element and then use the Element attributes section to add the baseform attribute.

    element attributes section shows glossterm is selected. The baseform attribute has been added.
  4. Set the value of the baseform attribute to the name of the term in the glossary. This has to be an exact match for the term in the glossary.

    The element attributes section shows the glossterm element is selected. It has a baseform attribute and the value for the baseform is Extensible Markup Language
  5. Repeat this process for other references, as needed.

  6. Select Save. Save icon.

When you publish, Paligo will automatically detect the references in your content and will match them to the terms in your glossary.

If you want a glossary term to refer to another glossary term, you can use a "see" reference. For example, if you have a glossary term for "Coolant" you could use a "see" reference to guide the reader towards a related term, such as "See refrigeration".

glossary-see-reference.jpg

Tip

You can also use "See Also" Glossary Reference.

To use a "see" reference:

  1. Open your glossary topic or Create a Glossary Topic.

  2. Click inside the glossary element.

  3. Press Alt + Enter ⏎ (Windows) or Command ⌘ + Enter ⏎ (Mac) to display the Element Context Menu.

    Element context menu shows a search field and a list of elements that are valid at the current position.
  4. Enter glossentry and select it from the menu.

    Paligo adds a glossentry element and it contains a glossterm, acronym, glossdef, and para element (the para is in the glossdef).

    glossterm-acronym-definition.jpg
  5. Click after the glossterm element, but before the acronym element.

    see-cursor-position.jpg

    This selects the glossentry element, which you can see in the Element Structure Menu and in the Element Attributes Panel.

    see-reference-allshow-glossentry.jpg
  6. Use the Element Context Menu to add the glossee element.

    Glossary topic open in Paligo editor. The glosssee element is selected. In the element attributes section, the otherterm attribute has been added to the glosssee element and it has its value set to the xml id of another glossary term.
  7. Delete the acronym, glossdef, and para elements for the glossary entry. You should now be left with the glossentry and glosssee elements.

    Note

    You can have either a glossee element or a glossdef element in a glossentry, but not both.

  8. In your glossary definitions, locate the glossary term that you want to reference.

    For example, if you want to have a "See Refrigeration" reference, find the glossary definition for "Refrigeration".

  9. Select the glossentry element for the term that you want to reference.

  10. In the Element Attributes Panel, copy the xml:id attribute for the glossentry.

    glossentry-id-copy.jpg

    Note

    If the glossentry does not have an xml:id, select the glossentry element in the element structure menu, and then select Generate ID. Paligo will create an xml:id for the glossentry element.

  11. Select the glosseealso or glossee element that you added earlier.

  12. In the Element Attributes Panel, add the Otherterm attribute and paste in the copied xml:id as the value.

    The Otherterm attribute links the glosseealso or glossee element with the other glossary term that you are referencing. The xml:id is what Paligo needs to identify the other glossary term.

    glossee-otherterm.jpg
  13. Select Save. Save icon.

When you publish your content (including your glossary), you will get a "See" reference to the glossary term you chose in step 8.

Example 1. "See" reference in a glossary

For this example, imagine you have a glossary term for "Profiling" and instead of a description, you want a reference to show "See Filters".

In your glossary topic, you already have a "Filters" glossary entry that has this structure:

<glossentry xml:id="N5fa17485ec783">
      <glossterm xinfo:text="14442">Filters</glossterm>
      <glossdef>
        <para>Filters are also known as profiles or conditional text. You can use them to markup your topics so that when you publish, you can choose whether to include of exclude parts of your content.</para>
      </glossdef>
    </glossentry>

The first step is to create a new glossary entry, so you add a new glossentry element and name the entry "Profiling".

glossary entry, with the term set to Profiling, and a blank acronym element and a blank definition.

You delete its acronymn and glossdef elements as there is no need for an acronym and you cannot have a definition and a "see" reference in the same glossary term.

Glossary entry has its term, but the acronym and definition have been deleted.

You add the glossee element.

Glossary term with the glossee element added.

You select the glossentry element for the glossary term you want to reference, in this case, "Filters". Then you copy its xml:id value from the Element attributes section.

Glossary topic in Paligo editor. The glossentry element is highlighted in the element structure menu and the element attributes section. Its xml id is shown in the element attributes section and is also highlighted.

You select the glossee element for the "Profiling" glossary entry, and then add the Otherterm attribute in the Element attributes section.

You copy the xml:id of the "Filters" glossary entry into the value field for the Otherterm attribute.

Glossary topic open in Paligo editor. The glosssee element is selected. In the element attributes section, the otherterm attribute has been added to the glosssee element and it has its value set to the xml id of another glossary term.

You save the glossary and publish it as part of a publication. In the output, the entry for Profiling shows "See Filtering".

Example of a glossary output. There is a glossary heading with a list of glossary terms and their definitions. An arrow points to the term for "Profiling" and its entry shows "see Filters"

For some glossary terms, you may want to include a "see also" reference as well as the definition of the glossary term. For example, if you have a glossary term for "coolant" you could have a definition and a "see also" reference to another related term, such as "see also refrigeration".

glossary-seealso-output.jpg

Tip

You can also use "See" Glossary Reference.

To use a "see also" reference:

  1. Open your glossary topic or Create a Glossary Topic.

  2. Click inside the glossary element.

  3. Press Alt + Enter ⏎ (Windows) or Command ⌘ + Enter ⏎ (Mac) to display the Element Context Menu.

    Element context menu shows a search field and a list of elements that are valid at the current position.
  4. Enter glossentry and select it from the menu.

    Paligo adds a glossentry element and it contains a glossterm, acronym, glossdef, and para element (the para is in the glossdef).

    glossterm-acronym-definition.jpg
  5. Click below the glossdef "Definition".

    The glossseealso element has to be inside the glossdef, but after the para that is inside the glossdef.

    seealso-definition-position.jpg
  6. Use the Element Context Menu to add the glosseealso element.

    profiling-def-seealso-3.jpg
  7. In your glossary definitions, locate the glossary term that you want to reference.

    For example, if you want to have a "See also Refrigeration" reference, find the glossary definition for "Refrigeration".

  8. Select the glossentry element for the term that you want to reference.

  9. In the Element Attributes Panel, copy the xml:id attribute for the glossentry.

    glossentry-id-copy.jpg

    Note

    If the glossentry does not have an xml:id, select the glossentry element in the element structure menu, and then select Generate ID. Paligo will create an xml:id for the glossentry element.

  10. Select the glosseealso or glossee element that you added earlier.

  11. In the Element Attributes Panel, add the Otherterm attribute and paste in the copied xml:id as the value.

    The Otherterm attribute links the glosseealso or glossee element with the other glossary term that you are referencing. The xml:id is what Paligo needs to identify the other glossary term.

    glossee-otherterm.jpg
  12. Select Save. Save icon.

When you publish your content (including your glossary), you will get a "See also" reference to the glossary term you chose in step 8.

Example 2. "See Also" reference in a glossary

For this example, imagine you want a glossary term for "Profiling" and you need it to provide a definition and also to guide readers to also see the term "Filters".

In your glossary topic, you already have a "Filters" glossary entry that has this structure:

<glossentry xml:id="N5fa17485ec783">
      <glossterm xinfo:text="14442">Filters</glossterm>
      <glossdef>
        <para>Filters are also known as profiles or conditional text. You can use them to markup your topics so that when you publish, you can choose whether to include of exclude parts of your content.</para>
      </glossdef>
    </glossentry>

The first step is to create a new glossary entry, so you add a new glossentry element and name the entry "Profiling".

glossary entry, with the term set to Profiling, and a blank acronym element and a blank definition.

You delete its acronym element as that is not needed in this case.

You enter a definition for "Profiling".

profiling-def-seealso.jpg

You add the glossseealso element.

profiling-def-seealso-2.jpg

You select the glossentry element for the glossary term you want to reference, in this case, "Filters". Then you copy its xml:id value from the Element attributes section.

You select the glosseealso element for the "Profiling" glossary entry, and then add the Otherterm attribute in the Element attributes section.

You copy the xml:id of the "Filters" glossary entry into the value field for the Otherterm attribute.

profiling-def-seealso-3.jpg

You save the glossary and publish it as part of a publication. In the output, the entry for Profiling shows the definition for profiling and it has a "See also Filtering" reference.

glossary-seealso-output.jpg

When you create a glossary, you add a glossary element, and by default, this includes a title element inside it. You can use the glossary title to name the glossary. But depending on how you have set up your glossary, you may decide that you do not want a title at all.

One of the most common ways to set up a glossary is to create a topic called "Glossary" and then add a glossary element to it. In this scenario, the topic's title is glossary, so there is no real need for a glossary title as well. That's not a problem - you can delete the glossary title and the glossary will still work as expected. In the following image, "Glossary" is the topic's title and then the actual glossary has no title of its own.

A topic with Glossary as its title. It contains a glossary element and inside that there are some glossary definitions.

But it is also possible to add a glossary to a topic that is not called "Glossary". For example, you could add a glossary to a topic called "Reference". In this scenario, it can be a good idea to include a glossary title as well. The title will make it easier for your readers to find your glossary, seeing as there is no "Glossary" topic. In the following image, a glossary has been added to a "Reference" topic, and the glossary has a title called "Glossary".

A topic called "Reference" and it contains a glossary. The glossary has its own title, which is labelled "Glossary".

If you are going to use a glossary title, you should consider:

By default, when you add a glossary element, it also contains a title. You can enter the text for your title inside the title element.

Glossary topic containing a glossary element. The glossary element contains a title element by default.

If you have removed the glossary title and later decide that you do want a title, you can either:

To manually add a glossary title:

  1. Open the topic that contains your glossary in the Paligo Editor.

  2. Select the glossary element.

    A References topic containing a glossary element. The glossary element is selected. There is no title element for the glossary.
  3. Use the element context menu to add the title element.

    A References topic containing a glossary element. The glossary element has a title element, which is selected, ready for the writer to enter the title text.
  4. Enter the text for your glossary title inside the title element.

  5. Select Save. Save icon.

Paligo can automatically add a title to your glossary. The automatic title has the text "Glossary" and if you publish to other languages, a translation of "Glossary" is provided as well.

To use an automatic glossary title for PDF outputs:

  1. Select Layout in the top menu.

    Paligo editor. The Layout option in the header menu is highlighted.

    Paligo displays a list of Layouts. The list is empty if there are no custom Layouts in your Paligo instance.

  2. Select the Layout you want to update or Create a Layout.

    Tip

    You can copy the URL of the Layout Editor and paste it into a new tab in your browser. This can be useful if you frequently switch between your Paligo content and the Layout settings.

  3. Select General and choose Glossary, Index, and Bibliography.

  4. Set Glossary auto title to Enable.

    When you publish, Paligo will check to see if your glossary has a title.

    • If the glossary already has a title, Paligo will use that title. It will not generate an automatic title.

    • If the glossary does not have a title, Paligo will add a title element with "Glossary" as the title text.

    If you set Glossary auto title to Disable, Paligo will not create an automatic glossary title.

  5. Select Save.

When you publish to PDF with this layout, the output will include or exclude the automatic glossary title.

PDFs can have bookmarks that act like a table of contents in a side panel, where your topics are shown in order. If you have a glossary, it's likely that you will want a link to the glossary to appear here.

If your glossary is inside a topic called "Glossary", you will not need to take any action. The "Glossary" topic will appear in the bookmarks by default.

But if your glossary is inside a topic with a different title, there will be no obvious way for the reader to access the glossary. For example, let's say you have added your glossary to a topic called "references" and you have removed the title for the glossary. In the published PDF, the bookmarks will only show "References", which makes it harder for your readers to find the glossary.

To fix this, you can set Paligo to include the glossary's title in the bookmarks as well. If your glossary does not have a title, you can add one or you can set Paligo to generate one automatically.

A PDF output showing a bookmarks side panel and a references topic. The topic contains a glossary that has no title and there is no bookmark link for "Glossary".
  1. Select Layout in the top menu.

    Paligo editor. The Layout option in the header menu is highlighted.

    Paligo displays a list of Layouts. The list is empty if there are no custom Layouts in your Paligo instance.

  2. Select the Layout you want to update or Create a Layout.

    Tip

    You can copy the URL of the Layout Editor and paste it into a new tab in your browser. This can be useful if you frequently switch between your Paligo content and the Layout settings.

  3. Select General and choose Glossary, Index, and Bibliography.

  4. Enable the Glossary title or auto title in bookmarks setting to get Paligo to include the title of the glossary element in the bookmarks.

    PDF layout setting called Glossary title or auto title in bookmarks. It is set to Enable.

    Note

    This setting will only work if your glossary has a title, or you have set Paligo to generate a title automatically.

  5. Select Save.

When you publish to PDF with this layout, the output will include or exclude the automatic glossary title.

When you publish to PDF with this layout, Paligo includes the glossary title in the bookmarks. It is a subsection of its parent topic.

PDF output showing a References topic on display. The topic contains a glossary and the glossary has its own title called "Glossary". In the bookmarks side panel, there is a top-level entry for the References topic and it has a sub-level link to the glossary title.

By default, Paligo includes a glossary title for HTML5 outputs, but it is hidden from view. The title varies, depending on how your glossary is set up:

  • If your glossary contains a title element, Paligo includes that title in the HTML5 output

  • If your glossary has no title element, Paligo creates an automatic title for the HTML5 output. The automatic title is called "Glossary" (or a translation of Glossary for other languages).

To display the glossary title in your HTML5 help center, you need to add some custom CSS:

  1. Create or edit an existing custom CSS file and add the following code:

    .glossary .titlepage{
        display: block;
    }

    To learn more about creating custom CSS, see Style with CSS.

  2. Create an HTML5 Help Center layout. Alternatively, you can Edit a Layout.

  3. Upload your custom CSS to the HTML5 layout.

  4. Select Save.

When you publish to HTML5 using this layout, the glossary title is shown.

For PDF and HTML5 outputs, you can make the Paligo Glossary filter out unused glossary terms from the published output. This is useful when you reuse the same glossary topic for different publications.

When you publish, Paligo will look for the glossary references in your publication. It will then filter the glossary so that it only includes entries for the glossary terms that are actually referenced in your publication. If there are any unused glossary terms, they are ignored and do not appear in the glossary.

To set your glossary to only include terms that appear in a publication:

  1. Create a Glossary Topic and add glossary terms and definitions.

  2. Mark up your topics with Glossary References for the filtering to work. Each glossary term needs to be referenced at least once in the publication's topics, otherwise it will be omitted when the glossary is published (as long as it has the role attribute set to auto, see step 5) .

  3. Open your glossary topic and click inside the Paligo Glossary.

  4. Select the glossary element in the Element Structure Menu and choose Go to element.

    Paligo editor shows a glossary topic is open. The glossary element is selected in the element structure menu and the go to element option is highlighted.
  5. Add the role attribute in the Element Attributes Panel and set its value to auto.

    The element attributes section shows the glossary element has a role attribute. The role attribute has its value set to auto.

    Note

    The automatic filtering of glossary terms only applies if the glossary has the role attribute set to auto.

    If you have a topic that contains multiple glossaries and some of them without the role="auto" element, you will get all their glossary terms, even if they are not used in the publication.

  • Select Save. Save icon.

  • When you publish, Paligo will filter out any unused glossary terms.

    Example 3. Range of publications for a single product

    For example, let's say you have a range of publications for a single product, such as an industrial fan:

    • A user guide aimed at customers who will use the fan controls in the factory.

    • An installation guide aimed at electricians who will fit the fan in the factory.

    • A firmware guide that is used by your service engineers who can visit the factory and apply updates to the fan.

    Rather than creating separate glossaries for these publications, you create one glossary that is reused in all three. However, the glossary will contain some terms that you do not want to appear in the user guide, as they are technical terms that are not intended for the customers.

    If you set the glossary to filter out unused glossary terms, each output will only include the terms that appear in the publication. In other words, you will get a user guide with a glossary that only contains the terms that appear in the user guide, the installation guide will only have terms that appear in the installation guide, and so on.


If you want your glossary to automatically be alphabetically sorted, there are two ways to sort the glossary entries in alphabetical order: Manual Sorting of Glossary Entries and Automatic Sorting of Glossary Entries.

You can manually sort the glossary entries in alphabetical order with Keyboard Shortcuts in the main Editor.

  1. Select the Glossary Topic in the Content Manager.

  2. Position the cursor inside the glossary element, but before the first glossterm element.

    A glossary topic. The cursor is positioned below the title but above the glossary element.
  3. Use a keyboard shortcut to sort the glossary entries into alphabetical order:

    • On Mac, use: Control ^ + Option ⌥ + Shift ⇧ + G

    • On Windows, use: Ctrl + Alt + Shift + G

  4. Select Save. Save icon.

Paligo can sort your glossary entries into alphabetical order when you publish to HTML5 or PDF output. The sorting happens as part of the "transform" and you can turn it on or off in the Layout Editor.

To control the automatic glossary sorting:

  1. Select Layout in the top menu.

    Paligo editor. The Layout option in the header menu is highlighted.

    Paligo displays a list of Layouts. The list is empty if there are no custom Layouts in your Paligo instance.

  2. Select the Layout you want to update or Create a Layout.

    Tip

    You can copy the URL of the Layout Editor and paste it into a new tab in your browser. This can be useful if you frequently switch between your Paligo content and the Layout settings.

  3. Locate the setting Sort Glossary Automatically:

    • For HTML5 output, it is in the sidebar option General.

    • For PDF output, expand the sidebar option General and select Glossary, Index and Bibliography.

    Sort_Glossary_Automatically_small.jpg
  4. Set Sort Glossary Automatically to:

    • Enable to to use the alphabetical sorting during the publishing process. In the published output, the glossary entries will appear in alphabetical order in the published output. For HTML5 it is activated by default.

    • Disable to not use this feature and leave the glossary as is. In the published output, the glossary entries will appear in the same order as in the Glossary Topic.

    • Default to inherit the value for this setting from the base Layout. The base Layout is either a built-in Layout provided by Paligo or another custom Layout, see Layout Relationships - Base, New, Duplicate.

  5. Select Save.

Glossary popovers are panels that appear when you hover the cursor over a term that is linked to the glossary. They contain the glossary term and definition from the matching term in your glossary, and are only available in HTML5 help center outputs.

Paligo creates glossary popovers for you automatically. But if you prefer, you can disable them so that your glossary references only have a link to your glossary topic.

Example of a glossary shown as a hover pop-up when published to HTML

To control whether glossary popovers are used for HTML5 output:

  1. Select Layout in the top menu.

    Paligo editor. The Layout option in the header menu is highlighted.

    Paligo displays a list of Layouts. The list is empty if there are no custom Layouts in your Paligo instance.

  2. Select the Layout you want to update or Create a Layout.

    Tip

    You can copy the URL of the Layout Editor and paste it into a new tab in your browser. This can be useful if you frequently switch between your Paligo content and the Layout settings.

  3. Select Classes and attributes in the sidebar.

    Classes_and_Attributes.png
  4. Use the Glossary Popovers setting to enable or disable them.

    glossary-popovers-layout-setting.jpg
  5. Select Save.

When you publish to HTML5 using this layout, your output will have glossary popovers if you enabled them. You can test it by hovering the cursor over text that references a term in your glossary. If you disabled popovers, the glossary references will appear as links only.

Glossaries, like any other topic, can be in multiple languages. You add each required language to the topic, and then the topic can contain the content for the source language and the translations for each additional language (see Working in Translation View).

For a glossary in multiple languages, you need:

  • A "glossary" topic to contain the glossary term definitions.

    This topic will be translated into different languages, so you have a single glossary topic with versions in English, French, German, Spanish, etc. To find out more, see Create a Glossary Topic.

  • Regular topics that contain text that references your "glossary" topic.

    These topics will also be translated into different languages. For the glossary references, Paligo will look in the version of the glossary that matches the language of the topic. For example, if the French version of a regular topic references "vanne", Paligo will look for "vanne" in the French version of the glossary topic.

Most types of glossary reference will work in all languages (see Glossary References), but there is one exception. If you want a term in your text to refer to a glossary entry, but the text does not match the glossary term, you will need to use an xml:id reference. To find out more, see Topic Term is Different to Glossary Term.

When your content is translated, it is important that only the text is translated. Do not translate element names, attribute names, or attribute values.

Glossary Terms in the Translation Editor

If you translate your content manually using the Translation Editor, make sure to follow these steps for any content that has a glossary term (or any other inline XML element):

  1. In the Translation Editor, select the part that you want to translate. The translation dialog appears.

  2. If the source content that you are translating contains a glossary term element, select Copy Source Text. This copies the entry in the original source language version into the translation dialog. Importantly, it copies the inline elements, such as glossterm too. The inline element is highlighted in the translation dialog.

    translate-glossterm-1.jpg
  3. Translate the content into the relevant language, including the highlighted content, and then save.

Note

If you do not use Copy Source Text, the text you enter in the translation dialog will not include the elements that are needed for glossary terms. It will only be regular text.