Topics
A topic is a container for your content and building blocks for your output. You create content inside a topic by adding elements for paragraphs, images, procedures, bullet lists, tables and more. You can add as many block elements and inline elements as you need, but the maximum permitted size for a topic is 1 MB.
Instead of writing all sections in one large file, you write each section in a separate topic. For best practice, each topic should focus on one subject or task.
To create the output, you assemble a collection of topic references
in Publications. The topics are your building blocks that you can choose to include or exclude from as many different publications as you like. This is why topics are so important for About Reusing Content. They allow you to use the same piece of information in many different publications, without having to create copies of it. There is one "single source of truth".


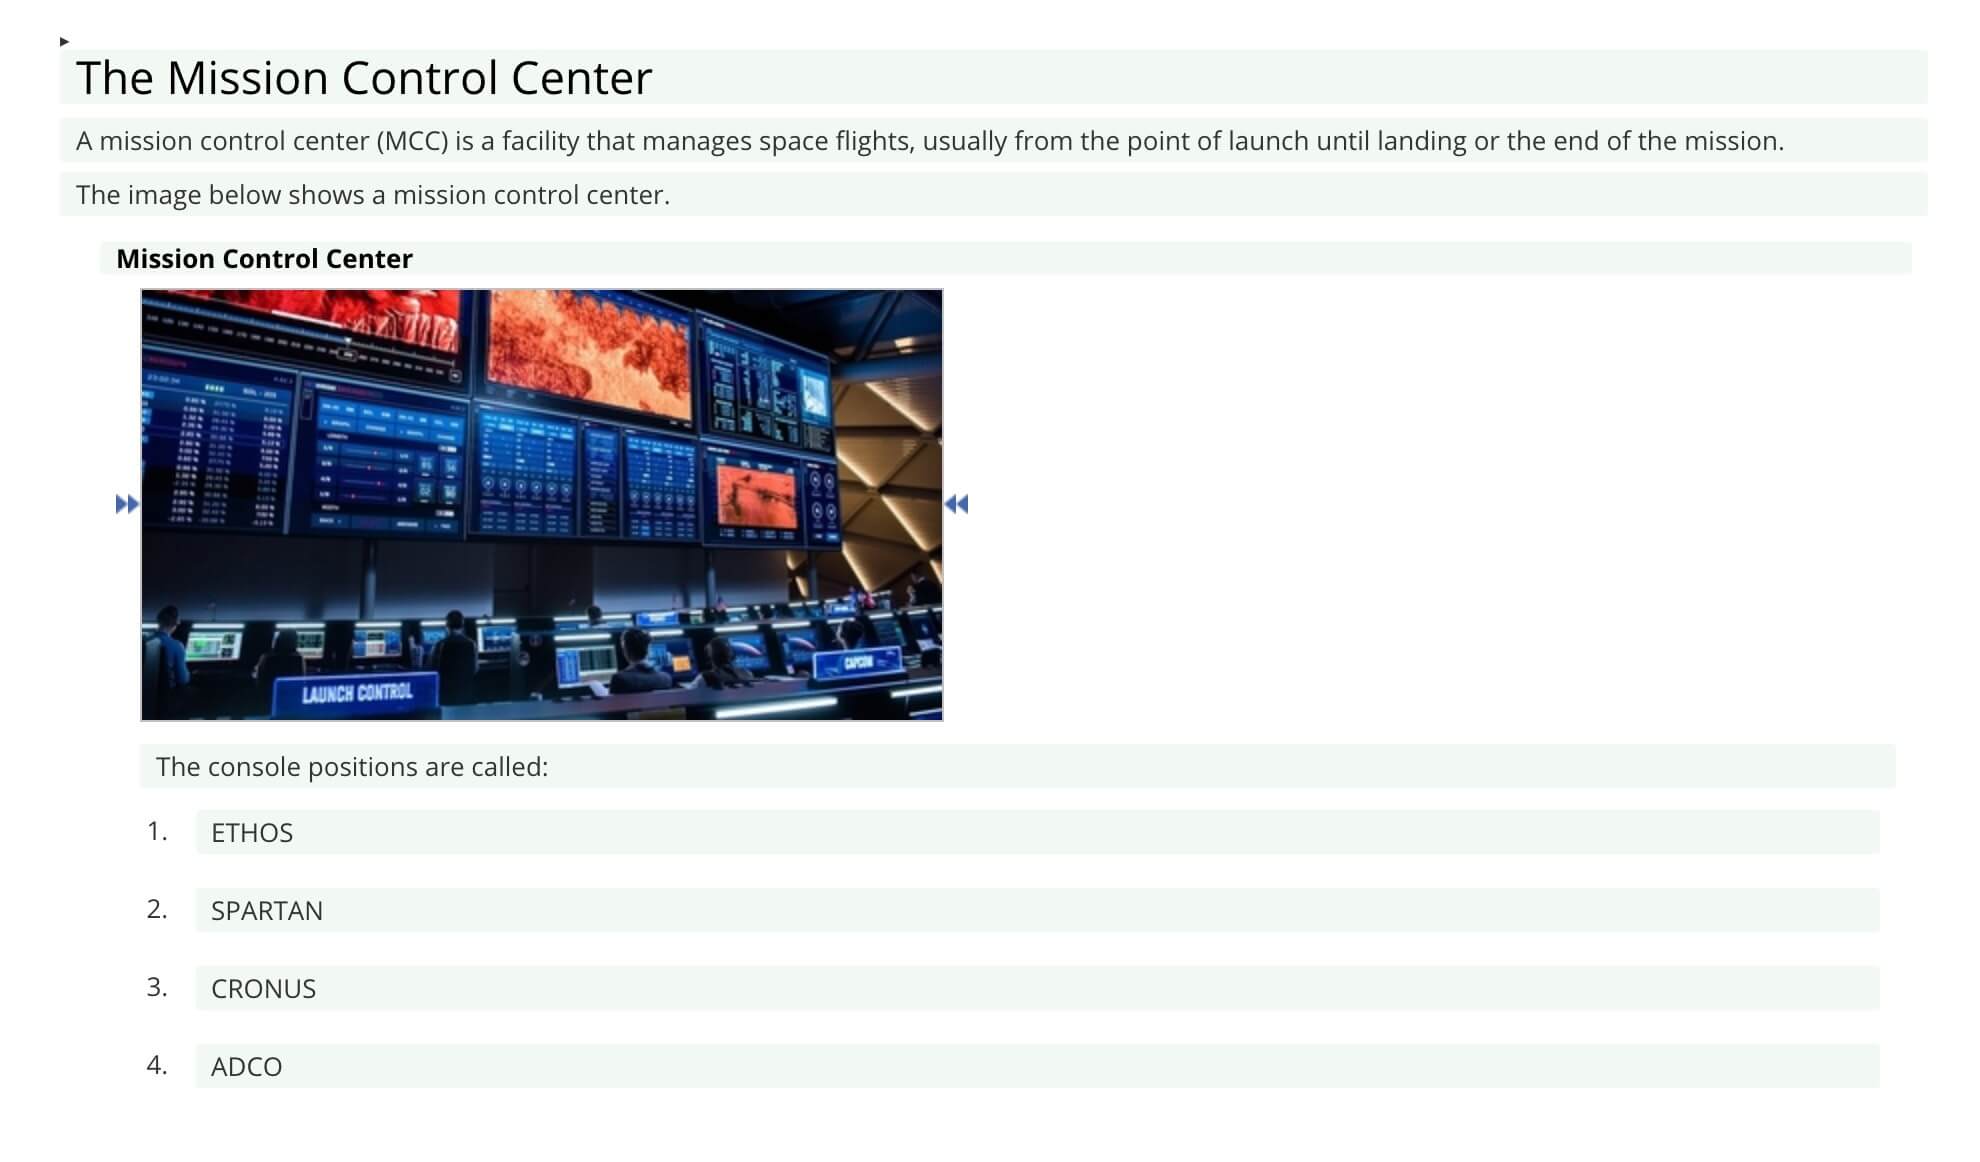
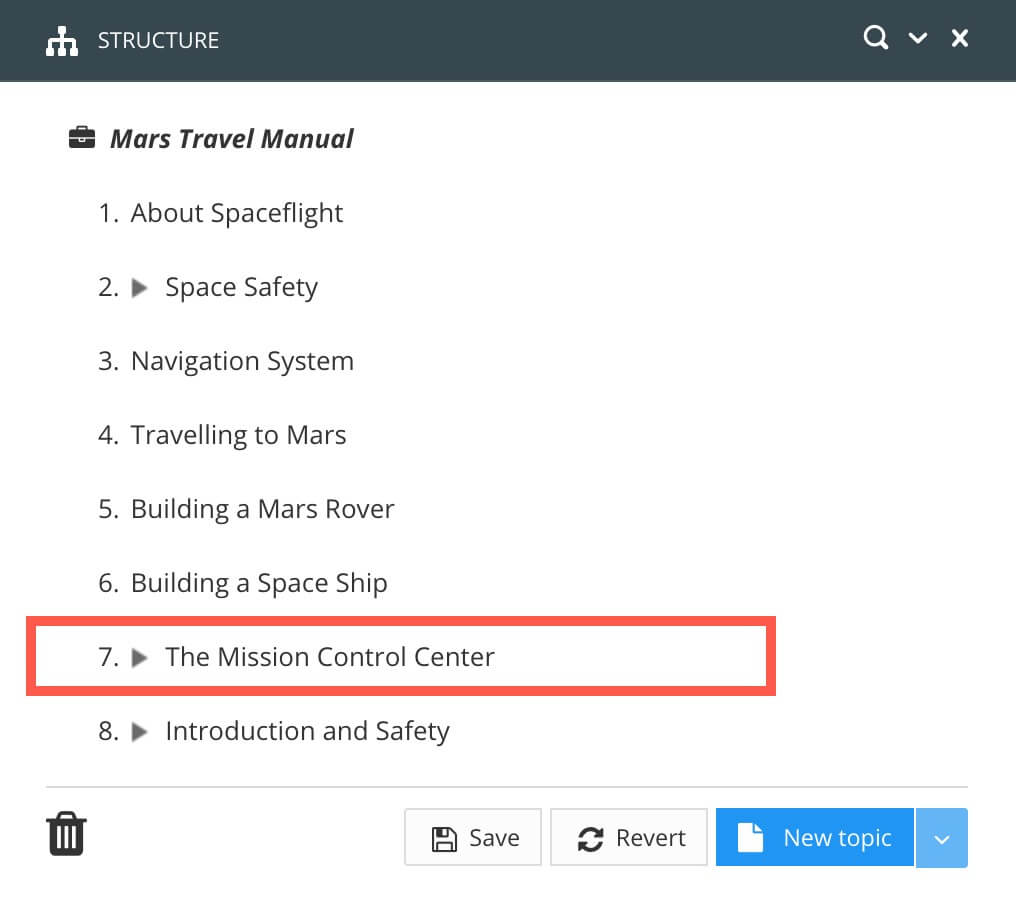
To the left a topic called "The mission control center". To the right the same topic included in a publication.
Tip
To create quizzes, see Quiz Topic.
The Paligo Editor is made to be as easy to use as possible, more or less like a word processor, but it is an XML editor. Although Paligo does not clutter the interface with lots of XML tags, there is still a strict structure underneath the surface. If you have not authored in a structured environment before, you need to at least get used to the basic concepts of adding and using elements., see Quick Start.
Add commonly used elements with the Edit and Insert tabs in the Toolbar. You can also add elements by using the Element Context Menu.
![]() |
To learn more about the various parts of the Editor, see Editor.
In-context editing
Sometimes you may be working on topics in a specific publication (for example for a certain product) and may prefer to be able to browse it in context while editing the various topics.
You can do that, and do simple editing, in the Contributor Editor. While mainly intended for Reviewers and Contributors, Authors also have access to it of course. And it provides a very convenient way to browse and edit content in context.
The following procedure shows you the basic concept:
-
In the Content Manager, open a topic in one of the following ways:
-
Click on the topic name to display it in the Editor.
-
Select Open in editor in the dotted menu (...) of the topic.
-
-
By default, you get a
title
(same as the topic name) and an empty paragraph (para
element) to start with.In most cases you should only have one title or heading in a topic, see Headings and Subheadings . Subheadings are created automatically when you build your publication in the Structure View.
-
In the Editor, place the cursor where you want to insert an element and do one of the following:
-
Use the Toolbar to insert the type of content (element) you want.
-
Press Alt (Windows) or Cmd (Mac) + Enter to display the Element Context Menu with available elements at current position. Start typing to narrow down the list. For example if you type "par" you will see the element
para
-
-
To add a new element of the same kind that you just inserted (for example paragraph (
para
),listitem
orstep
in aprocedure
, just press Enter.Tip
See Keyboard Shortcuts for more tips on speeding up your authoring in the editor.
-
To remove an element:
-
Place the cursor in the element you want to remove.
-
The Element Structure Menu (also called "breadcrumbs") below the Toolbar, shows hierarchic in which element you are. Place the cursor over the element name you want to remove and click to open a pop-up-menu.
-
Place the cursor (without clicking) over the Delete menu option to highlight the element to be removed with yellow background and text that is crossed with red bars.
-
Click Delete to remove the selected element.
-
-
Use the Element Structure Menu in a similar way to manipulate your content with full control, for example:
-
Highlight elements in the Editor.
-
Cut, copy and paste elements.
-
Move elements up and down (needs to be elements on the same level in the structure).
Tip
To split an element (for example a
para
orstep
) in two separate elements, position the cursor inside the element and press Enter. Also see Split a List.If you have used the bold or italic elements to format text, and you want to change it, see Remove Emphasis.
-
Every time you open a topic in Paligo for editing, the topic is automatically checked out. This means that you have ownership of the topic and other users cannot edit it. This helps to avoid conflicts, where two users might try to change each other's work at the same time.
When a topic is checked out, you will see this in the Content Manager, Resource View and Checked Out Documents Panel. Paligo uses a checkmark to show the checked-out status.


To the left a checked out topic in Content Manager. To the right a checked out topic in the Resource View.
If the topic is checked out by:
-
You - It can be opened in the Editor.
-
Someone else - It is locked with the filename is grayed out and you cannot open it unless it is checked in.
By default, Paligo is not overly restrictive about checkouts - a user can check in someone else's documents if needed. This is to stop check-outs hampering your work, for example, in case someone forgets to check in before going on vacation or is otherwise unavailable.
The topic can be checked in from its options menu (...) in the Content Manager or from the Checked Out Documents Panel on the Dashboard.
Tip
It is recommended to use Automatic check-in that forces Paligo to check-in topics when the Editor is closed.
![]() |
Two ways to see who has checked out a topic:
-
In the Resource View you can hover your cursor over the checkmark to see who has checked an item out.
-
See a list of checked-out topics in the Checked Out Documents Panel on your dashboard:


To the left the Resource View. To the right the Checked Out Documents Panel.
We recommend that you create a new topic for each section of content that needs a heading (either a top-level heading or a subheading). By having your content in separate topics, it becomes more versatile. For example, you could have a topic as a subsection in one publication but as a top-level topic in another publication.
When you create a topic, you can either:
-
Create a Topic in Content Manager. It will not be associated with any publications.
-
Create a Topic from the Publication Structure that will automatically to associated with a publication. It can still be used in other publications as well, if needed.
Note
For an introduction to topics and publications, see Topic-Based Authoring.
There are two ways to create a topic from the Content Manager:
-
Either:
-
Select the menu at the top of the Content Manager and then select Topic.
-
Select the dotted menu ( ...) for a folder and then select Create Content.
-
-
Use the Create content dialog to set the properties for the new component:
-
Make sure that the Document Type is set to Topic.
-
Enter a name for the new topic in the Document Title field.
Note
The characters you can use for titles are: numbers, language characters, punctuation characters and spaces. The punctuation characters are:
! " # $ % / & ' ( ) * + , - . : ; < = > ? @ [ \ ] ^ _ ` { | } ~
-
Use the Language section to choose which languages Paligo should include for the topic. You can select individual languages or check the Select all languages box to include all languages.
Note
You can only choose from those languages that are enabled on your Paligo instance. To learn about adding languages, see Language Management.
-
Use Open in editor to choose whether you want Paligo to display the new topic in the editor.
-
Check the box if you want Paligo to display the topic in the editor
-
Clear the box if you do not want Paligo to display the topic in the editor
-
-
Use Create another to choose whether you want Paligo to leave the Create content dialog open, ready for you to add another topic.
-
Check the box if you want Paligo to leave the Create content dialog open
-
Clear the box if you do not want Paligo to leave the Create content dialog open
-
-
-
Select OK.
Paligo creates the new topic.
Depending on your selections, Paligo may open the new topic in the editor automatically. Alternatively, you can select the topic in the Content Manager to display it in the editor.
To learn about the structure that is included in a new topic by default, see Structure of a New Topic.
Tip
Remember that your new topic is not included in any publications. To learn how to add it to a publication, see Add Content to a Publication.
It is possible to create new topics from the publication structure. The two benefits of this method is that:
-
The topic is automatically included in the publication.
-
The topic can instantly be moved to the intended position in the publication structure
Tip
At the top of the Content Manager, you also have the option to create content. This will however not automatically end up in the publication.
![]() |
-
Select the publication in the Content Manager.
Paligo displays the publication's structure.
-
Select the arrow next to the New topic button to choose where to save the new topic.
Note
If not done, the topic will by default be saved in the same folder as the topmost publication or topic.
-
Select New topic.
-
Name the new topic.
-
Move the topic to its intended position in the publication structure.
-
Select Save to confirm the publication changes.
Note
The new topic is created at the chosen location and can now be edited.
When you create a new topic, Paligo automatically adds some structural elements to it. By default, a new topic consists of a section element, a title element, and a para element:
![]() |
-
section
is the container for the topic's other elements. -
title
is the topic's heading. -
para
is the first paragraph in the topic.
To add content to a topic, you need to add suitable elements to form the structure. You can then add your content inside the elements. For example, if you wanted to have two paragraphs and an image, you would need to add two para
elements and also the mediaobject
, imageobject
, and imagedata
elements that are needed for an image. Paligo has toolbar options that make it easy to add commonly used structures in just a few clicks. There is also an Element Context Menu that you can use to build structures one element at a time.
To learn about adding content to a topic, see About Authoring.
There is a difference between copying and duplicating topics:
-
Copy is used for adding topic Forks to a publication, see Add Content to a Publication.
-
Duplicate creates a new topic with the same content and the same name as the original, with "copy" and a number added at the end. The duplicated topic has its own unique ID and is completely separated from the original topic.
There is no content reuse with a duplicate, the same content is recreated. You can edit the copy and the content inside it without affecting the original topic.
Tip
If you want to create different versions of a topic, the Branching feature may be a better option. With branching, you can create a copy that can later be merged back into the original if needed.
To duplicate a topic:
-
Select the dotted menu (...) in the Content Manager for the topic you want to duplicate.
-
Select Duplicate.
Paligo creates a duplicate of the topic.
-
Select its dotted menu ( ... ) and choose Rename.
-
Enter a new name.
-
Confirm the name change with the checkmark.
You can set up topics to be included in your HTML5 output, but not to appear as results in the search. This way you make your search more useful by only including more detailed topics that give your users the information they need.
Release notes are often excluded from the search results because they are useful to have in your documentation, but they rarely provide enough detail.
Tip
You can also exclude topics from the navigation sidebar (also known as the TOC), see Exclude Content from Publication TOC.
To exclude a topic from the search results:
-
Select the topic or component in the Content Manager to open it in the Editor.
Alternatively, you can Create a Topic and edit that.
-
Select the
section
element in the Element Structure Menu. -
Select Go to element.
-
Add the
role
attribute in the Element Attributes Panel and set the value tonotinsearch
.Note
The
role
attribute is not inherited. If you have different levels of topics, you need to add therole
to all of the sections that you want to exclude from the search, not just thesection
of the top-level topic. -
Select Save.
When you publish the topic to your HTML5 help center, the search will not include the topic in its results.
By default, the headings do not use numbering. If your documentation needs numbered headings, you can set Paligo to include numbers, see Numbered Headings.
You can also have subheadings in your topics. These help to break up pages that contain lots of information, so that they are easier to read. There are several ways of creating subheadings and subsections, as described in Subsections.
![]() |
Example of a help page that has subheadings (subsections).
In Paligo, each topic has a:
![]() |
-
Resource title is the name of the topic in the Content Manager.
Changing the Resource title or the text in the
title
element can affect the URL of the topic in HTML outputs. This depends on how your Layout is set up for publishing, see Topic File Names. -
section
element represents the topic as a whole. You can see it when you open the topic in the editor. -
title
element comes immediately after thesection
element and is for the main heading of the topic. By default, it is set to match the Resource title, but you can change either of them. They do not have to match.Some other elements also have
titles
, such as tables and examples. Thesetitle
s are included by default but you can remove them if you wish.
Subsections
To make a text easier for the reader to consume, you can use subsections to divide your content into smaller pieces of information, see Create Subsections.
Benefits of using subsections:
-
Readers can quickly scan the main title and the subtitles to get a feel for what the page is about.
-
Subsections make the writer focus on the information needed for the subsection rather than the topic as a whole.
-
Smaller sections of content are more visually appealing. A long page of text can be off-putting.
![]() |
This example shows the "Topic Templates" page that contains a subsection called "Create a Topic Template".
Subsections is a great way to make your content easier to read, as you can use them to break up a page into separate, but related pieces of information. There are several ways to create subsections in Paligo, each with their own pros and cons. If you know that you will need to reuse your main sections and subsections separately, you can create each section as a separate topic and then:
But the downside of this is that when you are editing, you can only see one section at a time. (In the output, your readers will see the content as a main section with a subsection on the same page, if space allows). If you want to be able to see the main section and the subsection in the same topic while editing, use of these methods:
Note
With these two methods, the subsections are shown inside the "main" topic. But this also means that if you reuse the "main" topic, you will also reuse the sections inside it.
![]() |
You can use the publication structure to create subsections. When you publish, Paligo will automatically create the same structure in the output.
Watch the video or see the text below,
-
Create all of your sections and subsections as separate topics. For example, if you have an Introduction topic and you want it to contain a References subsection, create one topic for Introduction and one topic for References.
-
Open the publication structure.
-
Drag your topics into the structure. You can create subsections by dragging the topics left and right below other topics.
-
For HTML outputs only, select Layouts and edit the layout you will use for publishing. In the Toc and chunking settings, use Chunk section depth to control whether topics become subsections. The default setting is 3, which means any topics at level 4 or below in the publication structure will become subsections of the level 3 topics.
Note
If a topic is set to have
xinfo:chunk=yes
, it will always be on its own page, even if it is at a lower level than the Chunk section depth. (see Use Chunking to Control Subsections) -
Publish your content.
For PDF outputs, the subsections are shown on the same page as the main section, where space allows. They are set as subsections with lower heading levels automatically.
For HTML outputs, Paligo displays each topic on its own page until the Chunk section depth is reached. Topics at a lower level then become subsections, unless they are specifically set to be separate chunks (see Use Chunking to Control Subsections).
In this example, we have three topics. To keep the explanation simple, we have named them "Heading 1", "Heading 2" and "Heading 3".
In the publication structure, "Heading 1" is set as the top-level topic and "Heading 2" and "Heading 3" are nested as subsections below "Heading 1".
![]() |
We publish to PDF.
Paligo detects the hierarchy of topics in the publication and recreates it in the PDF output. The "Heading 2" and "Heading 3" topics appear as subsections of the "Heading 1" topic.
![]() |
You can use Paligo's chunking feature to control whether a topic can be used as a subsection or to appear as a separate web page in the HTML / HTML5 output. The term "chunk" means that a topic has to be on its own. So if a topic is set to xinfo:chunk
with the value
set to:
-
Yes - the topic cannot be a subsection inside another topic and will always be on a separate page when published. It cannot be a subsection on another page.
-
No - the topic can be a subsection inside another topic.
Note
Learn more about chunking settings, see Chunking.
To set the chunking value:
-
Select the topic or component in the Content Manager to open it in the Editor.
Alternatively, you can Create a Topic and edit that.
-
Select the
section
element in the Element Structure Menu. -
Select Go to element.
-
Add the
xinfo:chunk
attribute in the Element Attributes Panel and set its value to:-
Yes to prevent the topic from being a subsection.
-
No to allow the topic to be a subsection.
-
-
Select Save.
Important
The xinfo:chunk
value takes priority over the Chunk section depth setting in the layout editor. For example, if you set the Chunk section depth to 3, it normally means that any topics at level 4 or below
will become subsections of the "parent" level 3 topic. However, if your level 4 topic has xinfo:chunk
= yes, the level 4 topic will not be included as a subsection of its "parent" level 3 topic. Instead, it will be a separate topic.
There are two ways to use chunking (and they can be combined):
-
Set the default level at which you want topics to become a chunk under "TOC and chunking" in the Layout Editor.
-
Add the
xinfo:chunk
attribute to thesection
element in a topic via the Element Attributes Panel.
If you have a publication called "Mars Travel Manual" and you have organized it so that there are topics at different levels.
![]() |
You are going to publish to HTML5 and your layout has Chunk section depth set to 2.
![]() |
When you publish, the output has the top-level and second-level topics as separate pages. The third-level pages and lower are subsections.
![]() |
So if we look at the "The Mission Control Center" topic and its lower-level topics, the output will work like this:
-
"The Mission Control Center" is a top-level topic. It is higher than the Chunk section depth setting of 2, so it has its own page in the output.
-
"Command Center" is a second-level topic. It is at the same level as the Chunk section depth setting of 2, so it has its own page in the output.
-
"Controls System" and "Control Room" are third-level topics. They are below the Chunk section depth setting of 2, and so they do not get their own page. Instead, they are subsections on the "Command Center" topic, as that is their immediate "parent" in the publication structure.
Note
The green dotted line in the image represents the Chunk section depth setting of 2.
But what if you wanted "Controls System" to be a subsection of "Command Center" and "Control Room" to have its own page? To do that, you would set the "Control Room" topic to have the attribute:
xinfo:chunk
= yes
With this in place, Paligo will give the "Controls System" topic its own page in the published output, as xinfo:chunk
takes priority over the Chunk section depth setting. So the result is that the output has:
-
"The Mission Control Center" and "Command Center" topics have their own pages as they are at a higher level than the Chunk section depth.
-
"Control Room" has its own page as it has
xinfo:chunk=yes
. The Chunk section depth does not apply to this topic. -
"Controls System" is a subsection of "Command Center" as it does not have
xinfo:chunk=yes
and so the Chunk section depth does apply.
If you like to be able to see the subsections inside topics while editing, using components for subsections is a good choice. With this technique, you create your main section and subsections as separate topics, and then import the subsections into the main topic. You can then view the main topic and subsections all inside the same topic. This can make it easier to check the flow of your content and that you have covered all of the points you need to make.
To learn how to use components for subsections, watch the video or read the instructions below.
-
Create all of your sections and subsections as separate topics. For example, if you have an Introduction topic and you want it to contain a References subsection, create one topic for Introduction and one topic for References.
-
Open a topic that will be a main section that contains subsections.
-
Select the Insert tab in the Toolbar.
-
Select Component and choose a topic.
The topic is added as an
import
element and you can see it as a subsection in your topic. -
Repeat steps 3 to 4 for each of the subsections you want to add and save each topic.
-
Select Save.
-
When you have finished adding topics as components, publish to HTML.
A quick and easy way to create a subsection is to add a section
element inside another section
element. You will then be able to see the main section and the subsection in the same topic while you are editing. However, there are
some limitations with this technique that makes it better to use an inserted component instead:
-
Reusability - You cannot reuse the subsection in other topics, unless you Convert Subsections into Separate Topics and import them as components, see Use Components to Create Subsections.
-
Number of subsections - The Paligo validation recommends a limit of10 sections per topic (a main section with 9 subsections) and enforces this via the "Paligo Recommended Rules" in the Editor Settings when validating / saving a topic. Note that there is no limitation when it comes to subsections that are inserted as components. However, if you know that a subsection is only needed in one topic, you can create it as a section inside a section. Read about possible settings in Editor Settings.
-
Searchability - Subsections not being inserted as components can be more difficult to find in the web search than topics. They can also be harder for the writer to via the Content Manager.
To add a second section element as a subsection:
-
Position the cursor at a valid position for a subsection.
You can only insert a section for a subsection at a position that is both:
-
A direct descendant of a section element (either the section for the main topic or a section for a subsection). It cannot be inside another element.
-
Immediately followed by another section element or a closing section element (
</section>
).You cannot have content "floating" between subsections or between a subsection and the end of the main topic. Your content must be inside the main topic and before the subsections or inside one of the subsections.
CORRECT: The cursor is positioned outside the other elements, and is a direct descendant of the section element of the main topic. The element that follows the position is the closing element for the main topic, and so is </section>. A subsection can only be followed by a section or closing section element.
INCORRECT: The cursor is positioned inside an element. The selected position is not a direct descendant of the section element of the main topic.
Note
In a topic, all of the content, including your subsection section elements, must be inside the main <section> and </section> tags of the topic.
-
-
Press Alt + Enter ⏎ (Windows) or Command ⌘ + Enter ⏎ (Mac) to display the Element Context Menu.
-
Enter
section
and select it from the menu.A new section element is added to the topic. As it is inside the main
section
element, the newsection
appears as a subsection. -
Enter the title for the new subsection. You can then add content to the subsection in the same way as any other topic.
Note
You cannot add para
elements and other block elements between subsections. The only valid content after the end of a subsection is another subsection.
Long topics with many subsections can be difficult to read because there's too much information provided in one place.
To avoid this "cognitive overload", you can convert the subsections into separate topics. You can choose to:
-
Create subsections by embedding a topic inside another topic, see Insert Component.
-
Keep the topics separated and use Cross-References and Links to guide people from one topic to another.
![]() |
In the image above, the subsections have been converted into separate topics and they are embedded in the main topic.
Tip
If you need a topic to contain several subsections, you can make the content less overwhelming by using Accordions (Collapsible Sections). They allow a subsection to be collapsed, which makes the subsection content only visible when the reader selects the subsection heading.
To convert a topic's subsections into separate topics, you can use Paligo's Convert reusable component feature.
-
Select the
title
of the subsection you want to convert in the Element Structure Menu. -
Select the
section
element for the subsection.Note
Make sure that you select the subsection's
section
element and not the mainsection
element for the topic. -
Select the Convert reusable component from the menu.
-
The existing subsection
title
is suggested as topic name. You can edit it if necessary. -
Select the folder to store the topic in.
-
Select the Reuse the component at position checkbox (in the lower left corner) to embed it in the current topic as a subsection.
If not selected the new topic is removed from the parent topic.
-
Select OK.
Paligo converts the subsection into a topic. If you checked the Reuse the component at position checkbox, the new topic is embedded in place of the subsection otherwise the subsection is removed from the topic.
Note
Reader-friendly URLs for subsections is only supported by HTML5 help centers.
With Paligo's Reader-friendly fragment identifiers (hash links) feature, you can have subsections that use a text URL instead of a unique ID (UUID). The text URLs are easier for people to understand, and so are better for when you need to share links to your HTML pages.
For example, if the UUID is used for creating the URL of a subsection, you get a URL like this:

Where the link targets the subsection by using the hashtag (#) followed by the UUID of the subsection's section
element.
But if you enable the Reader-friendly fragment identifiers feature, the URL will use the text of the title
element instead of the UUID, like this:

Note
URLs for subsections are also known as "hash links", as there is a hashtag # in the structure of the URL.
Accordions are sections of content that can be expanded or collapsed for HTML5 or Zendesk output. They are useful when you have a lot of subsections that make it hard to overview the topic. The reader can then expand or collapse each section in turn.
You can use accordions on sidebar
elements and section
elements. But for sections, the accordion only appears when that topic is inserted into another topic as a subsection, see Insert Component.
![]() |
Accordions are sections of content that can be expanded or collapsed for HTML5 or Zendesk output. In other output formats, the content will appear as usual.
This feature is enabled for section
and sidebar
elements. When you publish to HTML5, the sections or sidebars will appear as expandable and collapsible accordions.
When you nest topics (Insert Component) it is a good idea to turn them into accordions.
Note
You need to enable Output role attribute as class names for this to work, see Enable Output Role Attribute as Class Names.
Tip
The accordion can be styled just the way you want it in your own CSS.
If you want a background color for the header:
.panel-default > .panel-heading { background-color: #fafafa; padding: 1em; }
-
Select a
section
element or asidebar
element.You can select a section element for a subsection in a topic (a section inside another section).
-
Select Add attribute in the Element Attributes Panel.
-
Enter
Role
and select it from the menu. -
Set the value to
accordion
. -
Select Save.
When you publish to HTML5 or Zendesk, the section or sidebar will appear as expandable/collapsible accordions.
Tip
There's also a keyboard shortcut, Alt + Shift + Y. You can put your cursor anywhere in the section
or sidebar
you want to make an accordion and press this shortcut, and it will automatically add the appropriate attribute.
If you want all accordions to expand when a page in the HTML5 Helper Center output is loaded, add the following code to your custom JavaScript:
// Expand accordions $(document).ready(function () { $('.accordion .collapse').collapse('show'); $('.accordion .panel-heading').addClass('active'); // Uncomment below if you're using AJAX /* $(document).ajaxComplete(function() { $('.accordion .collapse').collapse('show'); $('.accordion .panel-heading').addClass('active'); }); */ });
Note
This script will apply to accordions on any page and will only work for HTML5 Helper Center output.
If you want to change the title text for a topic, you should first think about how it will affect your published output.
-
For PDFs, a change to a heading does not affect the output, so you can make changes as needed.
-
For HTML, Paligo uses the title to generate the URL (address) of the webpage for each topic. So if you change the title, the URL will also change when you publish.
Paligo detects title changes automatically and updates your content to use the new URL. But Paligo cannot change any links that come from external systems. For example, if your website links to a page in the help and the URL of the page has changed, the link will no longer work. To avoid this problem, you can:
One way to change the title of a topic without affecting its URL is to use the xinfo:outname attribute. This attribute is available for the section element.
When you set an xinfo:outname value, that value is used for the URL of the HTML page for that topic. The xinfo:outname takes priority over all other URL settings, so will be used even if you set the HTML layout to use topic names instead of titles.
To keep the existing URL of an HTML page:
-
Select the topic or component in the Content Manager to open it in the Editor.
Alternatively, you can Create a Topic and edit that.
-
Change the text in the
title
element. -
Select the
section
element in the Element Structure Menu. -
Select Go to element.
-
Add the
xinfo:outname
attribute in the Element Attributes Panel. -
In your existing help output, browse to the page that has the URL you want to keep and copy the page part of the URL.
For example, if the page has the URL:
https://acmehelp/docs/en/6083-introduction.html
Copy
6083-introduction
as that is the page part of the URL. Do not include the.html
file extension, you only need the page name. -
Paste the page part of the URL into the value box for the
xinfo:outname
attribute. -
Select Save.
When you publish to HTML, Paligo will use the xinfo:outname
value for the page part of the URL. It will not use the title
or the topic name, the xinfo:outname
takes priority.
For example, let's say you have a topic and it's title is "Introduction". When this was first published, Paligo set the URL to: https://acmehelp/docs/en/introduction.html
Your customer support team then used links to that page when they replied to customer queries.
Some time later, you need to update the page title to "Introduction to ACME 100" but you do not want to break the links that customer support sent out.
You change the title text of the topic to "Introduction to ACME 100" and then add the xinfo:outname
attribute to the section of the topic. You set the attribute's value to: introduction.
You publish the content to HTML. Paligo uses the xinfo:outname
value (introduction
) to create the page part of the URL, instead of the new title text. So in the output, the page has this URL:
https://acmehelp/docs/en/introduction.html
If you did not set the xinfo:outname
, the page would have the new URL based on the change to the title text, and it would have been:
https://acmehelp/docs/en/introduction-to-acme-100.html
You can set Paligo to use topic names instead of titles for the filenames and URLs for HTML pages. The topic names are then used instead of the title
text for the page part of the URLs.
For example, if a topic is named "IoT Controls" and has a title of "Controls for IoT System", the URL for the page in the HTML output will look like this: https://acmehelp/docs/en/iot-controls.html
Note
Note that the page part of the URL uses the name of the topic ("IoT Controls") and not the title text ("Controls for IoT System").
To set Paligo to use topic names instead of title text for URLs:
-
Select the Layout tab in the top menu.
Paligo displays a list of Layouts. The list is empty if there are no custom Layouts in your Paligo instance.
-
Select the Layout you want to update or Create a Layout.
Tip
You can copy the URL of the Layout Editor and paste it into a new tab in your browser. This can be useful if you frequently switch between your Paligo content and the Layout settings.
-
Select General in the sidebar.
-
Control if topic names are used for URLs in Use resource name instead of title for the HTML output filename:
-
Set it to Enabled to use topic names.
-
Set it to Disabled to use the text in the topic
title
element. Default
-
-
Select Save.
If you enabled the Use resource name instead of title for the HTML output filename setting, Paligo will use the topic names for the filenames and URLs. This means you can now change your topic title
text without affecting the URLs for the
pages.
By default, Paligo uses text-only headings, but you can use numbered headings instead. Numbered headings have numbers as a prefix.
To enable or disable numbered headings, edit the layout that you use for publishing.
-
Select the Layout tab in the top menu.
Paligo displays a list of Layouts. The list is empty if there are no custom Layouts in your Paligo instance.
-
Select the Layout you want to update or Create a Layout.
Tip
You can copy the URL of the Layout Editor and paste it into a new tab in your browser. This can be useful if you frequently switch between your Paligo content and the Layout settings.
-
Find the Section numbering settings.
On PDF layouts, the Section numbering settings are in Section titles > All sections.
For HTML layouts, the Section numbering settings are in Toc and chunking.
-
Use Section numbering to control whether your headings use numbers. Select Enabled for numbered headings, Disabled for text-only headings.
-
Use Section numbering maximum depth to control what heading levels have numbering. The default is 3, which means the top-three heading levels will be numbered, but level 4 onwards will be text-only.
-
Select Save.
You can choose whether your headings use a number prefix.
If you want to use an empty topic as a non-clickable label to categorize subtopics in the Table of Contents (HTML5), you can turn it into a topichead
. It means that its title will show in the TOC sidebar, but it will only serve as a label for its child topics.
By adding the role
attribute with its value set to topichead
to the main section
element, the topic becomes:
-
Visible, but non-clickable in the TOC sidebar, Category Panel Section and Featured Content Section for HTML5 output.
-
Excluded from internal search, Google search, and from the site map.
-
Skipped by Previous and Next navigation because it cannot locate its position on the site map.
-
Non-clickable in breadcrumbs.
![]() |
The main topics (Batteries, Fans, Motors and Solar Panels) in this image are "topicheads". In other words, empty topics that only serve as non-clickable labels in the TOC sidebar.
Note
This type of label is only for navigation in the TOC sidebar and is not the same as branch labels or labels added with the phrase
element.
Important
If you publish and the child topics are not showing for a non-clickable label, try increasing the Chunk section depth. You can find this setting in the TOC and Chunking category on your HTML5 Layout.
To turn a topic into a non-clickable label for HTML5 output:
-
Select the topic or component in the Content Manager to open it in the Editor.
Alternatively, you can Create a Topic and edit that.
-
Select the
section
element in the Element Structure Menu. -
Select Go to element.
-
Add
role
attribute in the Element Attributes Panel and set the value totopichead
. -
Select Save.
-
Repeat this procedure for all topics that are to be non-clickable.
To open a topic, either:
-
Click on the topic's name in the Content Manager or Resource View.
Example of a topic being selected in the Content Manager.
-
Click on the topic's link on the Dashboard. This is only possible for topics and publications that have been worked on recently.
Example of link to open topic from the Dashboard
-
Select the topic's dotted menu ( ... ) and choose Edit and then Open in editor. There are also options for opening the topic in Review View, Contributor View, and Translation View.
The topic dotted menu ( ... ) is available in the Content Manager, Resource View, and also in the publication structure.
Example of opening topic from publication structure
-
Select the link to one of your Assignments (either in the email Paligo sends to you or from your Dashboard). Paligo will open the topics in that assignment in the view that is appropriate for your user account. For example, for contributors, the topics will open in the Contributor View.
You can preview how your topic will appear in different outputs which gives you the chance to resize images, consider reducing the amount of text to better suit your output format, use accordions to easier overview a page, detect broken links, or discover necessary updates to your layout settings. Paligo strongly recommends that you preview every time you create or update content.
Make the preview use your customized output, see Set Preview Layouts. To learn more about filtering / profiling, see Filtering / Profiling.
Note
The preview feature is not available for certain components, such as informal topics. But if you add it to a regular topic as a component, you can preview the regular topic, see Insert Component.
To preview a topic:
-
Select the topic or component in the Content Manager to open it in the Editor.
Alternatively, you can Create a Topic and edit that.
-
Select the Preview tab in the Toolbar.
-
Select Profile settings.
-
Choose the Variables and Filtering / Profiling that you want to be used for the preview.
Tip
You can save the variables and profiling settings so that they become the default preview settings, see Create a Favorite Profile (Preview Tab) and Set a Favorite Profile as Default.
-
Select Apply and close the Profile settings dialog.
-
Select the type of output (PDF, HTML or HTML5).
Paligo shows the preview in a new tap topic. It uses the default Layout for each type of output. This gives you a good idea of what your topic will look like when it is published.
Important
If you make changes to your topic, you have to regenerate the preview. Refreshing the existing preview in the browser will only reload the preview that was previously generated.
For HTML5 outputs, the file names are normally generated automatically, but it is also possible to set it individually.
Paligo has a number of options for how the HTML5 output file name is auto-generated. It uses either the UUID (Universally Unique Identifier), the title of a topic, or the name of the resource to generate the HTML5 file name, depending on your settings in the Layout Editor.
However, you can also set the output file name individually for particular topics if needed. This can be useful if you are using the option to create the file name from the topic title, for instance, and then need to change the title. By setting the output file as below, you make sure it does not change even though you change the title.
To manually set the file name for a topic:
-
Select the topic or component in the Content Manager to open it in the Editor.
Alternatively, you can Create a Topic and edit that.
-
Select the
section
element in the Element Structure Menu. -
Select Go to element.
-
Add
xinfo:outname
in the Element Attributes Panel. -
Set the value to the name you want for the published file.
Note
You only need to enter the file name. Do not include the file extension at the end.
-
Select Save.
When you publish to HTML5, the file name for the topic is set to the value you defined for the xinfo:outname
attribute.
An appendix is a section that provides useful context or background material in your publication. The appendix topic is created the same way as a normal topic, except that you select the document type Appendix.
Appendix titles, when published, are automatically lettered (Appendix A, Appendix B, Appendix C). This lettering continues for every appendix that follows.
The most common use cases for appendices are to insert elements like glossaries, bibliographies, indices and Table of Contents (TOC). All these elements can be placed inside a normal topic, but you will not get the automatic title lettering that comes with appendices.
If an appendix title is "Specifications" and it is the first appendix in the publication, it will be published as Appendix A. Specifications
.
![]() |
To create an appendix topic:
-
Select the Dotted menu (... ) to the right of the folder that is to contain the appendix in the Content Manager.
If a suitable folder does not already exist, you can create a new one (Create Folder).
-
Select Create content.
-
Name the content.
Note
The characters you can use for titles are: numbers, language characters, punctuation characters and spaces. The punctuation characters are:
! " # $ % / & ' ( ) * + , - . : ; < = > ? @ [ \ ] ^ _
` { | } ~
-
Select the checkbox in front of Appendix.
The checkbox for topic is preselected.
-
Select Open in editor in the lower left corner to start editing.
-
Select OK.
-
Position the cursor straight under the title.
-
Press Alt + Enter ⏎ (Windows) or Command ⌘ + Enter ⏎ (Mac) to display the Element Context Menu.
-
Insert elements like:
-
toc
- Add a table of contents. It must be placed straight under the section title. When you publish to PDF, Paligo will automatically create the TOC. -
glossary
- See Create a Glossary Topic -
bibliography
-
index
- See Create an Index Topic -
section
- To add subtopics.
Tip
It is also possible to use existing topics in your appendix, see Insert Component.
-
-
Add the index to your publication.
Note
An important rule of thumb is that appendices must always be at the top level of your publication. Appendices cannot be nested under other topics.
The best practice is to place appendices at the very end of your publication, though Paligo will not prevent you from doing otherwise.
-
Select Save.
-
Publish your publication.
Bibliographies are useful for keeping an organized record of any information sources that you reference in your publications. They can help improve the credibility of your documentation and also give your audience extra sources of useful information.
![]() |
To get started:
-
Read Raw and Cooked Bibliography Entries.
There are two approaches to creating bibliography entries in DocBook, often called "cooked" and "raw". You will need to choose which approach you are going to use.
-
Either create a new bibliography topic or create a bibliography at the end of one of your existing topics. You can then add bibliography entries to it. For details, see Create a Bibliography.
Note
If you have imported content into Paligo from elsewhere, Paligo may have already created a bibliography as part of the import process.
-
In your content topics, add references to the bibliography entries. The references are called citations, see Add a Citation.
-
If you created a separate topic for your Bibliography, add it to the relevant publication.
-
Edit the bibliography settings on the Layout you are going to use for publishing. These settings are described in:
-
Publish your content, see About Publishing.
In DocBook 5.0 there are two different approaches to bibliography entries. They are sometimes called "raw" and "cooked" and Paligo supports them both.
Typically, we recommend that you:
-
Use "raw" entries if you are creating a new bibliography
-
Use "cooked" entries if they already exist in your content, for example, if you have imported content into Paligo and it already has "cooked" entries in place.
-
Only use all "raw" or all "cooked" entries. Do not mix the two types as this may produce inconsistent and unwanted results.
Raw Bibliographies
A "raw" bibliography is more structured than a "cooked" bibliography, as it does not allow for text between the elements. Every part of a bibliography entry has to be inside an appropriate element, such as firstname
and surname
. The
ordering and formatting is handled internally by Paligo when you publish. There is default styling and ordering, but it is also possible to process your bibliography to match a specific standard (we can provide this as a customization project, contact support for details).
The characteristics of a "raw" bibliography are:
-
Uses the
biblioentry
element (and not thebibliomixed
element) -
Does not allow text or characters between the elements.
-
Consistent structure and presentation.
-
Can be processed by Paligo to comply with bibliography standards.
If you are creating a new bibliography, we recommend that you use "raw" entries and avoid "cooked" entries. This is to help ensure consistency in your entries.
Note
Do not mix "raw" bibliography entries and "cooked" bibliography entries. If you do mix them, you may get inconsistent and unexpected results when you publish.
Here is an example of a "raw" bibliography that is in a separate topic. It contains two bibliography entries, one is a single author and the other is a combination of authors. We have provided an example of a valid structure, but have removed the XML ids and other metadata for clarity.
<section > <title>Raw bibliography</title> <bibliography> <bibliodiv> <title>Books</title> <biblioentry> <abbrev>RizwanAJan2011</abbrev> <title>SaaS: A Beginner's Guide</title> <author> <personname> <firstname>Rizwan</firstname> <surname>Jan</surname> </personname> </author> <date>2011</date> <publisher> <publishername>McGraw-Hill Education</publishername> </publisher> <bibliomisc>ISBN: 978-0071753759</bibliomisc> </biblioentry> <biblioentry> <abbrev>MenkenBlokdijk2009</abbrev> <title>SaaS and Web Applications Specialist Level Complete Certification Kit - Software as a Service Study Guide Book and Online Course</title> <authorgroup> <author> <personname><firstname>Ivanka</firstname> <surname>Menken</surname></personname> </author> <author> <personname><firstname>Gerard</firstname> <surname>Blokdijk</surname></personname> </author> </authorgroup> <date>2009</date> <publisher> <publishername>Emereo Publishing</publishername> </publisher> <bibliomisc>ISBN: 978-1921523311</bibliomisc> </biblioentry> </bibliodiv> </bibliography> </section>
Cooked Bibliographies
A "cooked" bibliography, while structured, does allow for more freeform bibliography entries. You create a "cooked" entry by using the bibliomixed
element and then adding your other bibliography elements inside that, such as firstname
and
surname
. Importantly, you can add characters between the elements and Paligo will include them in the published output. So if you include punctuation between your bibliography entry elements, the punctuation will be present in the output too. Paligo does not change the entries
or reorder them.
The key characteristics of "cooked" bibliography entries are:
-
Uses the
bibliomixed
element (and not thebiblioentry
element). -
Give you more control over your entries.
The information you provide is exactly what you get in the output. Paligo keeps the characters in the elements and between the elements and does not change the order.
-
Can result in inconsistent entries.
The more freeform nature of "cooked" entries means you could structure each entry in a different order with different punctuation and text between the elements.
If you are creating a new bibliography, we recommend that you avoid "cooked" entries and use "raw" entries instead. This is because "raw" entries are consistent. But if you have "cooked" entries already, perhaps due to importing content, then you can continue using those. Paligo can publish them.
Note
Do not mix "raw" bibliography entries and "cooked" bibliography entries. If you do mix them, you may get inconsistent and unexpected results when you publish.
Here is an example of a "cooked" bibliography that is in a separate topic. It contains two bibliography entries, one is a single author and the other is a combination of authors. We have provided an example of a valid structure, but have removed the XML ids and other metadata for clarity.
Note how characters are allowed between some elements, in this case, we have used a pipe character | and a period, and we have used them inconsistently. We have also changed the order of the elements for the second bibliomixed entry, again adding inconsistency.
<section> <title>Cooked bibliography</title> <bibliography> <bibliodiv> <title>Books</title> <bibliomixed> <abbrev>RizwanAJan2011</abbrev> <title>SaaS: A Beginner's Guide</title> | <author><personname><firstname>Rizwan</firstname><surname>Jan</surname></personname></author> . <pubdate>2011</pubdate>. <publishername>McGraw-Hill Education</publishername> | <bibliomisc>ISBN: 978-0071753759</bibliomisc>. </bibliomixed> <bibliomixed> <abbrev>MenkenBlokdijk2009</abbrev> <title>SaaS and Web Applications Specialist Level Complete Certification Kit</title>. <volumenum>2</volumenum>|<issuenum>1</issuenum>. <pubdate>Summer, 2009</pubdate>. <bibliomisc>ISBN: 978-1921523311</bibliomisc>. <author><personname><firstname>Ivanka</firstname><surname>Menken</surname></personname></author> | <author><personname><firstname>Gerard</firstname><surname>Blokdijk</surname></personname></author>. <publishername>Emereo Publishing</publishername>. </bibliomixed> </bibliodiv> </bibliography> </section>
Depending on your requirements, you can either create:
-
A bibliography topic that appears at the end* of a publication.
* Traditionally, bibliographies appear towards the end of a publication, near the index. You can place the bibliography elsewhere in your publication if you prefer. We call this a stand-alone bibliography.
-
A bibliography inside a topic that contains other content.
This is useful if you have a topic that acts as a reference article and you want people to be able to see the citations without leaving the page. The bibliography is included immediately after the content, rather than in a topic that is elsewhere in the publication. We call this an end-of-topic bibliography.
To create a bibliography topic that you can add to the end of your publication (or elsewhere if you prefer):
-
Create a new topic, give it a name, and then add it to a publication. For this procedure, we will assume that you named the topic "Bibliography".
For details, see Create a Topic and Add Content to a Publication.
-
Save the publication.
-
In the Content Manager, select your "Bibliography" topic to open it in the editor.
-
Select a position after the
title
element but before the firstpara
element (thepara
element is included in the topic by default). -
Press Alt + Enter ⏎ (Windows) or Command ⌘ + Enter ⏎ (Mac) to display the Element Context Menu.
-
Use the element context menu to add the
bibliography
element. -
Build your bibliography structure inside the
bibliography
element. To build the structure, you will need to use the various bibliography elements, as described in the DocBook 5.2 documentation (see https://tdg.docbook.org/tdg/5.2/bibliography.html).We have included an example bibliography at the end of this article. It shows a valid bibliography structure, so you can copy that structure as a starting point.
-
Select Save.
You have now created a bibliography. Over time, you may find that you want to add extra bibliography entries, in which case, edit the bibliography topic and add more biblioentry
("raw") or bibliomixed
("cooked") elements.
Now that you have a bibliography, you can add references (citations) to it from your other topics, see Add a Citation.
The following code samples show the underlying structure of a valid bibliography topic. When you are creating your own bibliography, look at the examples to see how the various bibliography elements are used. Some are "parents" and others are "children", for example, author
is a parent of personname
and personname
is a parent of firstname
.
Here is an example of a bibliography that uses "raw" entries:
<bibliography> <title>A Test Bibliography</title> <bibliodiv> <title>Books</title> <biblioentry> <abbrev>AhoSethiUllman96</abbrev> <authorgroup> <author> <personname> <firstname>Alfred V.</firstname> <surname>Aho</surname> </personname> </author> <author> <personname> <firstname>Ravi</firstname> <surname>Sethi</surname> </personname> </author> <author> <personname> <firstname>Jeffrey D.</firstname> <surname>Ullman</surname> </personname> </author> </authorgroup> <copyright> <year>1996</year> <holder>Bell Telephone Laboratories, Inc.</holder> </copyright> <editor> <personname> <firstname>James T.</firstname> <surname>DeWolf</surname> </personname> </editor> <biblioid class="isbn">0-201-10088-6</biblioid> <publisher> <publishername>Addison-Wesley Publishing Company</publishername> </publisher> <title>Compilers, Principles, Techniques, and Tools</title> </biblioentry> <biblioentry> <authorgroup> <author> <personname> <firstname>Andrea</firstname> <surname>Bahadur</surname> </personname> </author> <author> <personname> <firstname>Mark</firstname> <surname>Shwarek</surname> </personname> </author> </authorgroup> <copyright> <year>1974</year> <year>1975</year> <holder>Product Development International Holding N. V.</holder> </copyright> <biblioid class="isbn">0-88459-021-6</biblioid> <publisher> <publishername>Plenary Publications International, Inc.</publishername> </publisher> <title>Kites</title> <subtitle>Ancient Craft to Modern Sport</subtitle> <pagenums>988-999</pagenums> </biblioentry> </bibliodiv> <bibliodiv> <title>Periodicals</title> <biblioentry> <abbrev>Walsh97</abbrev> <biblioset relation="journal"> <title>XML: Principles, Tools, and Techniques</title> <publisher> <publishername>O'Reilly & Associates, Inc.</publishername> </publisher> <biblioid class="issn">1085-2301</biblioid> <editor> <personname> <firstname>Dan</firstname> <surname>Connolly</surname> </personname> </editor> </biblioset> <biblioset relation="article"> <title>A Guide to XML</title> <author> <personname> <surname>Walsh</surname> <firstname>Norman</firstname> </personname> </author> <copyright> <year>1997</year> <holder>ArborText, Inc.</holder> </copyright> <pagenums>97-108</pagenums> </biblioset> </biblioentry> </bibliodiv> </bibliography>
Note
The "raw" bibliography does not contain any formatting between the elements.
The next code sample shows the same bibliography, but using cooked entries. Here, there is formatting between the elements, such as commas between the firstname
and surname
entries, and periods after some surname
elements. Paligo will keep this formatting when you publish. Notice how this can result in inconsistent entries.
<bibliography> <title>A Test Bibliography</title> <bibliodiv> <title>Books</title>: <bibliomixed> <abbrev>AhoSethiUllman96</abbrev> <authorgroup> <author> <personname> <firstname>Alfred V.</firstname>,<surname>Aho</surname>. </personname> </author> <author> <personname> <firstname>Ravi</firstname>, <surname>Sethi</surname>. </personname> </author> <author> <personname> <firstname>Jeffrey D.</firstname>, <surname>Ullman</surname>. </personname> </author> </authorgroup> <copyright> <year>1996</year> <holder>Bell Telephone Laboratories, Inc.</holder>. </copyright> <editor> <personname> <firstname>James T.</firstname>, <surname>DeWolf</surname>. </personname> </editor> <biblioid class="isbn">0-201-10088-6</biblioid> <publisher> <publishername>Addison-Wesley Publishing Company</publishername>. </publisher> <title>Compilers, Principles, Techniques, and Tools</title> </bibliomixed> <bibliomixed> <abbrev>Kites74</abbrev> <authorgroup> <author> <personname> <firstname>Andrea</firstname>, <surname>Bahadur</surname>. </personname> </author> <author> <personname> <firstname>Mark</firstname>, <surname>Shwarek</surname>. </personname> </author> </authorgroup> <copyright> <year>1974</year> - <year>1975</year>. <holder>Product Development International Holding N. V.</holder> </copyright> <biblioid class="isbn">0-88459-021-6</biblioid> <publisher> <publishername>Plenary Publications International, Inc.</publishername> </publisher> <title>Kites</title> <subtitle>Ancient Craft to Modern Sport</subtitle> <pagenums>988-999</pagenums> </bibliomixed> </bibliodiv> <bibliodiv> <title>Periodicals</title> <bibliomixed> <abbrev>Walsh97</abbrev> <biblioset relation="journal"> <title>XML: Principles, Tools, and Techniques</title> <publisher> <publishername>O'Reilly & Associates, Inc.</publishername> </publisher> <biblioid class="issn">1085-2301</biblioid> <editor> <personname> <firstname>Dan</firstname>, <surname>Connolly</surname>. </personname> </editor> </biblioset> <biblioset relation="article"> <title>A Guide to XML</title> <author> <personname> <surname>Walsh</surname>,<firstname>Norman</firstname>. </personname> </author> <copyright> <year>1997</year>. <holder>ArborText, Inc.</holder> </copyright> <pagenums>97-108</pagenums> </biblioset> </bibliomixed> </bibliodiv> </bibliography>
To create a bibliography that appears at the end of a topic:
-
In the Content Manager, select the topic that you want to edit.
Alternatively, you can create a new topic and edit that (see Create a Topic).
-
Position the cursor after the content in your topic. It needs to be on a new line, as if you were going to add a new paragraph.
-
Press Alt + Enter ⏎ (Windows) or Command ⌘ + Enter ⏎ (Mac) to display the Element Context Menu.
-
Add the bibliolist element.
Note
We recommend that you use
bibliolist
instead ofbibliography
for end-of-topic bibliographies. -
Build your bibliography structure inside the
bibliolist
element. To build the structure, you will need to use the various bibliography elements, as described in the DocBook 5.2 documentation (see https://tdg.docbook.org/tdg/5.2/bibliography.html).We have included an example bibliography at the end of this article. It shows a valid bibliography structure, so you can copy that structure as a starting point.
-
Select Save.
-
In the content of your topic, add references (citations) from the content to the bibliography entries, see Add a Citation.
The following code shows the underlying structure of a valid end-of-topic bibliography. When you are creating your own bibliography, look at the example to see how the various bibliography elements are used. Some are "parents" and others are "children", for example, author
is a parent of personname
and personname
is a parent of firstname
.
<?xml version="1.0"?> <section> <title>Security in websites and data-centric applications</title> <para>As websites and other data-centric applications become increasingly common, users are required to trust the confidentiality and integrity of the data the applications collect, store and present <citation>Harauz, Kaufman & Potter, 2009</citation>.</para> <para>Because of this, these types of applications have become enticing targets for hackers wanting to input or access information without the owner’s permission. Inadequate security on the data input can allow hackers to create scams or spam, misleading or harassing users using automated bots <citation>Yan & El Ahmad, 2009</citation>.</para> <para>These bots are capable of performing actions at a significantly higher rate than any human could. Bot creators have used this advantage to rig online polls, create large amounts of email addresses used for spamming and to attempt dictionary attacks against password systems <citation>von Ahn et al., 2003</citation>.</para> <para>Furthermore, insufficient security when it comes to storing or accessing data can allow hackers access to confidential and private information such as credit card information and personal security details.</para> <bibliolist> <biblioentry> <title>Data Security in the World of Cloud Computing</title> <abbrev>Harauz, Kaufman & Potter, 2009</abbrev> <author> <personname>Harauz J</personname> </author> <author> <personname>Kaufman L.M</personname> </author> <author> <personname>Potter B</personname> </author> <pubdate>2009</pubdate> <citetitle>IEEE Security & Privacy. 7</citetitle> </biblioentry> <biblioentry> <title>CAPTCHA security: A Case Study. IEEE Security & Privacy</title> <abbrev>Yan & El Ahmad, 2009</abbrev> <author> <personname>Yan J</personname> </author> <author> <personname>El Ahmad A.S</personname> </author> <pubdate>2009</pubdate> <citetitle>IEEE Security & Privacy. 7</citetitle> </biblioentry> <biblioentry> <title>CAPTCHA: Using Hard AI Problems for Security</title> <abbrev>von Ahn et al., 2003</abbrev> <author> <personname>Von Ahn L</personname> </author> <author> <personname>Blum M</personname> </author> <author> <personname>Hopper, N.J</personname> </author> <author> <personname>Langford J</personname> </author> <pubdate>2003</pubdate> <citetitle>Lecture Notes in Computer Science. 2656</citetitle> </biblioentry> </bibliolist> </section>
A citation is a reference to a bibliography entry, such as a book's author, title, and publisher. You can add citations to your topics and when you publish, Paligo will convert them into hyperlinks to the appropriate bibliography entries.
Note
Depending on how bibliographies are set up, the hyperlink could navigate to a dedicated bibliography page or to a bibliography list at the end of the current section.
To learn about setting up these different types of bibliography, see Create a Bibliography.
There are two ways of using citations. You can:
-
Add a citation that uses the same text as an
abbrev
element in a bibliography entry. The text has to match exactly. -
Add a citation that uses different text to the bibliography entry.
For this, you add a
citation
and then add a cross-reference to a bibliography element'sxml:id
attribute. The xml:id attribute is on abiblioentry
element or abibliomixed
element, depending on whether you use "raw" or "cooked" entries.
You can add a citation
to a topic and use it to reference a bibliography entry. For the reference to work, you need:
-
A bibliography entry that has an
abbrev
element in its structure -
A citation that contains the exact same text as the bibliography entry's
abbrev
element.
Note
If your bibliography does not have an abbrev
element, you can use the element context menu to add one. For details, see Create a Bibliography.
To add a citation that references the abbrev
element of a bibliography entry:
-
In the Content Manager, select the topic that contains your bibliography.
Paligo opens the topic in the Editor.
-
Select the bibliography entry that you want to reference and select the text in its
abbrev
element. -
Copy the text inside the
abbrev
element.Note
This may produce unexpected results if the text in your
abbrev
element contains special characters, such as an ampersand ( & ). If your text has special characters, open the topic in the Source Code Editor instead and copy the text in theabbrev
element from there instead. -
In the Content Manager, select the topic that will contain the citation.
Note
This step only applies if you want to add a reference to a bibliography that is in a different topic to the citation. If they are both in the same topic, ignore this step.
Paligo opens the topic in the editor.
-
Position the cursor where the
citation
is to be added. -
Press Alt + Enter ⏎ (Windows) or Command ⌘ + Enter ⏎ (Mac) to display the Element Context Menu.
-
Search for the
citation
element and then add it. -
Paste the text from the bibliography entry's
abbrev
element into thecitation
element. Paligo uses the text to match the citation to the bibliography entry, so make sure that they are identical. Look out for extra spaces or similar characters that might be included in the citation accidentally, as these may stop the reference from working correctly. -
Select Save.
Note
If you publish with a Layout that has bibliography auto-numbering activated, your citation text is replaced with a number in square brackets. The number is a hyperlink to the matching entry in your bibliography.
As the number replaces the citation text, you may want to include a reference to the authors or document in the text before the citation.
To learn how to set up numbered bibliographies, see Bibliography Auto-Numbering.
If you want to add a citation that has different text to the bibliography entry, use a citation
element and add a cross-reference inside it. The cross-reference needs to be to the xml:id of the relevant biblioentry
element.
-
In the Content Manager, select the topic that will contain the citation.
Note
This step only applies if you want to add a reference to a bibliography that is in a different topic to the citation. If they are both in the same topic, ignore this step.
Paligo opens the topic in the editor.
-
Position the cursor where you want to add the
citation
. -
Press Alt + Enter ⏎ (Windows) or Command ⌘ + Enter ⏎ (Mac) to display the Element Context Menu.
-
Add the
citation
to the topic.You may need to use the search at the top of the menu to locate the
citation
element. -
Add a new
para
element below the citation and click inside it. You are going to use thispara
to get the correct link to the bibliography entry. -
Select Insert and then Link followed by Cross-reference.
-
Find your bibliography topic in the New cross-reference dialog.
-
Expand the bibliography topic so that you can see its elements.
Note
If you cannot see the
biblioentry
element for thebibliography
element you want to reference, it is because it has no XML:ID. You will need to open the bibliography topic and generate an ID for thebiblioentry
element. When you have done that, it will be available to use as a cross-reference. -
Select the biblioentry element that you want the citation to reference.
Paligo adds a cross-reference to the bibliography entry.
-
Click on the link and look at the Element attributes panel. It should show that the link (xref) has an
xlink:href
attribute and the value of that attribute is the target of the link. Highlight the entire value and copy it to your clipboad (ctrl + C or cmd + C). -
Click inside the
citation
element. -
In the Element attributes panel, make sure
citation
is shown as the selected element. Add the thelinkend
attribute and paste in the value that you copied from the cross-reference. -
Delete the
para
that contains the cross-reference. -
Select Save.
When you publish your content, Paligo turns the citation into a hyperlink to the relevant bibliography entry.
Note
If you publish with a Layout that has bibliography auto-numbering activated, your citation text is replaced with a number in square brackets. The number is a hyperlink to the matching entry in your bibliography.
As the number replaces the citation text, you may want to include a reference to the authors or document in the text before the citation.
To learn how to set up numbered bibliographies, see Bibliography Auto-Numbering.
Paligo can automatically number the entries in your bibliography and replace citations to them with a number. The number also acts as a hyperlink from the topic with the citation to the bibliography.
When you activate bibliography auto-numbering, Paligo numbers your bibliography entries. The number is a prefix to the entry and is shown in square brackets.
![]() |
Example of a bibliography with numbered entries
Paligo also sets your citations to reference the number of a bibliography entry instead of the text in its abbrev
element.
![]() |
Example of a citation in a topic that has had its text replaced with a number reference.
To set your bibliography and citations to use numbers instead of text:
-
Select the Layout tab in the top menu.
Paligo displays a list of Layouts. The list is empty if there are no custom Layouts in your Paligo instance.
-
Select the Layout you want to use for publishing.
The bibliography auto-numbering feature is available for HTML5 Help Center, HTML, and PDF Layouts.
-
Select the relevant category.
For PDF Layouts, select Glossary, Index, and Bibliography.
For HTML and HTML5 Help Center Layouts, select General.
-
Use the Bibliography auto numbering setting to control the numbering of bibliography entries and citations.
Choose either:
-
Enable to turn on auto-numbering for bibliographies.
-
Disable to turn off auto-numbering for bibliographies.
-
Default - To inherit the value for this setting from the base layout. The base layout is either a built-in layout provided by Paligo or another custom layout. To find out more, see Layout Relationships - Base, New, Duplicate.
-
-
Select Save.
When you use the Layout for publishing, Paligo will apply your choice to the bibliography entries and citations.
By default, "cooked" bibliography entries appear with a hanging indent (start indent and text indent) in PDF outputs. If you prefer, you can set them to be displayed as a list with a label and spacing.
![]() |
In the image shown, the "cooked" bibliography is set to use numbered entries and also to display as a list. Notice that the numbers are "labels" and there is equal spacing between those and the bibliography entries.
Note
The following instructions only apply to "cooked" bibliographies in PDF outputs.
To learn about "cooked" bibliographies, see Raw and Cooked Bibliography Entries.
To set a "cooked" bibliography to display as a list with labels for PDF:
-
Select the Layout tab in the top menu.
Paligo displays a list of Layouts. The list is empty if there are no custom Layouts in your Paligo instance.
-
Select the PDF Layout you are going to use for publishing. Alternatively, create a new one (see Create a Layout).
-
Select General in the sidebar.
-
Select Glossary, Index, and Bibliography.
-
Set Display bibliomixed as a list to:
-
Enable if you want the bibliography to be presented as a list with labels and a space between the labels and entries.
-
Disable if you want the bibliography to be presented as a regular list without spacing.
-
-
Use the bibliomixed label separation field to set the amount of space between the labels and the bibliography entries. Enter the value and the units of measurement, for example, 3em.
-
Select Save.
When you use this PDF Layout to publish your content, Paligo will apply the list and label separation settings to your bibliography.
If your labels do not appear as expected, see Troubleshooting Labels for "Cooked" Bibliography Entries
Troubleshooting Labels for "Cooked" Bibliography Entries
If the labels are not displaying as you would expect, it is likely because of how you have set up your bibliography entries and PDF Layout. The label for an entry can come from various sources, but Paligo looks for these in a specific order:
-
Automatically-generated number.
If the Layout setting Bibliography Auto numbering is on, Paligo will display a number in square brackets []. This is used as the label.
-
abbrev
element.If the first child element of
bibliomixed
isabbrev
, Paligo will use the contents ofabbrev
as the label. -
xreflabel
element.If the attribute
xreflabel
is set on thebibliomixed
element, Paligo will use the value ofxreflabel
as the label. -
id
attributeIf the attribute
id
is set on thebibliomixed
element, Paligo will use the the value ofid
as the label.Note
Paligo looks for the
id
attribute, not thexml:id
attribute. -
If none of the above exist, Paligo will use an empty label.
Using the information above, you can try to fix your labels, either by changing the Layout settings or changing the structure of your bibliography elements (see Create a Bibliography).
By default, Paligo automatically adds a "Bibliography" title to bibliographies in HTML, HTML5 and PDF outputs. You can choose to disable this feature if you prefer.
For example, if you have a bibliography inside a topic named "Bibliography", you will get two "Bibliography" titles, one for the topic and one for the bibliography. In this scenario, you will most likely want to disable the auto-title so that you only get the topic title.


Tip
For PDF output, this setting is found under General → Glossary, Index, and Bibliography in Layout Editor.
To control the bibliography auto-titles:
-
Select the Layout tab in the top menu.
Paligo displays a list of Layouts. The list is empty if there are no custom Layouts in your Paligo instance.
-
Select the Layout you want to update or Create a Layout.
Tip
You can copy the URL of the Layout Editor and paste it into a new tab in your browser. This can be useful if you frequently switch between your Paligo content and the Layout settings.
-
Select General in the sidebar.
-
Select Glossary, Index, and Bibliography. This step only applies when editing a PDF Layout.
-
Use Bibliography auto-title to turn the automatic title on or off.
Choose:
-
Enable to turn on auto-titles. Default
-
Disable to turn off the auto-titles.
-
-
Select Save.
Technical documentation often includes a glossary, where technical terms are listed alphabetically with a brief explanation. They act as a quick reference for terms that may not be commonly understood outside of your organization or industry.
To create a glossary in Paligo:
-
Create a Glossary Topic. This is where you add your glossary terms and their definitions.
When you are creating your glossary, you should consider whether you want to use an automatic glossary title. You can also sort the glossary so that the entries appear in alphabetical order.
-
If you want terms in your glossary to reference other terms in your glossary, you can use "see" and "see also" links. These need to be set up in the glossary topic.
-
This is an optional step. If you want your topics to contain hyperlinks to the explanations in the glossary, you need to add references in your content.
Alternatively, you can use the glossary topic without any references in your content. This will give you the glossary topic and the definitions you add, but there will be no links from your topics to your glossary.
-
If you are publishing to PDF, you can set the glossary to only include those terms that are used in your publication. This is useful when you have a single glossary topic that you reuse in several different publications.
-
If you are publishing to an HTML5 help center, you can choose whether your references to the glossary have "popovers" that appear when you hover the cursor over the term.
-
Add your glossary topic to a publication in the same way as you would add any other topic to a publication. Typically, the Glossary topic is placed at the end of the publication.
When you publish your content, the glossary is included. It contains a list of the glossary terms you have defined. If you have included references to the glossary in your content, those references appear as links. There are also popovers that appear if you publish to a HTML5 help center.
To create a glossary for your publication, a glossary
element must be added to a topic. When added, Paligo adds the basic structure that is required for a glossary. Some of the elements are optional and can be deleted if not needed. The use of glossterm
in topics allows you to change the formatting of terms in the publication and generates a link to the corresponding definitions on the glossary page.
Consider how you want the glossary to appear in the published output:
-
Glossary as a topic with the glossary entries to follow it.
This is the most common approach for glossaries. To set this up, use "Glossary" as the topic's
title
. When you add aglossary
element, it has its owntitle
. You can delete the glossary'stitle
element, so that only the topic'stitle
is used. -
Glossary as a subsection with the glossary entries to follow it.
To create this, give the topic the
title
that you want to use. When you add theglossary
element, it has its owntitle
. You can set the glossarytitle
to "Glossary" or any other name that you want.


Tip
If you want to sort the glossary entries in alphabetical order, see Sort the Glossary.
You can also add references, so that the terms in your topics contain links to the explanations in your glossary, see Glossary References.
-
Create a new topic or open an existing topic.
-
Position the cursor at a valid position for the glossary element.
For example, after the topic
title,
but before the firstpara
element. -
Press Alt + Enter ⏎ (Windows) or Command ⌘ + Enter ⏎ (Mac) to display the Element Context Menu.
-
Enter
Glossary
and select it from the menu.Paligo adds the basic structure for a glossary.
-
Add a
glossary title
and an introduction text in thepara
(both elements are optional). -
Add the
glossterm
(the name of the term). -
Add an
acronym
for the glossary term (optional).For example, if the glossary term is Extensible Markup Language, you could add the acronym XML.
<glossentry> <glossterm>Extensible Markup Language</glossterm> <acronym>XML</acronym> <glossdef><para>A self-descriptive language used to store and transfer data.</para></glossdef></glossentry>
-
Add a
glossdef
that explains what the term means. -
Use the Element Context Menu to add one
glossentry
per glossary term. -
Select Save.
-
Add your glossary topic to your publication, see Add Content to a Publication.
When you have created a glossary topic that contains the glossary terms and definitions, you can reference those terms in your topics. For example, if you have a glossary definition of "XML", you can reference it when you mention "XML" in your content. In your published output, the reference guides the reader to the glossary (PDF) or displays the definition (HTML).

Example of a hover popover showing a glossary definition in HTML output.
There are several types of glossary reference that you can use:
-
Exact match to the term in the glossary, for example, you have "Intake" in your content and the glossary term is also called "Intake"
-
Text that is different to the glossary term, for example, you might have "wireless" in your content but you want to link that to a glossary term called "WiFi".
-
"See" references, where there is no glossary term definition, only a "see" reference to another entry in the glossary.
-
"See also" references, where there can be a glossary term definition as well as a "see also" reference to another entry in the glossary.
You can associate terms in your topics with definitions in a glossary. If the term in your topic is an exact match for the term in the glossary, follow the steps below. This approach is suitable for content that is in a single language and content that is going to be translated.
-
Open the topic that will reference a term in your glossary.
-
Highlight the text that you want to reference the term in the glossary. This text has to be an exact match of the text for a glossary term in your glossary topic.
-
Use the Element Context Menu to add the
glossterm
element. -
Select Save.
When you publish, Paligo will automatically detect the references in your content and will match them to the terms in your glossary.
Note
As long as your term in the topic text and the glossary term are the same, you can use this technique for as many languages as you need. Because in the underlying XML, the code will be <glossterm
>text-term<glossterm
>,
where text-term is the word you want to use.
As long as the text-term exists in the glossary for the same language, it will work. For example, if you have an English topic with <glossterm
>valve</glossterm
>, your English glossary needs to contain a glossary term
called "valve", and in the French version, your topic would contain <glossterm
>vanne</glossterm
> and the French glossary would need a term called "vanne".
In a topic, you may have text that needs to refer to the glossary, but it does not match the glossary term. For example, you could have "configurable" in your topic, but you want it to reference a "Configure" glossary term.
There are two different ways to create this type of glossary reference:
-
Reference Glossary Entry by XML ID - If you have translations or are going to translate your content in the future, you should use references by xml:id.
-
Reference with Baseform and Term Name - This is only suitable if your content is only going to be written and published in one language. If you have translations, this technique will only work on the source language.
Reference Glossary Entry by XML ID
If you are going to translate your content, you will most likely want to refer to glossary terms that are also translated. For example, if you have English and French content, you probably want the French topics to reference French glossary terms. To do this, use an xml:id
reference.
With an xml:id
reference, the underlying code is the same for all language versions. So if you have a glossary entry with an xml:id
of N5f84b058951b3 in your English content, that same id is also used for the glossary entry in any
other languages.
If you used a baseform
reference instead, the glossary term would only work for one language. This is because the baseform
term is language-specific. For example, let's say you have English content and you use baseform
: valve for a glossary reference. Paligo will look for valve in the English glossary, and will find it (assuming it exists). But for the French glossary, Paligo will still look for
baseform
:valve, and valve will not exist in the French glossary as it is translated to vanne.
Tip
You can use xml:id references for content in a single language too. This is a good idea if you do not translate your content now, but may need to translate it in the future.
To use the xml:id
to reference a glossary entry:
-
Open your glossary topic. This is the topic that contains your glossary and the entries and definitions.
-
Select a
glossentry
element. Check that it does not have an xml:id entry in the Element attributes section. If it does, check the otherglossentry
elements too. If they all havexml:id
s, ignore step 3 and continue from step 4. If anyglossentry
does not have anxml:id
, you will need to add one (see step 3). -
Select the
glossentry
element on the Element Structure Menu and then select Generate ID. This gives theglossentry
a unique ID (xml:id
).When all of the
glossentry
elements have anxml:id
, you can reference them from your topics.Tip
You can manually change an
xml:id
to something that is more meaningful, if you wish. This can make it easier to work withxml:id
s for glossary references.When changing an xml:id, there are some rules to follow:
-
The xml:id must start with a letter
-
There is a 36 character limit
-
You cannot use spaces, so use an underscore instead. For example, glid valve is not allowed, but you could use glid_valve.
It is a good idea to have a consistent
xml:id
naming strategy for your glossary entries. -
-
Open a topic and select the text that you want to reference a glossary term.
-
Use the element context menu to apply the
glossterm
element. -
Select the
glossterm
element and then add thelinkend
attribute in the Element attributes section. -
Set the value of the linkend attribute to match the xml:id of the glossary entry you want to reference.
-
Repeat steps 4 to 7 inclusive for each reference.
-
Select Save.
When you publish, Paligo will automatically detect the references in your content and will match them to the terms in your glossary.
Reference with Baseform and Term Name
One way to reference a glossary term that does not match the text in your content is to use the baseform
attribute. But this is only suitable if you write and publish your content in a single language.
Important
If you have translations or are going to translate your content, use the xml:id to reference your glossary.
To use the baseform
attribute to reference a glossary term that does not match the text in your content:
-
Open a topic and select the text that you want to reference a glossary term.
-
Use the Element Context Menu to add the
glossterm
element.To find out more about using the element context menu to add content, see About Authoring
-
Select the
glossterm
element and then use the Element attributes section to add thebaseform
attribute. -
Set the value of the
baseform
attribute to the name of the term in the glossary. This has to be an exact match for the term in the glossary. -
Repeat this process for other references, as needed.
-
Select Save.
When you publish, Paligo will automatically detect the references in your content and will match them to the terms in your glossary.
If you want a glossary term to refer to another glossary term, you can use a "see" reference. For example, if you have a glossary term for "Coolant" you could use a "see" reference to guide the reader towards a related term, such as "See refrigeration".

Tip
You can also use a "see also" reference.
To use a "see" reference:
-
Edit your glossary topic. Alternatively, you can Create a Glossary Topic.
-
Click inside the
glossary
element and then use the element context menu to add aglossentry
element. Paligo adds aglossentry
element and it contains aglossterm
,acronym
,glossdef
, andpara
element (thepara
is in theglossdef
). -
Click after the
glossterm
element but before the acronym element. This selects theglossentry
element, which you can see in the element structure menu and in the Element attributes section. -
Use the element context menu to add the
glossee
element:To learn more about using the Element Context Menu, see About Authoring.
-
Delete the
acronym
,glossdef
, andpara
elements for the glossary entry. You should now be left with theglossentry
andglosssee
elements.Note
You can have either a
glossee
element or aglossdef
element in aglossentry
, but not both. -
In your glossary definitions, find the glossary term that you want to reference. For example, if you want to have a "See Refrigeration" reference, find the glossary definition for "Refrigeration".
-
Select the
glossentry
element for the term that you want to reference. -
In the Element attributes section, copy the
xml:id
attribute for theglossentry
.Note
If the
glossentry
does not have anxml:id
, select theglossentry
element in the element structure menu, and then select Generate ID. Paligo will create anxml:id
for theglossentry
element. -
Select the
glosseealso
orglossee
element that you added in step 4. -
In the Element attributes section, add the
Otherterm
attribute and paste in thexml:id
from step 7 as the value.The
Otherterm
attribute links theglossee
element with the other glossary term that you are referencing. Thexml:id
is what Paligo needs to identify the other glossary term. -
Select Save.
When you publish your content (including your glossary), you will get a "See" reference to the glossary term you chose in step 4.
For this example, imagine you have a glossary term for "Profiling" and instead of a description, you want a reference to show "See Filters".
In your glossary topic, you already have a "Filters" glossary entry that has this structure:
<glossentry xml:id="N5fa17485ec783"> <glossterm xinfo:text="14442">Filters</glossterm> <glossdef> <para>Filters are also known as profiles or conditional text. You can use them to markup your topics so that when you publish, you can choose whether to include of exclude parts of your content.</para> </glossdef> </glossentry>
The first step is to create a new glossary entry, so you add a new glossentry
element and name the entry "Profiling".

You delete its acronymn
and glossdef
elements as there is no need for an acronym and you cannot have a definition and a "see" reference in the same glossary term.

You add the glossee
element.

You select the glossentry
element for the glossary term you want to reference, in this case, "Filters". Then you copy its xml:id value from the Element attributes section.

You select the glossee element for the "Profiling" glossary entry, and then add the Otherterm attribute in the Element attributes section.
You copy the xml:id of the "Filters" glossary entry into the value field for the Otherterm attribute.

You save the glossary and publish it as part of a publication. In the output, the entry for Profiling shows "See Filtering".

For some glossary terms, you may want to include a "see also" reference as well as the definition of the glossary term. For example, if you have a glossary term for "coolant" you could have a definition and a "see also" reference to another related term, such as "see also refrigeration".
Tip
You can also use a "see " reference.
To use a "see also" reference:
-
Edit your glossary topic. Alternatively, you can Create a Glossary Topic.
-
Click inside the
glossary
element and then use the element context menu to add aglossentry
element. Paligo adds aglossentry
element and it contains aglossterm
,acronym
,glossdef
, andpara
element (thepara
is in theglossdef
).Note
You can have either a
glossee
element or aglossdef
element in aglossentry
, but not both. -
Click below the glossdef "Definition". The
glossseealso
element has to be inside theglossdef
, but after thepara
that is inside theglossdef
. -
Use the element context menu to add the
glosseealso
element:To learn more about using the Element Context Menu, see About Authoring.
-
In your glossary definitions, find the glossary term that you want to reference. For example, if you want to have a "See also Refrigeration" reference, find the glossary definition for "Refrigeration".
-
Select the
glossentry
element for the term that you want to reference. -
In the Element attributes section, copy the
xml:id
attribute for theglossentry
.Note
If the
glossentry
does not have anxml:id
, select theglossentry
element in the element structure menu, and then select Generate ID. Paligo will create anxml:id
for theglossentry
element. -
Select the
glosseealso
element that you added in step 4. -
In the Element attributes section, add the
Otherterm
attribute and paste in thexml:id
from step 7 as the value.The
Otherterm
attribute links theglosseealso
element with the other glossary term that you are referencing. Thexml:id
is what Paligo needs to identify the other glossary term. -
Select Save.
When you publish your content (including your glossary), you will get a "See also" reference to the glossary term you chose in step 4.
For this example, imagine you want a glossary term for "Profiling" and you need it to provide a definition and also to guide readers to also see the term "Filters".
In your glossary topic, you already have a "Filters" glossary entry that has this structure:
<glossentry xml:id="N5fa17485ec783"> <glossterm xinfo:text="14442">Filters</glossterm> <glossdef> <para>Filters are also known as profiles or conditional text. You can use them to markup your topics so that when you publish, you can choose whether to include of exclude parts of your content.</para> </glossdef> </glossentry>
The first step is to create a new glossary entry, so you add a new glossentry
element and name the entry "Profiling".

You delete its acronym
element as that is not needed in this case.
You enter a definition for "Profiling".

You add the glossseealso element.

You select the glossentry
element for the glossary term you want to reference, in this case, "Filters". Then you copy its xml:id value from the Element attributes section.
You select the glosseealso
element for the "Profiling" glossary entry, and then add the Otherterm
attribute in the Element attributes section.
You copy the xml:id of the "Filters" glossary entry into the value field for the Otherterm attribute.

You save the glossary and publish it as part of a publication. In the output, the entry for Profiling shows the definition for profiling and it has a "See also Filtering" reference.

When you create a glossary, you add a glossary
element, and by default, this includes a title
element inside it. You can use the glossary title
to name the glossary. But depending on how you have set up
your glossary, you may decide that you do not want a title at all.
One of the most common ways to set up a glossary is to create a topic called "Glossary" and then add a glossary element to it. In this scenario, the topic's title is glossary, so there is no real need for a glossary title as well. That's not a problem - you can delete the glossary title and the glossary will still work as expected. In the following image, "Glossary" is the topic's title and then the actual glossary has no title of its own.
![]() |
But it is also possible to add a glossary to a topic that is not called "Glossary". For example, you could add a glossary to a topic called "Reference". In this scenario, it can be a good idea to include a glossary title as well. The title will make it easier for your readers to find your glossary, seeing as there is no "Glossary" topic. In the following image, a glossary has been added to a "Reference" topic, and the glossary has a title called "Glossary".
![]() |
If you are going to use a glossary title, you should consider:
-
Do you want Paligo to automatically generate the title?
You can Add a Glossary Title yourself or you can get Paligo to generate a glossary title for you.
To use an automatically generated glossary title, see Automatic Glossary Title for PDF Outputs and Glossary Title for HTML5 Output.
-
If you publish to PDF, do you want the bookmarks to have a link to the glossary title?
If yes, you can set Paligo to include the glossary title as a bookmark, if needed.
-
For HTML5 outputs, do you want the glossary title to be shown?
They are hidden by default, but you can use custom CSS to display them if you prefer.
By default, when you add a glossary
element, it also contains a title
. You can enter the text for your title inside the title
element.
![]() |
If you have removed the glossary title and later decide that you do want a title, you can either:
-
Add a glossary title manually, by adding the title element
-
Set Paligo to generate a glossary title automatically.
To use an automatically generated glossary title, see Automatic Glossary Title for PDF Outputs and Glossary Title for HTML5 Output.
To manually add a glossary title:
-
Open the topic that contains your glossary in the Paligo Editor.
-
Select the
glossary
element. -
Use the element context menu to add the
title
element. -
Enter the text for your glossary title inside the
title
element. -
Select Save.
Paligo can automatically add a title to your glossary. The automatic title has the text "Glossary" and if you publish to other languages, a translation of "Glossary" is provided as well.
To use an automatic glossary title for PDF outputs:
-
Select the Layout tab in the top menu.
Paligo displays a list of Layouts. The list is empty if there are no custom Layouts in your Paligo instance.
-
Select the Layout you want to update or Create a Layout.
Tip
You can copy the URL of the Layout Editor and paste it into a new tab in your browser. This can be useful if you frequently switch between your Paligo content and the Layout settings.
-
Select General and choose Glossary, Index, and Bibliography.
-
Set Glossary auto title to Enable.
When you publish, Paligo will check to see if your glossary has a title.
-
If the glossary already has a title, Paligo will use that title. It will not generate an automatic title.
-
If the glossary does not have a title, Paligo will add a
title
element with "Glossary" as the title text.
If you set Glossary auto title to Disable, Paligo will not create an automatic glossary title.
-
-
Select Save.
When you publish to PDF with this layout, the output will include or exclude the automatic glossary title.
PDFs can have bookmarks that act like a table of contents in a side panel, where your topics are shown in order. If you have a glossary, it's likely that you will want a link to the glossary to appear here.
If your glossary is inside a topic called "Glossary", you will not need to take any action. The "Glossary" topic will appear in the bookmarks by default.
But if your glossary is inside a topic with a different title, there will be no obvious way for the reader to access the glossary. For example, let's say you have added your glossary to a topic called "references" and you have removed the title for the glossary. In the published PDF, the bookmarks will only show "References", which makes it harder for your readers to find the glossary.
To fix this, you can set Paligo to include the glossary's title in the bookmarks as well. If your glossary does not have a title, you can add one or you can set Paligo to generate one automatically.
![]() |
-
Select the Layout tab in the top menu.
Paligo displays a list of Layouts. The list is empty if there are no custom Layouts in your Paligo instance.
-
Select the Layout you want to update or Create a Layout.
Tip
You can copy the URL of the Layout Editor and paste it into a new tab in your browser. This can be useful if you frequently switch between your Paligo content and the Layout settings.
-
Select General and choose Glossary, Index, and Bibliography.
-
Enable the Glossary title or auto title in bookmarks setting to get Paligo to include the title of the glossary element in the bookmarks.
Note
This setting will only work if your glossary has a title, or you have set Paligo to generate a title automatically.
-
Select Save.
When you publish to PDF with this layout, the output will include or exclude the automatic glossary title.
When you publish to PDF with this layout, Paligo includes the glossary title in the bookmarks. It is a subsection of its parent topic.
![]() |
By default, Paligo includes a glossary title for HTML5 outputs, but it is hidden from view. The title varies, depending on how your glossary is set up:
-
If your glossary contains a
title
element, Paligo includes that title in the HTML5 output -
If your glossary has no
title
element, Paligo creates an automatic title for the HTML5 output. The automatic title is called "Glossary" (or a translation of Glossary for other languages).
To display the glossary title in your HTML5 help center, you need to add some custom CSS:
-
Create or edit an existing custom CSS file and add the following code:
.glossary .titlepage{ display: block; }
To learn more about creating custom CSS, see Style with CSS.
-
Create an HTML5 Help Center layout. Alternatively, you can Edit a Layout.
-
Upload your custom CSS to the HTML5 layout.
-
Select Save.
When you publish to HTML5 using this layout, the glossary title is shown.
For PDF output, you can make the Paligo Glossary filter out unused glossary terms from the published output. This is useful when you reuse the same glossary topic for different publications.
When you Publish to PDF, Paligo will look for the references in your publication. It will then filter the glossary to only include those terms that are actually referenced in your publication. Any other terms are excluded from the published glossary.
For example, let's say you have a range of publications for a single product, such as an industrial fan:
-
A user guide aimed at customers who will use the fan controls in the factory.
-
An installation guide aimed at electricians who will fit the fan in the factory.
-
A firmware guide that is used by your service engineers who can visit the factory and apply updates to the fan.
Rather than creating separate glossaries for these publications, you create one glossary that is reused in all three. However, the glossary will contain some terms that you do not want to appear in the user guide, as they are technical terms that are not intended for the customers.
If you set the glossary to filter out unused glossary terms, each output will only include the terms that appear in the publication. In other words, you will get a user guide with a glossary that only contains the terms that appear in the user guide, the installation guide will only have terms that appear in the installation guide, and so on.
Important
HTML outputs do not support the role="auto"
functionality. If role="auto"
is in place for HTML outputs, you will get an empty glossary, without glossary terms.
When you publish to both PDF and HTML:
-
Add the
role="auto"
attribute when you publish to PDF. -
Remove it when you publish to HTML.
To set your glossary to only include terms that appear in a publication:
-
Create a Glossary Topic and add glossary terms and definitions.
-
Mark up your topics with Glossary References for the filtering to work. Each glossary term needs to be referenced at least once.
-
Open your glossary topic and click inside the Paligo Glossary.
-
Select the
glossary
element in the Element Structure Menu and choose Go to element. -
Add the
role
attribute in the Element Attributes Panel and set its value toauto
.Note
The automatic filtering of glossary terms only applies if the glossary has the
role
attribute set toauto
.If you have a topic that contains multiple glossaries and some of them without the
role="auto"
element, you will get all their glossary terms, even if they are not used in the publication. -
Select Save.
There are two ways to sort the glossary in alphabetical order:
Sort the Glossary Entries in the Editor
You can sort the glossary entries so that they are listed in alphabetical order in the Paligo editor.
-
Open the glossary topic and position the cursor inside the
glossary
element but before the firstglossterm
element. -
Use a keyboard shortcut to sort the entries:
-
On Mac, use:
Control ^Option ⌥ Shift ⇧ G
On Windows, use:
CtrlAlt Shift G
-
Automatic Sorting of Glossary Entries for Publishing
Paligo can sort your glossary entries into alphabetical order when you publish an output. The sorting happens as part of the "transform" and you can turn it on or off in the Layout settings (HTML5 and PDF only, it is always on for HTML outputs).
To turn on or turn off automatic glossary sorting:
-
Select the Layout tab in the top menu.
Paligo displays a list of Layouts. The list is empty if there are no custom Layouts in your Paligo instance.
-
Select the Layout you want to edit. Alternatively, you can create a new Layout and edit that.
-
Locate the Sort Glossary Automatically setting.
-
On HTML5 Help Center Layouts, it is in the General category.
-
On PDF Layouts, select General and then Glossary, Index, and Bibliography. You will find Sort Glossary Automatically in that category.
-
-
Set Sort Glossary Automatically to:
-
Enable - To set Paligo to sort the glossary entries alphabetically during the transform. They will appear in alphabetical order in the published output.
-
Disable - To stop Paligo from sorting the glossary entries alphabetically. In the published output, the glossary entries will appear in the same order as in the topic(s) in the Paligo editor.
-
Default - To inherit the value for this setting from the base layout. The base layout is either a built-in layout provided by Paligo or another custom layout. To find out more, see Layout Relationships - Base, New, Duplicate.
-
-
Select Save.
Glossary popovers are panels that appear when you hover the cursor over a term that is linked to the glossary. They contain the glossary term and definition from the matching term in your glossary, and are only available in HTML5 help center outputs.
Paligo creates glossary popovers for you automatically. But if you prefer, you can disable them so that your glossary references only have a link to your glossary topic.
![]() |
To control whether glossary popovers are used for HTML5 output:
-
Select the Layout tab in the top menu.
Paligo displays a list of Layouts. The list is empty if there are no custom Layouts in your Paligo instance.
-
Select the Layout you want to update or Create a Layout.
Tip
You can copy the URL of the Layout Editor and paste it into a new tab in your browser. This can be useful if you frequently switch between your Paligo content and the Layout settings.
-
Select Classes and attributes in the sidebar.
-
Use the Glossary Popovers setting to enable or disable them.
-
Select Save.
When you publish to HTML5 using this layout, your output will have glossary popovers if you enabled them. You can test it by hovering the cursor over text that references a term in your glossary. If you disabled popovers, the glossary references will appear as links only.
Glossaries, like any other topic, can be in multiple languages. You add each required language to the topic, and then the topic can contain the content for the source language and the translations for each additional language (see Working in Translation View).
For a glossary in multiple languages, you need:
-
A "glossary" topic to contain the glossary term definitions.
This topic will be translated into different languages, so you have a single glossary topic with versions in English, French, German, Spanish, etc. To find out more, see Create a Glossary Topic.
-
Regular topics that contain text that references your "glossary" topic.
These topics will also be translated into different languages. For the glossary references, Paligo will look in the version of the glossary that matches the language of the topic. For example, if the French version of a regular topic references "vanne", Paligo will look for "vanne" in the French version of the glossary topic.
Most types of glossary reference will work in all languages (see Glossary References), but there is one exception. If you want a term in your text to refer to a
glossary entry, but the text does not match the glossary term, you will need to use an xml:id
reference. To find out more, see Topic Term is Different to Glossary Term.
When your content is translated, it is important that only the text is translated. Do not translate element names, attribute names, or attribute values.
Glossary Terms in the Translation Editor
If you translate your content manually using the Translation Editor, make sure to follow these steps for any content that has a glossary term (or any other inline XML element):
-
In the Translation Editor, select the part that you want to translate. The translation dialog appears.
-
If the source content that you are translating contains a glossary term element, select Copy Source Text. This copies the entry in the original source language version into the translation dialog. Importantly, it copies the inline elements, such as
glossterm
too. The inline element is highlighted in the translation dialog. -
Translate the content into the relevant language, including the highlighted content, and then save.
Note
If you do not use Copy Source Text, the text you enter in the translation dialog will not include the elements that are needed for glossary terms. It will only be regular text.
Paligo has several index-related elements that you can use to create an index with references to your topics. These are especially useful in PDF outputs, where users are more likely to need to refer to an index to find out where certain subjects are explained in a document. With HTML and other outputs that will be read digitally, the index is often less useful as there is a search tool to use instead. However, you may still decide to include an index in your online content too.
![]() |
To set up an index for your Paligo content:
-
Create an Index Topic and add it to your publication.
-
Add Index References to your content.
-
Edit your PDF layout to set the number of columns for the index and the column spacing (PDF outputs only).
-
Publish your content, see General Publishing Process.
Note
Paligo can generate and sort your index automatically, if you Create an Index Topic and there are index references added in your content.
An index topic is a regular topic where an index
element has been added. When you add the index topic to your publication, Paligo will automatically gather all index references from the topics. The index references will be categorized by letter and sorted alphabetically and
each has a page reference or a link.
If the publication does not contain any index references, the index will be empty. You need to add index references to your topics before you publish, see Add Index References.
Consider how you want your index to appear in the published output:
-
The index used as a main topic. This is the most common approach for an index.
-
The index used as a subsection inside a main topic (for example References).


To the left - The index as a main topic. To the right - The index as a subsection.
Note
The index
element will automatically add a title named Index. This means that if you have a main topic called Index, the subsection will also be called Index.
This extra title can be hidden, see Hide Index Title for HTML5 Output or Activate Index Auto-Title for PDF.
Tip
To find out more about using the Element Context Menu to add content, see About Authoring
To create an index topic:
-
Position the cursor at a valid position for the
index
element.For example, after the section
title
, but before the firstpara
element. -
Press Alt + Enter ⏎ (Windows) or Command ⌘ + Enter ⏎ (Mac) to display the Element Context Menu.
-
Enter index and select it in the menu.
-
Delete the
para
element that is included by default, if not needed. -
Select Save.
-
Add your index topic to your publication, see Add Content to a Publication.
When you publish your publication, Paligo will automatically gather the index references.
When you Create an Index Topic the index
element includes an extra title named Index. It is possible to hide this title for both PDF and HTML5 output or include them in PDF bookmarks.


To the left - the index as a main topic. To the right - the index as a subsection.
Paligo can automatically add a title to your index for PDF output. The automatic title will be "Index" and if you publish in other languages, a translation of "Index" is provided as well.
To include or exclude the automatically generated index title:
-
Select the Layout tab in the top menu.
Paligo displays a list of Layouts. The list is empty if there are no custom Layouts in your Paligo instance.
-
Select the Layout you want to update or Create a Layout.
Tip
You can copy the URL of the Layout Editor and paste it into a new tab in your browser. This can be useful if you frequently switch between your Paligo content and the Layout settings.
-
Select General and choose Glossary, Index, and Bibliography.
-
Control whether to include or exclude the Index auto-title.
-
Enabled - Paligo will check if your index has a title during publishing:
-
Existing title - Paligo will use that title.
-
No title - Paligo will generate a
title
element with "Index" as the title text.
-
-
Disabled Paligo will not generate an automatic index title. Default
-
-
Select Save.
When you publish to PDF with this layout, the output will include or exclude an automatic index title.
PDFs can have bookmarks that act like a table of contents in a side panel, where your topics are shown in order. If you have an index, it's likely that you will want a link to the index to appear here.
If your index is inside a topic called "Index", you will not need to take any action. The "Index" topic will appear in the bookmarks by default.
But if your index is inside a topic with a different title, there will be no obvious way for the reader to access the index. For example, let's say you have added your index to a topic called "references". In the published PDF, the bookmarks will only show "References", which makes it harder for your readers to find the index.
![]() |
To fix this, you can set Paligo to include the index's title in the bookmarks as well. If your index does not have a title, you can add one or you can set Paligo to generate one automatically.
-
Select the Layout tab in the top menu.
Paligo displays a list of Layouts. The list is empty if there are no custom Layouts in your Paligo instance.
-
Select the Layout you want to update or Create a Layout.
Tip
You can copy the URL of the Layout Editor and paste it into a new tab in your browser. This can be useful if you frequently switch between your Paligo content and the Layout settings.
-
Select General and choose Glossary, Index, and Bibliography.
-
Enable the Index title or auto title in bookmarks setting to get Paligo to include the title of the index element in the bookmarks.
Note
This setting will only work if your index has a title, or you have set Paligo to generate a title automatically.
-
Select Save.
When you publish to PDF with this layout, Paligo includes the index title in the bookmarks. It is a subsection of its parent topic.
![]() |
Your HTML5 output will show your index title by default if your index:
-
Contains a
title
element -
Has no
title
element, but your HTML5 layout is set to generate an index title automatically. The automatic title is called "Index" (or a translation of Index for other languages).
This can mean that your HTML index has two "Index" titles, one for the topic and one for the index element. To hide the title for the index element, use CSS:
-
Create or edit an existing custom CSS file and add the following code:
.index .titlepage{ display: none; }
To learn more about creating custom CSS, see Style with CSS.
-
Create an HTML5 Help Center layout. Alternatively, you can Edit a Layout.
-
Upload your custom CSS to the HTML5 layout.
-
Select Save.
When you publish to HTML5 using this layout, the index element's title is hidden.
Note
If you want to show the index title again, change the CSS to:
.index .titlepage{ display: block; }
To get index entries to appear when you Create an Index Topic, you need to markup the topics with index references. These references tell Paligo what terms should appear in the index topic and what type of reference should be used. If your content does not contain any index references, your index topic will be empty when you publish. There are four types of index references that you can use depending on which information to be included in the index topic.
Appearance |
Type |
Description |
---|---|---|
![]() |
Primary Index References |
The index topic will only show the main terms in alphabetical order with page numbers. Learn more, see Add a Primary Index Reference. |
![]() |
Secondary Index References |
The index topic will show both main terms and subterms in alphabetical order with page numbers. Learn more, see Add a Secondary Index Reference. |
![]() |
See Index References |
The index topic will show the main terms in alphabetical order without page numbers with a link within brackets to another term. Might be that you want to include terms that could be used for the same thing and refer the reader to the proper term instead. Learn more about how to add these extra references, see Add a See Index Reference. |
![]() |
See Also Index References |
The index topic will show the main terms in alphabetical order with page numbers including a link within brackets to an additional term. Learn more about how to add these extra references, see Add a See Also Index Reference. |
Note
If you publish to HTML or HTML5 there will be hyperlinks instead of page numbers.
If you use a primary index reference, the index topic will only show the main terms in alphabetical order with page numbers. If you publish to HTML, there is a hyperlink to the page instead of a page number.
![]() |
The index topic will look like this with primary index references.
Tip
To find out more about using the Element Context Menu to add content, see About Authoring.
To add a primary index reference to your content:
-
Select the topic or component in the Content Manager to open it in the Editor.
Alternatively, you can Create a Topic and edit that.
-
Position the cursor immediately before the text for the term that you want to use.
-
Press Alt + Enter ⏎ (Windows) or Command ⌘ + Enter ⏎ (Mac) to display the Element Context Menu.
-
Enter
indexterm
and select it from the menu.Paligo adds an
indexterm
element with anprimary
element inside it. -
Enter the main term inside the
primary
element to make it appear in the index.Note
You should now have a structure like that shown in the example below. Here, we have used "temperature" as an example of a primary term.
<para>If the sensor detects that the room is too hot or too cold, the system will raise a <indexterm><primary>Temperature</pr
-
Select Save.
When you publish, Paligo will automatically add your index entries to your index topic. If you do not have an index topic, see Create an Index Topic.
If you use a secondary index reference, the index topic will show both main terms and subterms in alphabetical order with page numbers. If you publish to HTML, there is a hyperlink to the page instead of a page number.
![]() |
The index topic will look like this with secondary index references.
Tip
To find out more about using the Element Context Menu to add content, see About Authoring.
To add a secondary index reference to your content:
-
Select the topic or component in the Content Manager to open it in the Editor.
Alternatively, you can Create a Topic and edit that.
-
Position the cursor immediately before the text for the term that you want to use.
-
Press Alt + Enter ⏎ (Windows) or Command ⌘ + Enter ⏎ (Mac) to display the Element Context Menu.
-
Enter
indexterm
and select it from the menu.Paligo adds an
indexterm
element with anprimary
element inside it. -
Enter the main term inside the
primary
element to make it appear in the index.Note
You should now have a structure like that shown in the example below. Here, we have used "temperature" as an example of a primary term.
<para>If the sensor detects that the room is too hot or too cold, the system will raise a <indexterm><primary>Temperature</pr
-
Position the cursor after the
primary
reference, but before the end of theindexterm
.Tip
Move the cursor with the keyboard arrows to easier position it between the chevrons.
-
Press Alt + Enter ⏎ (Windows) or Command ⌘ + Enter ⏎ (Mac) to display the Element Context Menu.
-
Enter
secondary
and select it from the menu. -
Enter the subterm inside the
secondary
element to make it appear in the index.Note
You should now have a structure like this (where we have used "alarm" as an example of a secondary term):
<para>If the sensor detects that the room is too hot or too cold, the system will raise a <indexterm><primary>Temperature</primary><secondary>alarm</secondary></indexterm>temperature alarm.</para>
-
Select Save.
When you publish, Paligo will automatically add your index entries to your index topic. If you do not have an index topic, see Create an Index Topic.
If you use a see index reference, the index topic will show the main terms in alphabetical order without page numbers with a link within brackets to another term. Might be that you want to include terms that could be used for the same thing and refer the reader to the proper term instead.
A see index reference is a combination of a primary
element for the main term and a see
element for the link to the additional term.
![]() |
The index topic will look like this with see index references.
Note
It is also possible to use a see
element for a secondary term, but these entries can become complicated. It is usually better to keep your index entries as simple as possible, so that your readers can find the information they need quickly.
To add a see index reference:
-
Select the topic or component in the Content Manager to open it in the Editor.
Alternatively, you can Create a Topic and edit that.
-
Position the cursor immediately before the text for the term that you want to use.
-
Press Alt + Enter ⏎ (Windows) or Command ⌘ + Enter ⏎ (Mac) to display the Element Context Menu.
-
Enter
indexterm
and select it from the menu.Paligo adds an
indexterm
element with anprimary
element inside it. -
Enter the main term inside the
primary
element to make it appear in the index.Note
You should now have a structure like that shown in the example below. Here, we have used "temperature" as an example of a primary term.
<para>If the sensor detects that the room is too hot or too cold, the system will raise a <indexterm><primary>Temperature</pr
-
Position the cursor after the
primary
reference, but before the end of theindexterm
.Tip
Move the cursor with the keyboard arrows to easier position it between the chevrons.
-
Press Alt + Enter ⏎ (Windows) or Command ⌘ + Enter ⏎ (Mac) to display the Element Context Menu.
-
Enter
see
and select it from the menu. -
Enter the term inside the
see
element that is to appear as link within brackets in the index.The entered term must be an existing index term.
Note
You should now have a structure like that shown below, where we have used "Temperature" as the "see" index entry.
<para>If the sensor detects that the room is too hot or too cold, the system will raise a <indexterm><primary>Thermal</primary><see>Temperature</see></indexterm>temperature alarm.</para>
-
Select Save.
When you publish, Paligo will automatically add your index entries to your index topic. If you do not have an index topic, see Create an Index Topic.
If you use a see also index reference, the index topic will show the main terms in alphabetical order with page numbers including a link within brackets to an additional term. If you publish to HTML, there is a hyperlink to the page instead of a page number.
A see also index reference is a combination of a primary
element for the main term and a seealso
element for the link to the additional term.
![]() |
The index topic will look like this with see also index references.
Note
It is also possible to use a seealso
element for a secondary term, but these entries can become complicated. It is usually better to keep your index entries as simple as possible, so that your readers can find the information they need quickly.
To add a see also index reference:
-
Select the topic or component in the Content Manager to open it in the Editor.
Alternatively, you can Create a Topic and edit that.
-
Position the cursor immediately before the text for the term that you want to use.
-
Press Alt + Enter ⏎ (Windows) or Command ⌘ + Enter ⏎ (Mac) to display the Element Context Menu.
-
Enter
indexterm
and select it from the menu.Paligo adds an
indexterm
element with anprimary
element inside it. -
Enter the main term inside the
primary
element to make it appear in the index.Note
You should now have a structure like that shown in the example below. Here, we have used "temperature" as an example of a primary term.
<para>If the sensor detects that the room is too hot or too cold, the system will raise a <indexterm><primary>Temperature</pr
-
Position the cursor after the
primary
reference, but before the end of theindexterm
.Tip
Move the cursor with the keyboard arrows to easier position it between the chevrons.
-
Press Alt + Enter ⏎ (Windows) or Command ⌘ + Enter ⏎ (Mac) to display the Element Context Menu.
-
Enter
seealso
and select it from the menu. -
Enter the term inside the
seealso
element that is to appear as a link within brackets in the index.The entered term must be an existing index term.
Note
You should now have a structure like that shown below, where we have used "Thermal" as the "seealso" index entry.
<para>If the sensor detects that the room is too hot or too cold, the system will raise a <indexterm><primary>Temperature</primary><seealso>Thermal</seealso></indexterm>temperature alarm.</para>
-
Select Save.
When you publish, Paligo will automatically add your index entries to your index topic. If you do not have an index topic, see Create an Index Topic.
Use the Advanced Search to find topics that include index references. Depending on what you want to find, you can choose to:
-
Include all topics with index references by using the
indexterm
element in the search. -
Narrow down the search by specifying the type of index reference (
primary
,secondary
,see
orseealso
).
To search for index references:
-
Select Quick Search in the top menu.
-
Select Advanced Search.
-
Select the Search tab.
-
Enter
indexterm
or specify a particular index reference type (primary
,secondary
,see
orseealso
) in the Contains field.To the left search for content with the
indexterm
element. To the right search for content with theseealso
element. -
Select the Content checkbox and clear the others in the Search in field.
-
Select Search.
-
All topics that match the search criteria will be presented below the search area.
Paligo can currently only use UTF-8 to define the sort order in an index. This means that languages that use symbols or a mix of symbols and phonemic characters (like Japanese, Korean and Chinese) will encounter problems when publishing in multiple languages.
A possible workaround for PDF output is by defining an indexterm
that uses a phonemic word (alphabetic writing) for index sorting. The indexterm
is invisible in the topics and works in the background to sort and group the index
references.
The sortas
attribute on the primary
, secondary
and tertiary
elements is used to express a key. Usually the key is the same word as used as the value of the primary,
secondary and tertiary element. This key is subsequently used to look up the actual phonemic version of the term in a lookup file for the language being published to.
![]() |
The image above shows a possible Japanese index.
For languages that require a mapping between a symbolic term and a phonemic sortas
value, you have to enable the feature in the System settings. Also, you have to prepare one lookup file for each language that includes the sortas
key and the translated phonemic word to replace it.
The sortas
key will control the sort order of the element sortas
attribute and group the indexterms
in the index topic.
-
Select the avatar in the top-right corner.
-
Select Settings from the menu.
-
Select the System Settings tab.
-
Enable Use lookup files for index sortering with the slider.
-
Prepare a
lookup
file for each language and name it like this:sortas-lookup-language code.xml
.Replace the text "language code" with a two-letter or four-letter code (for example "sortas-lookup-ja.xml", "sortas-lookup-zh.xml" or "sortas-lookup-ko.xml". Learn more, see Language Codes.
-
Build the file like this:
<sortas-lookup lang="language code"> <sortas key="phonemic word" value="phonemic word translated"/> </sortas-lookup>
The image shows what a sortas-lookup file for Japanese could look like in an instance that uses English as source language.
-
Upload the
lookup
file to thexsl
folder, see WebDAV Access to your Paligo Instance Folders.
Prepare the topics with indexterms
that will be replaced with translated phonemic words from a file called sortas-lookup
, see Enable Lookup Files for Index Sorting. Once the topics are ready, you add them to a publication containing an index topic and translate them.
The output index will be sorted according to the translated phonemic words (sortas
keys) from the sortas-lookup
files, but show the language symbols instead of the sortas
attribute value.


To the left - the English source topic. To the right - the translated topic shows the symbol instead of the phonemic word.
Note
When you have this feature enabled and Paligo cannot find a lookup file for a language, all sortas
attributes for this language will automatically be removed during the publishing process.
This means that you only require lookup files for languages that use symbols or a mix of symbols and phonemic characters (like Japanese, Korean and Chinese), but not for languages that use the Latin alphabet (like Swedish and English).
-
Select the topic or component in the Content Manager to open it in the Editor.
Alternatively, you can Create a Topic and edit that.
-
Position the cursor after the word that needs an
indexterm
added. -
Press Alt + Enter ⏎ (Windows) or Command ⌘ + Enter ⏎ (Mac) to display the Element Context Menu.
-
Enter
indexterm
and select it from the menu. -
Enter the word (within the chevrons) to be shown in the index topic. (Probably a symbol, if your source language is Japanese.)
It will be replaced with a translated phonemic version from the
sortas-lookup
file.The
indexterm
is invisible in the topic and used for sorting and grouping the index. -
Select the
primary
element in the Element Structure Menu and choose Go to element.Note
This also works for secondary and tertiary elements.
-
Enter
sortas
in the Element Attributes Panel and select it from the menu. -
Enter the key word that will fetch the phonemic word from the lookup file.
The
sortas
key will control the sort order of the elementsortas
attribute and group theindexterms
in the index topic. For a Japanese source language this can actually be the symbol. -
Select Save.
A revision history topic is a summary of the changes made to a document recorded in the Paligo Revision Control. They are useful to include in your publication as they provide an audit trail of the changes made to a document, with details of who made the changes, what the changes were, and when they were added.
When you publish your content, the revision history topic is included as part of the output (unless you have filtered it out).
-
For HTML outputs, you can use your CSS to style the revision history details, see Style with CSS.
-
For PDF output, only the default styling is available, although it is possible to change the styling as part of a customization project. Contact customer support for details.
![]() |
Above an example of a revision history topic for PDF output.
Tip
To view the revision history in Paligo, see View Revision History.
The following code shows the XML for a valid revision history topic. We have removed the XML IDs and attributes for clarity. When you create your own revision history, the elements will have XML IDs and attributes added when you save.
<?xml version="1.0"?> <section> <title>Revision History</title> <info> <revhistory> <revision> <revnumber>2</revnumber> <date>24 May 2022</date> <authorinitials>CW</authorinitials> <revremark>Added information on recycling and ordering replacement parts.</revremark> </revision> <revision> <revnumber>1</revnumber> <date>20 May 2022</date> <authorinitials>CW</authorinitials> <revremark>Added legal information in front matter.</revremark> </revision> </revhistory> </info> </section>
To create a revision history topic:
-
Create a new topic with a suitable name, such as "Revision History".
-
Select the topic or component in the Content Manager to open it in the Editor.
Alternatively, you can Create a Topic and edit that.
-
Position the cursor below the
title
. -
Press Alt + Enter ⏎ (Windows) or Command ⌘ + Enter ⏎ (Mac) to display the Element Context Menu.
-
Enter
info
and select it from the menu. -
Position the cursor inside the
info
element. -
Press Alt + Enter ⏎ (Windows) or Command ⌘ + Enter ⏎ (Mac) to display the Element Context Menu.
-
Enter
revhistory
and select it from the menu.When you add a
revhistory
element, Paligo adds child elements to it automatically.The child elements are:
-
revision
- This is a container element for therevnumber
,date
,authorinitials
andrevremark
elements. You need the revision for the structure, but do not enter any information directly into it. -
revnumber
- Enter the number of the revision, for example, 6 if this is the sixth revision to the content. -
date
- Paligo inserts the date automatically, by default. You can overwrite it with a different date if you wish. -
authorinitials
- Paligo inserts the name of the person who adds the revision element, by default. You can overwrite it with a different name or initials if you wish. -
revremark
- Enter a brief description of the changes that have been made. This will help other users to understand what each revision included and why the changes were made.
Tip
You can delete an element if you do not want to include that information in the revision history.
-
-
Repeat step 8 to add more revisions.
You can add multiple
revision
elements inside arevhistory
element. -
Select Save.
-
Add your revision history topic to your publication.
It is recommended to position it as the first topic in the publication structure.
Tip
You may also want to put an output filter on its
section
element to exclude it from outputs, but remains in the publication for internal use, see Filtering / Profiling).