The Basics of Topic Editing
The Paligo Editor is made to be as easy to use as possible, more or less like a word processor, but it is an XML editor. Although Paligo does not clutter the interface with lots of XML tags, there is still a strict structure underneath the surface. If you have not authored in a structured environment before, you need to at least get used to the basic concepts of adding and using Elements and Attributes, see Quick Start.
Add commonly used elements with the Edit and Insert tabs in the Toolbar or add elements by using the Element Context Menu.
 |
To learn more about the various parts of the Editor, see Editor.
In-context editing
Sometimes you may be working on topics in a specific publication (for example for a certain product) and may prefer to be able to browse it in context while editing the various topics.
You can do that, and do simple editing, in the Contributor Editor. While mainly intended for Reviewers and Contributors, Authors also have access to it of course. And it provides a very convenient way to browse and edit content in context.
The following procedure shows you the basic concept:
In the Content Manager, open a topic in one of the following ways:
Click on the topic name to display it in the Editor.
Select Open in editor in the dotted menu (...) of the topic.
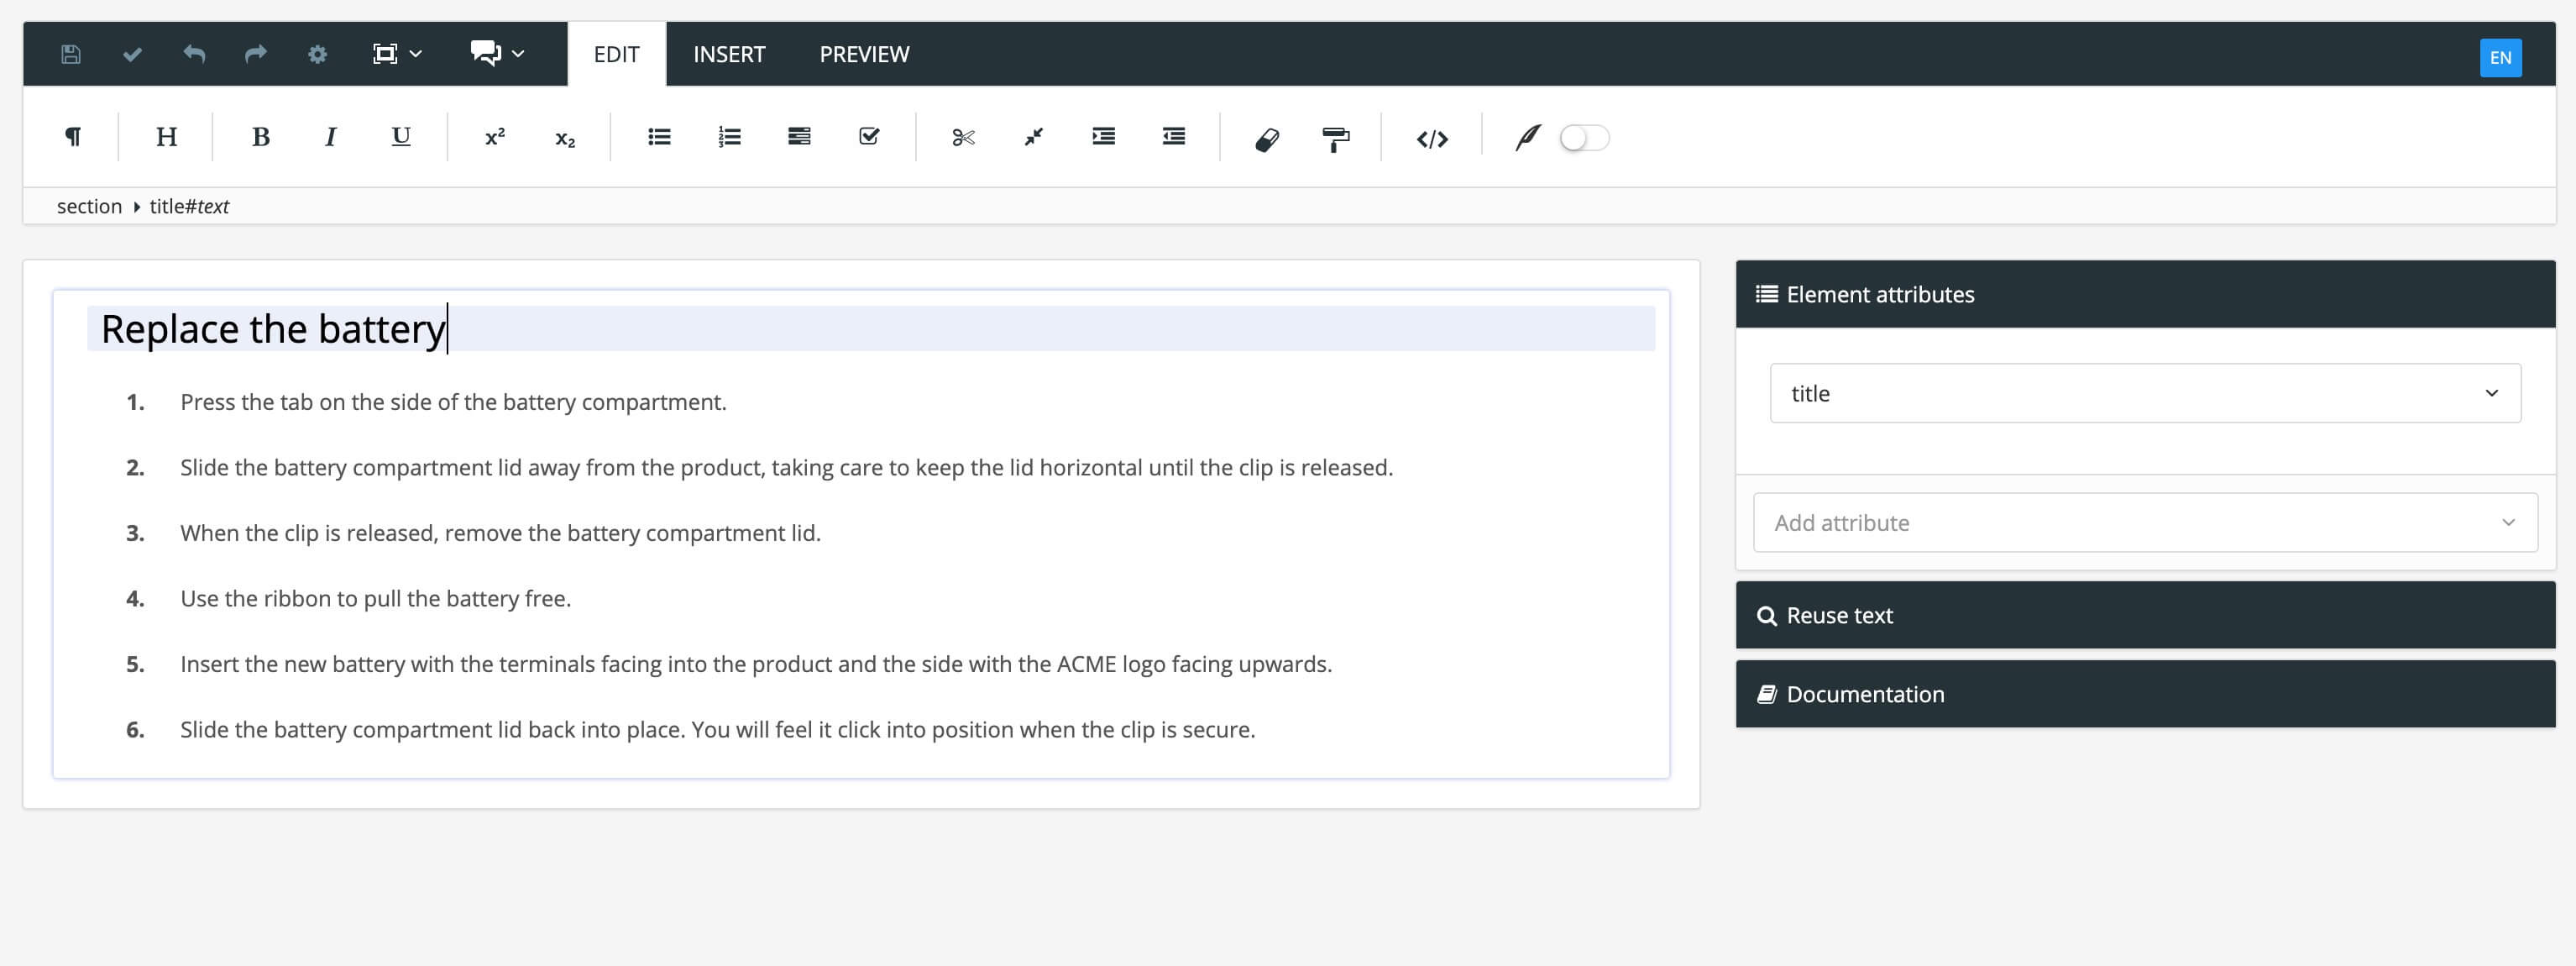
By default, you get a
title(same as the topic name) and an empty paragraph (paraelement) to start with.In most cases you should only have one title or heading in a topic, see Headings and Subheadings . Subheadings are created automatically when you build your publication in the Structure View.
In the Editor, place the cursor where you want to insert an element and do one of the following:
Use the Toolbar to insert the type of content (element) you want.

It shows available elements at current position. Start typing to narrow down the list. For example if you type "par" you will see the element
para
To add a new element of the same kind that you just inserted (for example
para,listitemorstepin aprocedure) just press Enter.Tip
See Keyboard Shortcuts for more tips on speeding up your authoring in the editor.
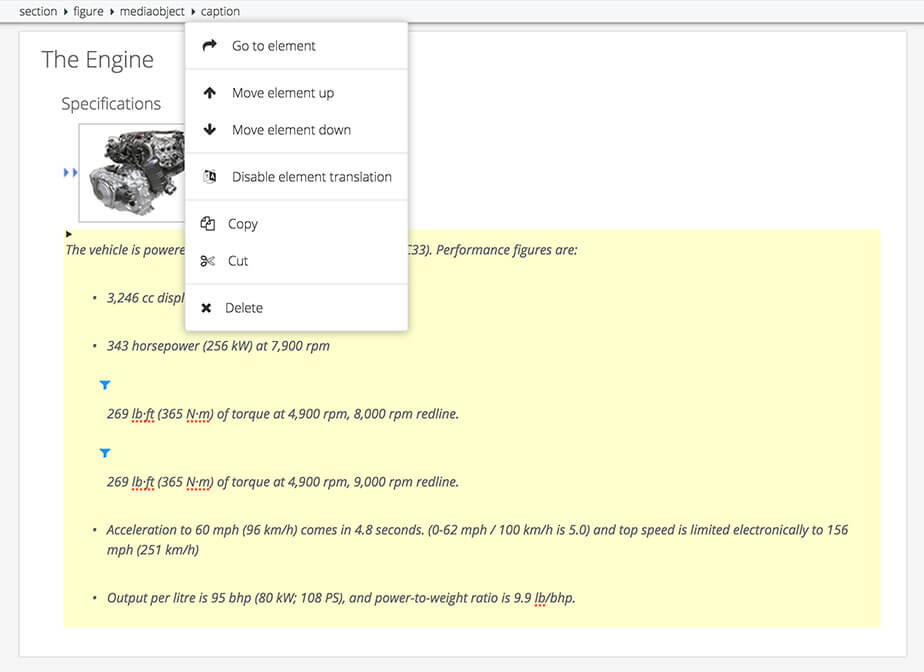
To remove an element:
Place the cursor in the element you want to remove.
The Element Structure Menu (also called "breadcrumbs") below the Toolbar, shows hierarchic in which element you are. Place the cursor over the element name you want to remove and click to open a pop-up-menu.

Place the cursor (without clicking) over the Delete menu option to highlight the element to be removed with yellow background and text that is crossed with red bars.
Click Delete to remove the selected element.
Use the Element Structure Menu in a similar way to manipulate your content with full control, for example:
Highlight elements in the Editor.
Cut, copy and paste elements.
Move elements up and down (needs to be elements on the same level in the structure).
Tip
To split an element (for example a
paraorstep) in two separate elements, position the cursor inside the element and press Enter, see Split a List.If you have used the bold or italic elements to format text, and you want to change it, see Remove Emphasis.