Upload Images from a Topic
When you are editing a topic, you can insert a figure, image, inline image, or side-by-side images. When you do this, you can choose one of the existing images from the library or you can upload a new image to the library and insert that.
Note
It is also possible to upload an image to a topic by using the image details dialog. But that approach does not include checking the filenames against existing images in the library or language variants.
To add images to the library from a topic:
Select an image in a topic to display a browse dialog.
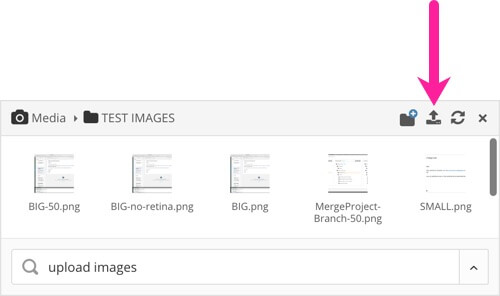
Select Upload Images.

Select the blue menu at the top of the dialog to select where to upload the images.
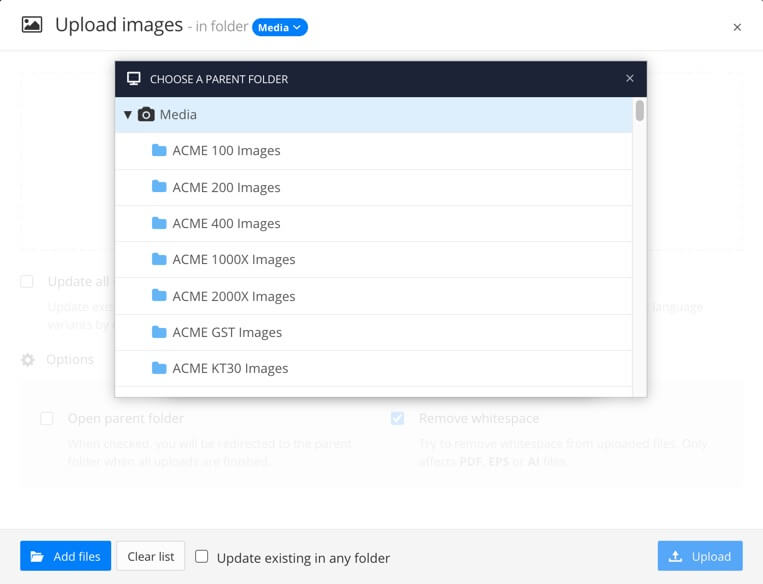
The blue menu displays a hierarchical view of your media library folders.
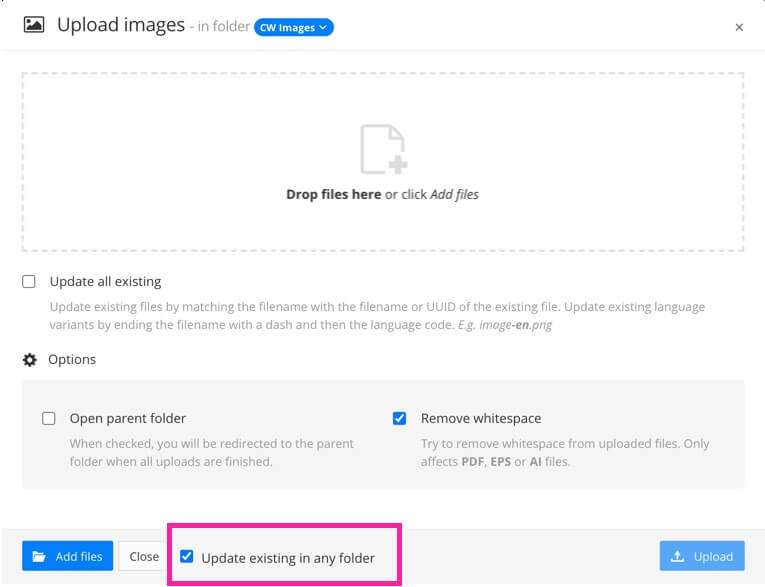
Decide whether you want Paligo to compare your new images to images in the selected folder only, or images in child folders too.
Check the Update existing in any folder box to set Paligo to look in the selected folder and any of its descendant folders (child folders).
Clear the Update existing in any folder box to set Paligo to look only in the root of the selected folder.
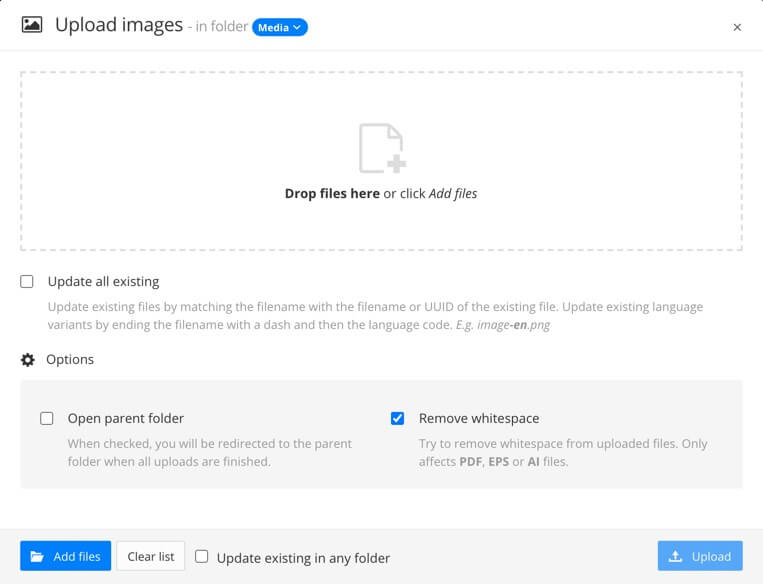
Drag and drop your image files from your computer into the box.
Alternatively, select Add Files
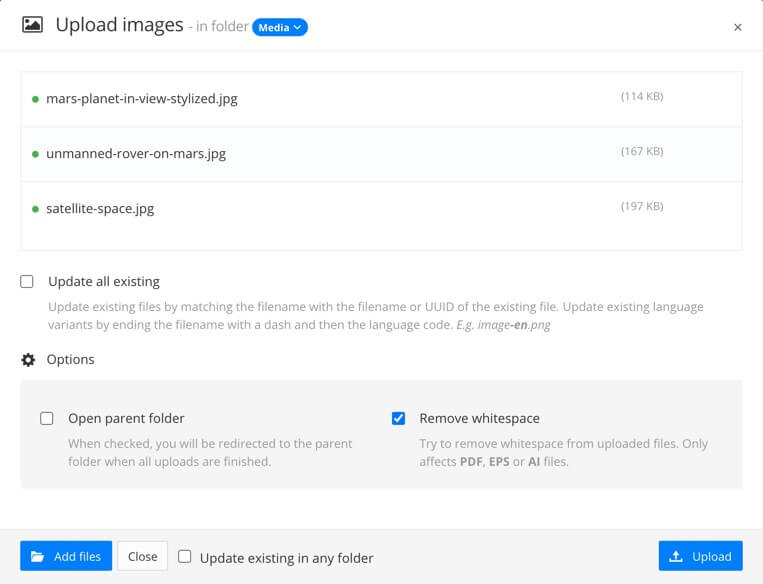
If all the image files you are adding are new, your new files are listed with a green icon showing that the image will be uploaded as a new file in the library.
Note
If you are uploading files that have a hyphen and language code suffix, such as battery-fr.jpg, Paligo will look for source language versions of the same image. If it finds a match, you get the option to update the language variant, for example, Update (fr) for a French variant. For more details, see Translate Images.
Decide whether you want your new files to update any existing files of the same name.
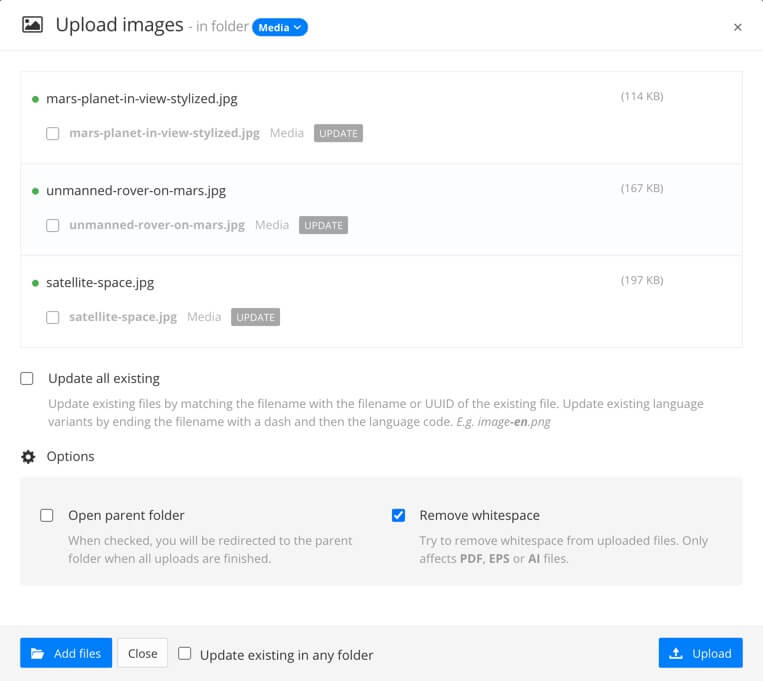
If there are images with matching names already in the media library, the new images are listed, but they also have an Update checkbox.
Check the Update box to replace an existing image with your new image.
Clear the Update box to upload the new image in addition to the existing image.
Meaning if you have multiple images with the same name. You can rename the images in the Content Manager to make them easier to manage.
Tip
You may be able to save time by selecting the Update all existing box, which automatically selects all of the update boxes at once.
Check the Remove whitespace box if you want Paligo to automatically remove any unnecessary white space (empty areas) from the edges of your image. This only applies if your image is AI. EPS, or PDF.
Use the Open parent folder box to choose whether Paligo will show you the folder that contains the images when they have finished uploading.
Select Upload.
Paligo uploads your image files to the media library. If you have updated any of the image files, the topics that use those images are automatically updated with the new images.