Auto-Translate Content
Auto-translation provides a convenient and fast way to get a basic translation of topics, publications or text fragments. The translation is provided by an online translation service.
Always manually edit automatic translations
Please note that the automatic / machine translation feature is for assistance with translation, and you should never rely on the quality of machine translated text. It can be used to speed up translation, but will almost always need to be edited to get good end results.
To auto-translate an entire publication or topic:
Display the Translation View for the publication or topic.
Use the language selectors to choose any language that has been added to your content.

Select Settings.

Select Auto translation.


Paligo displays an Auto translation dialog.

Use the Include previously auto translated checkbox to choose whether the service will re-translate content that has already been auto-translated. Check the box to re-translate, clear it to ignore the existing translations.
Note
If you clear the box, the translation will not re-translate any content that has been auto-translated before. This also applies to text that has changed since it was previously auto-translated.
Select Continue to auto-translate the content.
To auto-translate a text fragment (paragraph):
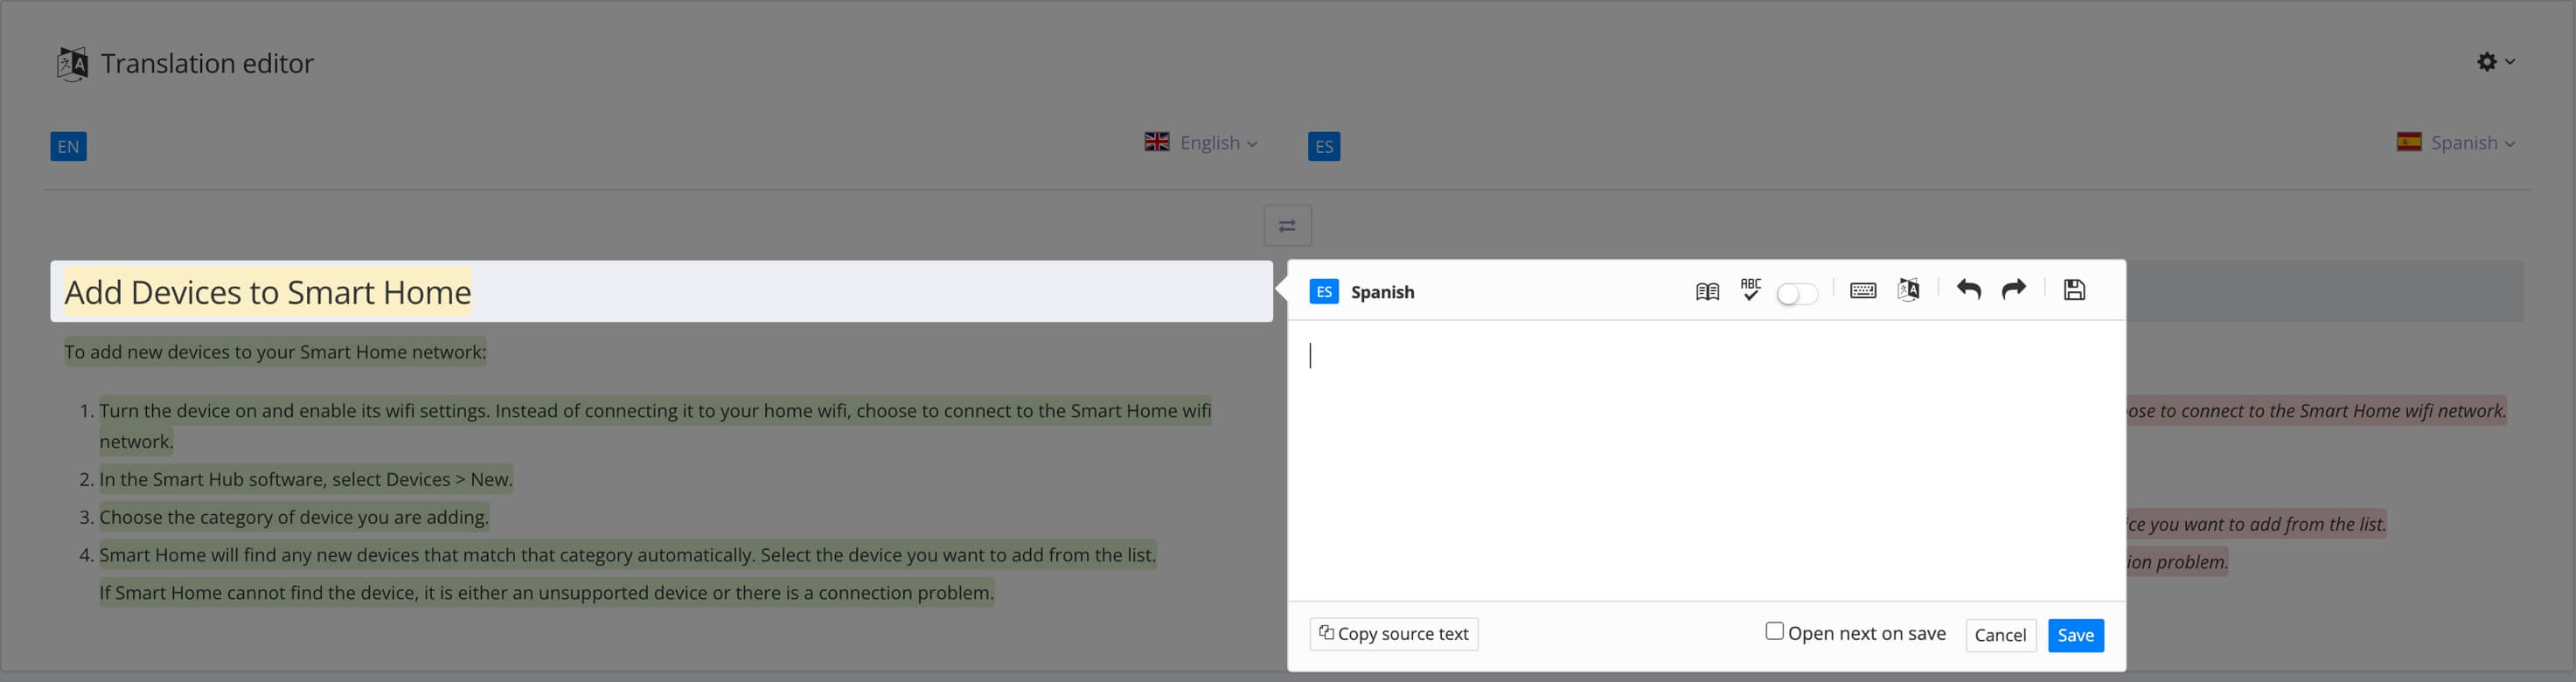
Display the Translation View for the publication or topic.
Use the language selectors to choose any language that has been added to your content.
On the translation side (right side), select the text fragment you want to auto-translate.
When you select the text fragment, the matching fragment is highlighted on the original language side (left side). Also, a translation dialog appears.
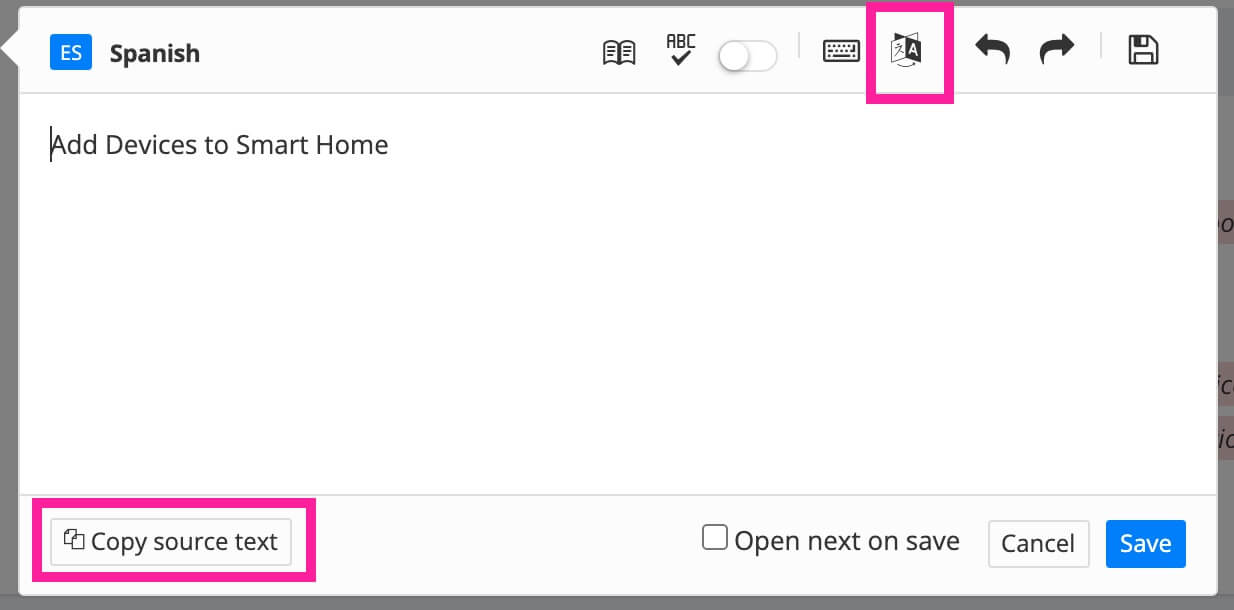
Select Copy source text to add the text, in the source language, to the translation dialog. This also copies over the underlying XML, so will still work for content that has inline elements. Then select the Auto-translate icon in the toolbar.
Paligo gets the machine translation from an online translation service and gives you a preview.
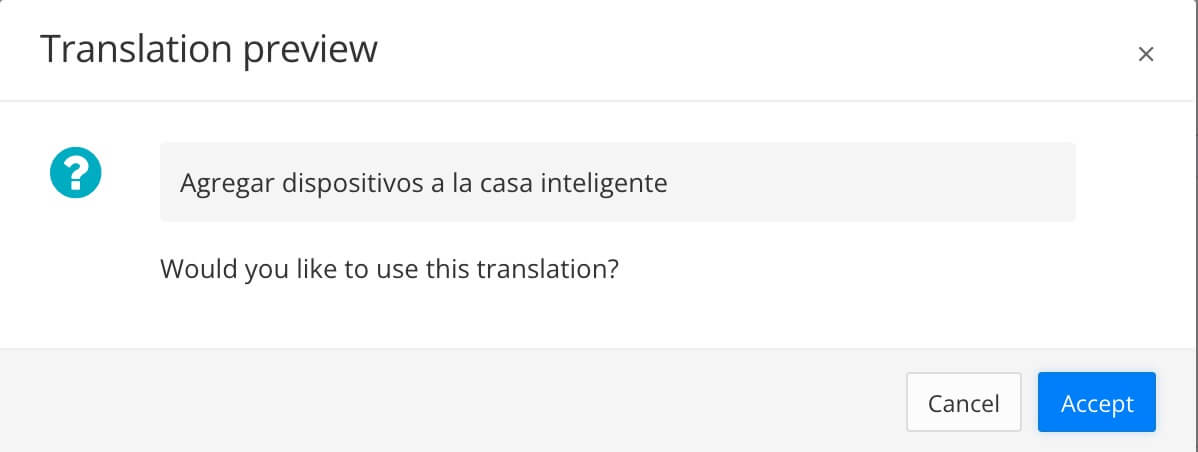
Select Accept to use the auto-translation (or Cancel if you do not want to use it).
If you accept, Paligo shows the translation in the translation dialog.
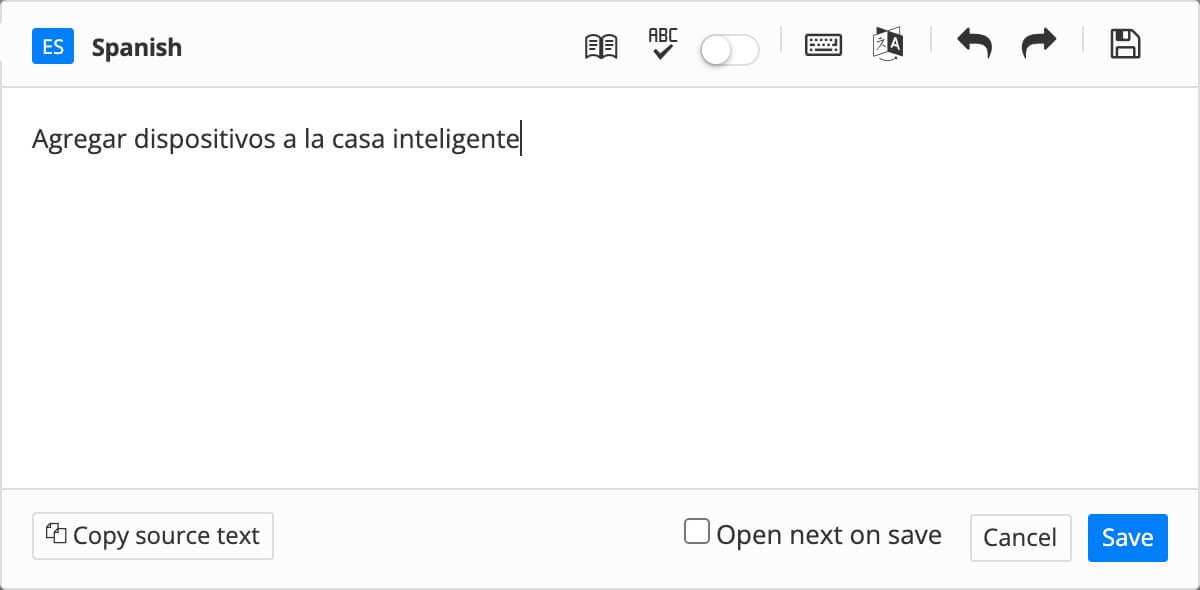
Select Save.
Repeat this process for any other text fragments that you want to auto-translate.