Add Emphasis
By using the emphasis element, you can create bold, italic, and underlined text. There are several ways to add the emphasis attribute to your content, and we will explain them all in this article.
Note
Some other inline elements are automatically styled to have bold text for emphasis. For example, guilabel is designed for user interface labels and appears as bold text. You can apply guilabel and other inline elements by using the Element Context Menu. For instructions, see Block elements and inline elements.
Tip
To apply more than one type of emphasis to the same text, use the toolbar options on the Edit toolbar. This is the only way to use a combination of emphasis styles.
Add Emphasis from the Edit Toolbar
To add emphasis from the Edit toolbar:
In the Content Manager, select a topic to open it in the editor.
Highlight the word or sequence of words that you want to be emphasized.
On the Edit tab, select the type of emphasis you want:

Bold
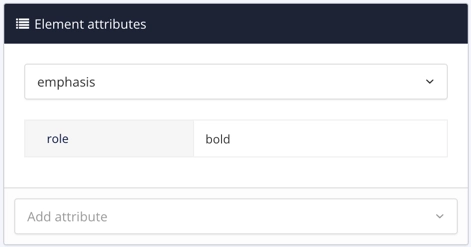
Bold uses the
emphasiselement. Theemphasiselement has aroleattribute with a value ofbold.Italic
Italic uses the
emphasiselement on its own, with noroleattribute.Note that some people may find italic difficult to read, especially for long sequences of words. For readability, it may be better to use a different style for emphasis.
Underline
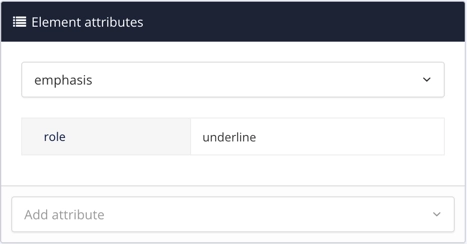
Underline uses the
emphasiselement with aroleattribute that has its value set tounderline.
Note that with the toolbar options, you do not have to manually add the
emphasiselement or its role attribute and value. You highlight your text, select the toolbar button, and Paligo applies the element, attribute, and value for you.
Add Emphasis using Keyboard Shortcuts
To use keyboard shortcuts to add emphasis:
In the Content Manager, select a topic to open it in the editor.
Highlight the word or sequence of words that you want to be emphasized.
Use the appropriate keyboard shortcut:
Bold: Ctrl + B (Windows) Command ⌘ + B (Mac)
Italic: Ctrl + I (Windows) ORCommand ⌘ + I (Mac)
Note that some people may find italic difficult to read, especially for long sequences of words. For readability, it may be better to use a different style for emphasis.
Underline: Ctrl + U (Windows) ORCommand ⌘ + U (Mac)
Add Emphasis using the Element Context Menu
To use the Element Context Menu to add emphasis:
In the Content Manager, select a topic to open it in the editor.
Highlight the word or sequence of words that you want to be emphasized.
Press Alt + Enter ⏎ (Windows) or Command ⌘ + Enter ⏎ (Mac) to display the Element Context Menu.
Select the
emphasiselement to apply it to your selected text.If you want to use italic as the emphasis style, you can ignore steps 5 and 6. Continue from step 7.
If you want to use bold or underline as the emphasis style, continue from step 5.
Select the
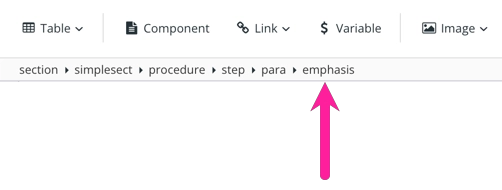
emphasiselement in your text so that you can see it as the last entry on the Element Structure Menu.
In the Element attributes side panel, give the
emphasiselement theroleattribute. Set theroleattribute's value to the style that you want:bold

underline

Note
Italic text uses the
emphasiselement without aroleattribute or value.Select Save.
