Set Thumbnails for Individual Images
You can set individual images to be shown as a thumbnail image instead of at full size. This is useful if you only want to use the thumbnail feature for certain images, such as images that are especially large.
Tip
If you want most, but not all, images to use thumbnails it may be quicker to Set All Images as Thumbnails and exclude some images from using thumbnails by adding a role attribute to the mediaobject element and with the value set to img-thumbnail-reset.
To use the thumbnail feature for individual images:
Select Layout in the top menu.

Paligo displays a list of Layouts. The list is empty if there are no custom Layouts in your Paligo instance.
Select the Layout you want to update or Create a Layout.
Tip
You can copy the URL of the Layout Editor and paste it into a new tab in your browser. This can be useful if you frequently switch between your Paligo content and the Layout settings.
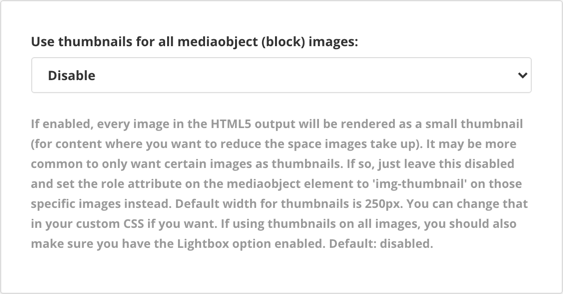
Select Images in the sidebar.
Set Use thumbnails for all mediaobject (block) images to default or Disable.
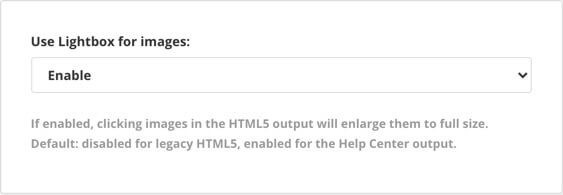
Enable Use Lightbox for images to allow users to click on your thumbnail image to display it at a larger size.
Select Save.
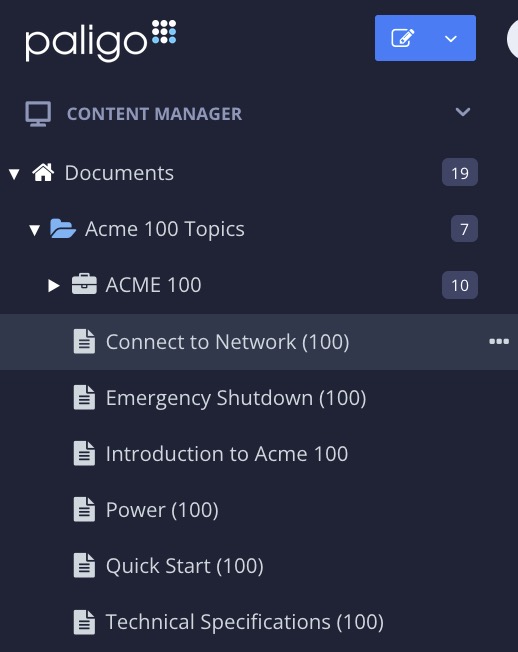
Select the topic or component in the Content Manager to open it in the Editor.
Alternatively, you can Create a Topic and edit that.
Select the image in the content.
Either:
Select Insert.
Select Image.
Select Make thumbnail.
Paligo will resize your image in the editor, although it may not be shown as a thumbnail. When you publish, it will be shown as a thumbnail image in the output.
or:
Select the image's
mediaobjectelement in Element Structure Menu and choose Go to element.Add the
roleattribute Element Attributes Panel and set its value toimg-thumbnail.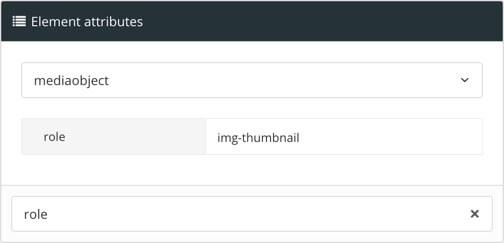
Tip
If you already have a
roleattribute on the mediaobject, separate the values with a semi-colon.
Select Save.

When you publish your content, Paligo will display the image as a thumbnail. Your users can select the thumbnail to view a larger version (as long as you have enabled the lightbox feature on your Layout, see step 5).