- Paligo Documentation
- Publish
- PDF Styling
- Style the Related Topics Section (PDF)
Style the Related Topics Section (PDF)
Use the Related Topics Section settings in the PDF Layout to style the "See also" automatic links in your PDF outputs. The "See also" automatic links only appear if you have set Paligo to generate them (see Automatic Links to Related Topics ("See also" sections)).
To style the "see also" links for PDF:
Select Layout in the top menu.

Paligo displays a list of Layouts. The list is empty if there are no custom Layouts in your Paligo instance.
Select the PDF Layout you are going to use for publishing. Alternatively, create a new one (see Create a Layout).
Select the General category and then select the Related Topics Section subcategory.
Use Font-family to choose the typeface for the text.
Alternatively, select Default to inherit the value from the Layout's "base" Layout (see Layout Relationships - Base, New, Duplicate).
Use Font size to control the size of the lettering.
Enter either:
An absolute value with the units of measurement, for example, 14pt.
A relative value, such as 125%. This will size the text in relation to the size of the main body font.
Use Font weight to set the thickness of the characters.
Choose from the list of weight options. For example, extra light will produce characters drawn with a fine line and bold with produce characters drawn with a thicker line. To have effect the choice must be supported by the selected font family.
Note
Some fonts do not support all of the weight options.
Use Font style to add or remove emphasis styling from the text. Choose Normal for regular text, Italic for forward leaning text, or Backslant for backwards-leaning text.
Alternatively, select Default to inherit the value from the Layout's "base" Layout (see Layout Relationships - Base, New, Duplicate).
Note
Using Backslant can produce poor results, as many fonts do not support it as a separate outline.
Set the Font variant to normal for regular sized, mixed case letters or small-caps for smaller, upper-case letters.
Alternatively, select Default to inherit the value from the Layout's "base" Layout (see Layout Relationships - Base, New, Duplicate).
Use Text transform to capitalize the text. Choose from:
Choose from:
None - Paligo does not change the case of the characters.
Capitalize - The first letter in each word is uppercase, and the other letters are lowercase (for example Abc Def Ghi Jkl).
Upper case - All letters are capitalized (for example ABC).
Lower case - All letters are small (for example abc).
Default to inherit the value for this setting from the base Layout. The base Layout is either a built-in Layout provided by Paligo or another custom Layout, see Layout Relationships - Base, New, Duplicate.
Set the Letter spacing.
This is the amount of space between each letter in the text. Enter a value and its unit of measurement, for example, 0.25pt or 0.05em.
Use Hyphenate to control how words wrap at the end of a line.
Choose either:
True to set Paligo to hyphenate words that wrap on to the next line of text.
False to set Paligo to avoid using hyphenations when words wrap on to the next line of text. Paligo will place the entire word on the next line instead.
Default to inherit the value for this setting from the base Layout. The base Layout is either a built-in Layout provided by Paligo or another custom Layout, see Layout Relationships - Base, New, Duplicate.
Set the Color of the "See also" section title.
Clear the Use default color checkbox to select a color of your own choice.
Set the color either by:
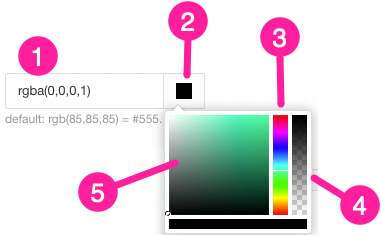
Entering an RGBA code for the color you want (1).
Selecting the Color square to display the color selector (2).
Choose the color with the spectrum bar (3).
Control the transparency with the opacity bar (4).
Choose the color shade with the main color panel (5).

Use the Background color setting to apply a custom color to the background of the block.
Clear the Use default color checkbox and then use the color selector to choose your custom color.
Set the styling for the border.
Enter a Border-width to define the thickness of the border line. Enter a value and its units of measurement, for example, 3pt or 0.3cm.
Leave the field empty if you do not want a border.
Select a Border style from the list.
None - There is no border.
Hidden - There is a border but it cannot be seen.
Dotted - The border is a dotted line.
Dashed - The border is made up of short lines.
Solid - The border is a single line with no breaks.
Double - The border is two lines with no breaks.
Groove - The border has lines and shading to create a "pressed down" look.
Ridge - The border has lines and shading to create a "raised" look.
Inset - The border has lines and shading to create a "pressed down" look. It is similar to the groove style, but uses a different line and shading pattern.
Outset - The border has lines and shading to create a "raised" look. It is similar to the ridge style, but uses a different line and shading pattern.
Alternatively, select Default to inherit the value for this setting from the base Layout. To learn about base Layouts, see Layout Relationships - Base, New, Duplicate.
Use the Border color setting to apply a custom color to the border.
Clear the Use default color checkbox and then use the color selector to choose a color.
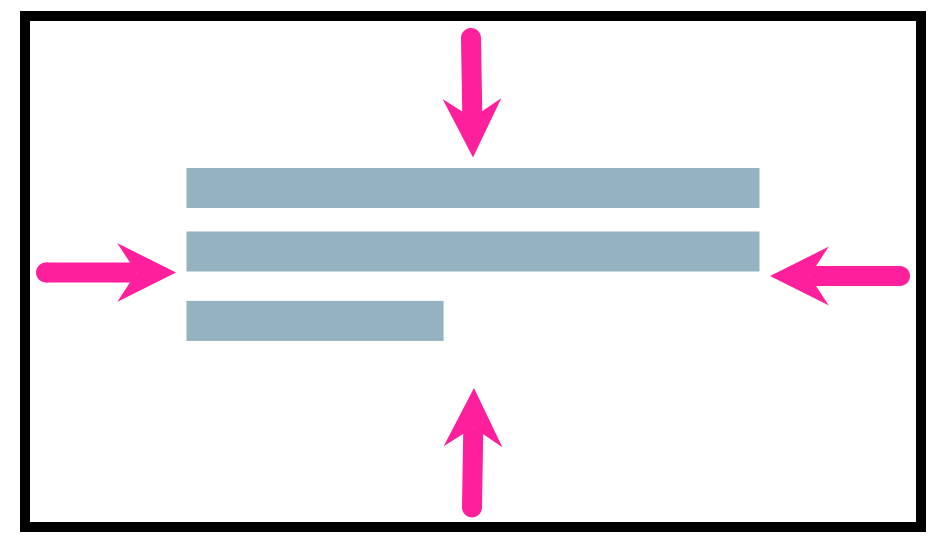
Use the Padding settings to set the amount of space inside the border of the block.

Use Padding-start to set the left-side spacing.
Use Padding-end to set the right-side spacing.
Use Padding-top to set the spacing above the text.
Use Padding-bottom to set the spacing below the text.
For each setting, enter a value and its units of measurement, for example, 1.2em.
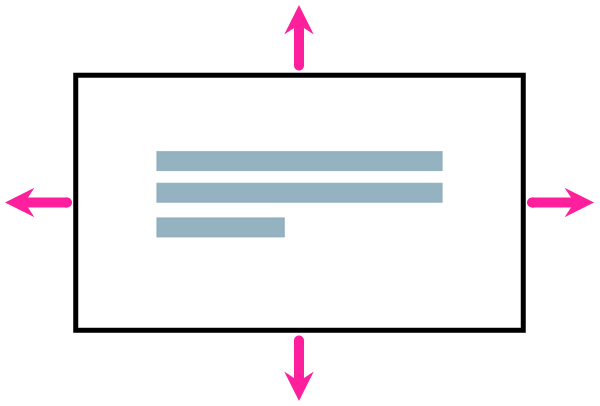
Use the margin settings to set the amount of space around the block. There is a separate setting for each side: Margin-left, Margin-right, Margin-top, Margin-bottom.
Enter a value and its units of measurement, for example, 1.2em or 6pt.

Use the space settings to control the amount of space above and below the element block.
The Space-before.optimum is for the space above and the Space-after.optimum is for the space below. Enter a value and its units of measurement, for example, 1.2em or 6pt.
Note
These are different to margin settings, as they define a maximum amount of space. For example, if you have an element with a space-after.optimum of 4pt and the next element has a space-before.optimum of 4pt, the space is 4pt. It works as a maximum amount of space, not a sum total.
Also, Space-before.optimum and Space-after.optimum are normally ignored at the boundary of pages and columns.
Select Save.
When you use this Layout to publish to PDF, Paligo will apply your choices.