Add the Filter Values
You need to define the values that you want to be available in Paligo. For example, if you decide you are going to use the market filter, you will need to add the values for each different market that you serve, such as USA, EU, UK.
When you create a filter value and save the topic, the filter value is stored in Paligo. It is then available to choose as a filter option in the publishing settings when you publish.
To add the filter values:
In the Content Manager, select a topic to open it.
Alternatively, you can create a new topic.
Select an element, such as a
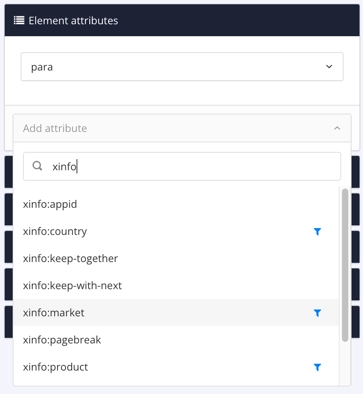
para.In the Element attributes panel, select the Add attribute dropdown and then add the attribute for one of the filters you want to use. For example, add
xinfo:market.
To learn about the available filters, see Types of Filter.
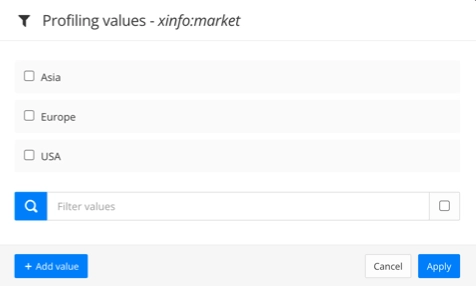
Select the attribute to display the Profiling values dialog.

Select Add Value.
Enter the new profiling value and select OK.

Note
You can use a hierarchy of taxonomy tags for filter values. For example, for a market filter, you could have a hierarchy like this:
market
USA
Alabama
Alaska
Arkansas
California
To create the filter values for a hierarchy like this, add each unique value. For example, add an xinfo:market filter attribute and then add USA, Alabama, Alaska, Arkansas, and California as filter values. The profile attributes don't include the hierarchy. Paligo gets the hierarchy and relationship information from the taxonomy structure.
Select OK.
Repeat this process for each filter and filter value you want to use. This adds the filter values to Paligo so that you can select them when you choose the filters to apply in the publishing settings.
Select Save.

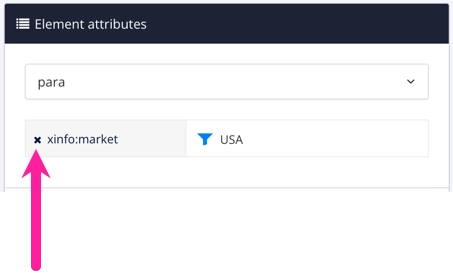
If you don't want to use the filters in the topic, go back and remove them.
Select an element that has a filter and then select the cross next to the filter attribute in the Element attributes dialog.

If you don't need the topic for your publications, you can delete it. The filter values are now saved in Paligo and are available even if the topic no longer exists.
Note
If you are using taxonomy filters, you will need a parent taxonomy tag for the filter and a child taxonomy tag for each of the filter values. Each time you add a new filter value, you will need to create a matching child taxonomy tag. Similarly, each time you add a child taxonomy tag, you will need to add a new filter value.
For instructions, see Taxonomy Filters.