Table Styling (PDF)
To style tables for PDF, you can use a combination of:
The table editor in the main topic editor
Attributes that you can set in the main topic editor
The default table settings that you can set in PDF layouts.
Note
Paligo will only use the default settings in the PDF layouts if those settings are not already defined in the main editor. For example, if you set the width in the main editor, Paligo will use that width and ignore the default width settings in the PDF layout.
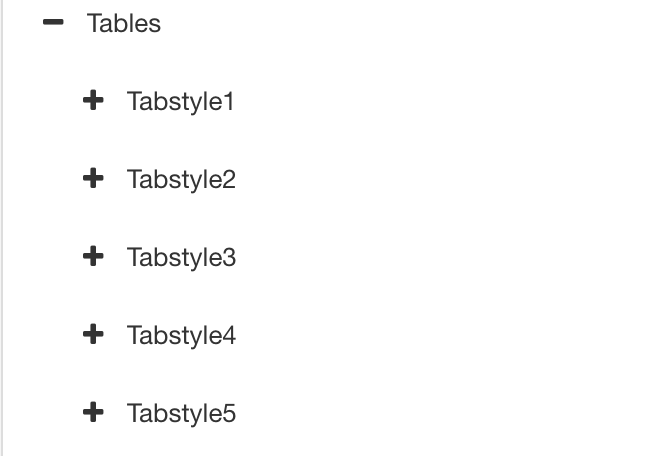
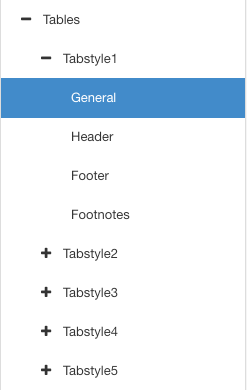
For PDF outputs, Paligo has table settings that you can set in the PDF layout. There are five sets of table settings, named Tabstyle1 to Tabstyle5, so you can apply up to 5 different styles of tables to the same document. For example, you may have some tables that you want to use settings from Tabstyle1 and other tables that you want to use the settings from Tabstyle4.
Note
Paligo uses Tabstyle1 for all tables that do not have a tabstyle set already. So if you have tables in your documents, but have not assigned them a tabstyle, then Tabstyle1 is applied to them.
To leave those tables styled as they are currently, leave the Tabstyle1 settings in place. If you want to add any different table styles, use Tabstyle2 to Tabstyle5 instead.
If you change Tabstyle1, it will affect all tables that do not have a tabstyle set.
 |
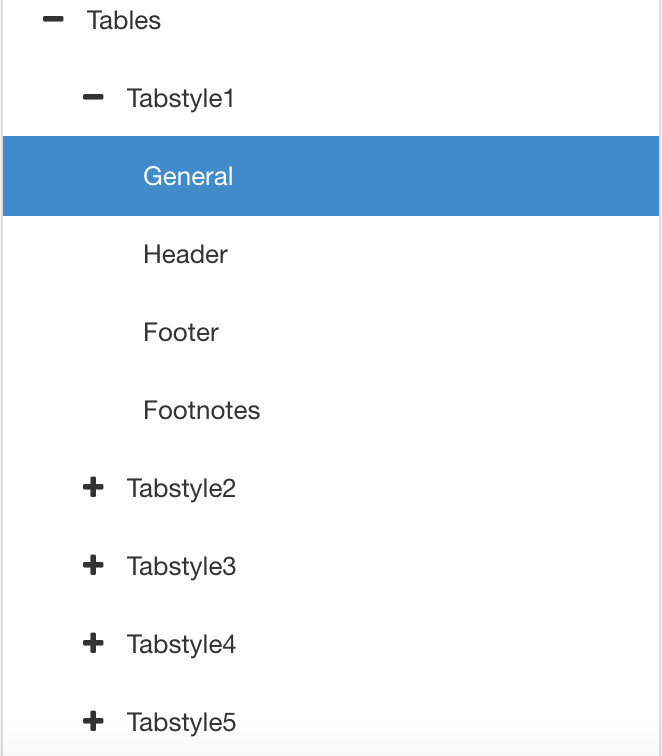
Each Tabstyle has 4 categories of settings: General (for styling the table frame and body), Header, Footer, and Footnotes. You can use these to define the default settings for each part of your tables.
 |
Paligo will apply the settings in the layout to any table that:
Is set to use the relevant table style, see Apply a Table Style (PDF).
Does not have the equivalent settings and attributes applied in the topic. For example, if you open a topic and use the table editor to set a table width, Paligo will use that width. It will ignore any width that is set in the PDF layout.
The table settings in the topic take priority over those in the PDF layout.
Tip
To learn how to style the table header, body, footer, and footnotes for each tablestyle, see:
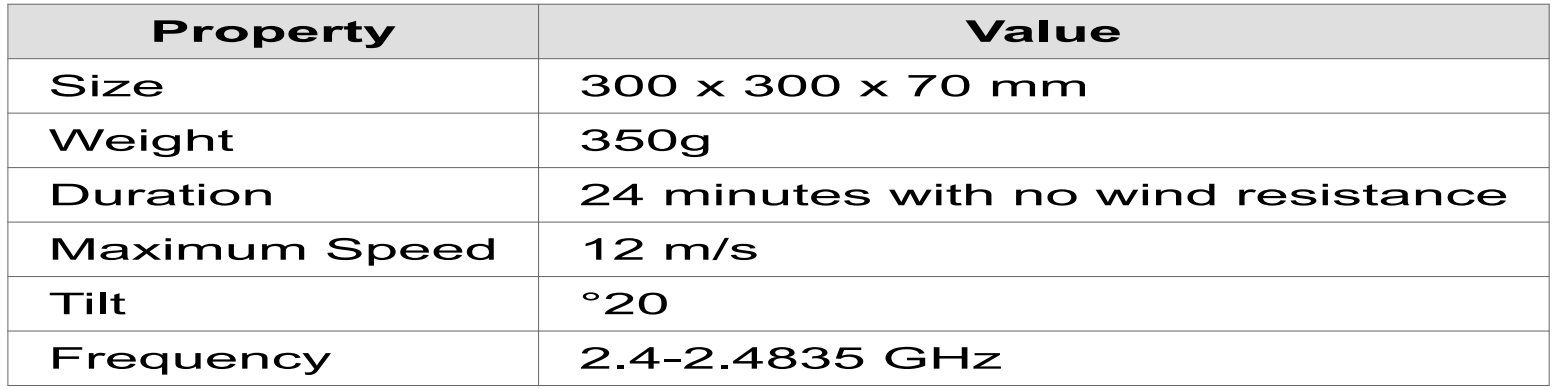
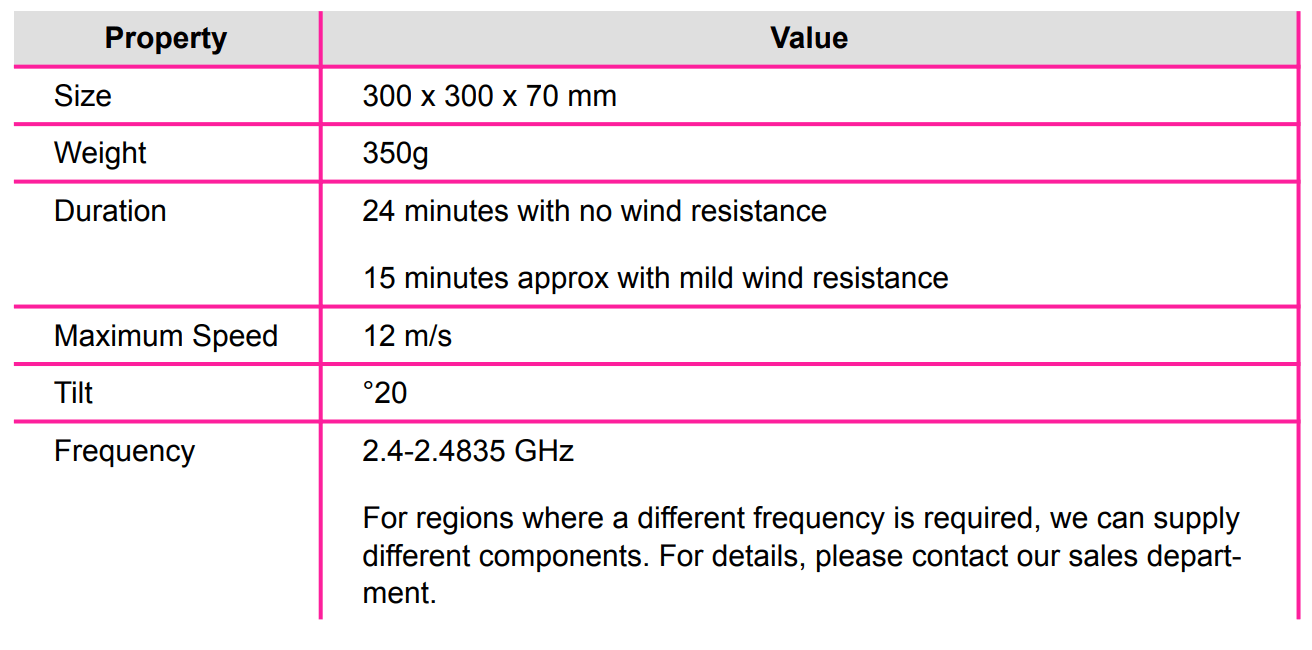
Paligo's PDF layouts allow you to define up to five different table styles. You can then set the tables in your document to use any of the five styles, depending on your requirements. By default, all tables use the styles in Tabstyle1. But you can use the tabstyle attribute to set your tables to use a different style.
For example, you could have a specifications table that uses the styles from Tabstyle1 and then set tables in your instruction topics to use styles from Tabstyle2.
 |
To apply a table style to a specific table:
Select the topic or component in the Content Manager to open it in the Editor.
Alternatively, you can Create a Topic and edit that.
Position the cursor inside the table
Select the
tableelement in the Element Structure Menu and choose Go to element.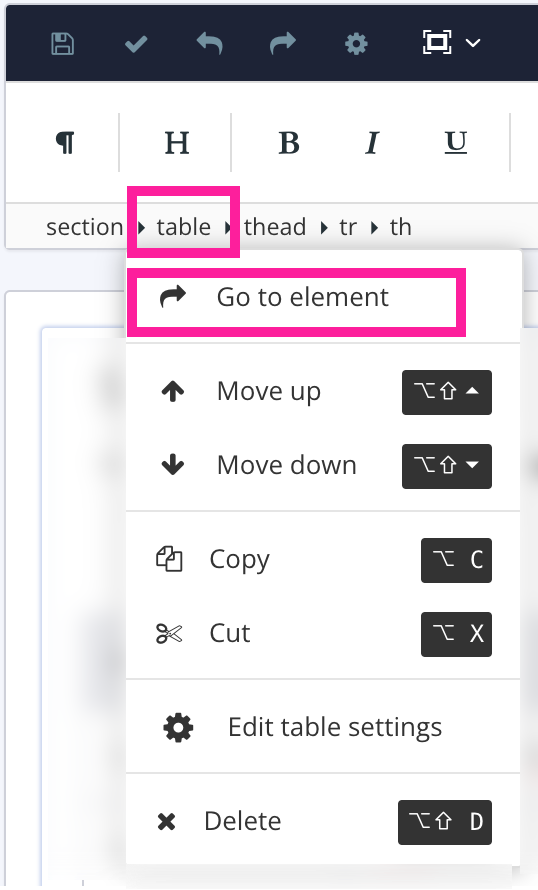
Add the
tablestyleattribute in the Element Attributes Panel and set the value to match the name of the table styles you want to use (tabstyle1, tabstyle2, tabstyle3, tabstyle4, or tabstyle5).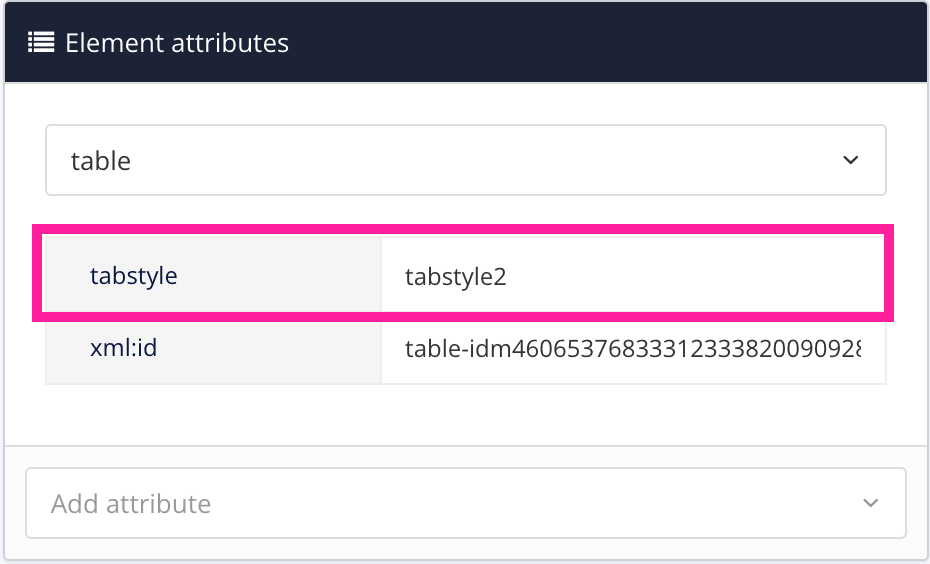
Select Save.

Tip
To learn how to style the table header, body, footer, and footnotes for each tablestyle, see:
When you publish, the table you have edited will use the settings from the table style you set as the attribute value.
Note
Note that some table settings will only apply if the table does not already have that attribute. For example, if your table has a width attribute in a topic, the width setting in the layout editor is ignored.
For PDF outputs, use the PDF layout to set the default styling for tables. There are 5 Tabstyle categories to choose from, and each of those has General settings for styling the table body. (To learn about the different Tabstyle categories, see Apply a Table Style (PDF)).
 |
For PDF outputs, use the Layout Editor to set the default width of tables. Paligo will use the default width for any tables that do not have a width attribute.
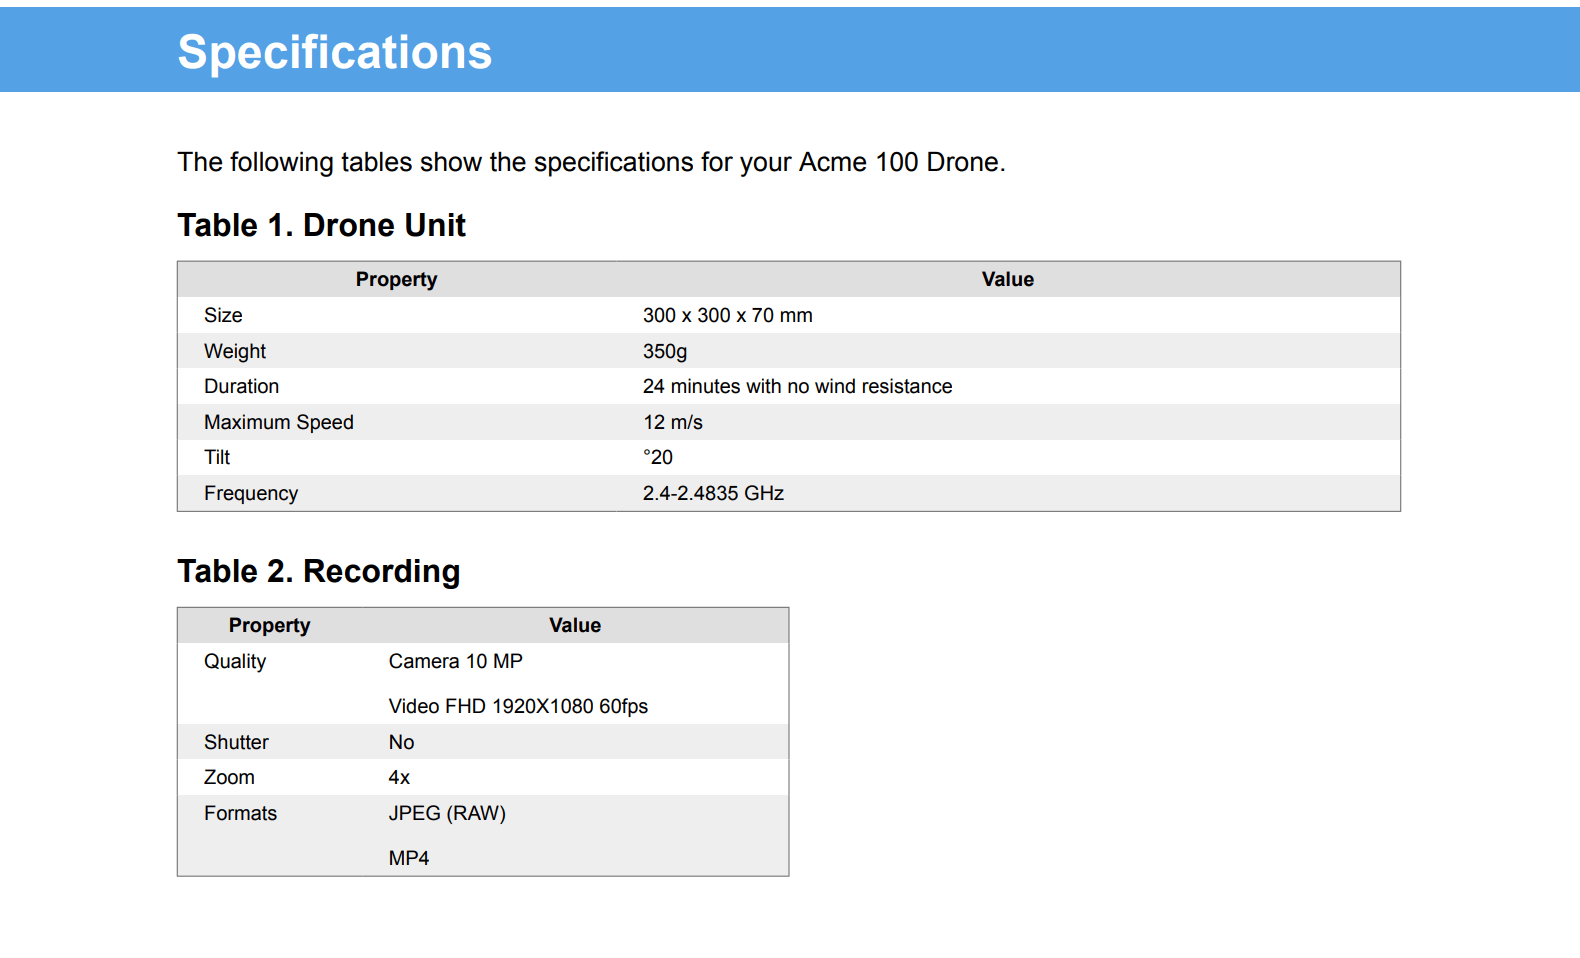
The PDF layout editor has settings for up to 5 table styles, named Tabstyle1 to Tabstyle5. All tables use the settings in Tabstyle1 by default, but you can set each table to use the styles from Tabstyle2 to Tabstyle5 instead.
For example, the following image shows two tables. Table 1 is set to use the styles from Tabstyle1 and that has default width of tables set to 100%. Table 2 is set to use the styles from Tabstyle 2 and that has default width of tables set to 50%.
 |
To set the default table width:
Select Layout in the top menu.

Paligo displays a list of Layouts. The list is empty if there are no custom Layouts in your Paligo instance.
Select the Layout you want to update or Create a Layout.
Tip
You can copy the URL of the Layout Editor and paste it into a new tab in your browser. This can be useful if you frequently switch between your Paligo content and the Layout settings.
Select Tables in the sidebar.

Select the Table style that you want to change in the sidebar.
There are 5 table styles that you can use. By default, tables will use the Tabstyle1 settings, but you can set them up to use any of the other four settings instead, see Apply a Table Style (PDF).
Select General.
Set The default width of tables.
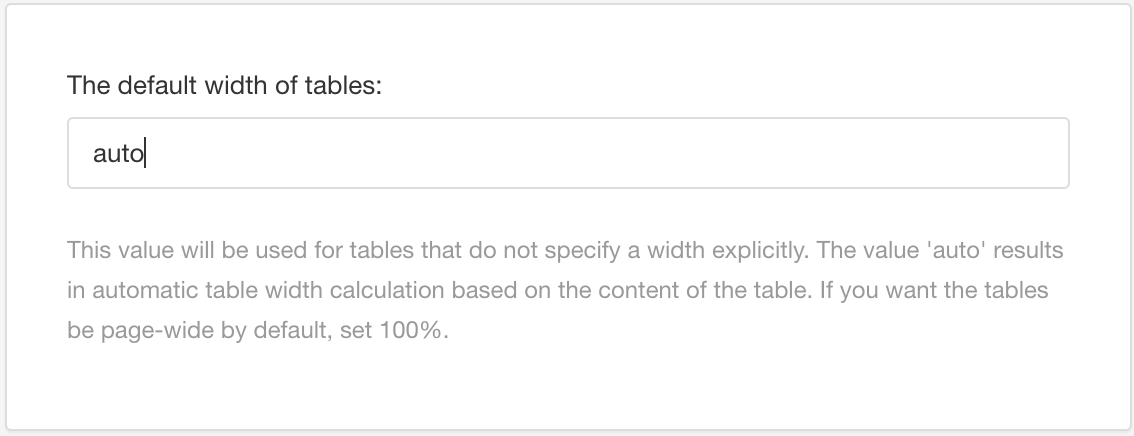
You can enter:
Auto - This sets Paligo to adjust the width according to the content in the table.
A percentage - For example, 70% will size the table at 70% of the body area of the page. 100% sets the table at full width of the body.
Select Save.
Note
The style you have set will only apply to a table that has:
A
tabstyleattribute with a value that matches the tabstyle set, for example, tabstyle2No
widthattribute. If there is awidthattribute and value, Paligo will use that instead of the default table width that is set in a PDF layout.
Use the PDF layout editor to set the background color for tables. Depending on your requirements, you can set the background color for:
The entire background of a table body
The background of each row in tables that use alternating rows.
For example, the following image shows a table that uses alternating rows. It has a blue background for the odd-numbered rows and a gray background for the even-numbered rows.
 |
To set the background color for tables:
Select Layout in the top menu.
Paligo displays a list of Layouts. The list is empty if there are no custom Layouts in your Paligo instance.
Select the Layout you want to update or Create a Layout.
Tip
You can copy the URL of the Layout Editor and paste it into a new tab in your browser. This can be useful if you frequently switch between your Paligo content and the Layout settings.
Select Tables in the sidebar.
Select the Table style that you want to change in the sidebar.
There are 5 table styles that you can use. By default, tables will use the Tabstyle1 settings, but you can set them up to use any of the other four settings instead, see Apply a Table Style (PDF).
Select General.
Use the Background color for table body setting to choose the main background color for the table. If a table is set to use alternate table rows, this color is used for the odd numbered rows.
Clear the Use default color checkbox to select a color of your own choice.
Set the color either by:
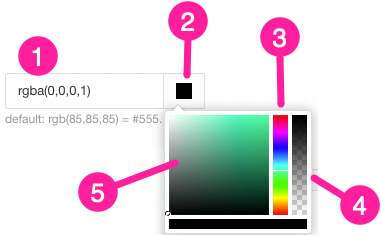
Entering an RGBA code for the color you want (1).
Selecting the Color square to display the color selector (2).
Choose the color with the spectrum bar (3).
Control the transparency with the opacity bar (4).
Choose the color shade with the main color panel (5).
This step only applies if you have Set Alternate Table Row Shading.
Use the Background color for alternate table body rows setting to choose a background color for the even numbered rows.
Select Save.
When you publish, Paligo will apply the background colors to any tables that are set to use the table style you updated.
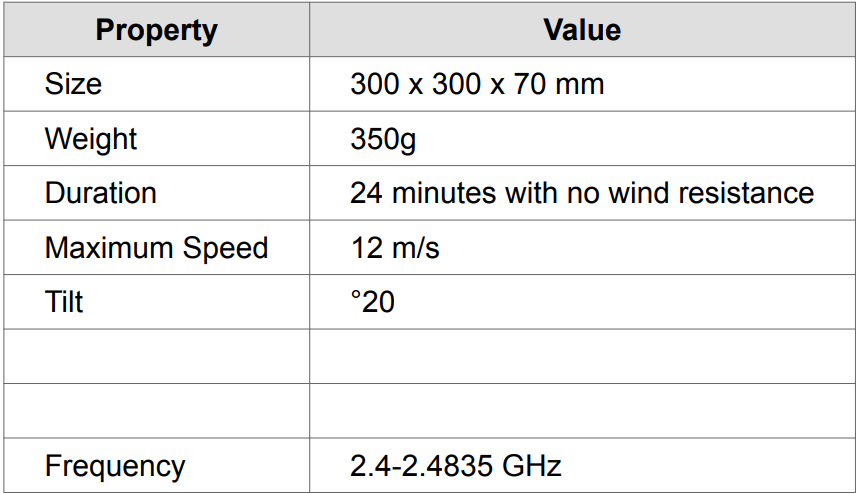
By default, Paligo will display empty table rows as narrow (less height) rows in PDF outputs, like this:
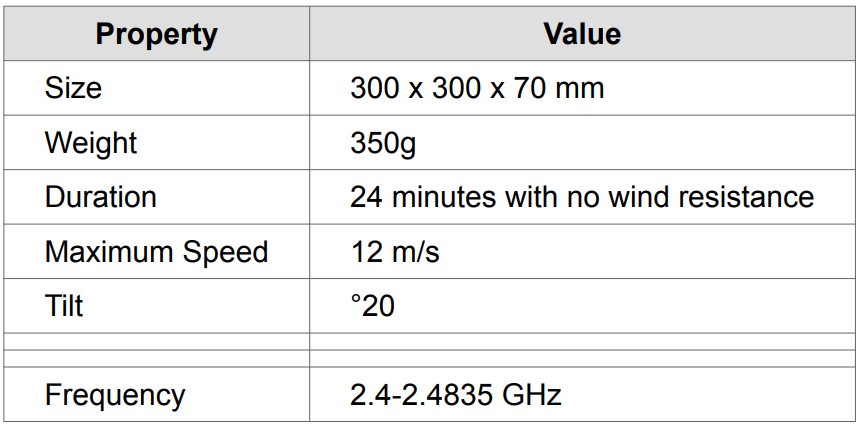 |
If you prefer, you can set tables in PDFs to display empty rows at the same height as other rows, like this:
 |
Note
An empty row is a table row that contains no elements other than the <tr> and <td> that define the table row and cell structure. If a table row contains a para, it is not an empty row, even if the para contains no text.
To control the height of empty table rows:
Select Layout in the top menu.
Paligo displays a list of Layouts. The list is empty if there are no custom Layouts in your Paligo instance.
Select the Layout you want to update or Create a Layout.
Tip
You can copy the URL of the Layout Editor and paste it into a new tab in your browser. This can be useful if you frequently switch between your Paligo content and the Layout settings.
Select Tables in the sidebar.
Select the Table style that you want to change in the sidebar.
There are 5 table styles that you can use. By default, tables will use the Tabstyle1 settings, but you can set them up to use any of the other four settings instead, see Apply a Table Style (PDF).
Select General.
Set Ensure empty rows have normal height to:
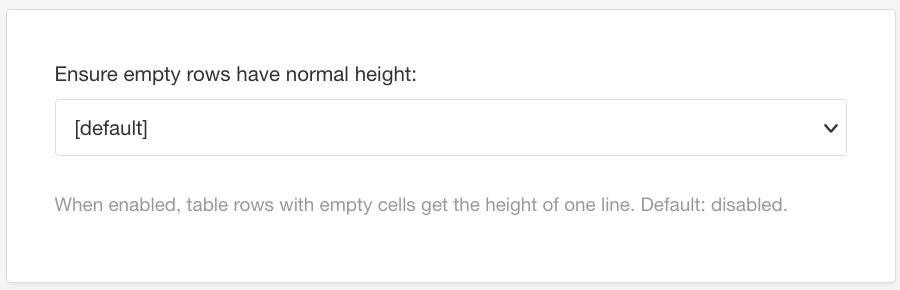
Enable - For empty rows that are the same height as rows that contain content.
Disable - For empty rows that are narrower (less height) than rows that contain content.
Select Save.
When you publish using this layout, Paligo will apply the empty row height setting to any tables that are set to use the table style you updated.
You can set tables to use alternate shading for rows. By default, Paligo will set the odd numbered rows to use a white background and the even numbered rows a gray background, like this:
 |
But you can choose your own background colors if you prefer (see Set Table Background Color).
To enable or disable alternate row shading:
Select Layout in the top menu.
Paligo displays a list of Layouts. The list is empty if there are no custom Layouts in your Paligo instance.
Select the Layout you want to update or Create a Layout.
Tip
You can copy the URL of the Layout Editor and paste it into a new tab in your browser. This can be useful if you frequently switch between your Paligo content and the Layout settings.
Select Tables in the sidebar.
Select the Table style that you want to change in the sidebar.
There are 5 table styles that you can use. By default, tables will use the Tabstyle1 settings, but you can set them up to use any of the other four settings instead, see Apply a Table Style (PDF).
Select General.
Set Alternate table rows to:
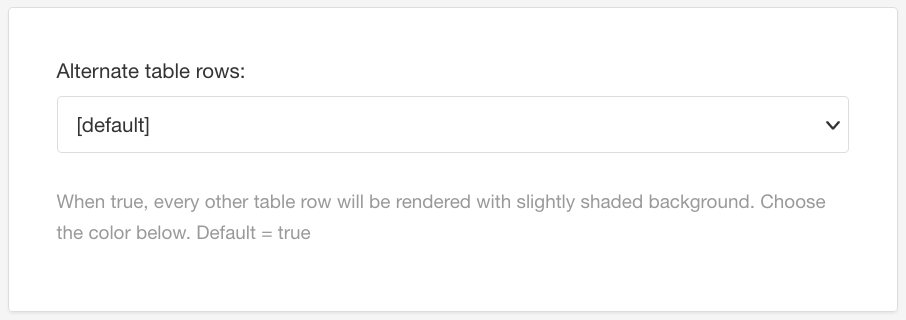
True - To enable alternate table row shading.
False - To disable alternate table row shading. The table will use the same background color for all of the cells.
Select Save.
When you publish, Paligo will apply the background colors to any tables that are set to use the table style you updated.
In single-sourcing, you should not apply any styling to your source content but rather keep content and layout separately.
Instead, you can apply a generic value to be used for individual cells that can be set in the Layout Editor for 'bg1', 'bg2', or 'bg3'. This way you can determine what the color should be and change it everywhere you have used it.
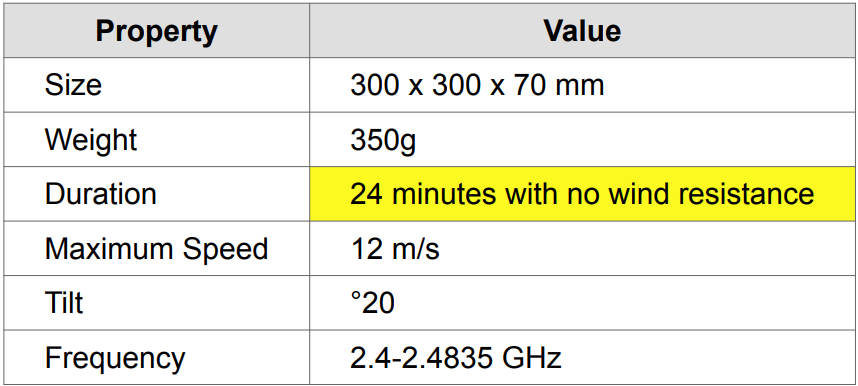 |
One cell is set to have a yellow background so that it is more prominent.
Tip
To choose a background color:
For the main table, see Set Table Background Color.
For even-numbered table rows, see Set Alternate Table Row Shading.
Note
In some rare cases, you may still find the need to give a certain cell a different background color. But, if you were to apply a specific color in multiple places, it would be hard to change it later.
Should you still want to set a specific background color as a one-off, that's also possible, see Style a Table.
Select the topic or component in the Content Manager to open it in the Editor.
Alternatively, you can Create a Topic and edit that.
Click inside the table cell that you want to style differently. Dot not click on any content in the cell.
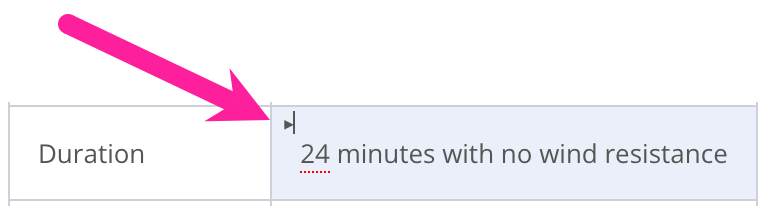
Check that the
tdelement is selected (orthelement if you selected a cell in a table header) in the Element Attributes Panel.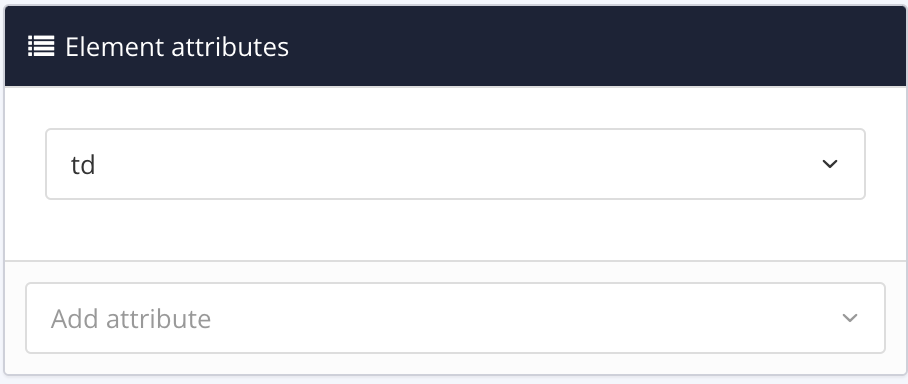
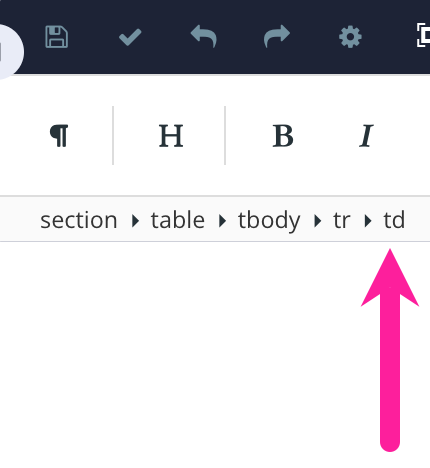
It should also be the rightmost entry on the Element Structure Menu
Add the
styleattribute in the Element Attributes Panel (depending on which ones you will set in the Layout Editor) with one of these values:background-color:bg1background-color:bg2background-color:bg3
Select Save.
Select Layout in the top menu.
Paligo displays a list of Layouts. The list is empty if there are no custom Layouts in your Paligo instance.
Select the Layout you want to update or Create a Layout.
Tip
You can copy the URL of the Layout Editor and paste it into a new tab in your browser. This can be useful if you frequently switch between your Paligo content and the Layout settings.
Select Tables in the sidebar.
Select Tabstyle1 and General.
Note
There are 5 table styles that you can use. By default, tables will use the Tabstyle1 settings, but you can set them up to use any of the other four settings instead, see Apply a Table Style (PDF).
Important
This is only necessary for PDF layouts. In HTML layouts you will get the value as a class name and can use that in your CSS to style it.
Scroll down to Special cell background color for 1, 2, or 3.
For example, if you entered background-color:bg2 in step 4, then the settings in Special cell background color 2 will affect that table cell.
Special cell background color 1 to style
background-color:bg1Special cell background color 2 to style
background-color:bg2Special cell background color 3 to style
background-color:bg3
Clear the Use default color checkbox to select a color of your own choice.
Set the color either by:
Entering an RGBA code for the color you want (1).
Selecting the Color square to display the color selector (2).
Choose the color with the spectrum bar (3).
Control the transparency with the opacity bar (4).
Choose the color shade with the main color panel (5).
Select Save.
When you publish with this layout, any "special" table cells in your content will use the background color you have set.
Note
If the color is not showing, make sure that you have set the style value correctly. Also, check that you have chosen the color in the matching special cell background color setting in the PDF layout.
For PDF outputs, you can use the PDF Layout settings to set the default alignment for tables. Paligo will apply the default alignment to tables that do not already have their alignment set locally in the topic.
For example, you can set tables to use centered text by default.
 |
Note
To learn how to set the alignment for columns for individual tables, see Display Table Settings.
To set the default alignment for tables:
Select Layout in the top menu.
Paligo displays a list of Layouts. The list is empty if there are no custom Layouts in your Paligo instance.
Select the Layout you want to update or Create a Layout.
Tip
You can copy the URL of the Layout Editor and paste it into a new tab in your browser. This can be useful if you frequently switch between your Paligo content and the Layout settings.
Select Tables in the sidebar.
Select the Table style that you want to change in the sidebar.
There are 5 table styles that you can use. By default, tables will use the Tabstyle1 settings, but you can set them up to use any of the other four settings instead, see Apply a Table Style (PDF).
Select General.
Set the Default horizontal alignment for text in tables.
Choose from:
From-table-column() - Tells Paligo to use the column alignment is set on the table in the main editor, see Display Table Settings. If you have a table that has no column alignment in place, Paligo will use the Start alignment instead.
Select Save.
When you publish with this PDF layout, Paligo will apply the default settings you have chosen. The settings only apply to tables that use the tablestyle you updated.
For publishing to PDF, use the PDF layout to set the size, style, and typeface for the text in tables. The settings in the General category are for styling the main body of the table.
Note
There are also Header, Footer, and Footnotes categories for styling the fonts in those parts of your tables.
Select Layout in the top menu.
Paligo displays a list of Layouts. The list is empty if there are no custom Layouts in your Paligo instance.
Select the Layout you want to update or Create a Layout.
Tip
You can copy the URL of the Layout Editor and paste it into a new tab in your browser. This can be useful if you frequently switch between your Paligo content and the Layout settings.
Select Tables in the sidebar.
Select the Table style that you want to change in the sidebar.
There are 5 table styles that you can use. By default, tables will use the Tabstyle1 settings, but you can set them up to use any of the other four settings instead, see Apply a Table Style (PDF).
Select General.
Choose the default font settings:
Default font family for text in tables
Choose the typeface that Paligo will use for tables that use this table style.
Default font size for text in tables
Set the default typeface size. You can enter:
Auto
Table will use same typeface size as body text in the topic.
Percentage
Table will use a typeface size that is a percentage of the body text in the topic. For example, 50% would be half the topic text size.
Value and units of measurement
Any measurement with the units, for example, 12pt or 1.3em.
Default font stretch for text in tables.
Use to choose the amount of space each character takes up. You can choose normal for regular lettering or from a range of condensed and stretched options. The condensed options, such as narrower and ultra-condensed make the characters smaller horizontally. The stretched options, such as expanded and ultra-expanded make the characters wider horizontally.
Tip
When changing the font stretch, consider the readability of the information in your table. The stretch features can make it more difficult to read a table, and so should only be used in special circumstances where regular text is inappropriate.
Select Save.
When you publish with this PDF layout, Paligo will apply your changes to any tables that use the tablestyle you selected in step 2.
To set the default outer and inner borders for tables in your PDF outputs, use the settings on the PDF layout. There are settings for controlling which borders are shown and what style and color they use.
For table borders, we use the following terms:
Frame
The frame is the outer edge of the table (top, left, right, and bottom) and also the border around the table header.

Rules
These are the inner lines of the table that form the row, column, and cell borders.
To choose your preferences for the the default frame and rules:
Select Layout in the top menu.
Paligo displays a list of Layouts. The list is empty if there are no custom Layouts in your Paligo instance.
Select the Layout you want to update or Create a Layout.
Tip
You can copy the URL of the Layout Editor and paste it into a new tab in your browser. This can be useful if you frequently switch between your Paligo content and the Layout settings.
Select Tables in the sidebar.
Select the Table style that you want to change in the sidebar.
There are 5 table styles that you can use. By default, tables will use the Tabstyle1 settings, but you can set them up to use any of the other four settings instead, see Apply a Table Style (PDF).
Select General.
Use Default frame for tables to choose which parts of the frame get a border line. Choose from:
void - No frame border.
No frame border.
above - The top edge of the table frame will have a border.
The top edge of the table frame will have a border.
below - The bottom edge of the table frame will have a border.
The bottom edge of the table frame will have a border.
hsides - The horizontal sides of the table frame will have a border (top/above and bottom/below).
The horizontal sides of the table frame will have a border (top/above and bottom/below).
vsides - The vertical sides of the table frame will have a border (left and right edges of the table).
The vertical sides of the table frame will have a border (left and right edges of the table).
lhs - The left edge of the table frame will have a border.
The left edge of the table frame will have a border.
rhs - The right edge of the table frame will have a border.
The right edge of the table frame will have a border.
box - All 4 edges of the table frame will have a border. This does the same as the border option.
All 4 edges of the table frame will have a border. This does the same as the border option.
border - All 4 edges of the table frame will have a border. This does the same as the box option.
All 4 edges of the table frame will have a border. This does the same as the box option.
Use Default rules for tables to choose which inner lines get a border. Choose from:
none - No inner borders.
No inner borders.
groups - There will be a border line between each group. The groups are the table header, the table body and the table footer.
There will be a border line between each group. The groups are the table header, the table body, and the table footer.
rows - There will be a border line for each row.
There will be a border line for each row.
cols - There will be a border line for each column.
There will be a border line for each column.
all - All groups, rows, and columns will have a border.
All groups, rows, and columns will have a border.
Use Table frame and rules width to set the thickness of the border lines. Enter a value and its units of measurement, for example, 3pt.
Use Table frame and rules style to choose set the appearance of the border lines. Choose from:
None - There is no border.
There is no border.
Hidden - There is a border but it cannot be seen.
There is a border but it cannot be seen.
Dotted - The border is a dotted line.
The border is a dotted line.
Dashed - The border is made up of short lines.
The border is made up of short lines.
Solid - The border is a single line with no breaks.
The border is a single line with no breaks.
Double - The border is two lines with no breaks.
The border is two lines with no breaks.
Groove - The border has lines and shading to create a "pressed down" look.
The border has lines and shading to create a "pressed down" look.
Ridge - The border has lines and shading to create a "raised" look.
The border has lines and shading to create a "raised" look.
Inset - The border has lines and shading to create a "pressed down" look. It is similar to the groove style, but uses a different line and shading pattern.
The border has lines and shading to create a "pressed down" look. It is similar to the groove style, but uses a different line and shading pattern.
Outset - The border has lines and shading to create a "raised" look. It is similar to the ridge style, but uses a different line and shading pattern.
The border has lines and shading to create a "raised" look. It is similar to the ridge style, but uses a different line and shading pattern.
Set the Table frame and rules color.
Clear the Use default color checkbox to select a color of your own choice.
Set the color either by:
Entering an RGBA code for the color you want (1).
Selecting the Color square to display the color selector (2).
Choose the color with the spectrum bar (3).
Control the transparency with the opacity bar (4).
Choose the color shade with the main color panel (5).
Select Save.
When you publish to PDF using the layout you edited, Paligo will apply the table borders. They will apply to any tables that are set to use the table styles you changed.
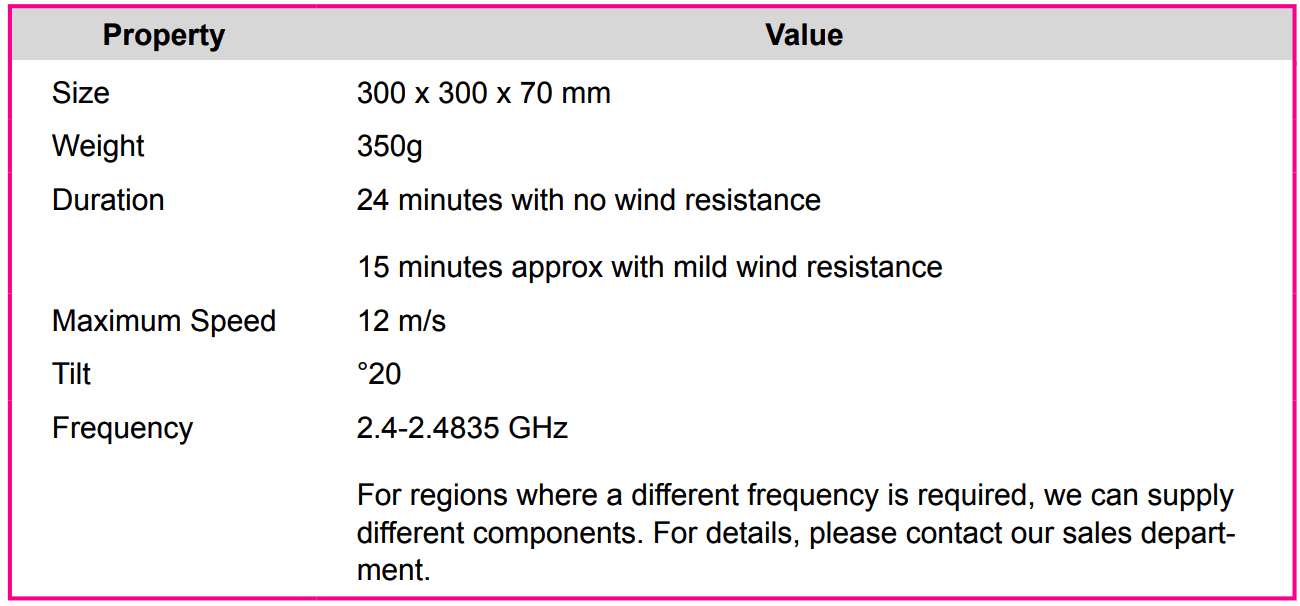
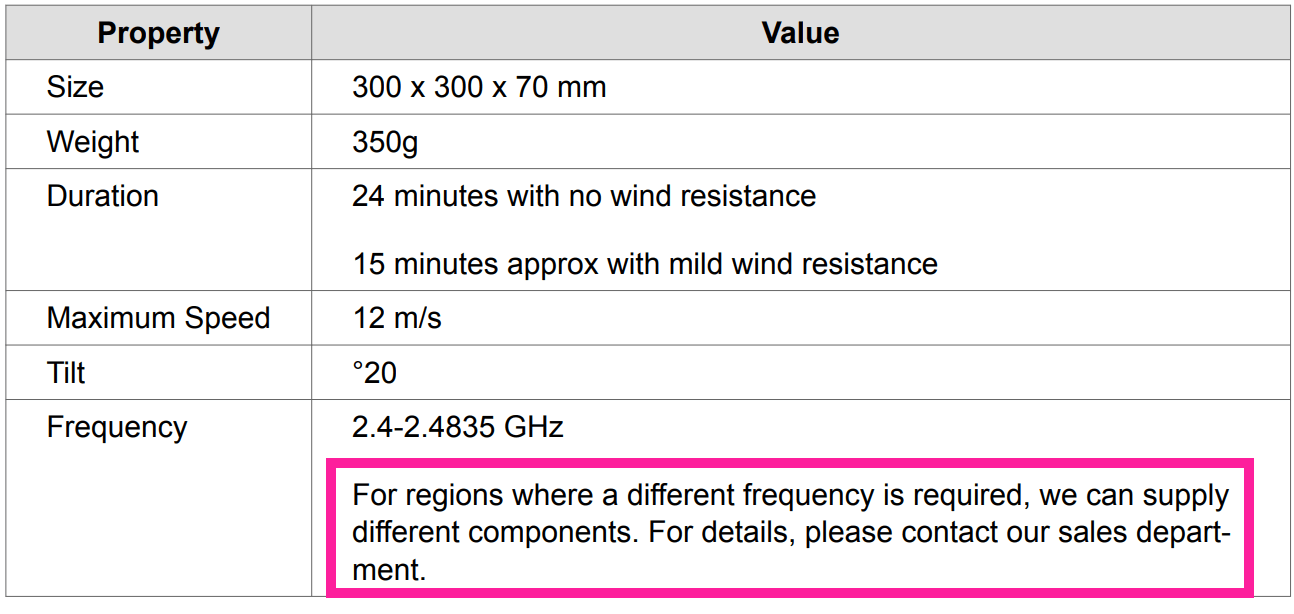
When you are setting up tables, "padding" is the amount of space between the content area of a cell and the edges of the cell. For example, the following image shows a single cell of a table. The outer black edges are the outer sides of the cell. The white area in the middle of the cell is the content area (where content can go), and the shaded area is the "padding".
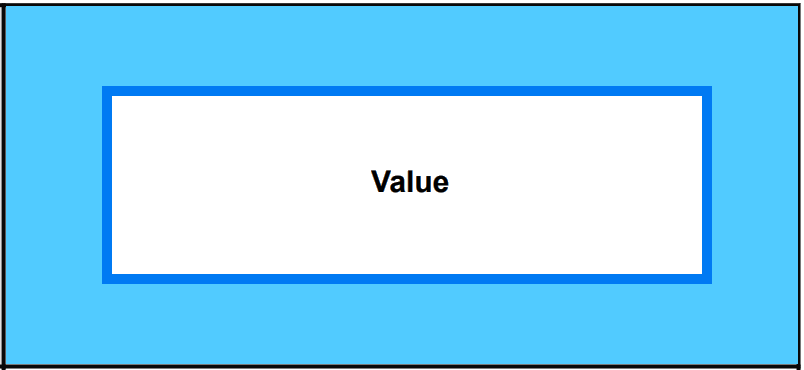 |
In this image the light blue area represents the padding. The outer edges are the sides of the cell and the inner rectangle is the content area.
For PDF outputs, you can set the default amount of padding in the PDF layout.
Select Layout in the top menu.
Paligo displays a list of Layouts. The list is empty if there are no custom Layouts in your Paligo instance.
Select the Layout you want to update or Create a Layout.
Tip
You can copy the URL of the Layout Editor and paste it into a new tab in your browser. This can be useful if you frequently switch between your Paligo content and the Layout settings.
Select Tables in the sidebar.
Select the Table style that you want to change in the sidebar.
There are 5 table styles that you can use. By default, tables will use the Tabstyle1 settings, but you can set them up to use any of the other four settings instead, see Apply a Table Style (PDF).
Select General.
Use the following settings to set the amount of padding for each side of a table cell. For each setting, enter the amount of space as a value followed by the units of measurement, for example, 2pt.
padding-start of table cells
Use to set the amount of space between the left-side of the content and the left edge of all table cells.
padding-end of table cells
Use to set the amount of space between the right-side of the content and the right edge of all table cells.
padding-top of table cells
Use to set the amount of space between the content and the top edge all table cells.
padding-bottom of table cells
Use to set the amount of space between the content and the bottom edge of all table cells.
Select Save.
When you publish to PDF using the layout you edited, Paligo will apply the rule and frame settings. They will only affect tables that use the tabstyle you updated.
If you are publishing to PDF, you can control the amount of spacing between the paragraphs in a cell.
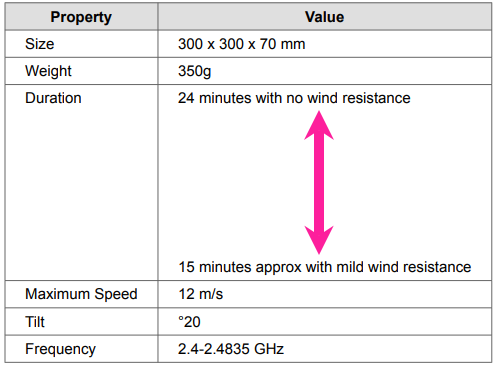 |
For each of the Tabstyle groups of settings (Tabstyle 1-5), you can set two different paragraph spacing values:
Paragraph spacing in normal tables
This spacing applies to all tables except those that are set to be "compact" tables.
Paragraph spacing in compact tables
This spacing only applies to tables that are set to be "compact" tables, see Set Up a Compact Table.
So for each table style, you can have two different paragraph spacing rules (normal and compact).
To set the paragraph spacing for normal and compact tables, edit a PDF layout:
Select Layout in the top menu.
Paligo displays a list of Layouts. The list is empty if there are no custom Layouts in your Paligo instance.
Select the Layout you want to update or Create a Layout.
Tip
You can copy the URL of the Layout Editor and paste it into a new tab in your browser. This can be useful if you frequently switch between your Paligo content and the Layout settings.
Select Tables in the sidebar.
Select the Table style that you want to change in the sidebar.
There are 5 table styles that you can use. By default, tables will use the Tabstyle1 settings, but you can set them up to use any of the other four settings instead, see Apply a Table Style (PDF).
Select General.
Set the Paragraph spacing in normal tables.
Enter a value and the units of measurement. For example, you could use em, point, or centimeter measurements such as 1em, 15pt, 0.5cm.
The default value is 1em.
Set the Paragraph spacing in compact tables.
Again, enter a value and the units of measurement. This setting will only apply to cells in tables where the
tableelement has thetabstyleattribute with a value of: compact.The default is 0.1em.
Select Save.
When you publish to PDF with this layout, Paligo will apply the paragraph spacing to your normal tables and compact tables (if you have any).
To set a table to use the 'compact' paragraph spacing instead of the normal paragraph spacing:
Select the topic or component in the Content Manager to open it in the Editor.
Alternatively, you can Create a Topic and edit that.
Click inside the table.
Select the
tableelement in the Element Structure Menu and choose Go to element.Add the
tabstyleattribute in the Element Attributes Panel and set its value tocompact.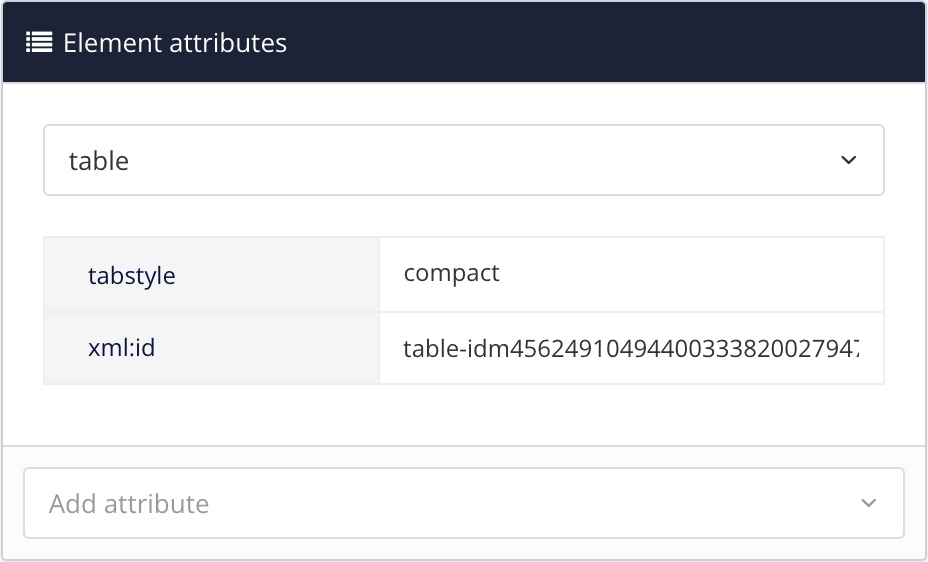
Note
If the table already has a tabstyle and value, add a semi-colon after the existing value and then add the compact value.
For example, if a table has tabstyle with tabstyle2 as a value already, set the value to:
tabstyle2; compact.Select Save.
Edit a PDF layout and apply the paragraph spacing for the table, see Set Table Cell Paragraph Spacing.
When you publish to PDF using the layout you edited, Paligo will apply the paragraph spacing to your compact table.
You can set Paligo to show the table lines by default for PDF outputs. Each table can have lines for:
Rules - These are the horizontal lines for rows and the vertical lines for columns.
Frame - The frame is the outer sides of the table.
To control which lines are shown, use the table frame and rules settings in the PDF layout:
Select Layout in the top menu.
Paligo displays a list of Layouts. The list is empty if there are no custom Layouts in your Paligo instance.
Select the Layout you want to update or Create a Layout.
Tip
You can copy the URL of the Layout Editor and paste it into a new tab in your browser. This can be useful if you frequently switch between your Paligo content and the Layout settings.
Select Tables in the sidebar.
Select the Table style that you want to change in the sidebar.
There are 5 table styles that you can use. By default, tables will use the Tabstyle1 settings, but you can set them up to use any of the other four settings instead, see Apply a Table Style (PDF).
Select General.
Use the Default rules for tables option to choose which rule lines will be shown on tables by default.
All - To include all of the rule lines for cells and the outer frame of the table.
None - To exclude all of the rule lines for cells and the outer frame of the table.
Groups - To include rule lines for each group. The groups are: the table header, the table body, and the table footer.
Rows - To add a horizontal rule for each row.
Cols - To add a vertical rule for each column.
Set the Table frame and rules width.
Enter the line thickness as a value and units of measurement, for example, 1pt, or 1.5em.
Choose the Table frame and rules style:
Set the Table frame and rules color.
Clear the Use default color checkbox to select a color of your own choice.
Set the color either by:
Entering an RGBA code for the color you want (1).
Selecting the Color square to display the color selector (2).
Choose the color with the spectrum bar (3).
Control the transparency with the opacity bar (4).
Choose the color shade with the main color panel (5).
Select Save.
When you publish to PDF using the layout you edited, Paligo will apply the rule and frame settings. They will only affect tables that use the tabstyle you updated.
To control the hyphenation in tables for PDF outputs, use the Allow hyphenation in tables setting in the PDF layout.
When hyphenation is enabled, Paligo will automatically hyphenate words that cannot fit on a line in a table cell.
 |
When it is disabled, Paligo will move the word to the next line.
 |
To set the default hyphenation rules for tables in PDFs:
Select Layout in the top menu.
Paligo displays a list of Layouts. The list is empty if there are no custom Layouts in your Paligo instance.
Select the Layout you want to update or Create a Layout.
Tip
You can copy the URL of the Layout Editor and paste it into a new tab in your browser. This can be useful if you frequently switch between your Paligo content and the Layout settings.
Select Tables in the sidebar.
Select the Table style that you want to change in the sidebar.
There are 5 table styles that you can use. By default, tables will use the Tabstyle1 settings, but you can set them up to use any of the other four settings instead, see Apply a Table Style (PDF).
Select General.
Use the Allow hyphenation in tables setting to set your preference:
True
Paligo will use hyphenation when a word cannot fit on a line in a table cell.
False
If a word in a table cell cannot fit on a line, Paligo will move it to the next line. It will not use hyphenation.
Select Save.
When you publish to PDF using the layout you edited, Paligo will apply the hyphenation rules. They will apply to any tables that are set to use the table settings you changed.
If you use the Sort feature when you edit your tables, Paligo reorders the table so that it is in ascending or descending alphabetical order. By default, when you publish to PDF, Paligo applies the sort order again as part of the processing. This is useful when:
You publish to multiple languages (and so the order may be different in some languages)
You have added content to a table in an update and forgotten to reapply the sort order.
You can use the PDF layout to control whether Paligo reapplies the sort order when you publish:
Select Layout in the top menu.
Paligo displays a list of Layouts. The list is empty if there are no custom Layouts in your Paligo instance.
Select the Layout you want to update or Create a Layout.
Tip
You can copy the URL of the Layout Editor and paste it into a new tab in your browser. This can be useful if you frequently switch between your Paligo content and the Layout settings.
Select Tables in the sidebar.
Select the Table style that you want to change in the sidebar.
There are 5 table styles that you can use. By default, tables will use the Tabstyle1 settings, but you can set them up to use any of the other four settings instead, see Apply a Table Style (PDF).
Select General.
Use the Re-sort sorted tables automatically on publish setting to set your preference:
Enable - Paligo will re-sort the tables each time you publish with this PDF layout. It will also re-sort for each language that you publish.
Disable - Paligo will publish to PDF without re-sorting. It will use the order that is set for the table in the main editor (even if that order is now incorrect). It will not re-sort for each language.
Select Save.
Your re-sort preference will apply whenever you publish to PDF with this layout. It will only affect tables that are set to use the table style you updated and that also have sort orders applied to them in the main editor.
The PDF layout has settings for styling the table footer for PDFs. You can use it to change various properties of the footer, including the background color, alignment, and text color.
For example, the following image shows a table with a footer that has been set to have a blue background, white text, and right-aligned text.
 |
Note
As with the table body, table header, and table footnotes settings, there are 5 Tabstyle categories to choose from. Each of those has its own footer settings. To learn about the different Tabstyle categories, see Apply a Table Style (PDF)
For PDF outputs, you can use the PDF layout to set the default background color for table footers. For example, in the following image, the table footer has been set to have a blue background.
To set the default background color for table footers:
Select Layout in the top menu.
Paligo displays a list of Layouts. The list is empty if there are no custom Layouts in your Paligo instance.
Select the Layout you want to update or Create a Layout.
Tip
You can copy the URL of the Layout Editor and paste it into a new tab in your browser. This can be useful if you frequently switch between your Paligo content and the Layout settings.
Select Tables in the sidebar.
Select the Table style that you want to change in the sidebar.
There are 5 table styles that you can use. By default, tables will use the Tabstyle1 settings, but you can set them up to use any of the other four settings instead, see Apply a Table Style (PDF).
Select Footer.
Set the Background color for table footer rows. This is the "fill" color of the footer row.
Clear the Use default color checkbox to select a color of your own choice.
Set the color either by:
Entering an RGBA code for the color you want (1).
Selecting the Color square to display the color selector (2).
Choose the color with the spectrum bar (3).
Control the transparency with the opacity bar (4).
Choose the color shade with the main color panel (5).
Select Save.
When you publish with this PDF layout, Paligo will apply the footer styles to any tables that are set to use the tabstyle you selected in step 2.
For PDF outputs, you can use a PDF layout to set the default style of text in table footers. The PDF layout has settings for controlling the typeface, color, and size of the text. For example, the following image shows footer text that is set to use a different font, and the text is white and smaller than the text in the rest of the table.
To set the default style for text in table footers:
Select Layout in the top menu.
Paligo displays a list of Layouts. The list is empty if there are no custom Layouts in your Paligo instance.
Select the Layout you want to update or Create a Layout.
Tip
You can copy the URL of the Layout Editor and paste it into a new tab in your browser. This can be useful if you frequently switch between your Paligo content and the Layout settings.
Select Tables in the sidebar.
Select the Table style that you want to change in the sidebar.
There are 5 table styles that you can use. By default, tables will use the Tabstyle1 settings, but you can set them up to use any of the other four settings instead, see Apply a Table Style (PDF).
Select Footer.
Set the Font color for table footer rows. This is the color of the text in the footer row.
Clear the Use default color checkbox to select a color of your own choice.
Set the color either by:
Entering an RGBA code for the color you want (1).
Selecting the Color square to display the color selector (2).
Choose the color with the spectrum bar (3).
Control the transparency with the opacity bar (4).
Choose the color shade with the main color panel (5).
Set the Default font family for text in table footer. This is the typeface for the text in the footer and you can choose any of the available fonts from the list.
Set the Default font size for text in table footer. You can enter:
Auto
The table footer will use same typeface size as body text in the topic.
Percentage
The table footer will use a typeface size that is a percentage of the body text in the topic. For example, 50% would be half the topic text size.
Value and units of measurement
Any measurement with the units, for example, 12pt or 1.3em.
Select Save.
When you publish with this PDF layout, Paligo will apply the footer styles to any tables that are set to use the tabstyle you selected in step 2.
Note
To control the position of the text in the footer, see Set Table Footer Alignment.
To control what happens if a word cannot fit on a line in the footer, see Control Table Footer Hyphenation.
For PDF outputs, you can use the PDF layout to set the default alignment for text in table footers. For example, in the following image, the table footer text is set to be aligned to the right.
|
To set the alignment for table footers:
Select Layout in the top menu.
Paligo displays a list of Layouts. The list is empty if there are no custom Layouts in your Paligo instance.
Select the Layout you want to update or Create a Layout.
Tip
You can copy the URL of the Layout Editor and paste it into a new tab in your browser. This can be useful if you frequently switch between your Paligo content and the Layout settings.
Select Tables in the sidebar.
Select the Table style that you want to change in the sidebar.
There are 5 table styles that you can use. By default, tables will use the Tabstyle1 settings, but you can set them up to use any of the other four settings instead, see Apply a Table Style (PDF).
Select Footer.
Set the Default alignment for text in table footer.
From-table-column() - Tells Paligo to use the column alignment that you can set on the table in the main editor, see Display Table Settings. This is the default setting. If you have a table that has no column alignment in place, Paligo will use the Start alignment instead.
Select Save.
When you publish with this PDF layout, Paligo will apply the footer styles to any tables that are set to use the tabstyle you selected in step 2.
To control the hyphenation in table footers for PDF outputs, use the Allow hyphenation in table footer setting in the PDF layout.
Select Layout in the top menu.
Paligo displays a list of Layouts. The list is empty if there are no custom Layouts in your Paligo instance.
Select the Layout you want to update or Create a Layout.
Tip
You can copy the URL of the Layout Editor and paste it into a new tab in your browser. This can be useful if you frequently switch between your Paligo content and the Layout settings.
Select Tables in the sidebar.
Select the Table style that you want to change in the sidebar.
There are 5 table styles that you can use. By default, tables will use the Tabstyle1 settings, but you can set them up to use any of the other four settings instead, see Apply a Table Style (PDF).
Select Footer.
Use Allow hyphenation in table footers to control whether words are hyphenated when they cannot fit on a line. Choose either:
True
Paligo will use hyphenation when a word cannot fit on a line in the table footer.
False
If a word in a table footer cannot fit on a line, Paligo will move it to the next line. It will not use hyphenation.
Select Save.
When you publish with this PDF layout, Paligo will apply the header styles to any tables that are set to use the tabstyle you updated.
The PDF layout has settings for styling footnotes in tables. The footnotes appear as a label in the table cell, with the footnote text listed below the table.
 |
Note
As with the table body, table header, and table footer settings, there are 5 Tabstyle categories to choose from. Each of those has its own footnotes settings. To learn about the different Tabstyle categories, see Apply a Table Style (PDF)
Tip
To learn how to add footnotes, see Footnotes.
If a table cell contains a footnote, Paligo will add a footnote label, such as a number, to the cell. It will also add the full text of the footnote in a list after the table. For PDF outputs, you can use the PDF layout to set the default style of the label.
 |
Select Layout in the top menu.
Paligo displays a list of Layouts. The list is empty if there are no custom Layouts in your Paligo instance.
Select the Layout you want to update or Create a Layout.
Tip
You can copy the URL of the Layout Editor and paste it into a new tab in your browser. This can be useful if you frequently switch between your Paligo content and the Layout settings.
Select Tables in the sidebar.
Select the Table style that you want to change in the sidebar.
There are 5 table styles that you can use. By default, tables will use the Tabstyle1 settings, but you can set them up to use any of the other four settings instead, see Apply a Table Style (PDF).
Select Footnotes.
Set the Number format for table footnotes. This defines the appearance of the footnote label that appears inside the table.
Choose from:
a
For a lower case letter, used in alphabetical order.
A
For an upper case letter, used in alphabetical order.
1
For a number, with no 0 prefix for numbers below 10.
01
For a number, with a 0 prefix for numbers below 10.
i
For lower case roman numerals, for example, iii
I
For upper case roman numerals, for example, III
Select Save.
When you publish with this PDF layout, Paligo will apply the footnote styles to any tables that are set to use the tabstyle you updated.
For PDF outputs, use the PDF layout to define the style, size, and color of the text for footnotes. For example, in the following image, the text has been styled so that it is blue, has a thin weight, and has a back slant.
|
Select Layout in the top menu.
Paligo displays a list of Layouts. The list is empty if there are no custom Layouts in your Paligo instance.
Select the Layout you want to update or Create a Layout.
Tip
You can copy the URL of the Layout Editor and paste it into a new tab in your browser. This can be useful if you frequently switch between your Paligo content and the Layout settings.
Select Tables in the sidebar.
Select the Table style that you want to change in the sidebar.
There are 5 table styles that you can use. By default, tables will use the Tabstyle1 settings, but you can set them up to use any of the other four settings instead, see Apply a Table Style (PDF).
Select Footnotes.
Set the Font family for table footnotes. This is the typeface for the text in the footnotes below the table. You can choose any of the available fonts from the list.
Set the Font size for table footnotes. You can enter:
Percentage
The table footer will use a typeface size that is a percentage of the body text in the topic. For example, 50% would be half the topic text size.
Value and units of measurement
Any measurement with the units, for example, 12pt or 1.3em.
Or leave the field blank to reset to the default sizing.
Set the Font weight for table footnotes. The font weight defines the thickness of the characters, and there are options ranging from Thin (for the narrowest lines) to Extra bold and Black for the thickest lines.
Set the Font style for table footnotes. You can choose from:
Normal
Regular text, no slant.
Italic
Forward leaning text.
Backslant
Backwards-leaning text.
Set the Color for table footnotes. This is the color of the footnote text below the table.
Clear the Use default color checkbox to select a color of your own choice.
Set the color either by:
Entering an RGBA code for the color you want (1).
Selecting the Color square to display the color selector (2).
Choose the color with the spectrum bar (3).
Control the transparency with the opacity bar (4).
Choose the color shade with the main color panel (5).
Select Save.
When you publish with this PDF layout, Paligo will apply the footnote styles to any tables that are set to use the tabstyle you updated.
When publishing to PDF, you can use a PDF layout to control the amount of spacing above each footnote under a table.
 |
Select Layout in the top menu.
Paligo displays a list of Layouts. The list is empty if there are no custom Layouts in your Paligo instance.
Select the Layout you want to update or Create a Layout.
Tip
You can copy the URL of the Layout Editor and paste it into a new tab in your browser. This can be useful if you frequently switch between your Paligo content and the Layout settings.
Select Tables in the sidebar.
Select the Table style that you want to change in the sidebar.
There are 5 table styles that you can use. By default, tables will use the Tabstyle1 settings, but you can set them up to use any of the other four settings instead, see Apply a Table Style (PDF).
Select Footnotes.
Set the Space-before for table footnotes. This is an amount of space that Paligo will add above each footnote that appears after the table. Enter a value and a unit of measurement, for example, 3pt or 1.5em.
Select Save.
When you publish with this PDF layout, Paligo will apply the footnote styles to any tables that are set to use the tabstyle you updated.
The PDF layout has settings for styling the table header for PDFs. You can use it to change various properties of the header, including the background color, alignment, and text color.
For example, the following image shows a table with a header that has been set to have a blue background, white text, with a different font and font size to the rest of the table.
Note
As with the table body, table footer, and table footnotes settings, there are 5 Tabstyle categories to choose from. Each of those has its own header settings. To learn about the different Tabstyle categories, see Apply a Table Style (PDF)
For PDF outputs, you can use the PDF layout to set the default background color for table headers. For example, in the following image, the table header has been set to have a blue background.
To set the default background color for table headers:
Select Layout in the top menu.
Paligo displays a list of Layouts. The list is empty if there are no custom Layouts in your Paligo instance.
Select the Layout you want to update or Create a Layout.
Tip
You can copy the URL of the Layout Editor and paste it into a new tab in your browser. This can be useful if you frequently switch between your Paligo content and the Layout settings.
Select Tables in the sidebar.
Select the Table style that you want to change in the sidebar.
There are 5 table styles that you can use. By default, tables will use the Tabstyle1 settings, but you can set them up to use any of the other four settings instead, see Apply a Table Style (PDF).
Select Header.
Set the Background color for table header rows. This is the "fill" color of the header row.
Clear the Use default color checkbox to select a color of your own choice.
Set the color either by:
Entering an RGBA code for the color you want (1).
Selecting the Color square to display the color selector (2).
Choose the color with the spectrum bar (3).
Control the transparency with the opacity bar (4).
Choose the color shade with the main color panel (5).
Select Save.
When you publish with this PDF layout, Paligo will apply the header styles to any tables that are set to use the tabstyle you updated.
For PDF outputs, you can use a PDF layout to set the default style of text in table headers. The PDF layout has settings for controlling the typeface, color, and size of the text. For example, the following image shows header text that is set to use a serif font, and the text is white and larger than the text in the rest of the table.
To set the default style for text in table headers:
Select Layout in the top menu.
Paligo displays a list of Layouts. The list is empty if there are no custom Layouts in your Paligo instance.
Select the Layout you want to update or Create a Layout.
Tip
You can copy the URL of the Layout Editor and paste it into a new tab in your browser. This can be useful if you frequently switch between your Paligo content and the Layout settings.
Select Tables in the sidebar.
Select the Table style that you want to change in the sidebar.
There are 5 table styles that you can use. By default, tables will use the Tabstyle1 settings, but you can set them up to use any of the other four settings instead, see Apply a Table Style (PDF).
Select Header.
Set the Font color for table header rows. This is the color of the text in the header row.
Clear the Use default color checkbox to select a color of your own choice.
Set the color either by:
Entering an RGBA code for the color you want (1).
Selecting the Color square to display the color selector (2).
Choose the color with the spectrum bar (3).
Control the transparency with the opacity bar (4).
Choose the color shade with the main color panel (5).
Set the Default font family for text in table header. This is the typeface for the text in the header and you can choose any of the available fonts from the list.
Set the Default font size for text in table header. You can enter:
Auto
The table header will use same typeface size as body text in the topic.
Percentage
The table header will use a typeface size that is a percentage of the body text in the topic. For example, 50% would be half the topic text size.
Value and units of measurement
Any measurement with the units, for example, 12pt or 1.3em.
Select Save.
When you publish with this PDF layout, Paligo will apply the header styles to any tables that are set to use the tabstyle you updated.
Note
To control the position of the text in the header, see Set Table Header Alignment.
To control what happens if a word cannot fit on a line in the header, see Control Table Header Hyphenation.
For PDF outputs, you can use the PDF layout to set the default alignment for text in table headers. For example, in the following image, the table header text is set to be aligned to the center.
|
To set the alignment for table headers:
Select Layout in the top menu.
Paligo displays a list of Layouts. The list is empty if there are no custom Layouts in your Paligo instance.
Select the Layout you want to update or Create a Layout.
Tip
You can copy the URL of the Layout Editor and paste it into a new tab in your browser. This can be useful if you frequently switch between your Paligo content and the Layout settings.
Select Tables in the sidebar.
Select the Table style that you want to change in the sidebar.
There are 5 table styles that you can use. By default, tables will use the Tabstyle1 settings, but you can set them up to use any of the other four settings instead, see Apply a Table Style (PDF).
Select Header.
Set the Default alignment for text in table header.
From-table-column() - Tells Paligo to use the column alignment that you can set on the table in the main editor, see Display Table Settings. This is the default setting. If you have a table that has no column alignment in place, Paligo will use the Start alignment instead.
Select Save.
When you publish with this PDF layout, Paligo will apply the header styles to any tables that are set to use the tabstyle you updated.
To control the hyphenation in table headers for PDF outputs, use the Allow hyphenation in table header setting in the PDF layout.
Select Layout in the top menu.
Paligo displays a list of Layouts. The list is empty if there are no custom Layouts in your Paligo instance.
Select the Layout you want to update or Create a Layout.
Tip
You can copy the URL of the Layout Editor and paste it into a new tab in your browser. This can be useful if you frequently switch between your Paligo content and the Layout settings.
Select Tables in the sidebar.
Select the Table style that you want to change in the sidebar.
There are 5 table styles that you can use. By default, tables will use the Tabstyle1 settings, but you can set them up to use any of the other four settings instead, see Apply a Table Style (PDF).
Select Header.
Use Allow hyphenation in table headers to control whether words are hyphenated when they cannot fit on a line. Choose either:
True
Paligo will use hyphenation when a word cannot fit on a line in the table header.
False
If a word in a table header cannot fit on a line, Paligo will move it to the next line. It will not use hyphenation.
Select Save.
When you publish with this PDF layout, Paligo will apply the header styles to any tables that are set to use the tabstyle you updated.