Custom Class Names for Images - Role Attribute
To style an individual image or perhaps a selection of images, you need to give the image(s) a class name. The class name has to be different to the general mediaobject or inlinemediaobject that is assigned to all images by default. When the class name is in place, that class can be styled separately in your CSS.
One way to give an image a class name is to use the role attribute. You can set it on the image's mediaobject element, and then set its value as the class name you want to use.
In Paligo, open the topic that contains the image you want to style once it is published.
Select the image and then, in the Element Structure Menu, select the
mediaobjectelement. From the menu, select Go to element.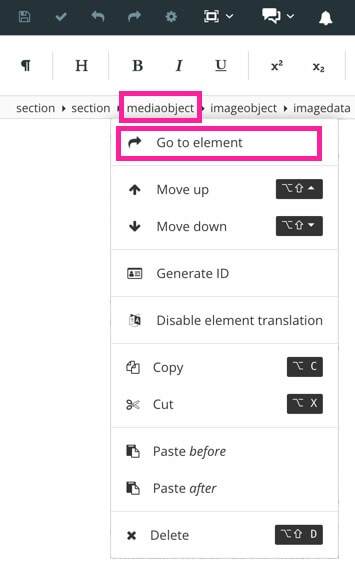
Note
For inline images, use the
inlinemediaobjectelement instead.In the Element attributes section, use the Add attribute field to add a
roleattribute. For theroleattribute's value, enter the name you want to use as the class name. Use lower case.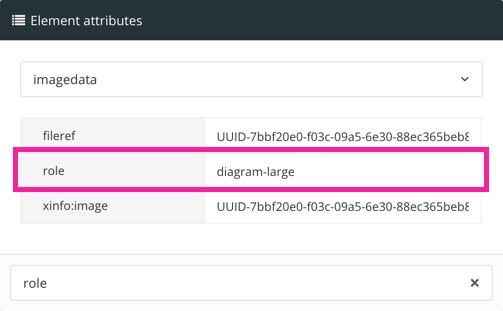
Select Save.

Use a code/text editor to create a custom CSS stylesheet file (or edit an existing CSS file that you use for Paligo).
When Paligo publishes your content, the role is added to the "container" mediaobject <div> or <span> inlinemediaobject for the image. For example, if you have a block image and add a role with the value diagram-large, this will appear like this in the HTML:
<div class="mediaobject diagram-large">
    <div class="material-placeholder">
        <img src="image/1602519409130b.png" style="" alt="image2-transparent.png" class="materialboxed">
    </div>
</div>
If you have an inline image and add a role with the value diagram-small, it will appear in the HTML like this:
<span class="inlinemediaobject diagram-small">
    <img src="image/16025194086577.jpg" alt="large-version-screenshot2.jpg">
</span>
To style the image rather than the container <div> or <span>, use a CSS selector to target the image inside the container, for example:
.mediaobject.diagram-large img {
    border: blue;
    border-style: dashed;
}
or for an inline image:
.inlinemediaobject.diagram-small img {
    border: blue;
    border-style: dashed;
}
Save your CSS file and Upload Customized CSS.
Publish your content using the HTML layout that contains the CSS file with the image styling.
Paligo publishes the content and the output includes your CSS. The styles in your CSS take precendence over the other CSS provided by Paligo, and the styling is applied to your images.