Create a Checklist
Use the checklist toolbar to create a checklist in a topic.
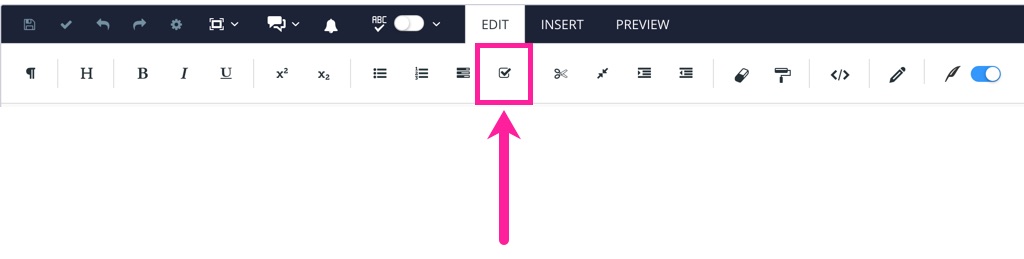
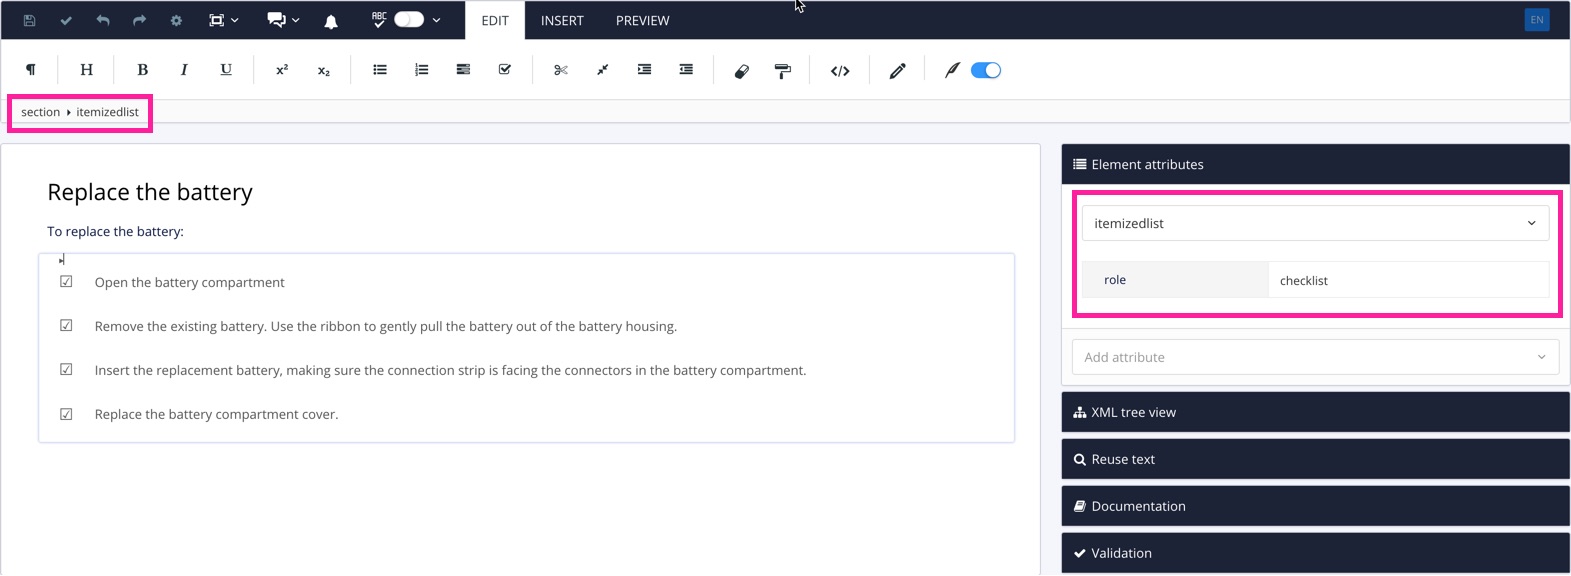
When you select the checklist toolbar icon, Paligo adds the first item in a checklist. You can add text to that item and when you press Enter at the end, it will automatically create the next checklist item. The checklist is actually an itemizedlist with a role attribute of checklist. So you could also make one by adding an itemized list (i.e. bullet list or undordered list) and giving it a role attribute with checklist as the value.
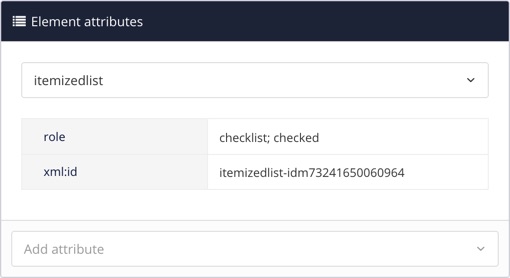
To set the list to have pre-checked checkboxes for PDF outputs, select the itemizedlist element in the element structure menu. Then add the value checked to the role attribute. Use a semicolon as a separator, for example:
A checklist would usually be on the first level only, but it is possible to have nested checklists too. Each checklist item can also contain any other content just like a regular list, such as images, other lists, tables, etc. For these, add the block element, such as a list, inside the listitem.
To end the list, position the cursor outside the the itemizedlist and then you can add another block element, such as a para. This approach is common to all lists.
You can then add extra content after your checklist, if needed. Save your topic when you have finished.
Note
The checklist functionality only works if the itemizedlist element for the checklist has an xml:id. To find out if it does, select the itemizedlist element in the element structure menu and then look at the element atttibutes.
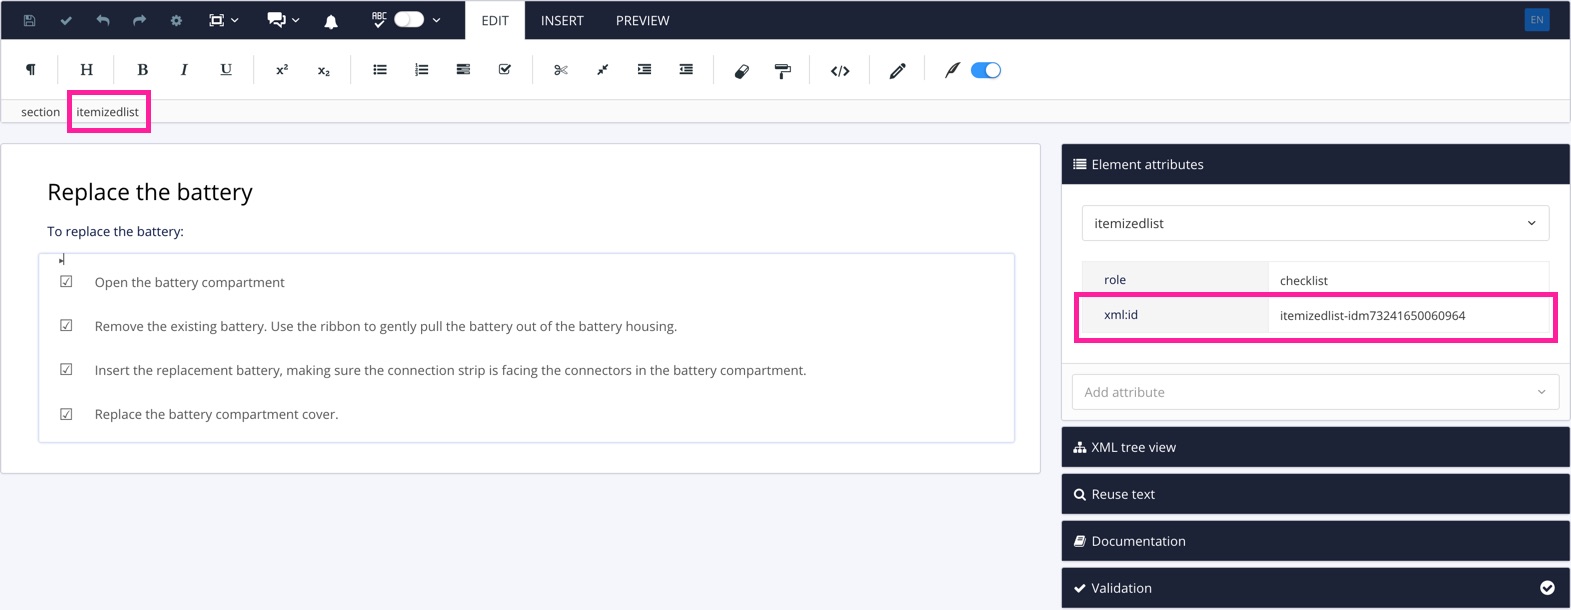
If there is an xml:id with a value, the list is fine. If there is no xml:id, you can add one. To do this, we recommend that you select itemizedlist in the elementstructure menu, then select the Generate id option.