Publish to Zendesk
To publish content from Paligo to Zendesk, you need to have the following in place a:
Valid connection from Paligo to Zendesk, see Connect Paligo to Zendesk.
Publication that contains the topics that you want to map to articles in Zendesk, see Create a Publication.
Note
Paligo does not support publishing articles that use “content blocks” in Zendesk.
Zendesk layout either use the built-in Zendesk Layouts or create your own, see Create a Zendesk Layout).
Tip
You do not have to publish an entire publication to Zendesk. You can also publish part of a publication, for example, one chapter of a user guide. To find out more, see Publish to Multiple Zendesk Categories.
Select the dotted menu (...) for the topic or publication in the Content Manager.
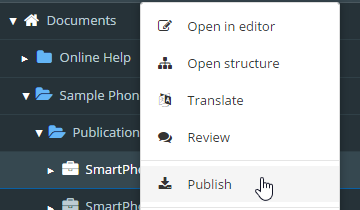
Select Publish.
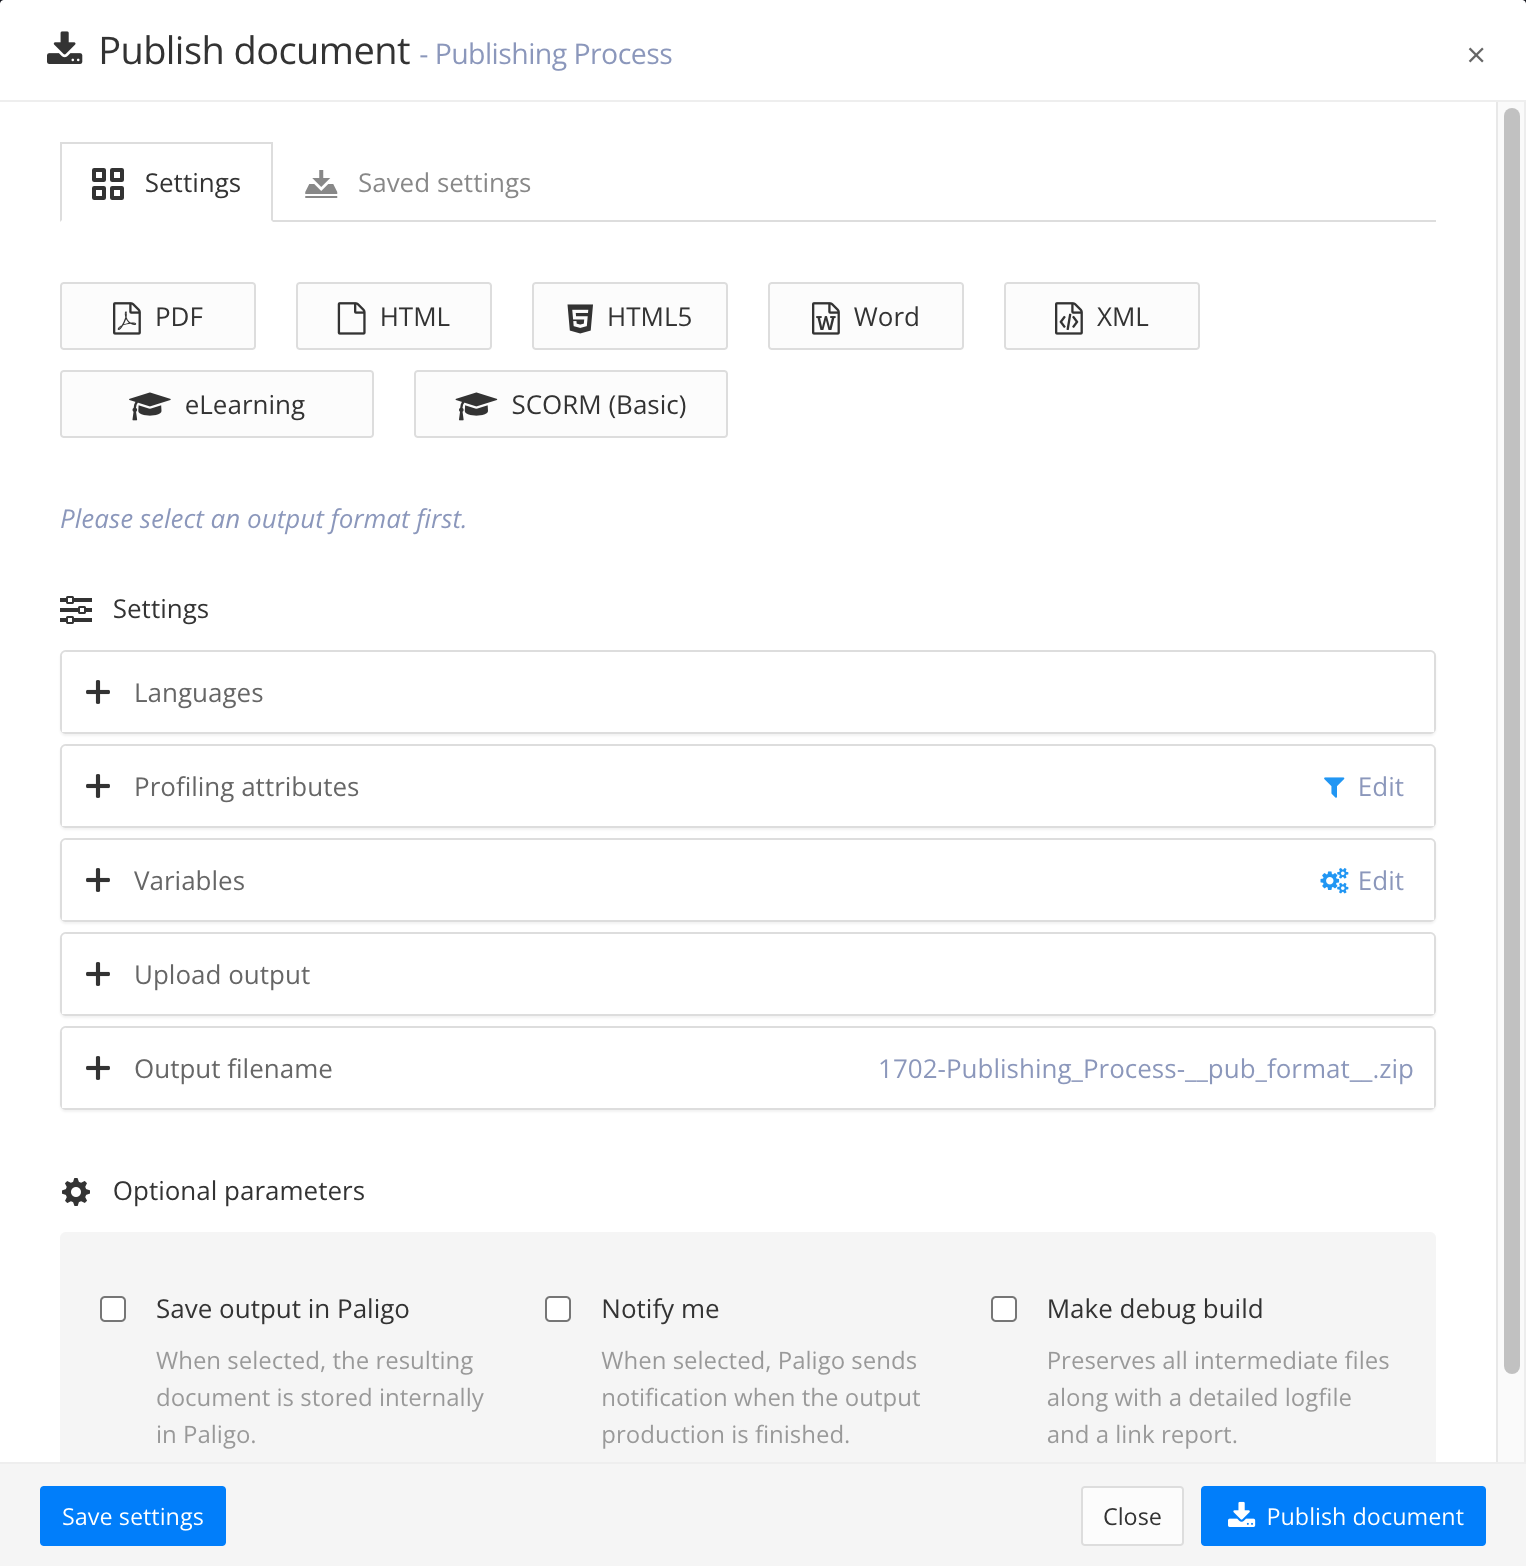
Paligo displays the Publish document dialog.
On the Settings tab, select HTML.
Choose the Zendesk layout that you want your publication to use.
The different types of Zendesk layout map content to Zendesk differently, so it is important that you choose a layout that meets your requirements. To find out how each layout maps content to Zendesk, see Zendesk Layouts.
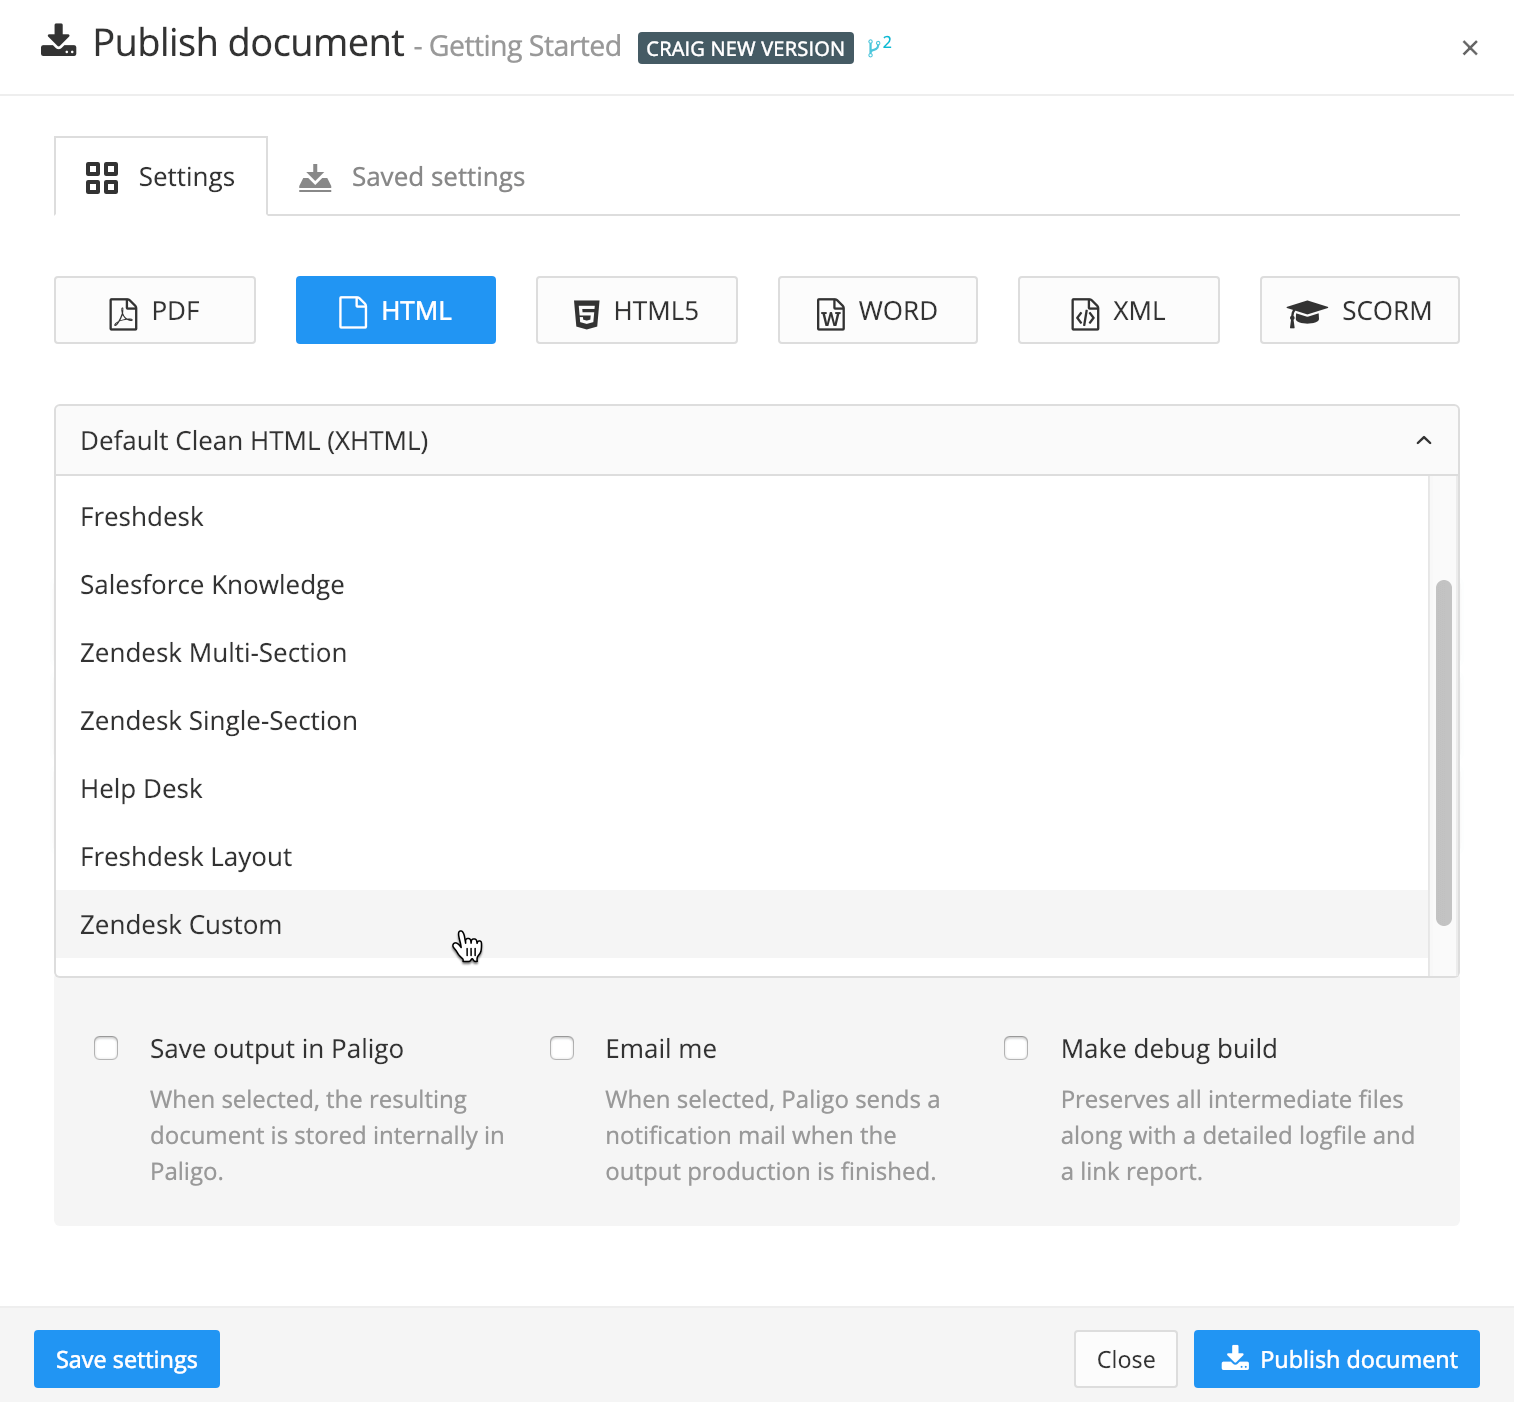
Choose the Zendesk category that will receive your selected Paligo content.

Use the Managed by setting to choose which types of user can edit and publish the articles that Paligo creates or updates in Zendesk. The Managed by setting is sometimes called Permission Group in Zendesk.
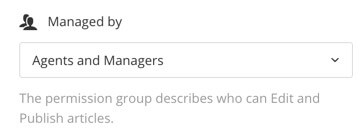
This setting is applied as the default for all articles that Paligo publishes to Zendesk, but you can have different settings for individual articles as well. The individual settings take priority over the default settings. You set Managed By for individual articles on the Zendesk Preflight tab.
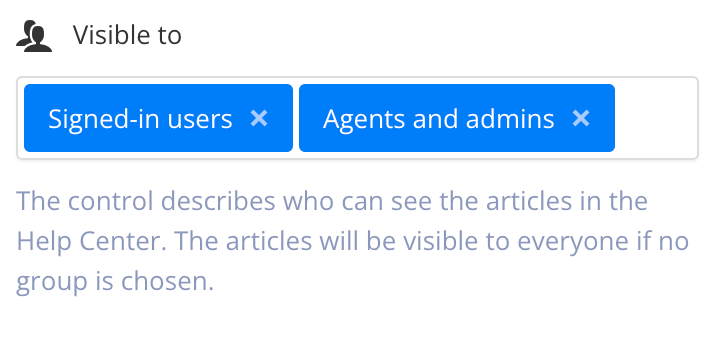
Use the Visible to setting to choose who can see the articles that Paligo creates or updates in Zendesk. The Visible to group is sometimes called the User Segment Group in Zendesk. Click on the Visible to field to select from the groups configured in the selected account. Multiple groups can be selected. Use the x button to remove any unwanted groups.
Note
Paligo uses the Visible to settings configured in the integration as the default for all articles when you publish to Zendesk, unless you configure specific groups in the Publish window.
The Zendesk Preflight feature has Visible To settings for each article. The article settings take priority over the default settings, as well as those configured in the Publish settings.
Select the languages to be published.

Note
If no translations are available, only the Source Language will show. If you have multiple languages translated and approved, you can select which ones to include. Paligo will publish each language as a separate output.
For PDF output you can publish them as one multilingual publication, check the Combine selected languages box.
If your content is set up to use Filtering / Profiling, use the Profiling attributes section to apply them. [Optional]. If you do not use filtering, ignore this setting.
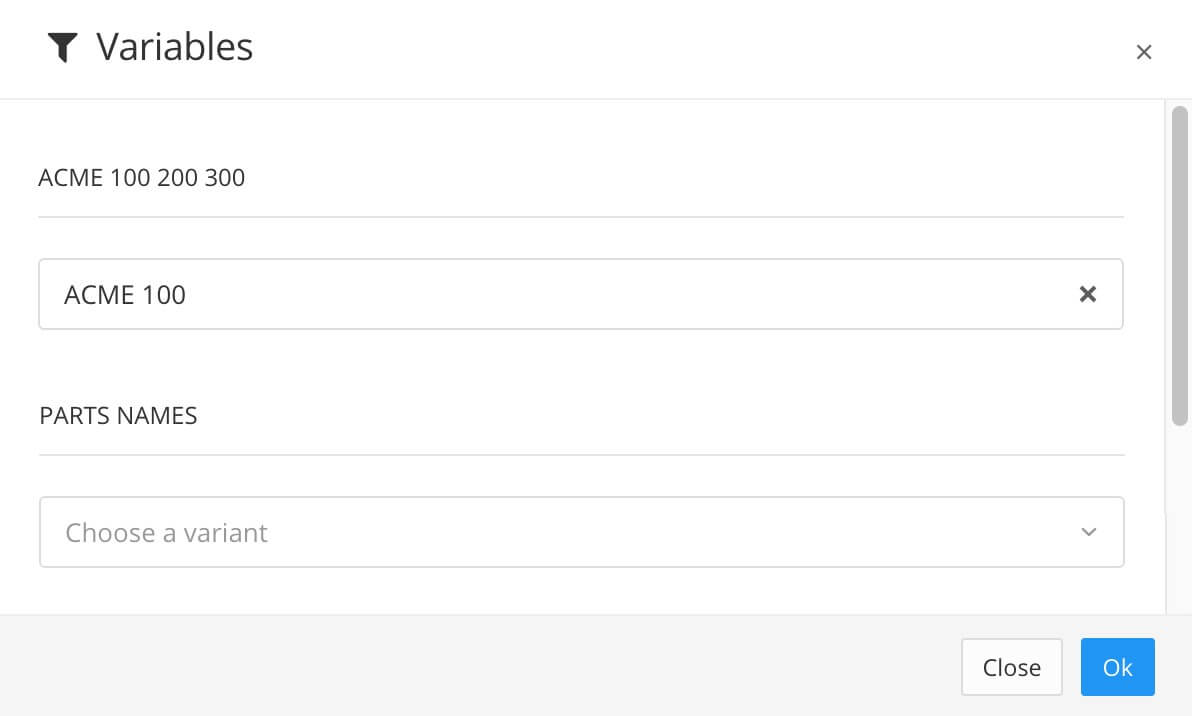
Select Edit and then choose the value for each filter that you want Paligo to use. For example, for Audience, choose Expert to include content that is marked as for expert users.
If you do not want to apply a filter, leave the field blank.
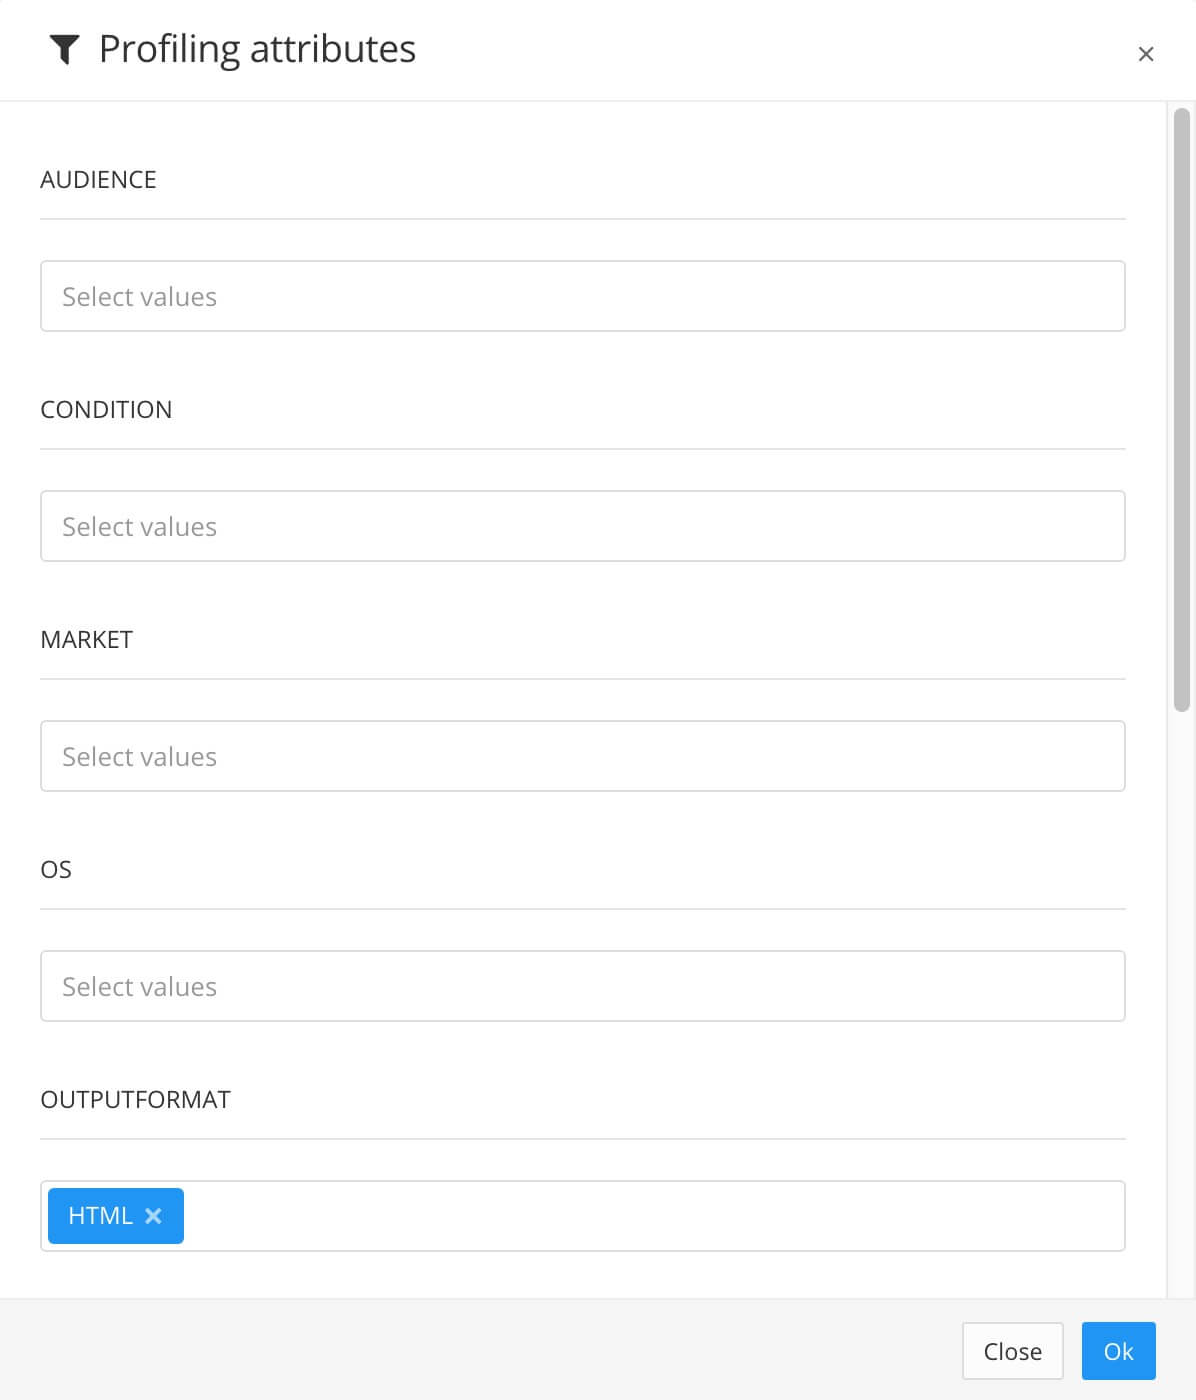
Select OK to add your chosen profiling attribute(s).

Use the Output filename section to control the filename.
By default, Paligo will use the filename syntax that is defined in the System Settings.

To change the information included in the filename, enter your preferred format in the publishing settings. Default is:
ID-Title-Format.You can use:
ID - The ID of the document.
Title - The title of the publication or topic that you are publishing.
Format - The name of the output format, for example, PDF or HTML5.
Edit date - The date that the publication or topic was last edited.
Branch label - The text from the branch label for the publication or topic. This only applies if your content has been branched and it has a branch label. For details, see Add or Edit Branch Labels.
Unique value - A random string of characters, generated by Paligo, that is added to the filename to make it unique. This can stop the file from being overwritten by later publishes of the same document.
Tip
If you type @ into the field, Paligo displays a list of the available values and you can select from the list. To remove a value, click in it and use the delete key or backspace key to remove all of its characters.
Note
The filename shown in the top-right corner is a preview of the filename that Paligo will use when you publish.
Set the Optional Parameters (leave unchecked if you do not want these features):
Save the output in Paligo - Check the box to save the zip file that Paligo creates when you publish. The zip file will be available from the Resource View and you can download it from the Saved Outputs tab. Clear the box if you don't want Paligo to store the zip file.
Notify me - Check this box if you want Paligo to send you an email when the publication is ready. This is useful if you have very large publications that can take a longer time to process and publish.
Make debug build - Check this box if you want Paligo to include a log file and link report. If there is an issue with your content, Paligo support may ask you to enable this feature so that they can use the log files to investigate.
Select the Zendesk Preflight tab to View the Paligo-to-Zendesk Mapping.
If you are happy with the existing mapping, you can proceed to the next step.
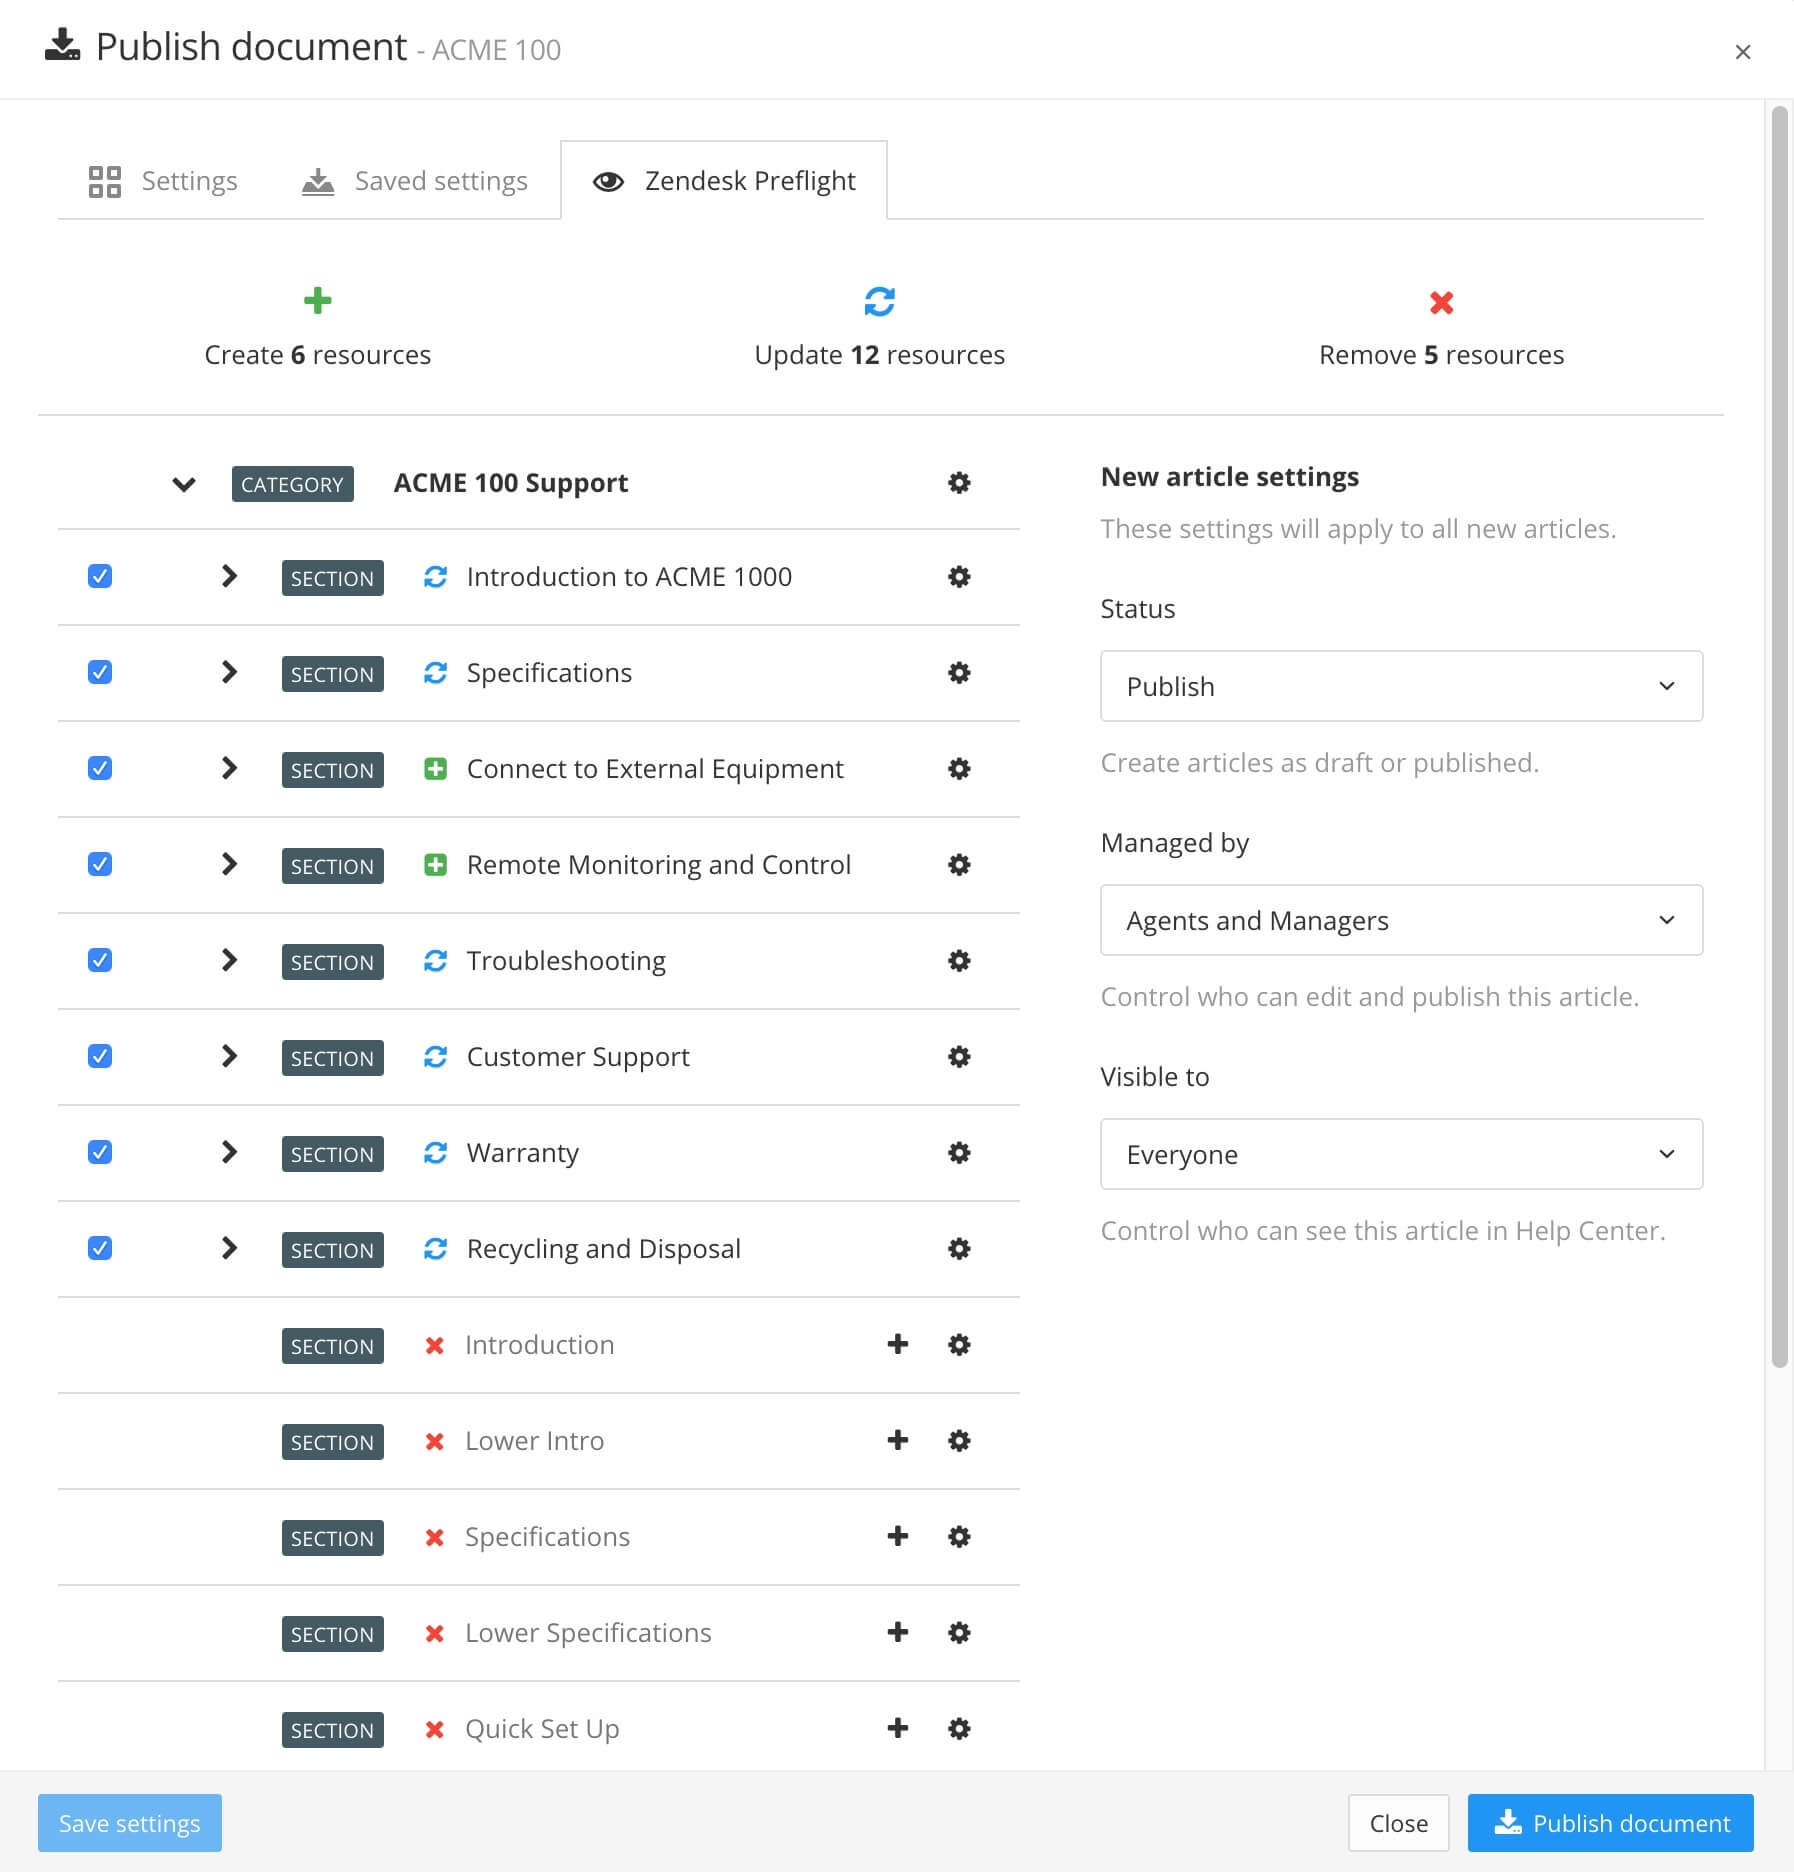
To change the mapping, use the various settings on the Zendesk Preflight tab. You can map the Paligo topics to different sections and articles, change the Managed By and Visible To status, set the topics to be draft or publish, and promote them as needed. To find out more, see Customize Paligo-to-Zendesk Mapping.
Select Publish Document.
Paligo starts processing your content and applies your layout and publishing settings. The time that this takes varies depending on how much content you are publishing (the more content, the longer it takes).

A progress bar appears. Select the arrow to hide the progress bar and reopen it by selecting the progress clock in the top menu. To abort the publish, select the X.
The published output appears as:
A ZIP file with the published output appears in the downloads folder on your computer.
If you have altered your browser's settings to store downloaded files somewhere else, the zip file will be found there instead.
If you are using a publishing integration, the zip file will also be sent to the relevant service.
A link in the Activity Feed Panel to download the published content.
Note
To make the content available online, first unzip the file. You can then use the file locally or you can use an FTP client, such as Filezilla, to upload the unzipped content to a web server.
Tip
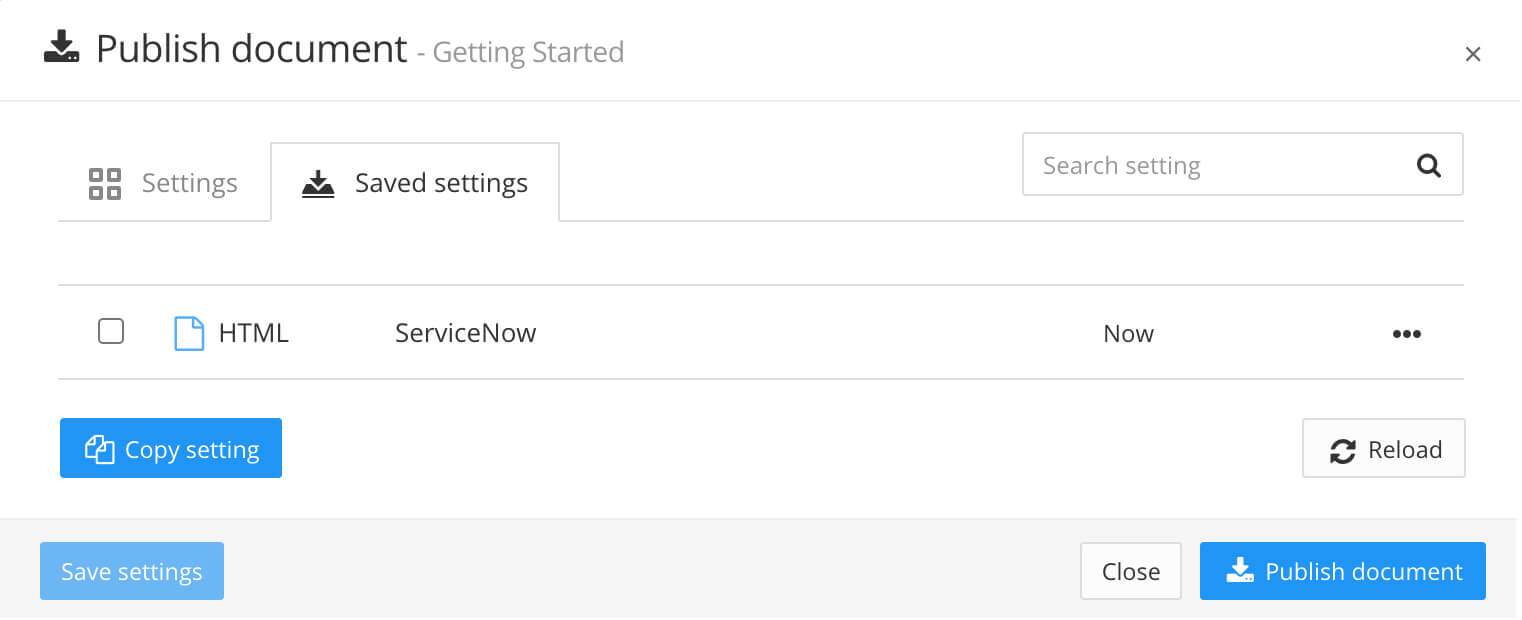
You can save your publishing settings and reuse them to achieve a smoother publishing process, see Publishing Settings. Any settings you save can also be used for Batch Publishing.
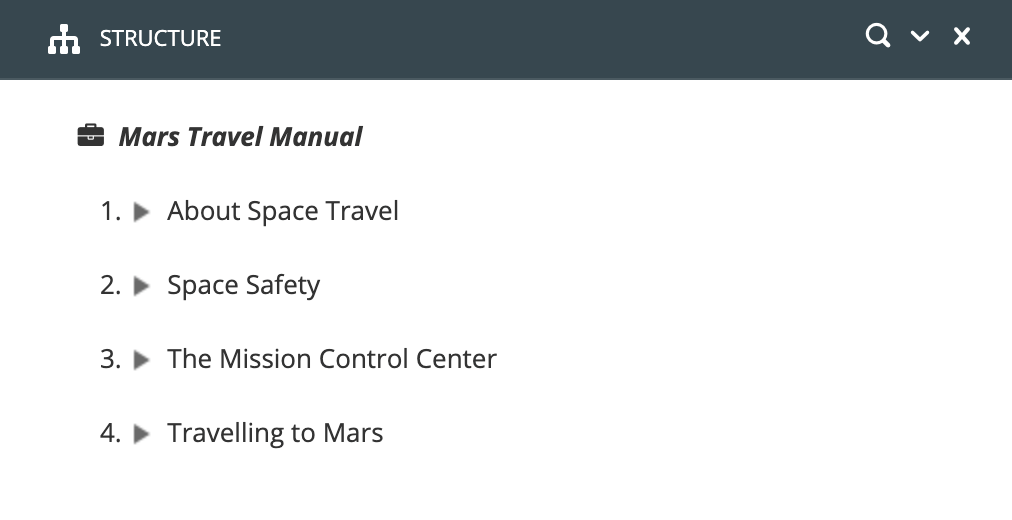
You can publish an entire publication, or parts of it, to different categories in Zendesk. This is especially useful when you want publication sections to map to different Zendesk categories.
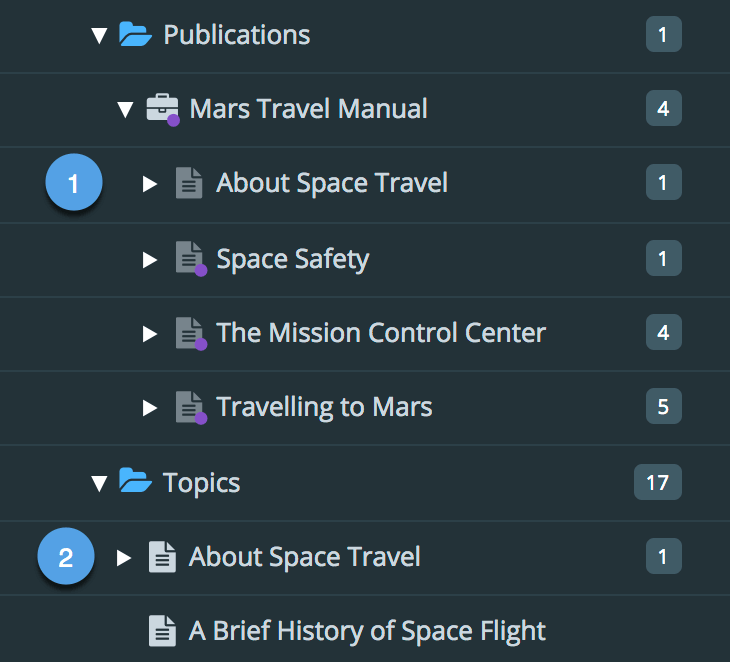
For example, suppose you had a "Mars Travel Manual" publication as shown below. In that case, you might want to publish each "chapter" to a different Category in Zendesk (you could have a category for "About Space Travel", a category for "Space Safety", a category for "The Mission Control Center" and so on.
To publish to multiple Zendesk categories:
Activate the setting Fix Cross Links outside Publication
 |
To be able to publish to different Zendesk categories, you need to activate the setting Fix cross links outside of publication scope in the Layout Editor.
Select Layout in the top menu.

Paligo displays a list of Layouts. The list is empty if there are no custom Layouts in your Paligo instance.
Select the Zendesk layout that you want to edit in the Layout Editor.
Select Zendesk in the sidebar.
Select the checkbox Fix cross links outside of publication scope.

Select Save.
Paligo "pushes" the content in the publication to Zendesk. Map Content from Paligo to Zendesk and sections and articles are created and/or updated.
Repeat steps 2-10 of the process for each different Zendesk category.
Note
If you use branching to create different versions of your topics, see Map Branched Content to Zendesk to learn how branched topics are mapped.
To publish an entire publication, or parts of it, to different categories in Zendesk:
In the Content Manager, expand the publication that you want to publish to Zendesk.
Select the dotted menu (...) for the part of the publication that you want to publish to Zendesk.
You can choose an entire publication or any "fork" in the publication. A "fork" is a topic and its subtopics ("child" topics).
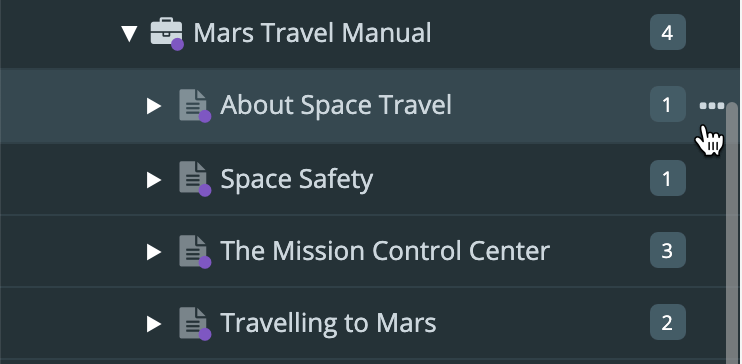
Select Publish.

On the Settings tab, select HTML.
Choose the Zendesk layout that you want your publication to use.

Choose the Zendesk category that will receive your selected Paligo content.

Select the languages to be published.

Note
If no translations are available, only the Source Language will show. If you have multiple languages translated and approved, you can select which ones to include. Paligo will publish each language as a separate output.
For PDF output you can publish them as one multilingual publication, check the Combine selected languages box.
If your content is set up to use Filtering / Profiling, use the Profiling attributes section to apply them. [Optional]. If you do not use filtering, ignore this setting.
Select Edit and then choose the value for each filter that you want Paligo to use. For example, for Audience, choose Expert to include content that is marked as for expert users.
If you do not want to apply a filter, leave the field blank.

Select OK to add your chosen profiling attribute(s).

Select Publish Document.
Paligo starts processing your content and applies your layout and publishing settings. The time that this takes varies depending on how much content you are publishing (the more content, the longer it takes).

A progress bar appears. Select the arrow to hide the progress bar and reopen it by selecting the progress clock in the top menu. To abort the publish, select the X.
The published output appears as:
A ZIP file with the published output appears in the downloads folder on your computer.
If you have altered your browser's settings to store downloaded files somewhere else, the zip file will be found there instead.
If you are using a publishing integration, the zip file will also be sent to the relevant service.
A link in the Activity Feed Panel to download the published content.
Note
To make the content available online, first unzip the file. You can then use the file locally or you can use an FTP client, such as Filezilla, to upload the unzipped content to a web server.
Tip
You can save your publishing settings and reuse them to achieve a smoother publishing process, see Publishing Settings. Any settings you save can also be used for Batch Publishing.

When you publish content from Paligo to Zendesk, you choose a category, see Publish to Zendesk. If you choose a category that Paligo has published to before, Paligo will:
Check the publication for new topics (topics that do not have a corresponding article in Zendesk). For each new topic, Paligo creates a new article in Zendesk and writes the topic content to it.
Find the topics that already have a corresponding article in Zendesk. It then updates the Zendesk articles with the latest content from the topics in the Paligo publication.
Important
Paligo does not delete articles from Zendesk. So if you republish content to Zendesk, you should check that the articles match the latest structure of your Paligo publication. If any topics have been removed from the publication, you will need to manually remove the corresponding articles in Zendesk.
Note
If you use branching to create different versions of your topics, see Map Branched Content to Zendesk to learn how branched topics are mapped.
To remove articles from Zendesk, you can:
Use Zendesk preflight to choose which articles to delete, and then publish
Delete the articles manually in Zendesk.
To find out how to use Zendesk preflight to remove articles, see Remotely Delete Zendesk Articles and Sections.
