
Revision History Topic

A revision history topic is a summary of the changes made to a document recorded in the Paligo Revision Control. They are useful to include in your publication as they provide an audit trail of the changes made to a document, with details of who made the changes, what the changes were, and when they were added.

When you publish your content, the revision history topic is included as part of the output (unless you have filtered it out).

  • For HTML outputs, you can use your CSS to style the revision history details, see Style with CSS.

  • For PDF output, only the default styling is available, although it is possible to change the styling as part of a customization project. Contact customer support for details.

Revision history page from a PDF output. There is a list of revisions, each with details of the date, author, and a summary of the changes.

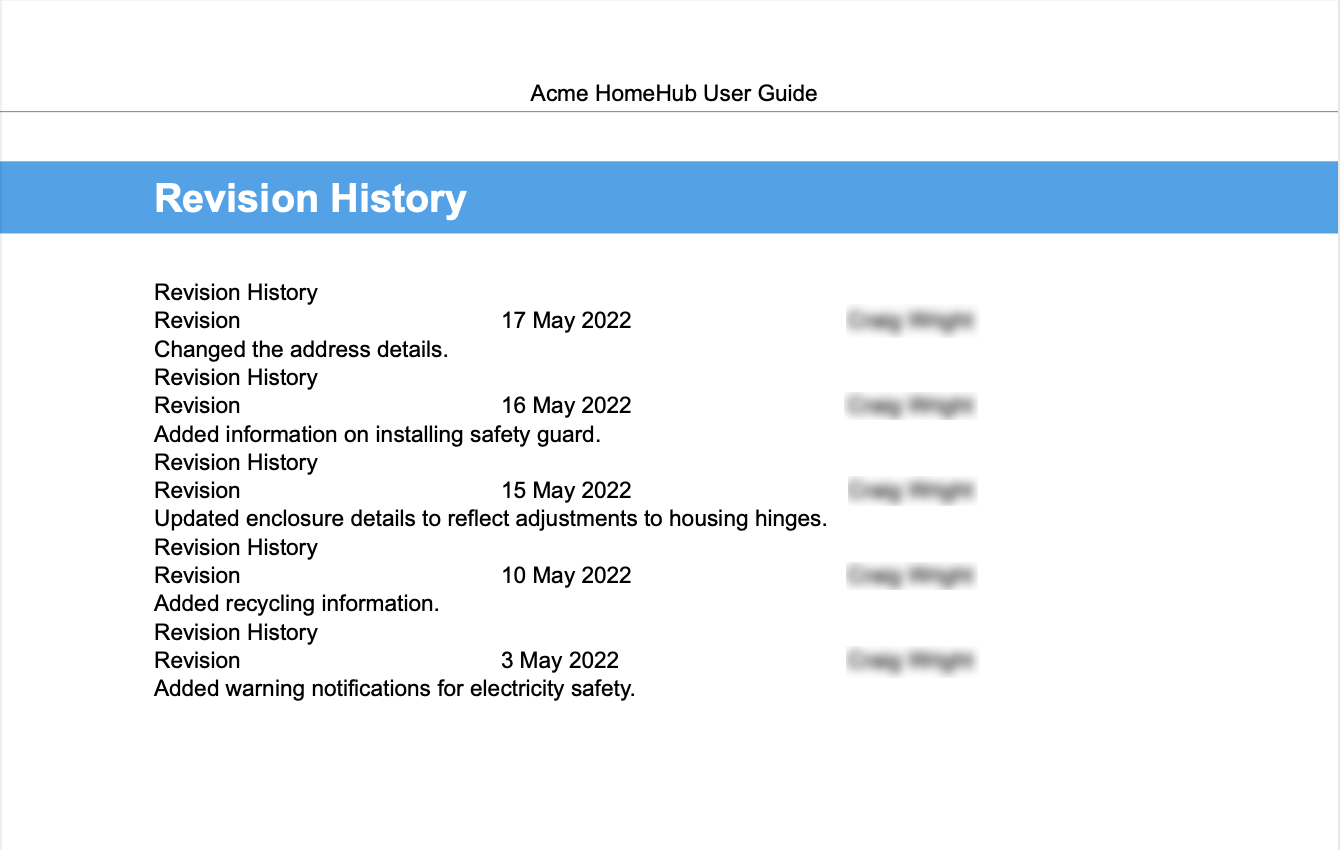
Above an example of a revision history topic for PDF output.

Tip

To view the revision history in Paligo, see View Revision History.

Example 1. Revhistory and revision structure

The following code shows the XML for a valid revision history topic. We have removed the XML IDs and attributes for clarity. When you create your own revision history, the elements will have XML IDs and attributes added when you save.

<?xml version="1.0"?>
<section>
    <title>Revision History</title>
    <info>
        <revhistory>
            <revision>
                <revnumber>2</revnumber> 
                <date>24 May 2022</date> 
                <authorinitials>CW</authorinitials> 
                <revremark>Added information on recycling and ordering replacement parts.</revremark>
            </revision>
            <revision>
                <revnumber>1</revnumber> 
                <date>20 May 2022</date> 
                <authorinitials>CW</authorinitials>
                <revremark>Added legal information in front matter.</revremark>
            </revision>
        </revhistory>
    </info>
</section>

To create a revision history topic:

  1. Create a new topic with a suitable name, such as "Revision History".

  2. Select the topic or component in the Content Manager to open it in the Editor.

    Content Manager in Paligo. It shows the Documents section contains an Acme 100 Topics folder. Inside the folder there is a publication and many topics, including "Connect to Network (100).

    Alternatively, you can Create a Topic and edit that.

  3. Position the cursor below the title.

  4. Press Alt + Enter ⏎ (Windows) or Command ⌘ + Enter ⏎ (Mac) to display the Element Context Menu.

    Element context menu shows a search field and a list of elements that are valid at the current position.
  5. Enter info and select it from the menu.

  6. Position the cursor inside the info element.

  7. Press Alt + Enter ⏎ (Windows) or Command ⌘ + Enter ⏎ (Mac) to display the Element Context Menu.

    Element context menu shows a search field and a list of elements that are valid at the current position.
  8. Enter revhistory and select it from the menu.

    Revision history topic. The Element Structure Menu shows the structure is: section, info, revhistory, revision, revnumber.

    When you add a revhistory element, Paligo adds child elements to it automatically.

    The child elements are:

    • revision - This is a container element for the revnumber, date, authorinitials and revremark elements. You need the revision for the structure, but do not enter any information directly into it.

    • revnumber - Enter the number of the revision, for example, 6 if this is the sixth revision to the content.

    • date - Paligo inserts the date automatically, by default. You can overwrite it with a different date if you wish.

    • authorinitials - Paligo inserts the name of the person who adds the revision element, by default. You can overwrite it with a different name or initials if you wish.

    • revremark - Enter a brief description of the changes that have been made. This will help other users to understand what each revision included and why the changes were made.

    Tip

    You can delete an element if you do not want to include that information in the revision history.

  9. Repeat step 8 to add more revisions.

    You can add multiple revision elements inside a revhistory element.

  10. Select Save. Save icon.

  11. Add your revision history topic to your publication.

    It is recommended to position it as the first topic in the publication structure.

    Tip

    You may also want to put an output filter on its section element to exclude it from outputs, but remains in the publication for internal use, see Filtering / Profiling).