Bulk Import Users
As an administrator, you can save a lot of time, by using the bulk import feature when creating many user accounts at the same time. Instead of creating each user account individually, you can create a CSV (Comma Separated Value) file that contains the basic user information and then import that file into Paligo. Paligo will then automatically create a user account for each user listed in the CSV file.
You use any application that supports saving as .csv to create the CSV file. If you for example want to create user accounts for both Authors and Contributors, you will need two CSV files, one for each user type.
Note
New user accounts are grayed out until the user logs in for the first time.
To bulk import users in the Icons View:
Create a
CSVfile for each user type that you want to import.Add the user details in this format:
username,email address,full namein the CSV file, like this:jamessmith,james@smith.com,James Smith frankjohnson,frank@johnson.com,Frank Johnson janemurphy,jane@murphy.com,Jane Murphy
Tip
For the
usernameyou could instead use the email address there as well, as it's a simple way to make sure theusernameis unique.Sign in to Paligo using a user account that has administrator permissions.
Select the avatar in the top-right corner.

Select Settings from the menu.

Select the Users tab.

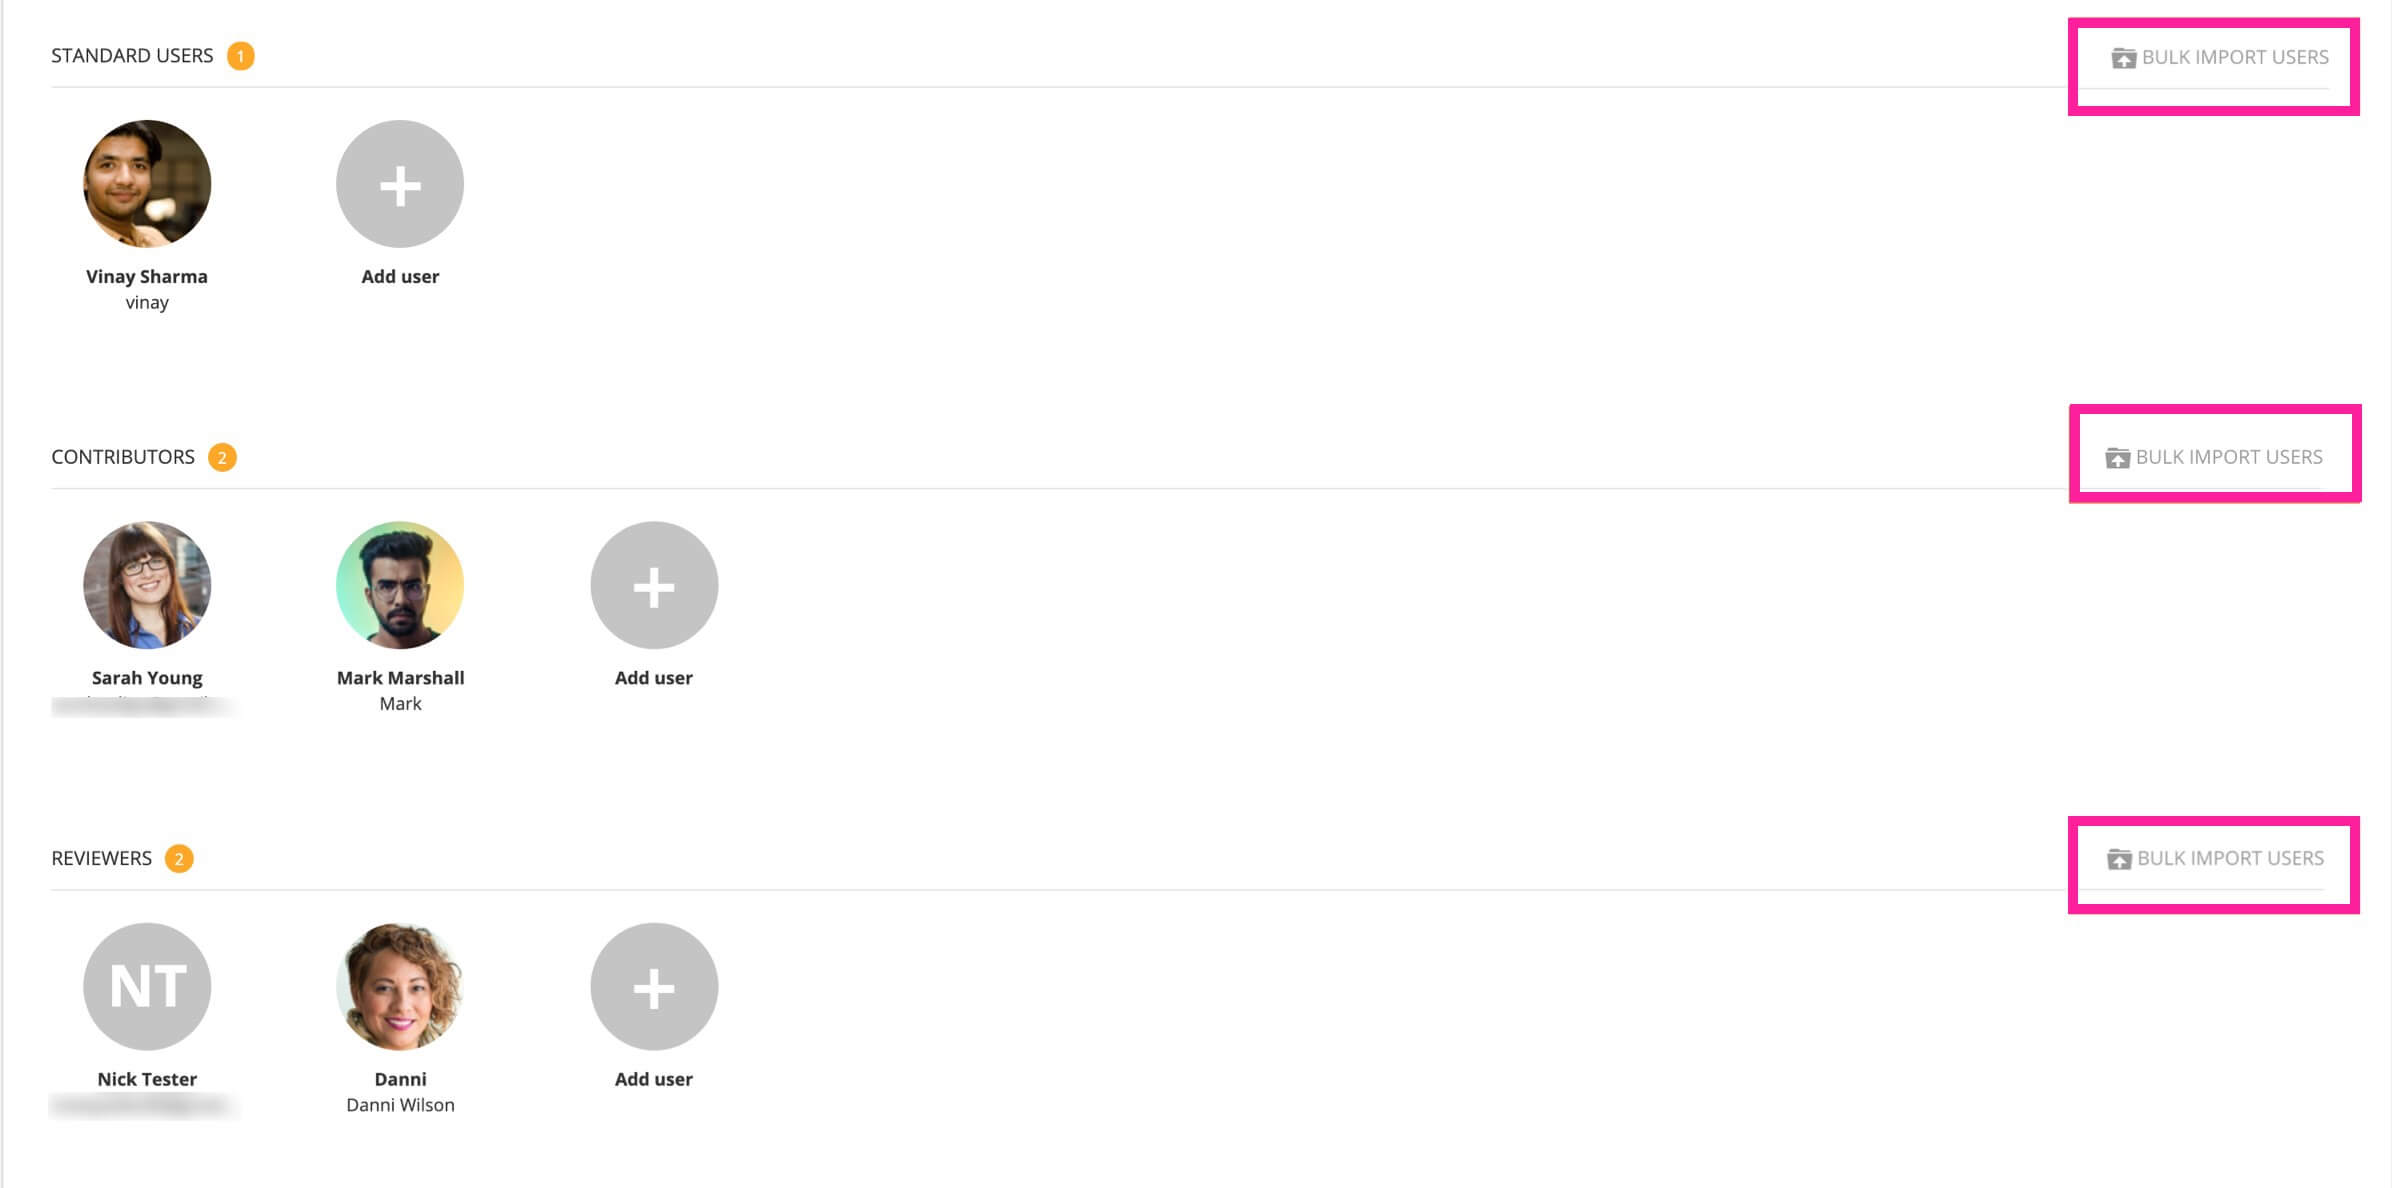
Select Bulk Import Users for the user group that you want to create new accounts for.
Note
In the List View, the Bulk Import Users option is located at the bottom of the page.
Select User Group from the menu, to choose the user type for the import.
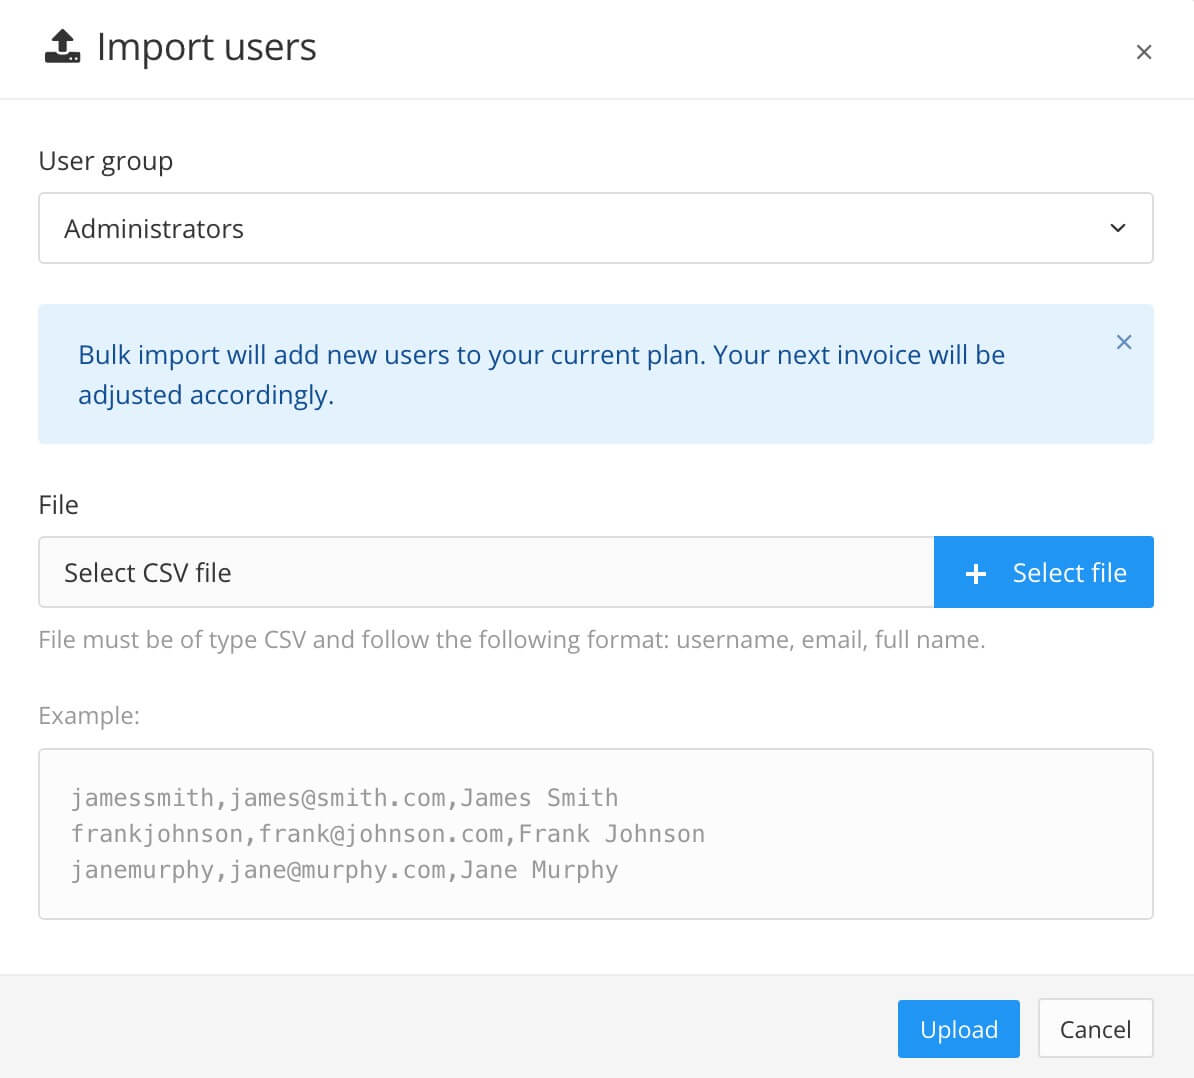
Use Select file to choose the CSV file that you want to import.
Select Upload.
Paligo imports the CSV file and creates a user account for each user defined in the file.
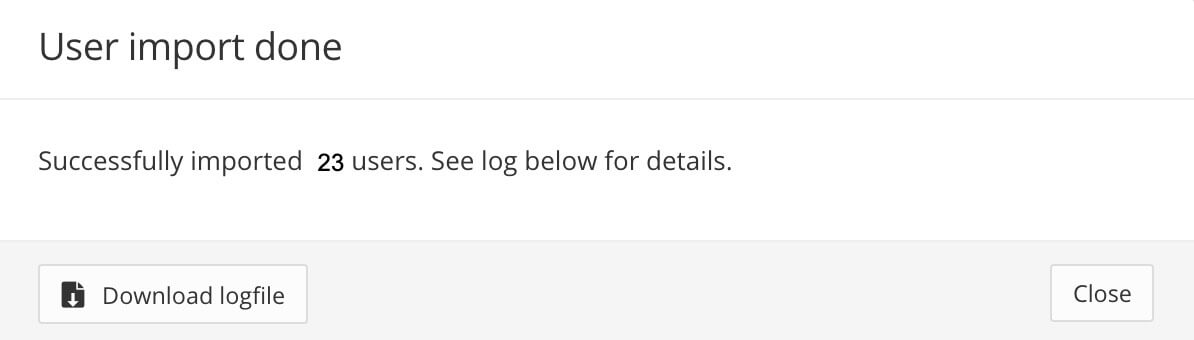
If the import is successful, a User Import Done dialog appears and you can download a log file of the import.
Repeat this procedure for each user type.
Tip
When Paligo has created the user accounts, you can Edit Users and Remove Users if needed.