Create an Informal Topic Branch
Branches make it possible to update without affecting the original content. They are handled almost the same way for topics, publications, informal topics and admonitions.
However, Forks from informal topics cannot be branched from inside a publication or topic because they are only a collection of reusable elements inside a topic. They are not standalone components like regular topics.
Therefore, you have to branch the informal topic in the Content Manager. Then manually replace the inserted informal topic with the branch in affected topics, see Replace an Informal Topic Branch.
Tip
If an informal topic serves as a reusable component in a publication, you can filter the content in your informal topic instead of branching it, see Filtering / Profiling and Publish Multiple Versions of Content.
To create a branch of your informal topic:
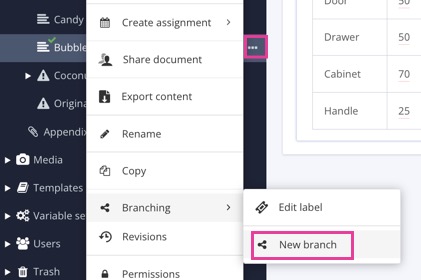
Select the dotted menu (...) to the right of the
informal topicin the Content Manager.Select Branching and choose New branch.

The branch will appear below the file it originates from.
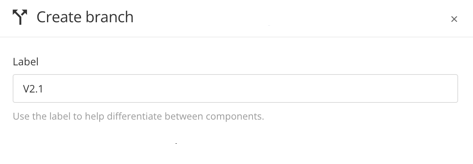
Enter a branch Label. This label will appear next to the name and makes it easier to identify different branches of the same content. [Optional, but recommended].

Tip
You can add branch labels afterwards as well, see Add or Edit Branch Labels
To control where Paligo stores the new branched content, check the Select location for new branch box. You can then browse to the folder you want Paligo to use.

If you leave Select location for new branch unchecked, Paligo will add the branched content to the same folder as the parent version of the content.
Choose whether you want to Open new branch in editor. Check the box for yes or leave it clear for no.
Select Create.