Publish to LMS
When your eLearning course is ready for release, you can publish it to a Learning Management System (LMS). Paligo will generate an eLearning output that downloads as a zip file in your browser. That zip file is to be uploaded to your LMS.
There are two stages to complete:
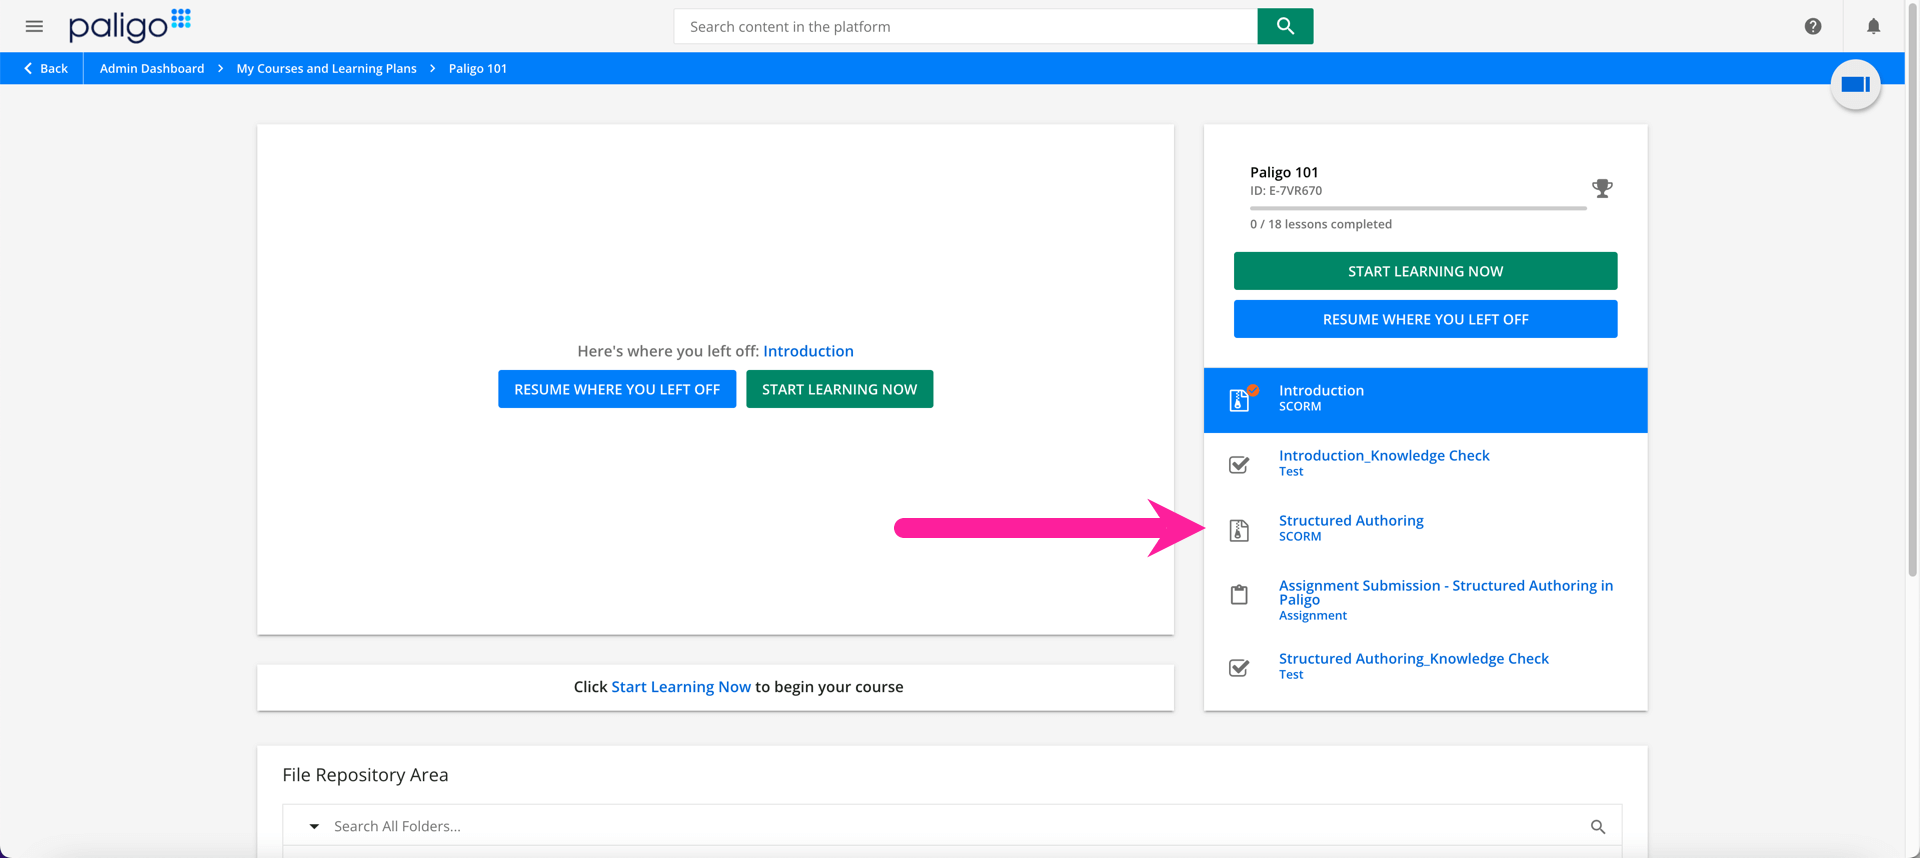 |
Example of a Paligo eLearning course in an LMS.
Paligo includes an eLearning layout that you can use for publishing. The layout contains a variety of settings that affect how Paligo processes your content when it converts it from Paligo XML into the eLearning output. This can be the default eLearning layout or a custom eLearning layout that you have created in Paligo, see Create a Layout.
Tip
To prepare your eLearning, see
To publish your eLearning:
Prepare your content in Paligo and make sure you add your topics to a publication.
Select the Dotted menu (...) to the right of the publication in the Content Manager you want to import into the LMS (such as Moodle).
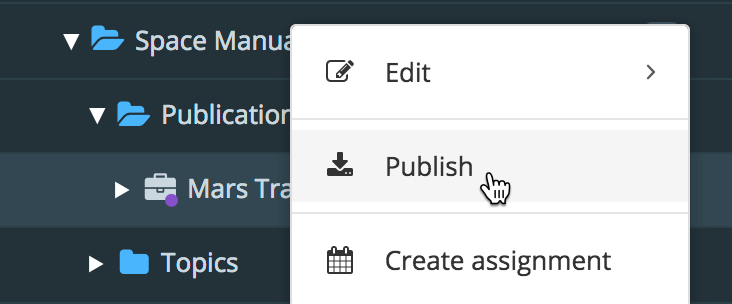
Select Publish.

Select Elearning as output.

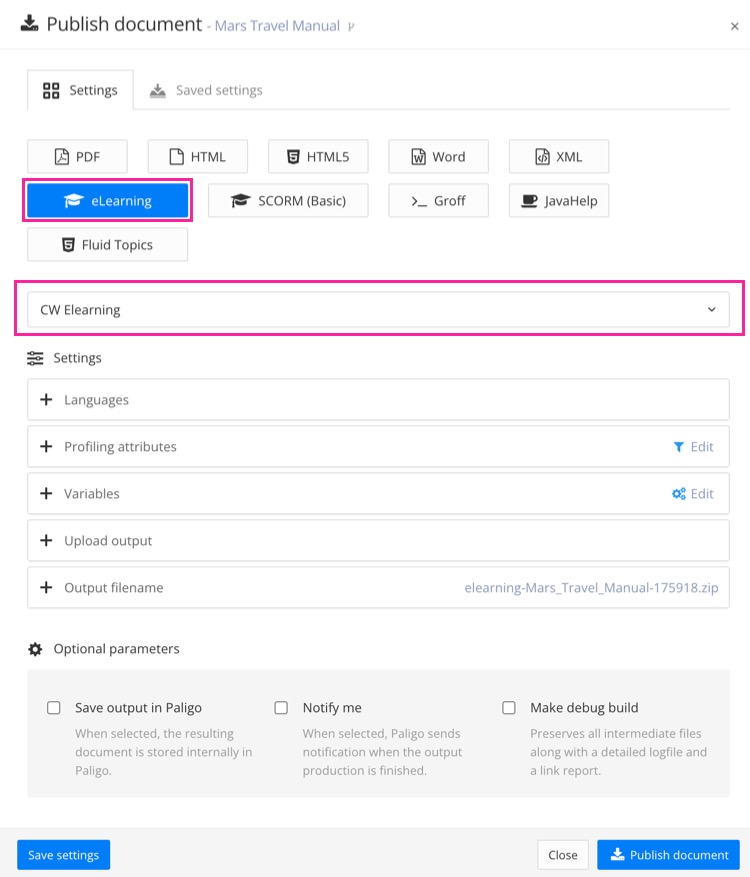
Select a publishing layout from the menu
Adjust the publishing settings:
Languages - Choose which languages to publish. Paligo will create a separate zip file output for each language.
Profiling attributes - If you have used profiling (filters), choose which filters and values to include in the output.
Variables - If you have used variables in your content, choose which variable set to use and which variants (values) to include in the output.
Upload output - If you have Paligo set up to use a publishing integration, choose the service that Paligo will upload the output to, for example, GitHub.
Optional parameters - Use to choose whether Paligo saves the output, includes a log file and link report, and notifies you via email.
Tip
For more details on these settings, see Publish Content.
You can also save your Publishing Settings so that you can select the saved version instead of re-applying all the filters, variables each time. Any settings you save can also be used for Batch Publishing.
Select Publish Document.
Paligo will process the content and apply your layout and publishing settings. The time it takes can vary depending on how much content you are publishing (the more content, the longer time it takes).
When the publishing process is finished, Paligo creates a zip file that downloads in your browser. There is a separate zip file for each language.
The next step is to Upload the eLearning Output to your LMS.
Tip
You can open the Paligo output in a browser to get an idea of how your eLearning content will work in a Learning Management System (LMS).
Unzip the file and browse to the index.html file (for example, if you have an English SCORM output, look in the out>scorm-en folder). Open the index.html file in a browser. You will be able to preview your content, including any quizzes, but your score is not recorded like it would be if you ran the course in an LMS.
You can publish Paligo content as a SCORM output. SCORM is an interchange format for importing into Learning Management Systems (LMSs) and eLearning platforms.
Paligo's SCORM (basic) output is for publishing regular content to an LMS. It is available on all plans, but does not support progress tracking or interactive features such as quizzes.
 |
Note
Paligo also has a more powerful SCORM output that supports progress tracking, quizzes, and more. It is currently in beta, so if you would like to use it, please contact customer support so they can enable it on your instance. it is available on the Enterprise plan and on trials.
The following instructions explain how to use the basic SCORM support. It covers publishing Paligo content to SCORM and then importing that content into an LMS. We have used the free LMS Moodle Sandbox environment as an example, but you can use a different LMS if you prefer.
Prepare your content in Paligo and make sure you add your topics to a publication.
Select the Dotted menu (...) to the right of the publication in the Content Manager you want to import into the LMS (such as Moodle).
Select Publish.
Select SCORM (basic) as output.
To learn how to create a SCORM layout, see Create a Layout.
For details on the SCORM layout settings, see SCORM Layout Editor Options.
To learn how to publish content, see Publish Content.
Adjust the publishing settings:
Languages - Choose which languages to publish. Paligo will create a separate zip file output for each language.
Profiling attributes - If you have used profiling (filters), choose which filters and values to include in the output.
Variables - If you have used variables in your content, choose which variable set to use and which variants (values) to include in the output.
Upload output - If you have Paligo set up to use a publishing integration, choose the service that Paligo will upload the output to, for example, GitHub.
Optional parameters - Use to choose whether Paligo saves the output, includes a log file and link report, and notifies you via email.
Tip
For more details on these settings, see Publish Content.
You can also save your Publishing Settings so that you can select the saved version instead of re-applying all the filters, variables each time. Any settings you save can also be used for Batch Publishing.
Select Publish Document.
Paligo will process the content and apply your layout and publishing settings. The time it takes can vary depending on how much content you are publishing (the more content, the longer time it takes).
When the publishing process is finished, Paligo creates a zip file that downloads in your browser. There is a separate zip file for each language.
Unzip the published content.
Inside the zip file, in the
outfolder, there is another zip file. This is the one you will import.Log into the Moodle sandbox using the supplied test login credentials "admin" / "sandbox".
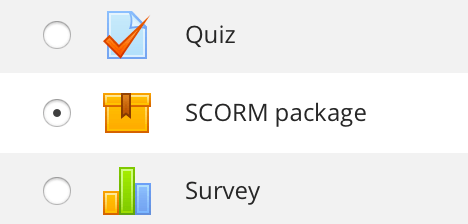
Select Add an activity or resource. Select "SCORM package" in the dialog that pops up:
In the next view, Adding a new SCORM package, give it a name and description.
Drag and drop the zip file in the
outfolder of your published content. Then click Save and display.
Note
The SCORM output contains a simple Table of Contents (TOC). In Moodle, the TOC is auto-created, so you'll have duplicate TOCs. In such a case you would use CSS to hide the included TOC:
div.toc{
  display: none;
}
Other LMS systems do not auto-create the TOC, which is why one is included.
Note
The initial styling is quite basic and is provided by Moodle and also CSS that's included in the Paligo conversion. Whatever LMS you publish to, you will need a customization to make it look good.
The zip file that Paligo generates for eLearning outputs is designed to be uploaded to a learning management system (LMS). There are many different LMS applications available and the procedure for uploading course content to them can vary. We recommend that you refer to the documentation for your LMS for details on how to upload courses.
Note
If you are unable to find suitable information and need further assistance, please contact Paligo customer support.