Tables
Move Row or Column
You can move entire tables by moving the table or informaltable element in the same way as other block elements (see Move Elements). But to move columns or rows, you need to take a different approach:
Columns
To move a column, use the Table Context Menu, see Move Rows or Columns with Table Context Menu.
Rows
There are several ways to move rows in a table. For instructions, see:
To make it easier to rearrange a table, you can select multiple columns or rows at once. For details, see Select Multiple Columns or Rows.
Move Rows or Columns with Table Context Menu
To move a table row or column with the Table Context Menu:
Select the topic or component in the Content Manager to open it in the Editor.

Alternatively, you can Create a Topic and edit that.
Position the cursor in the row or column that you want to move.
Right-click in the table to display the Table Context Menu.
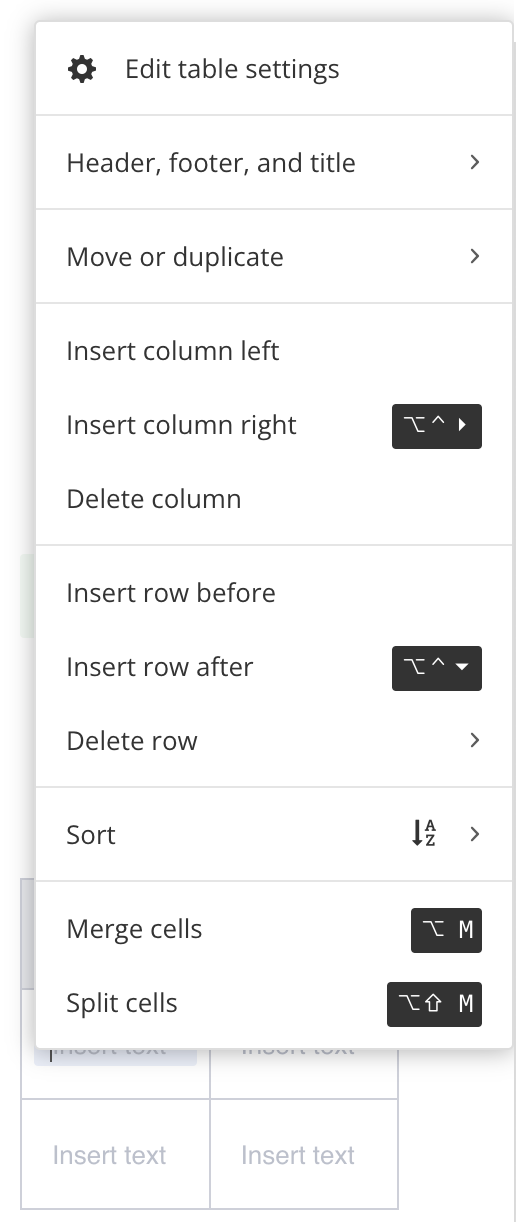
Select Move or duplicate and choose:
Move column right
Move column left
Move row up
Move row down
Paligo moves the row or column.
Select Save.

Move Rows with Keyboard Shortcuts
When you are moving block elements, it's important to note that you can only move an element up or down at the same level in the overall topic structure. This is by design, as it ensures that you do not move elements into positions where they are not allowed. For example, you can move a step in a procedure up or down in the procedure order, but you cannot move the step outside of the procedure.
You can use keyboard shortcuts to move table rows up or down.
Place the cursor in a table cell in the row you want to move.
The cursor must be in the
td. Not theparaor any other element inside the cell. Important
Use the Element Structure Menu to see that you have the cursor in the correct position. The
tdelement should be the last element on the right.Use the keyboard shortcuts to move the element.
Move up is Alt + Shift + ↑ (Windows) or Option ⌥ + Shift ⇧ + ↑ (Mac).
Move down is Alt + Shift + ↓ (Windows) or Option ⌥ + Shift ⇧ + ↓ (Mac).
Select Save.
Move Rows with XML Tree View
You can use the XML Tree View to move table rows:
To another position in the same table
Into a different table inside the topic.
Note that you can only use the XML Tree View to move rows, you cannot move columns or individual cells.
To move a table:
Open a topic in the editor and select the XML Tree View in the side panel.
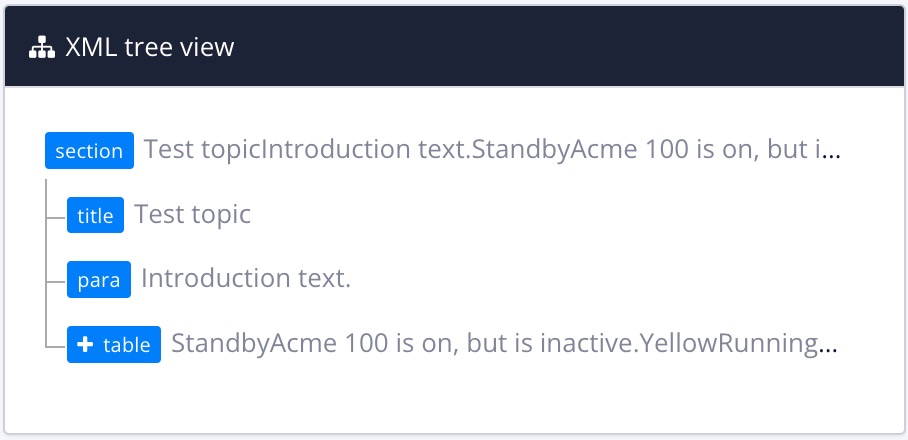
The XML Tree View shows the main elements in your topic as blue boxes, arranged in a hierarchy that matches the structure. Any box with a white cross has lower-level content. If you select the white plus icon, the tree expands to show the lower levels.
Expand the tree to locate the table block until you can see the table rows (
tr).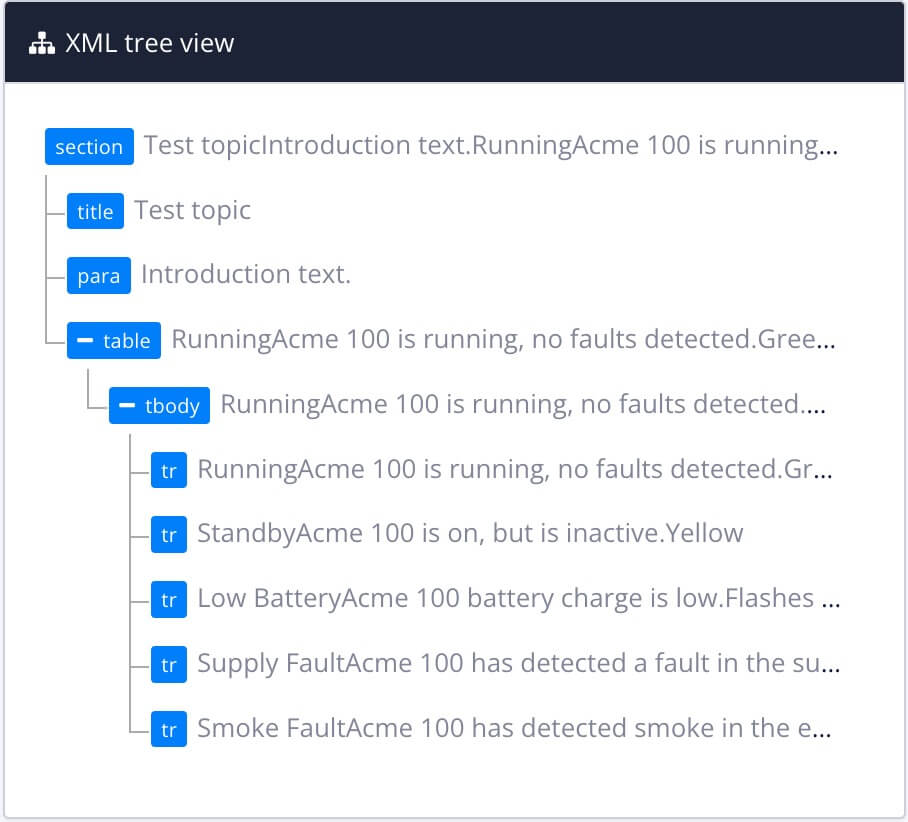
Select a table row and drag it to a new location in the XML Tree View.
NotePaligo will only let you move it to another valid position, so you can move it to another position in the current table or you can move it into a different table.
Select Save.