Connect Paligo to Salesforce Knowledge
Learn how to set up Paligo's integration settings for Salesforce Knowledge.
Before you start setting up the Paligo integration, make sure that you have configured your Salesforce Instance as described in Preparations for Salesforce Integration. When you have done that, you can set up the Salesforce integration in Paligo. You will then be able to publish from Paligo to Salesforce and use Paligo to delete Salesforce content remotely.
For the Paligo to Salesforce connection setup, there are quite a number of tasks to complete, so we have divided them into separate stages.
To connect to Salesforce, Paligo needs various details, including the user credentials and a security token. To get the credentials and security token, it can be easier to switch from Salesforce's Lightning Experience interface to the Classic interface.
Note
If you are publishing to a Salesforce sandbox and a Salesforce production instance, you need separate user credentials for each instance. Also, you must include both sets of user credentials, even if you are only publishing to the sandbox.
Do not copy the user credentials for one instance into the settings for another instance. You need separate user credentials, including separate tokens, for each instance.
Using the Classic interface:
Make sure the "Permission API" is enabled in your Salesforce account. This is normally enabled by default, but if not, you can set it under Setup at Users > Profiles.
Get the user credentials for Salesforce that you want to use to connect the integration.
Note
We recommend that you create a separate user for this purpose. This can be especially important so that you are not dependent on a single user that may leave your company.
Get the security token. You may have received this when you created your Salesforce account. But if you don't have it, you can generate a new one:
In Salesforce, select your profile in the top-right corner.
Choose Settings.
In the Quick find field, search for "token" and then select Reset Security Token. A new security token is sent to you by email.
You will need the user credentials and security token in stage 4, when you add the integration settings in Paligo.
Next, you need to set up the API field.
You need to get an API field name as this is another setting that is needed for the Paligo-to-Salesforce integration.
Go to Setup in Salesforce.
Search for Object Manager in the quick find, and select it.
In the Object Manager, select Knowledge.
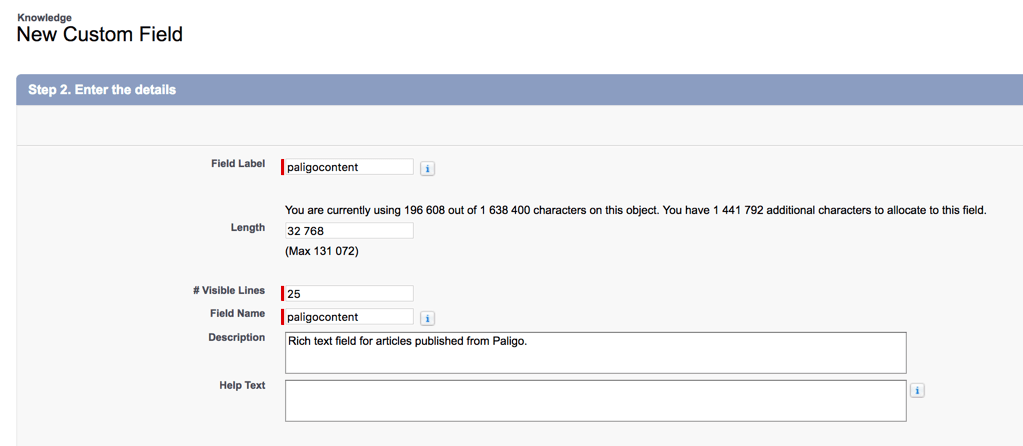
Create a Rich Text Field.
Select Fields and Relationships.
Select New.
Select Text Area (Rich).
Select Next.
Fill out the fields:
(You can choose a different name if you want to)
Note
If you're going to publish large articles, increase the Length to its max value. If the length is too small, it can result in an error when you publish.
Select Next.
Leave the next screen as is by default. Select Next.
On the next screen, uncheck all boxes. We will add this field to a new Article type/Page layout later.
Select Save.
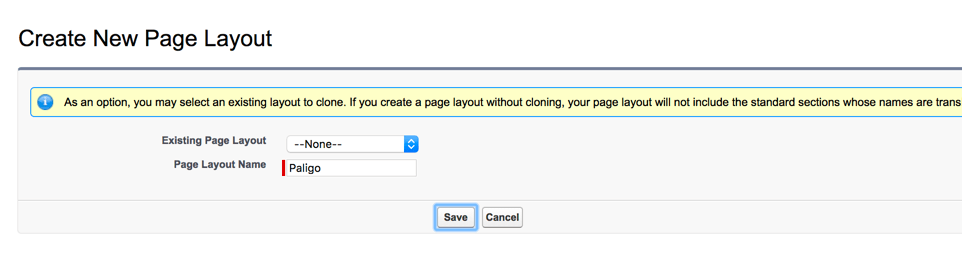
If you do not have an existing Page Layout you want to publish to, you can create a new one.
Select Save.
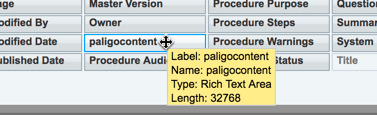
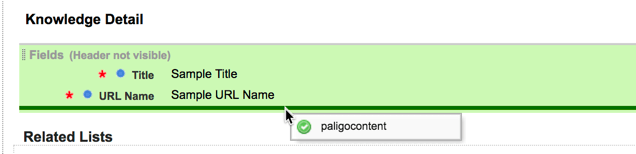
Drag your Rich Text field to the Knowledge Detail area:
Create a new record type:
Select Record Types in the left menu of the Object Manager.
Select New.
Fill in the fields something like below, but again you can choose your name:
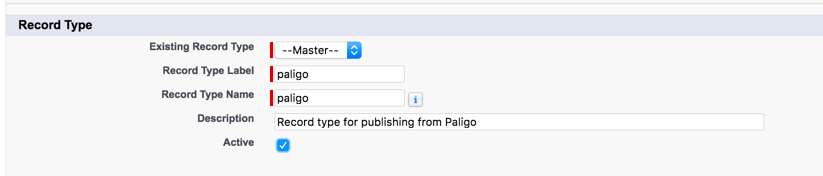
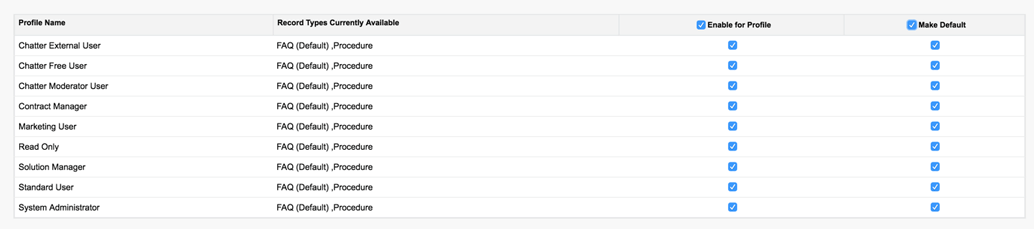
If you want to enable it for everyone, check all the boxes. You also need to make it the default record type for Paligo to be able to publish to it.
Select Next.
Select the Page Layout you want to use.

Select Save.
Get the API field content for the Paligo settings:
Select Fields & Relationships.
Find your Rich Text field and make a note of the field name. You will need the field name when you add the integration settings in Paligo.

Next, you need to create a connected app in Salesforce.
To connect Paligo to Salesforce, you need to have a connected app in Salesforce.
Go to Setup.
Enter "oauth" in the Quick Find box and select OAuth and OpenID Connect Settings.
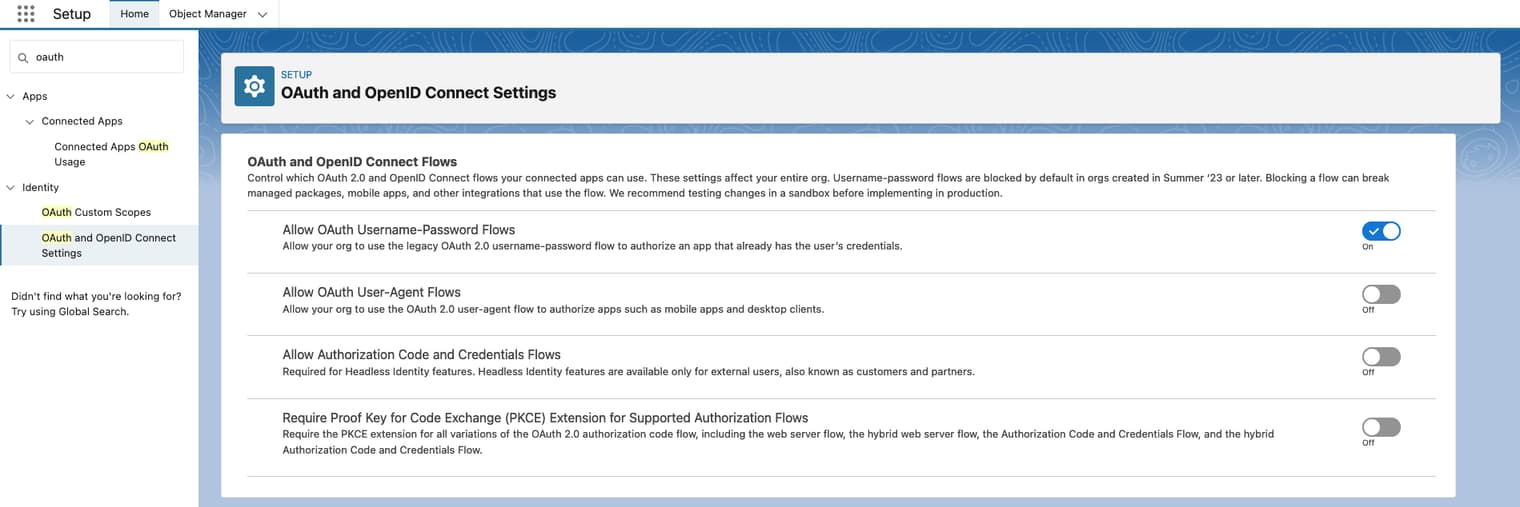
Select the the slider Allow OAuth Username-Password Flows to enable it.
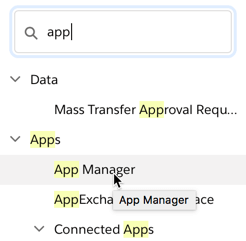
Enter "app" in the Quick Find box and select App Manager.
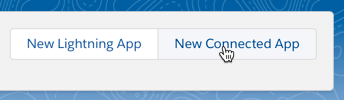
Create a New Connected App.
Enter a name for the app, for example,
Paligo. The API name is filled in automatically.Enter a contact email address.
Select Enable OAuth Settings.
In the Callback URL field, enter
https://login.salesforce.com/services/oauth2/callback.In the list of Available OAuth Scopes, add Full Access (full) to the Selected OAuth Scopes.
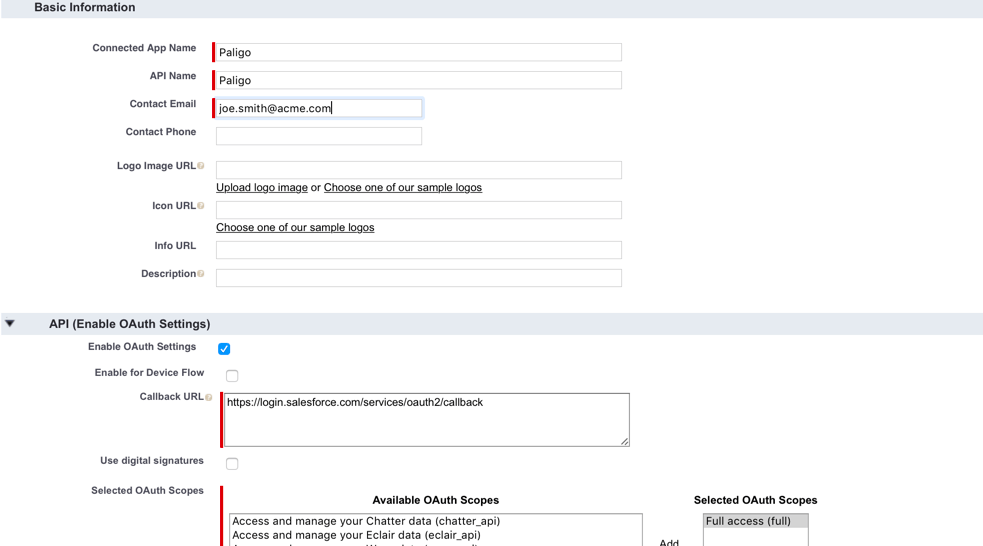
Select Save.
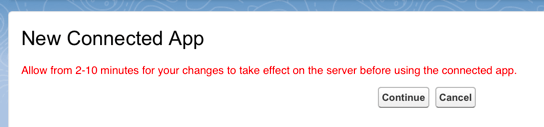
It takes up to 10 minutes before the app is ready to be used in Salesforce.
Make a note of the Consumer Key and Consumer Secret as you will need to add these to the integration settings in Paligo.
Next, you can add the Salesforce integration details to Paligo.
When you have completed stages 1-3 inclusive in Salesforce, add the integration details to Paligo.
Important
If you are going to use a Salesforce sandbox instance:
Complete the connection details for the production instance. Paligo needs these settings to be in place, even if you don't intend to publish to a production instance.
Complete the connection details for the sandbox instance in the dedicated Sandbox section. Only enter details for a sandbox instance in the dedicated sandbox section.
You need to complete both sets of settings. Paligo needs the connection details for the production instance and the sandbox, even if you only intend to publish to the sandbox.
Sign in to Paligo using a user account that has administrator permissions.
Select the avatar in the top-right corner.

Select Settings from the menu.

Select the Integrations and webhooks tab.

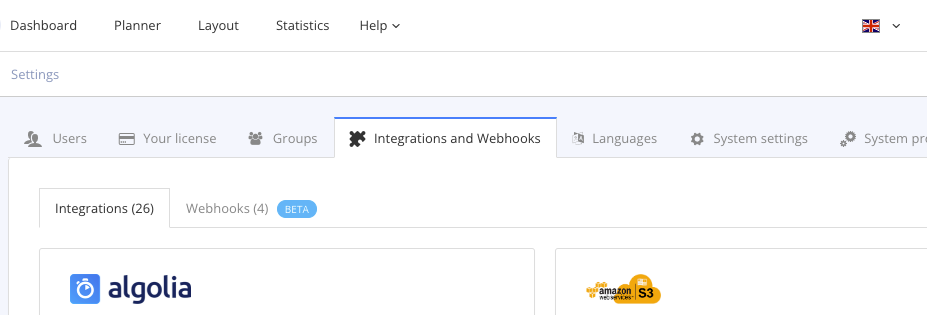
Select Add or Change for the Salesforce integration.
Enter the Username and Password from Salesforce Knowledge.
These need to be details for your production environment. Do not enter details for a sandbox environment here.
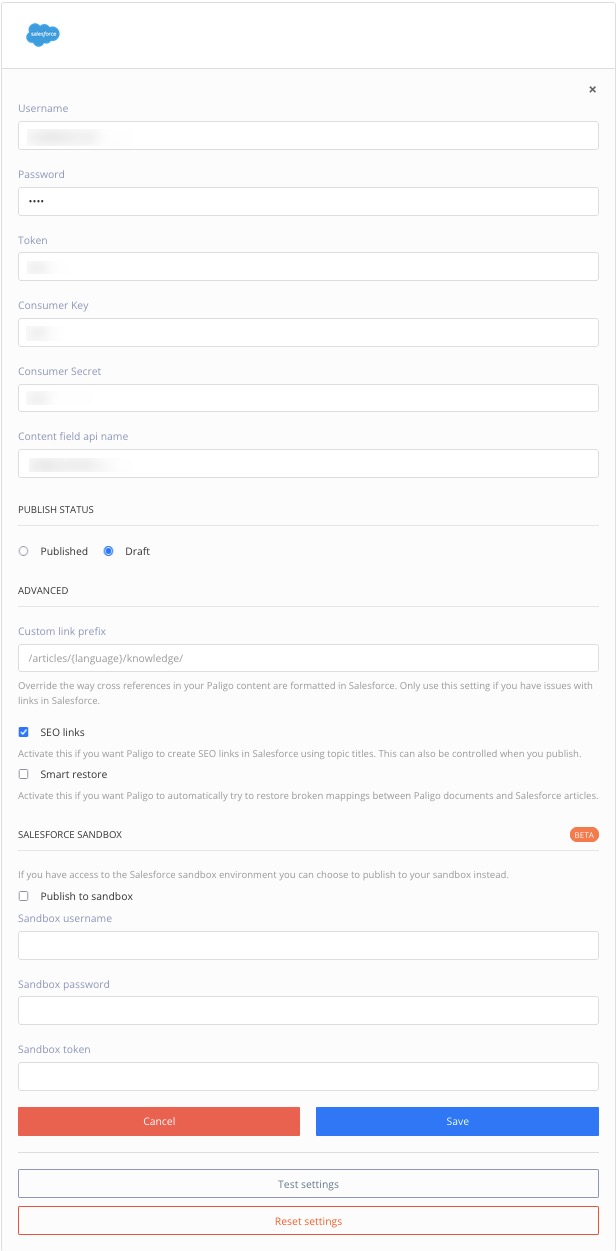
Add the security Token from Salesforce Knowledge.
Add the Consumer Key and Consumer Secret.
Add the rich text field name in the Content field API name field.
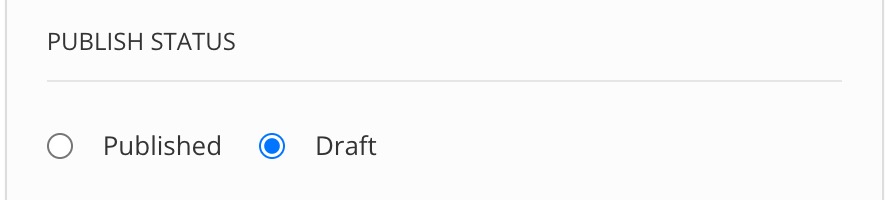
Choose whether you want Paligo to publish content as Draft or Published articles.
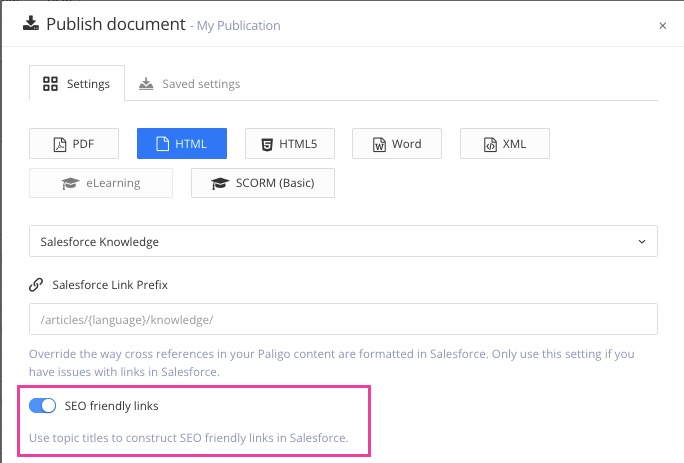
Use the Custom link prefix field to customize the URLs.
By default, Paligo uses this syntax for article URLs:
my-instance.force.com/If your articles use this syntax, leave the Custom link prefix field empty.
If you want to use a different URL structure, enter the required syntax in the Custom link prefix field. For example, if your articles are in an "sa" directory, enter:
my-instance.force.com/sa/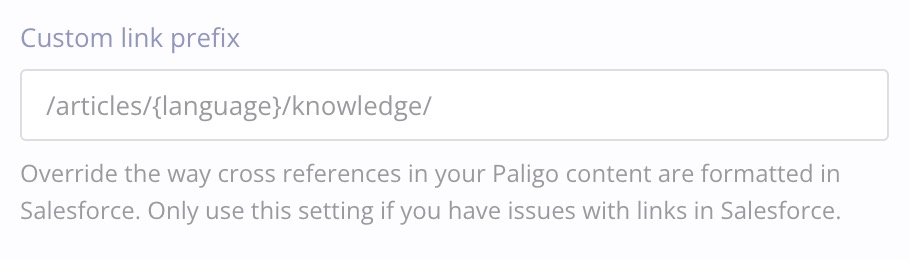
Note
Paligo will use the custom link prefix automatically each time you publish from Paligo to Salesforce. But it can be overridden by another custom link prefix that you can enter in the publishing settings, see Publish to Salesforce Knowledge.
Check the SEO links box to set Paligo to create URLs that are based on each topic's title. When you publish, Paligo will create article URLs in Salesforce that are more descriptive and better for SEO.
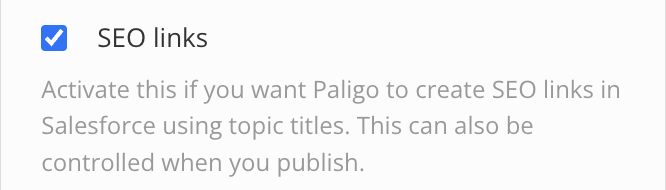
If you clear the SEO links box , Paligo will generate article URLs based on the UUID of the topics. This creates a URL that contains a number and is less descriptive.
The SEO links is a global setting that acts as the default for all content you publish to Salesforce Knowledge. But you can override it when you publish by using the SEO friendly links option on the Publish document dialog.
Note
There are certain characters that are not allowed in Salesforce URL names. If you use any of these characters, they will be filtered out when the URLs are created. Paligo will then ignore this setting and return to using default UUID.
Ignore the Smart restore box. This feature is being gradually retired. Use the Match articles based on URL setting to fix broken mapping instead (see Fix Broken Mapping for Salesforce).
Check the Automatically populate summary fields with abstracts if you want content contained in the
abstracttag to be rendered as Summary in Salesforce.Choose whether Paligo will update the URL fields of your articles when you publish to Salesforce:
Check the Always update URL Name Fields box to allow Paligo to create new URLs and change existing ones in Salesforce Knowledge. It will create URLs based on the UUID or title of mapped topics, depending on how you have set SEO links (see step 13) and SEO Friendly Links in the publishing settings (see Publish to Salesforce Knowledge).
Paligo can only update the URLs of articles that map to topics in Paligo.
Clear the Always Update URL Name Fields box to prevent Paligo from changing URLs for articles. It can only generate URLs for new articles that it is publishing to Salesforce Knowledge for the first time.
If you want to publish to a Salesforce sandbox environment instead of your production environment:
Check the Publish to sandbox box.
Uncheck the box if you want to switch back to publishing to the production Salesforce Knowledge.
Enter the connection details for the sandbox environment. These are the Sandbox Username, Sandbox Password, and Sandbox Token (security token).
Note
The user in the sandbox instance does not have to be a user in the production instance as well.
When the settings are in place, Paligo will publish to your sandbox if Publish to sandbox is checked. It will publish to your production Salesforce Knowledge if Publish to sandbox is unchecked .
Select Save.
Select the Change button for the integration.
Select Test Settings to run a connection test.
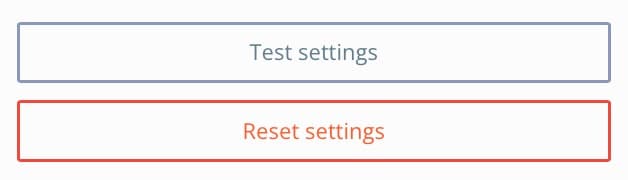
If the settings are:
Correct, Paligo shows a green success notification.
Incorrect, Paligo shows a red failure notification.
Check each connection setting carefully, to make sure you have not made any mistakes and try again.
If the connection test continues to fail, contact Paligo support for assistance.
You should now be able to publish from Paligo to Salesforce Knowledge. You can use the built-in Salesforce Knowledge Layout or Salesforce Nested Layout or you can create your own.
For instructions on how to publish from Paligo to Salesforce Knowledge, see Publish to Salesforce Knowledge.
Note
When you publish articles as drafts in Salesforce, they will have basic formatting. To make them more visually appealing, you can set up Salesforce to publish the articles to a Salesforce Community that uses a help center theme.
The " Lightning experience" view in Salesforce may be inconsistent in how it presents draft articles. If you do not see them in that view, switch to "Classic mode" and choose to view draft articles.