Create a Topic Branch
You can create a branch directly from a topic in the Content Manager. This way of branching creates a new branched topic that is independent. An independent topic only appears in the Content Manager as a topic, it is not available as a fork of a publication as it has not been added to a publication's structure. You will need to manually add the branched topic to your publication structures.
This is useful when:
You want to update a topic but you still need to be able to publish the original version as part of an existing publication.
You intend to use the branched topic in many publications.
By branching the topic directly, you create one branched topic that you can manually add to as many publications as you like. The same branched topic is reused. If you branch from a publication fork instead, you would have separate branched topics for each publication, which can be less efficient (see Create a Topic Branch from a Fork).
When you branch a topic, it is possible to auto-branch reused components. For more information on topic auto-branching, see Auto-branching topics below.
To create an independent branch of a topic:
Note
You can create a branch from another branch if Consecutive branching is enabled in the system settings. If it is disabled, you can only create a branch from the original version of a publication or topic. For details, see Select Branching Mode.
Locate the topic in the Content Manager.

Important
Find the topic and not the publication fork to the topic. To learn about the difference, see Topic or Fork.
Select the dotted menu ( ... ) for the topic.
Select Branching and then select New branch.

Enter a branch Label. This label will appear next to the name and makes it easier to identify different branches of the same content. [Optional, but recommended].
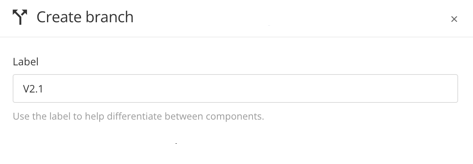
Tip
You can add branch labels afterwards as well, see Add or Edit Branch Labels
To control where Paligo stores the new branched content, check the Select location for new branch box. You can then browse to the folder you want Paligo to use.

If you leave Select location for new branch unchecked, Paligo will add the branched content to the same folder as the parent version of the content.
Choose whether you want to Open new branch in editor. Check the box for yes or leave it clear for no.
Select Create.
Paligo creates a new branch of the topic and adds it in the appropriate location (either the location you specified or the same folder as the original version of the topic). You can now edit the branched topic.
Tip
To find out more, see What Happens When You Create a Branch?.
Note
Auto-branching for topics is only available if your Paligo instance has the appropriate module switched on. For information about using the module, please contact customer support.
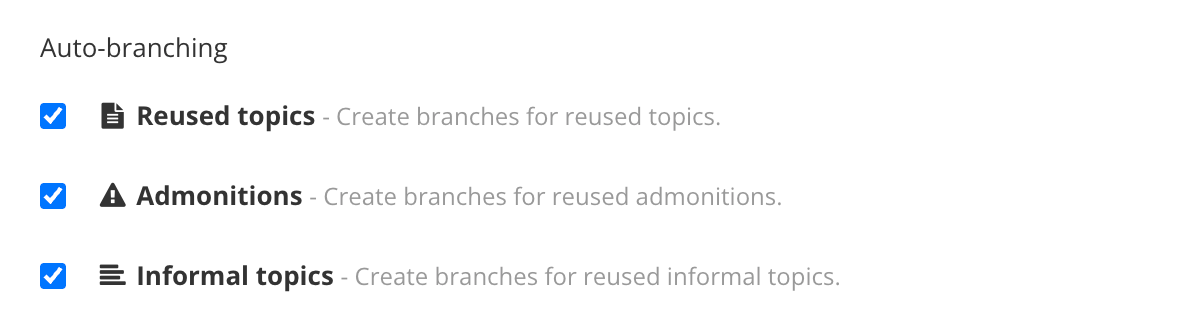
When you create a branch of a topic, you have the possibility to automatically auto-branch components that are reused within the topic. Auto-branching can include the following:
Reused topics
Admonitions (only those admonitions that are reusable components)
Informal topics
Note
You can only auto-branch reused topics, admonitions and informal topics when creating a branch of a topic. Using the auto-branch feature when branching publications will not create automatically create branches for these components.
Locate the topic in the Content Manager.
Select the dotted menu ( ... ) for the topic.
Select Branching and then select New branch.
Enter a branch Label. This label will appear next to the name and makes it easier to identify different branches of the same content. [Optional, but recommended].
Tip
You can add branch labels afterwards as well, see Add or Edit Branch Labels
Choose whether or not you want to apply the branch label to all branched components.

To control where Paligo stores the new branched content, check the Select location for new branch box. You can then browse to the folder you want Paligo to use.
If you leave Select location for new branch unchecked, Paligo will add the branched content to the same folder as the parent version of the content.
Select the reused components you want to auto-branch.
Choose whether you want to Open new branch in editor. Check the box for yes or leave it clear for no.
Select Create.