Fluid Topics Integration
Fluid Topics is software that is designed to provide a single portal for all of your documentation, including PDFs, Word documents, knowledge base articles and content you create in Paligo too.
To use your Paligo content in Fluid Topics, you will need:
A Fluid Topics account with administrator permissions
A source set up in Fluid Topics. The source is a "silo" that will receive the content from Paligo.
An API key, generated in Fluid Topics.
Note
For details on how to set these up in Fluid Topics, refer to the Fluid Topics documentation.
If you connect Paligo to Fluid Topics you can publish directly to your Fluid Topics instance.
Note
If your Fluid Topics has been connected to your Paligo instance before, you may already have a source and API key, in which case, you can use those instead of creating new ones.
Log in to Fluid Topics as an administrator to create a new source ID and generate a new API key.
The source is the "silo" that will receive the content from Paligo. Fluid Topics uses the API key to authenticate the connection from Paligo.
For details on creating a source and generating an API key, see the Fluid Topics documentation.
Sign in to Paligo using a user account that has administrator permissions.
Select the avatar in the top-right corner.

Select Settings from the menu.

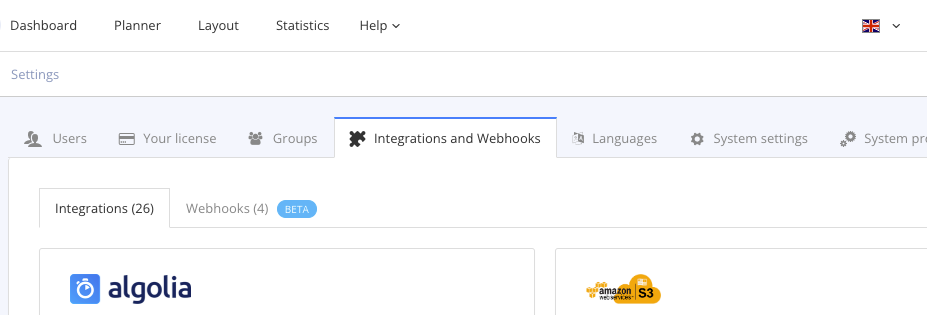
Select the Integrations and webhooks tab.

Select Add in the Fluid Topics box.
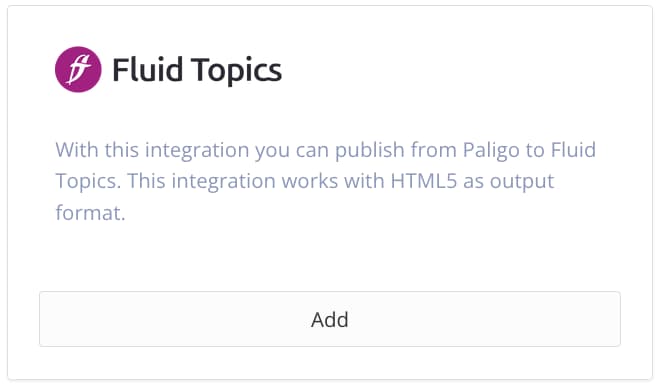
If the integration is set up already, there is a Change button instead.
Enter the Account name.
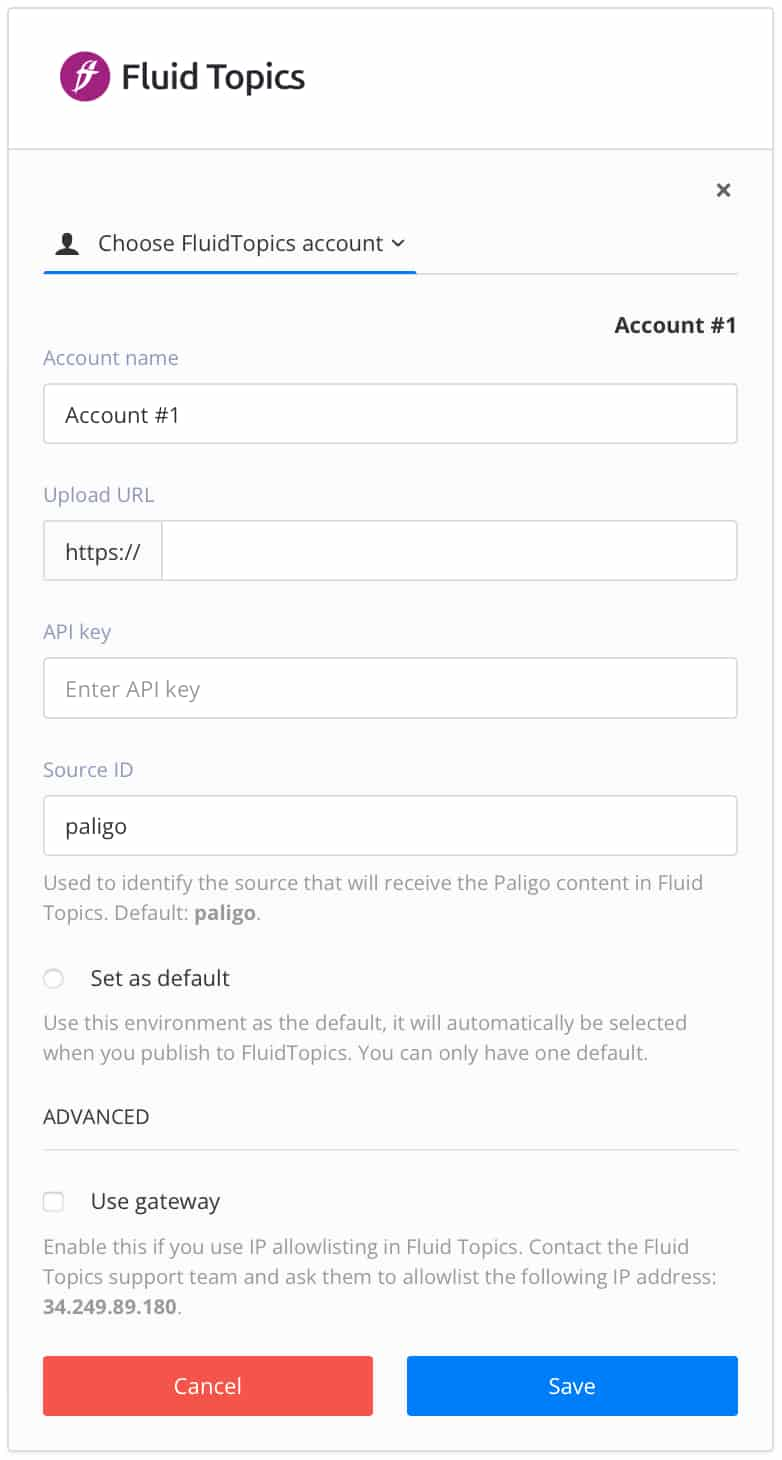
Enter the Upload URL of the Fluid Topics portal that will receive content from Paligo.
Enter the API key created in step 2.
Enter the Source ID created in step 2.
Fluid Topics uses the Source ID to identify the "silo" that will receive the Paligo content. It also uses the Source ID to identify the type of content being received.
Select Save.
Check the box Use gateway to enable IP Allowlisting. Optional
If you have IP restrictions enabled in Fluid Topics, you need to set Paligo to use a static IP address (via a gateway).
Provide Fluid Topics support with Paligo's IP address 34.249.89.180 to allowlist it. Optional
This will enable Paligo to publish to Fluid Topics even if "IP restrictions" are enabled.
Select Save.
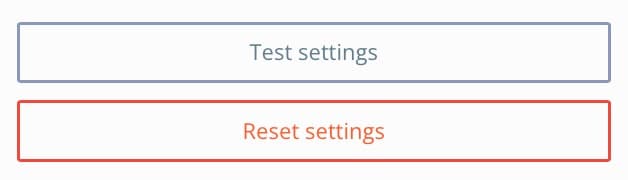
Select the Change button for the integration.
Select Test Settings to run a connection test.
If the settings are:
Correct, Paligo shows a green success notification.
Incorrect, Paligo shows a red failure notification.
Check each connection setting carefully, to make sure you have not made any mistakes and try again.
If the connection test continues to fail, contact Paligo support for assistance.
To publish content from Paligo to Fluid Topics, you must first set up the Paligo to Fluid Topics connection. When that is in place, you can publish content from Paligo to Fluid Topics, and unlike some of the other integrations, there is no need for a layout.
When you publish with the Fluid Topics output, a zip file of your output is sent to Fluid Topics, where it is processed and added to the relevant source. You specify the source in the Paligo integration settings.
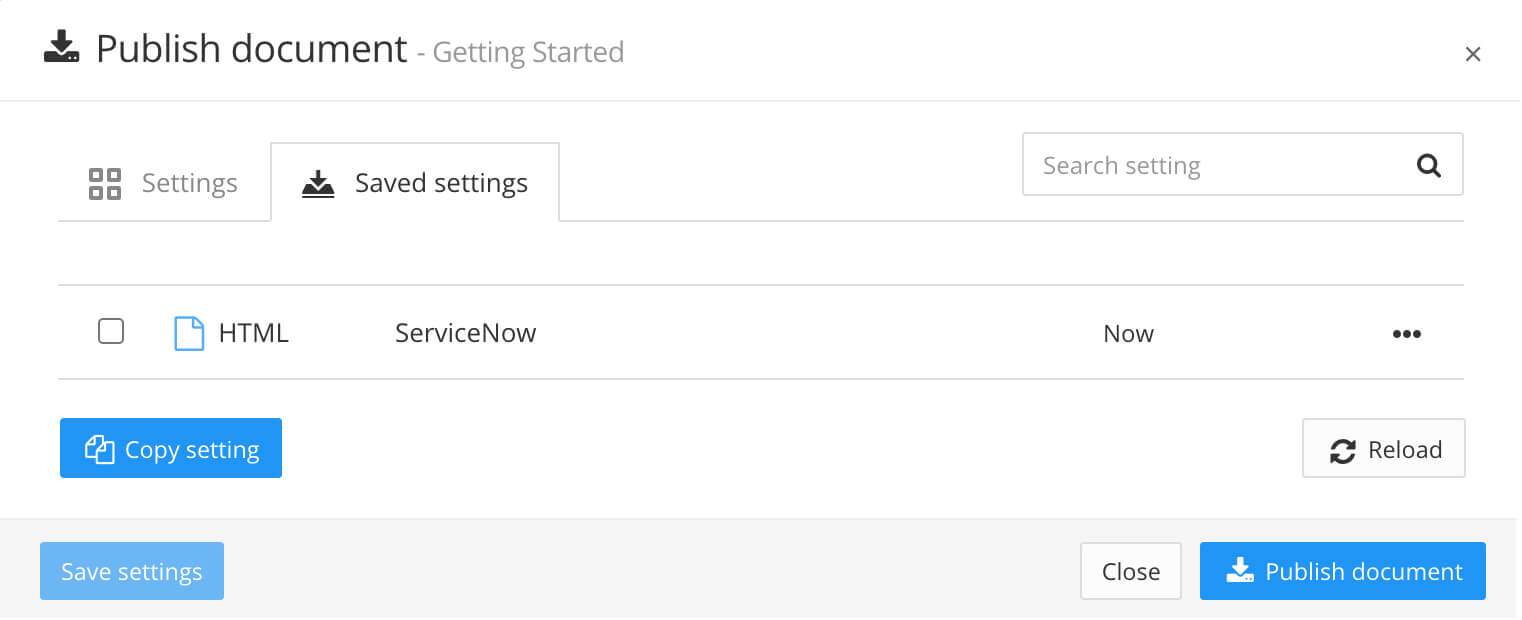
Select the dotted menu (...) for the topic or publication in the Content Manager.
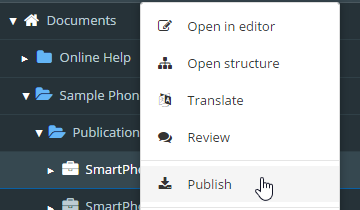
Select Publish.
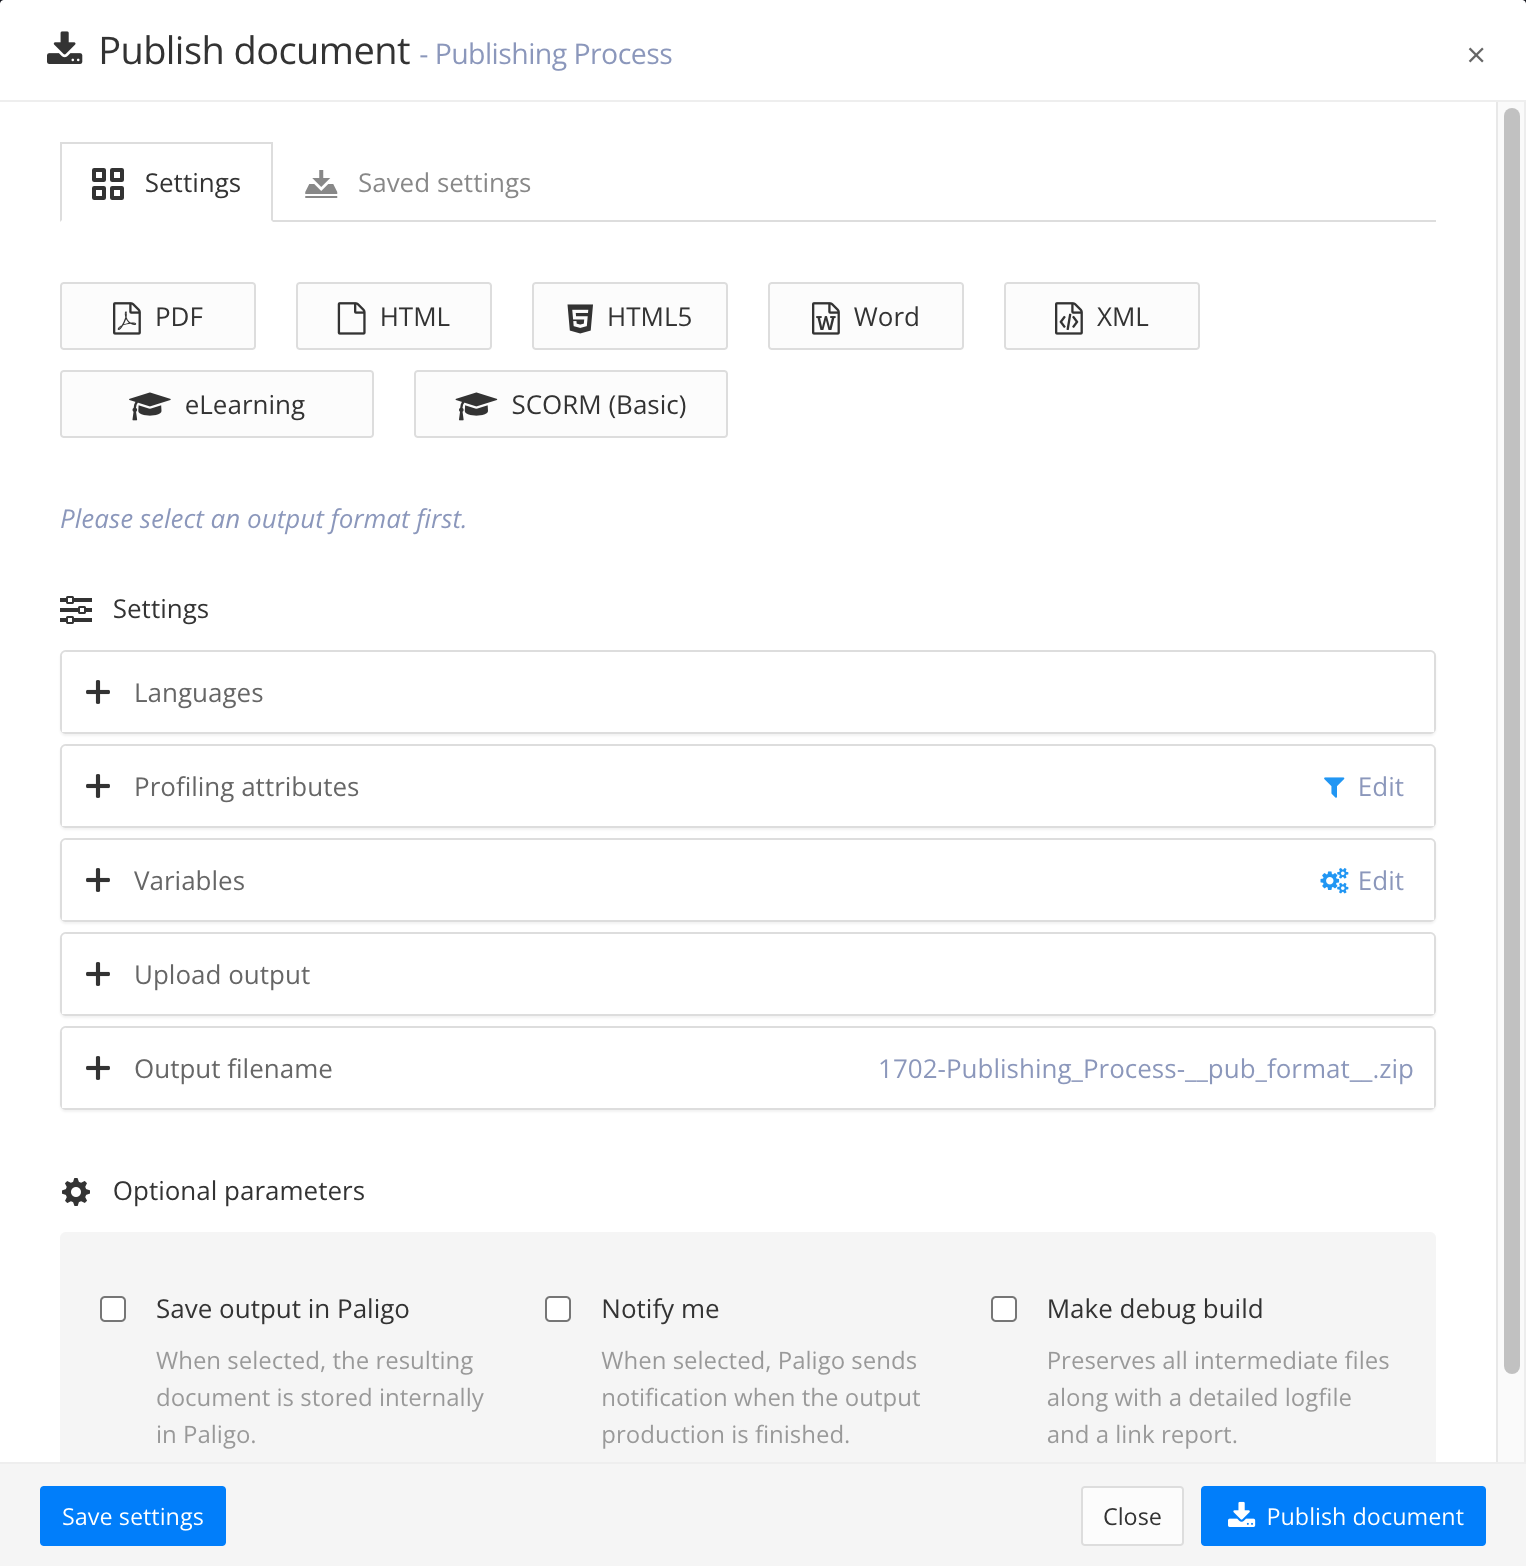
Paligo displays the Publish document dialog.
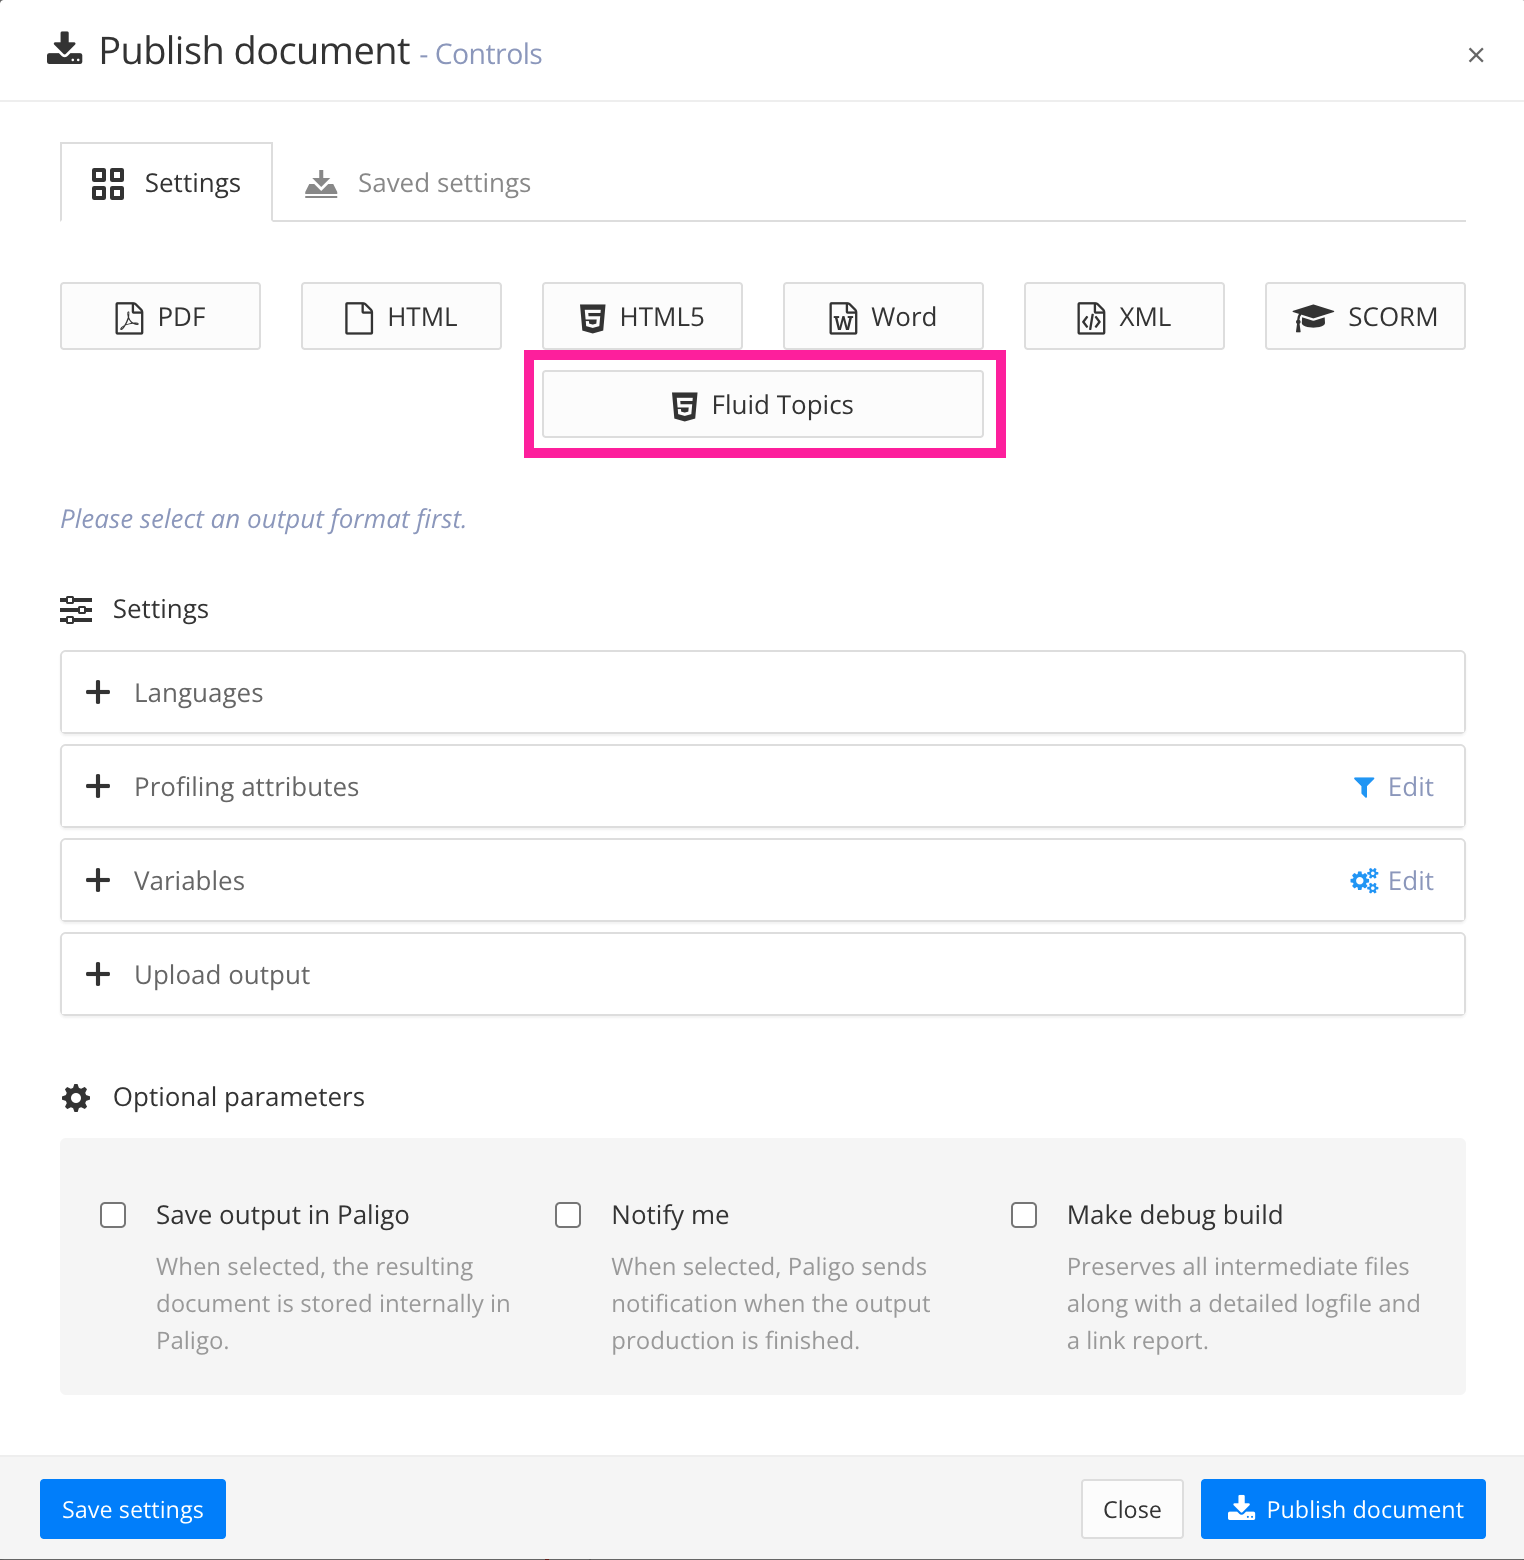
Select Fluid Topics.
Note
If the Fluid Topics option is not shown, check that Paligo can connect to Fluid Topics. The Fluid Topics option only shows when the connection is set up correctly.
Select the languages to be published.
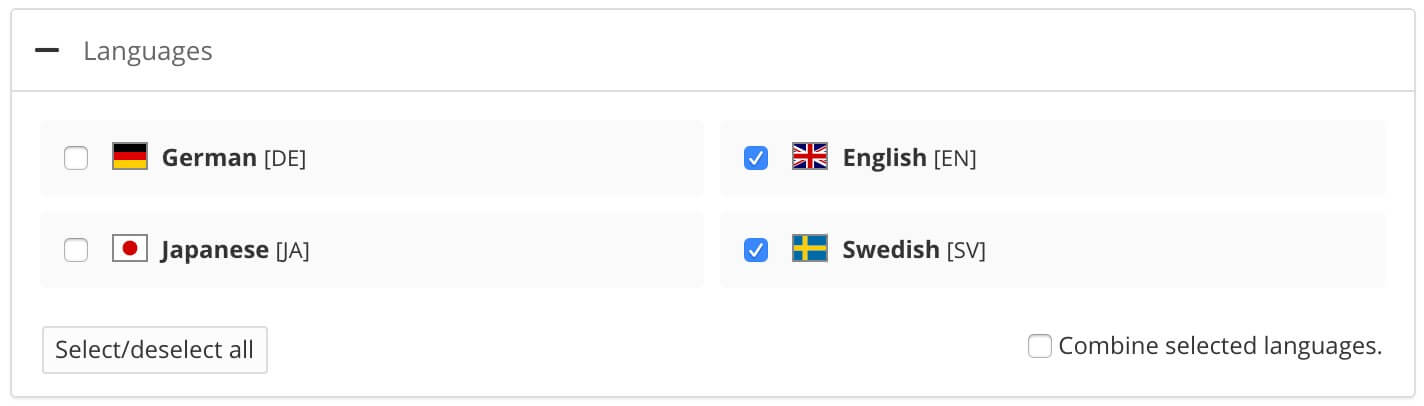
Note
If no translations are available, only the Source Language will show. If you have multiple languages translated and approved, you can select which ones to include. Paligo will publish each language as a separate output.
For PDF output you can publish them as one multilingual publication, check the Combine selected languages box.
If your content is set up to use Filtering / Profiling, use the Profiling attributes section to apply them. [Optional]. If you do not use filtering, ignore this setting.
Select Edit and then choose the value for each filter that you want Paligo to use. For example, for Audience, choose Expert to include content that is marked as for expert users.
If you do not want to apply a filter, leave the field blank.
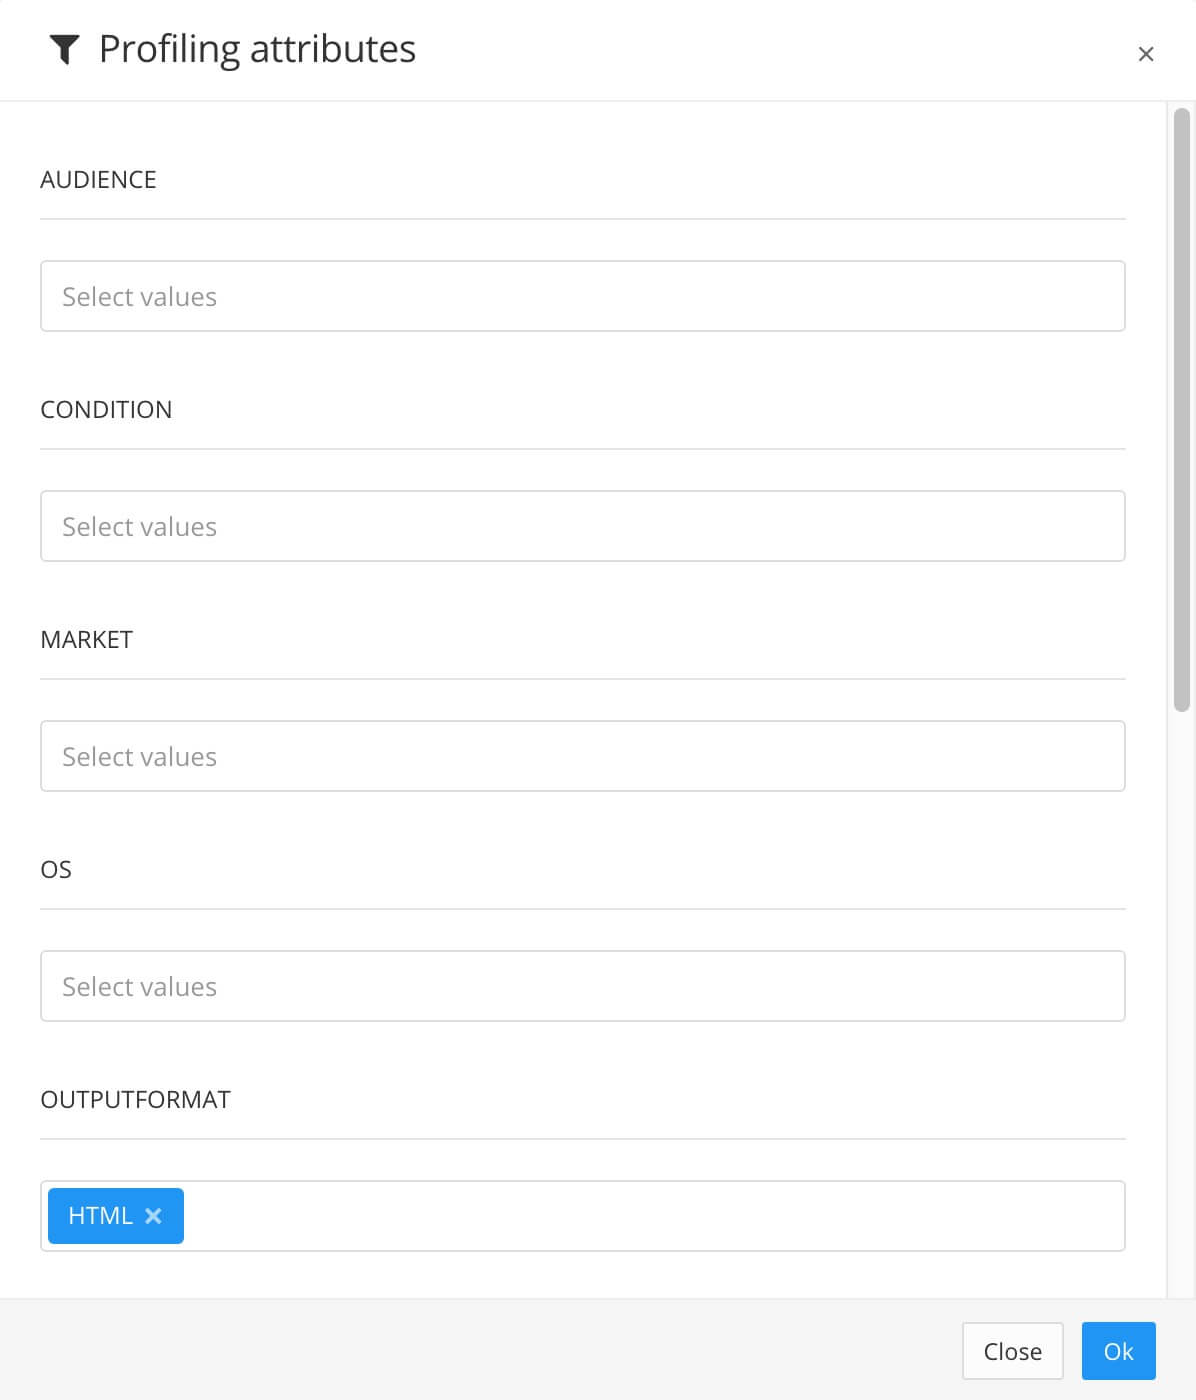
Select OK to add your chosen profiling attribute(s).

If your content is set up to use Variables , choose which variants to apply (optional).
Select Edit and then for each variable, choose the variant (value) that Paligo should apply to your publication.
If you do not want to apply a variable, leave the field blank.
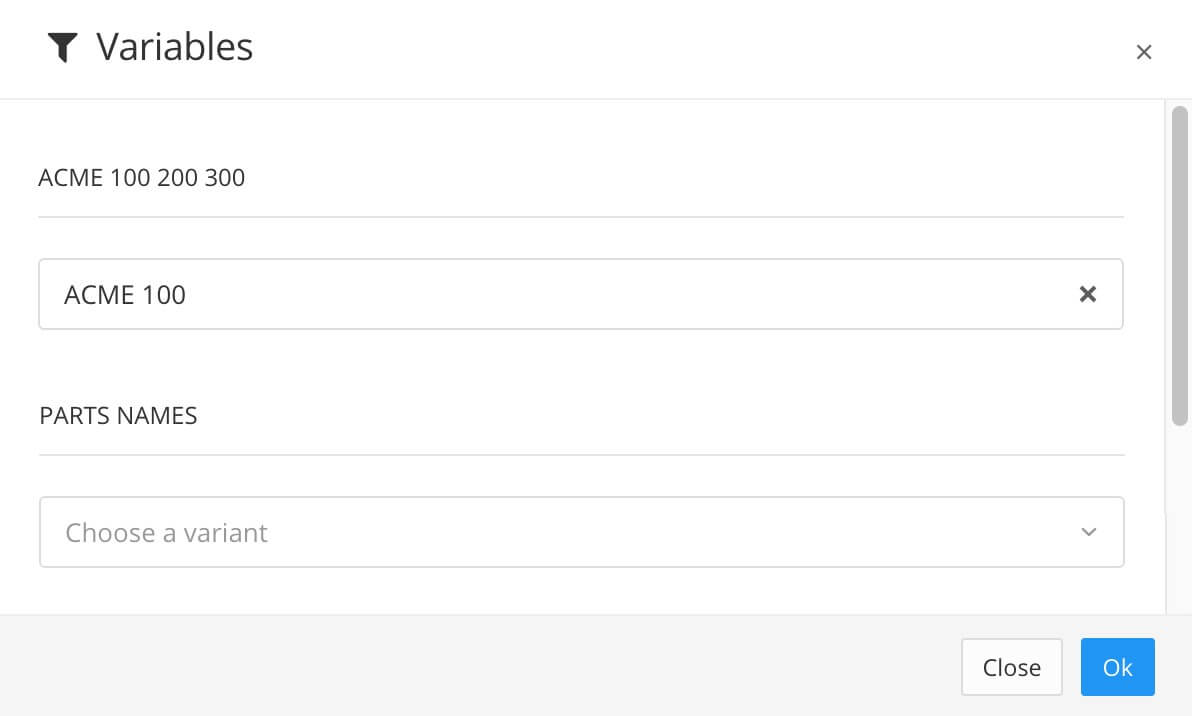
Select OK to add the selected variables.

Use the Upload output section to upload a zip file of the content to a repository, see Integrations.
Use the Output filename section to control the filename.
By default, Paligo will use the filename syntax that is defined in the System Settings.
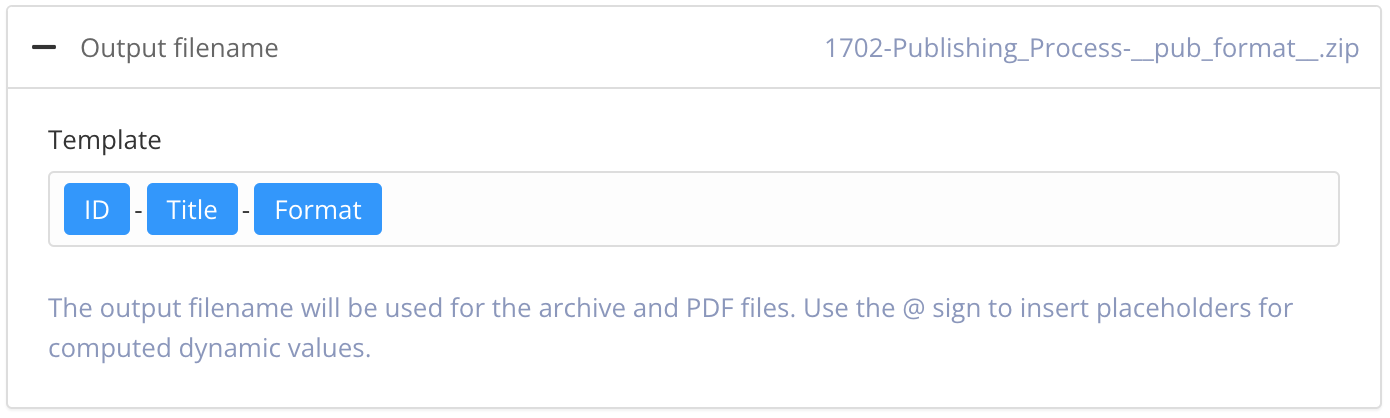
To change the information included in the filename, enter your preferred format in the publishing settings. Default is:
ID-Title-Format.You can use:
ID - The ID of the document.
Title - The title of the publication or topic that you are publishing.
Format - The name of the output format, for example, PDF or HTML5.
Edit date - The date that the publication or topic was last edited.
Branch label - The text from the branch label for the publication or topic. This only applies if your content has been branched and it has a branch label. For details, see Add or Edit Branch Labels.
Unique value - A random string of characters, generated by Paligo, that is added to the filename to make it unique. This can stop the file from being overwritten by later publishes of the same document.
Tip
If you type @ into the field, Paligo displays a list of the available values and you can select from the list. To remove a value, click in it and use the delete key or backspace key to remove all of its characters.
Note
The filename shown in the top-right corner is a preview of the filename that Paligo will use when you publish.
Set the Optional Parameters (leave unchecked if you do not want these features):
Save the output in Paligo - Check the box to save the zip file that Paligo creates when you publish. The zip file will be available from the Resource View and you can download it from the Saved Outputs tab. Clear the box if you don't want Paligo to store the zip file.
Notify me - Check this box if you want Paligo to send you an email when the publication is ready. This is useful if you have very large publications that can take a longer time to process and publish.
Make debug build - Check this box if you want Paligo to include a log file and link report. If there is an issue with your content, Paligo support may ask you to enable this feature so that they can use the log files to investigate.
Select Publish Document.
Paligo starts processing your content and applies your layout and publishing settings. The time that this takes varies depending on how much content you are publishing (the more content, the longer it takes).
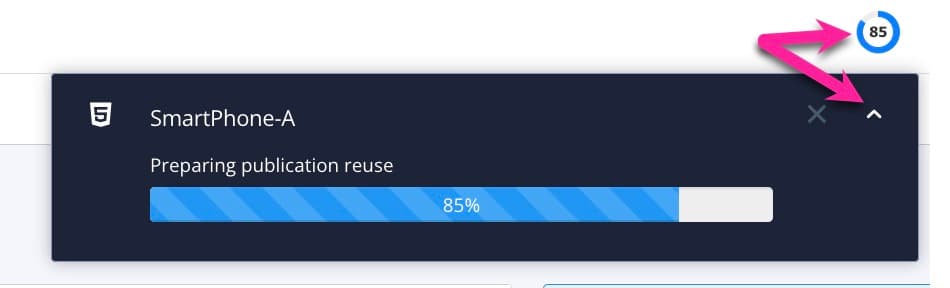
A progress bar appears. Select the arrow to hide the progress bar and reopen it by selecting the progress clock in the top menu. To abort the publish, select the X.
The published output appears as:
A ZIP file with the published output appears in the downloads folder on your computer.
If you have altered your browser's settings to store downloaded files somewhere else, the zip file will be found there instead.
If you are using a publishing integration, the zip file will also be sent to the relevant service.
A link in the Activity Feed Panel to download the published content.
Note
To make the content available online, first unzip the file. You can then use the file locally or you can use an FTP client, such as Filezilla, to upload the unzipped content to a web server.
Tip
You can save your publishing settings and reuse them to achieve a smoother publishing process, see Publishing Settings. Any settings you save can also be used for Batch Publishing.