Checklists in HTML5 Help Center and Zendesk
In HTML5 and Zendesk publications, each list item has a container with a clickable checkbox and a close option that removes the step from view.
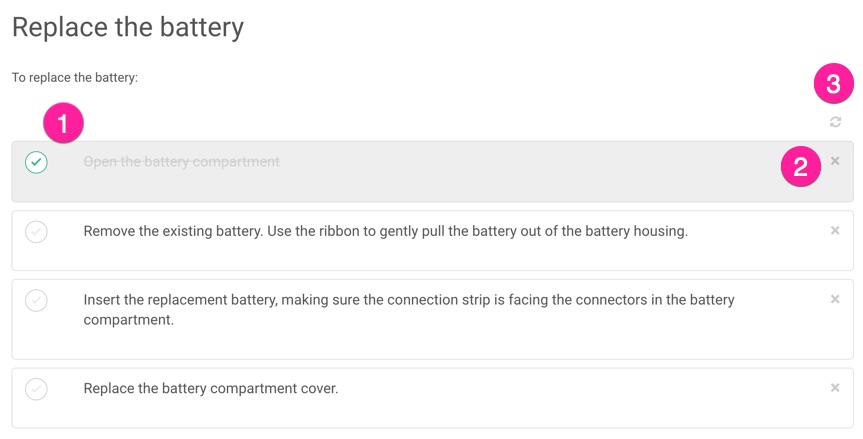
Where (1) is the clickable checkbox, (2) is the close option, and (3) is the refresh option. The refresh option returns the list to its original state, with all boxes unchecked and every checkbox in the list made visible.
To find out how to make your own checklists, see Create a Checklist.
Note
Make sure that your checklist has an
xml:idattribute and value for theitemizedlistroot element. It will only work properly if it has an id. To find out how to generate an id, see IDs for Cross-References. You can also use the Editor Settings to set Paligo to generate ids for all lists automatically.This feature uses JavaScript that, in some browsers like Safari, will only run if published on a web server. So if you test it locally, you may need to try another browser first. But once published, it will work on all modern browsers.
If you are publishing to Zendesk, make sure that in Zendesk's Knowledge Admin settings, the Display unsafe content option is turned on. The HTML tags needed for checklists are not included in Zendesk's list of "safe tags".