Page Preferences (PDF)
When you publish to PDF, Paligo uses the settings in the PDF layout to determine the page size, orientation, and other page-related properties.
To set the page size for a PDF output:
Select Layout in the top menu.

Paligo displays a list of Layouts. The list is empty if there are no custom Layouts in your Paligo instance.
Select the Layout you want to update or Create a Layout.
Tip
You can copy the URL of the Layout Editor and paste it into a new tab in your browser. This can be useful if you frequently switch between your Paligo content and the Layout settings.
Select General in the sidebar.

Select Document in the sidebar.
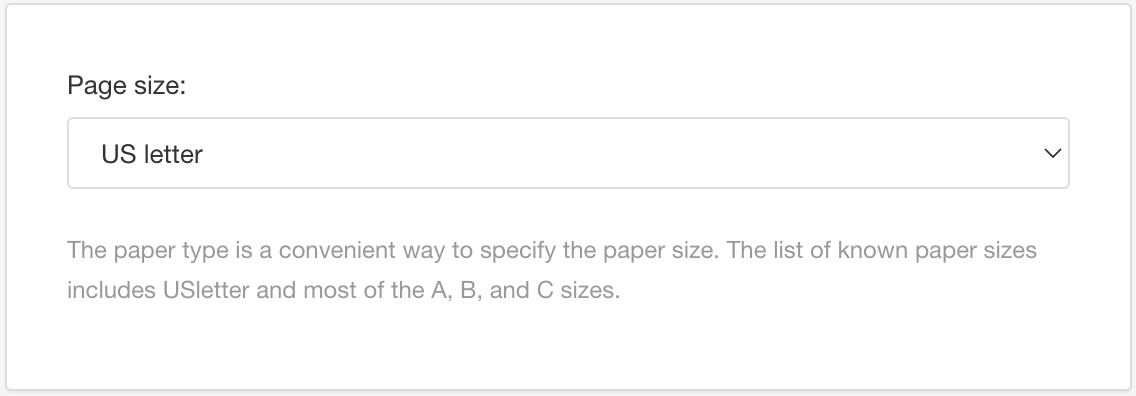
Choose the Page Size from the list, for example, US letter.
Select Save.
When you publish with this PDF layout, Paligo will create a PDF that uses your chosen page size.
By default, Paligo publishes PDFs with a portrait orientation (long edges on left and right, shorter edges on top and bottom), but you can change it to use landscape instead.
Tip
If you only want to rotate individual pages rather than all pages in the PDF, see Rotate a Page (PDF).
Select Layout in the top menu.
Paligo displays a list of Layouts. The list is empty if there are no custom Layouts in your Paligo instance.
Select the Layout you want to update or Create a Layout.
Tip
You can copy the URL of the Layout Editor and paste it into a new tab in your browser. This can be useful if you frequently switch between your Paligo content and the Layout settings.
Select General in the sidebar.
Select Document in the sidebar.
Set Orientation to:
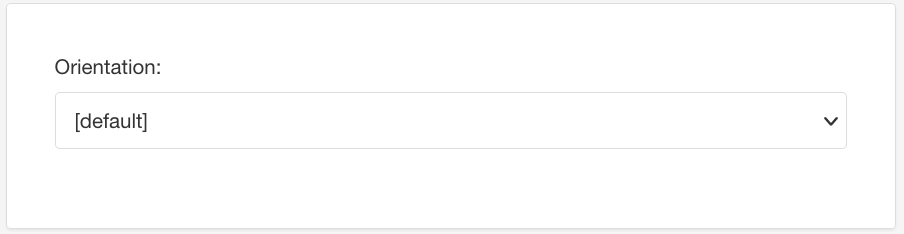
Portrait for pages with long edges on the left and right, shorter edges on the top and bottom.
Landscape for pages with short edges on the left and right, longer edges on the top and bottom.
Select Save.
When you publish with this PDF layout, Paligo will produce a PDF that has its pages set to your choice of orientation.
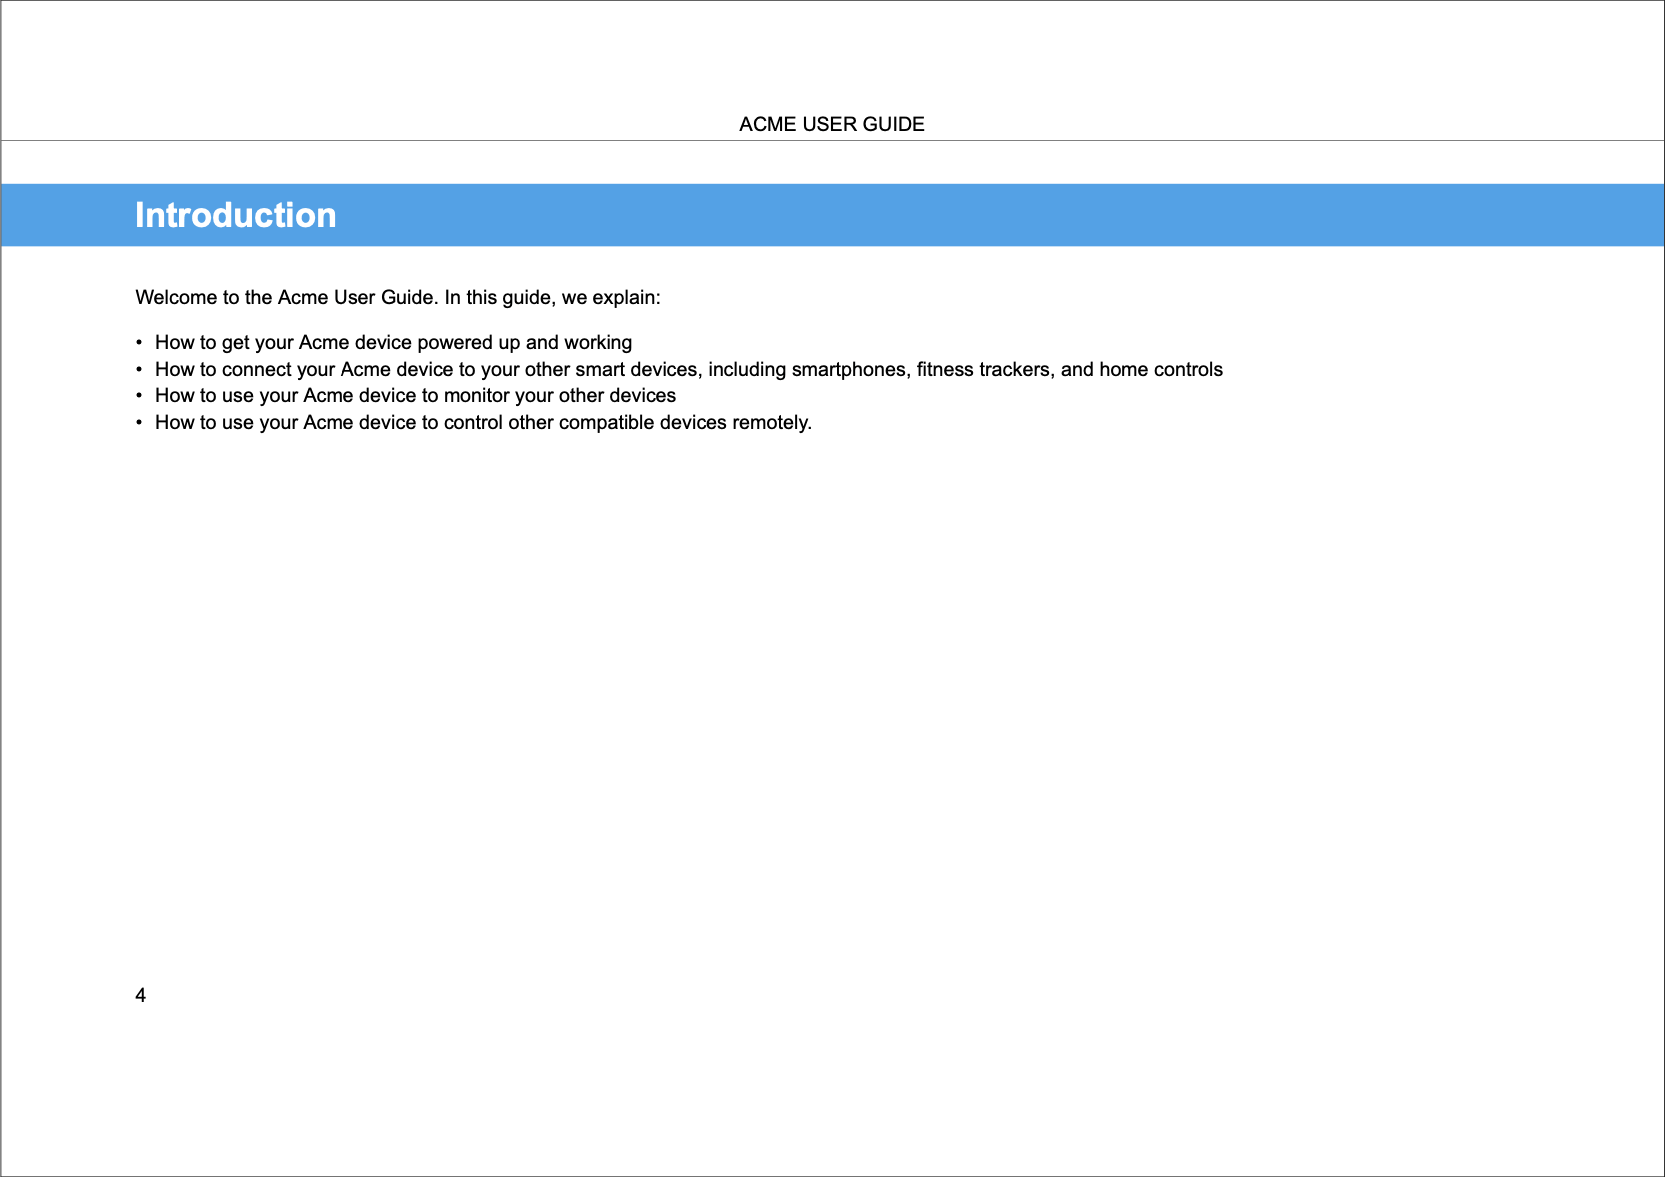
If you are going to print your content, consider using the double-sided pages feature. With this feature enabled, Paligo applies a slightly wider margin on the binding edge of the page. It also "mirrors" the headers and footers, for example, if you have set the page number to appear in the left cell, it will alternate between the left cell and right cell on the left and right pages.
Note
If you are using Paligo's PDF booklet feature, the "mirror" applies to the pages that are positioned inside the grid as well as the individual PDF pages.
Select Layout in the top menu.
Paligo displays a list of Layouts. The list is empty if there are no custom Layouts in your Paligo instance.
Select the Layout you want to update or Create a Layout.
Tip
You can copy the URL of the Layout Editor and paste it into a new tab in your browser. This can be useful if you frequently switch between your Paligo content and the Layout settings.
Select General in the sidebar.
Select Document in the sidebar.
Set Double sided to:
Enabled - To turn on the double-sided feature, giving pages a wider margin and mirrored headers and footers.
Disabled - To turn off the double-sided feature.
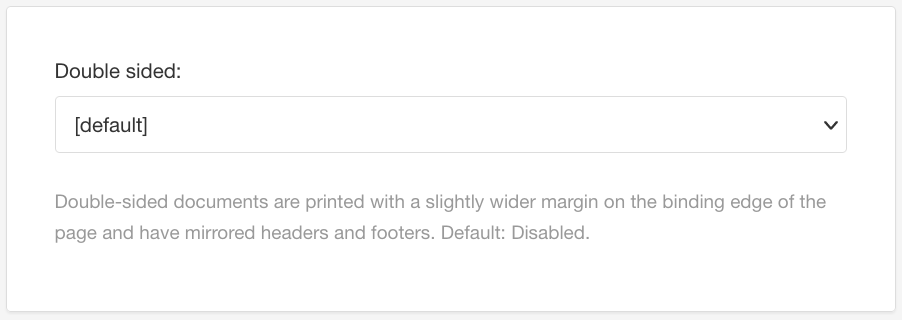
If you have enabled double-sided pages, use the Force blank pages setting to control how page sequences end. Choose either:
Choose Enabled if you want Paligo to insert blank pages to "pad out" the document so that each "chapter" of your content ends on an even-numbered page.
Choose Disabled if you want Paligo to end each "chapter" wherever the content ends, irrespective of whether the page is an even number or odd number.
Select Save.
When you publish to PDF using this layout, Paligo applies the double-sided pages and force blank pages settings you have chosen.
Double-sided documents are typically set up so that each "chapter" ends on an even page, and each new "chapter" starts on an odd page. To make this possible, Paligo may need to insert blank pages at the end of a "chapter". This is because it is unlikely that all of your "chapters" will contain the right amount of content to end on even pages through the natural flow of the document.
By default, Paligo is set to add blank pages if needed. You may prefer to disable this feature if blank pages are not needed, for example, if the PDF is only to be used online,
To set a PDF to include or exclude blank pages:
Select Layout in the top menu.
Paligo displays a list of Layouts. The list is empty if there are no custom Layouts in your Paligo instance.
Select the Layout you want to update or Create a Layout.
Tip
You can copy the URL of the Layout Editor and paste it into a new tab in your browser. This can be useful if you frequently switch between your Paligo content and the Layout settings.
Select General in the sidebar.
Select Document in the sidebar.
Set Force blank pages to:
Enabled to get Paligo to add blank pages where necessary.
Disabled to prevent Paligo from adding blank pages.
Select Save.
When you publish with this PDF layout, Paligo applies your choices.
Professional print services may require PDFs that have a page count that is divisible by a certain number, usually 4. This is because they print the pages on large sheets, which are then folded, cut, and bound to make the finished book.
For example, if a printer produces 4 pages per sheet, then the front cover, back cover, inside front cover, and inside back cover will all be printed on the same sheet.
To make sure your content has a suitable page count, you can set Paligo to automatically add extra "empty" pages at the end of your document:
Select Layout in the top menu.
Paligo displays a list of Layouts. The list is empty if there are no custom Layouts in your Paligo instance.
Select the Layout you want to update or Create a Layout.
Tip
You can copy the URL of the Layout Editor and paste it into a new tab in your browser. This can be useful if you frequently switch between your Paligo content and the Layout settings.
Select General in the sidebar.
Select Document in the sidebar.
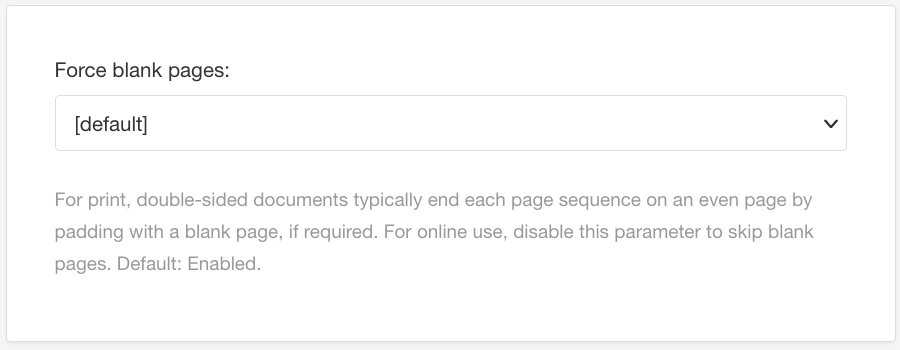
In the Set page count for print to a number divisible by 4 field, enter the word
documentfollowed by two values:
First value Page count divisible by - This is a number that defines what the total page count should be divisible by. It is usually 4, but could be 16 or 32.
Second value Back cover pages - For the page count, Paligo does not include a back cover or the inside of the back cover. So for the second number, enter either:
0 if your document does not have back cover pages
Page count divisible bynumber minus theBack cover pagesnumber.Example 1. Page count divisible by 4 with two back coversIf your document needs a page count that is divisible by 4 and it has back cover recto and verso components, enter:
document 4 2This is because 4 is the "page count divisible by" number. You have 2 back cover components (recto and verso), so 4 - 2 = 2.
Example 2. Page count divisible by 16 with two back coversIf your document needs a page count that is divisible by 16 and you have back cover recto and verso components, enter:
document 16 14As the page count has to be divisible by 16 and you have two back cover components, so 16 - 2 = 14.
Select Save.
When you publish with this PDF layout, Paligo will apply the page count control you have set.
Tip
You can Troubleshoot a PDF Booklet.
If the page organization looks incorrect in the preview, it is likely that it is because the Set page count for print to a number divisible by 4 setting is incorrect.
If you Use Double-Sided Pages (PDF), Paligo can Include or Exclude Blank Pages (PDF). The blank pages are needed to make sure that:
New chapters start on a certain page (usually the right-hand page in a left-to-right document)
A certain page count is reached.
Depending on your requirements, you can set the blank pages to be empty or:
Include or Exclude Header on Blank Pages (PDF) (same header as shown on pages with content)
Include or Exclude Footer on Blank Pages (PDF) (same footer as shown on pages with content)
Add Intentionally Blank Message (PDF). This can be a requirement in some industries, where the user needs to be told that the page is blank by design so that they know it is not missing any information.
You can choose to include or exclude the header section on the blank pages that appear in your PDF. Traditionally, the header is shown on all pages inside the document and is only excluded from the front and back cover, and sometimes the "front matter" pages.
To include or exclude the header on blank pages:
Select Layout in the top menu.
Paligo displays a list of Layouts. The list is empty if there are no custom Layouts in your Paligo instance.
Select the Layout you want to update or Create a Layout.
Tip
You can copy the URL of the Layout Editor and paste it into a new tab in your browser. This can be useful if you frequently switch between your Paligo content and the Layout settings.
Select General in the sidebar.
Select Page in the sidebar.
Set Headers on blank pages to:

Yes to include the header on blank pages.
No to exclude the header on blank pages. The top section of the page will be blank.
Select Save.
When you publish with this layout, Paligo will produce a PDF that applies your chosen settings.
You can choose to include or exclude the footer section on the blank pages that appear in your PDF. Traditionally, the footer is shown on all pages inside the document and is only excluded from the front and back cover, and sometimes the "front matter" pages.
To include or exclude the footer on blank pages:
Select Layout in the top menu.
Paligo displays a list of Layouts. The list is empty if there are no custom Layouts in your Paligo instance.
Select the Layout you want to update or Create a Layout.
Tip
You can copy the URL of the Layout Editor and paste it into a new tab in your browser. This can be useful if you frequently switch between your Paligo content and the Layout settings.
Select General in the sidebar.
Select Page in the sidebar.
Set Footers on blank pages to:
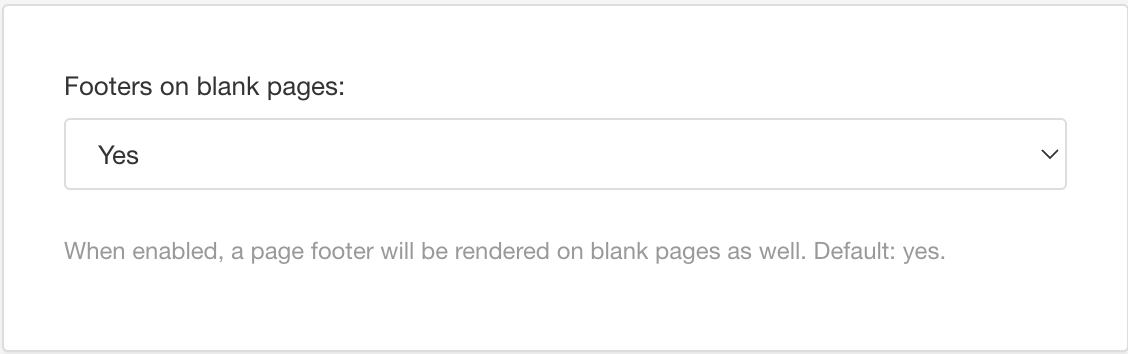
Yes to include the footer on blank pages.
No to exclude the footer on blank pages. The bottom section of the page will be blank.
Select Save.
When you publish with this layout, Paligo will produce a PDF that applies your chosen settings.
You can add a message to blank pages to let users know that the page is empty by design. If you enable this feature, Paligo adds the following message to blank pages:
This page is intentionally left blank.
If you publish in multiple languages, Paligo translates the message automatically.
To add or remove the message:
Select Layout in the top menu.
Paligo displays a list of Layouts. The list is empty if there are no custom Layouts in your Paligo instance.
Select the Layout you want to update or Create a Layout.
Tip
You can copy the URL of the Layout Editor and paste it into a new tab in your browser. This can be useful if you frequently switch between your Paligo content and the Layout settings.
Select General in the sidebar.
Select Page in the sidebar.
Set Display 'This page is intentionally left blank' message on blank pages to:

Yes to include the message
No to exclude the message.
Select Save.
When you publish using this layout, Paligo will create a PDF that uses the settings you have chosen.
For PDF outputs, you can set your pages to have multiple columns. You can either enable it for all topics or or create multi-columns in individual topics, see Create Multi-Columns in Topic (PDF).
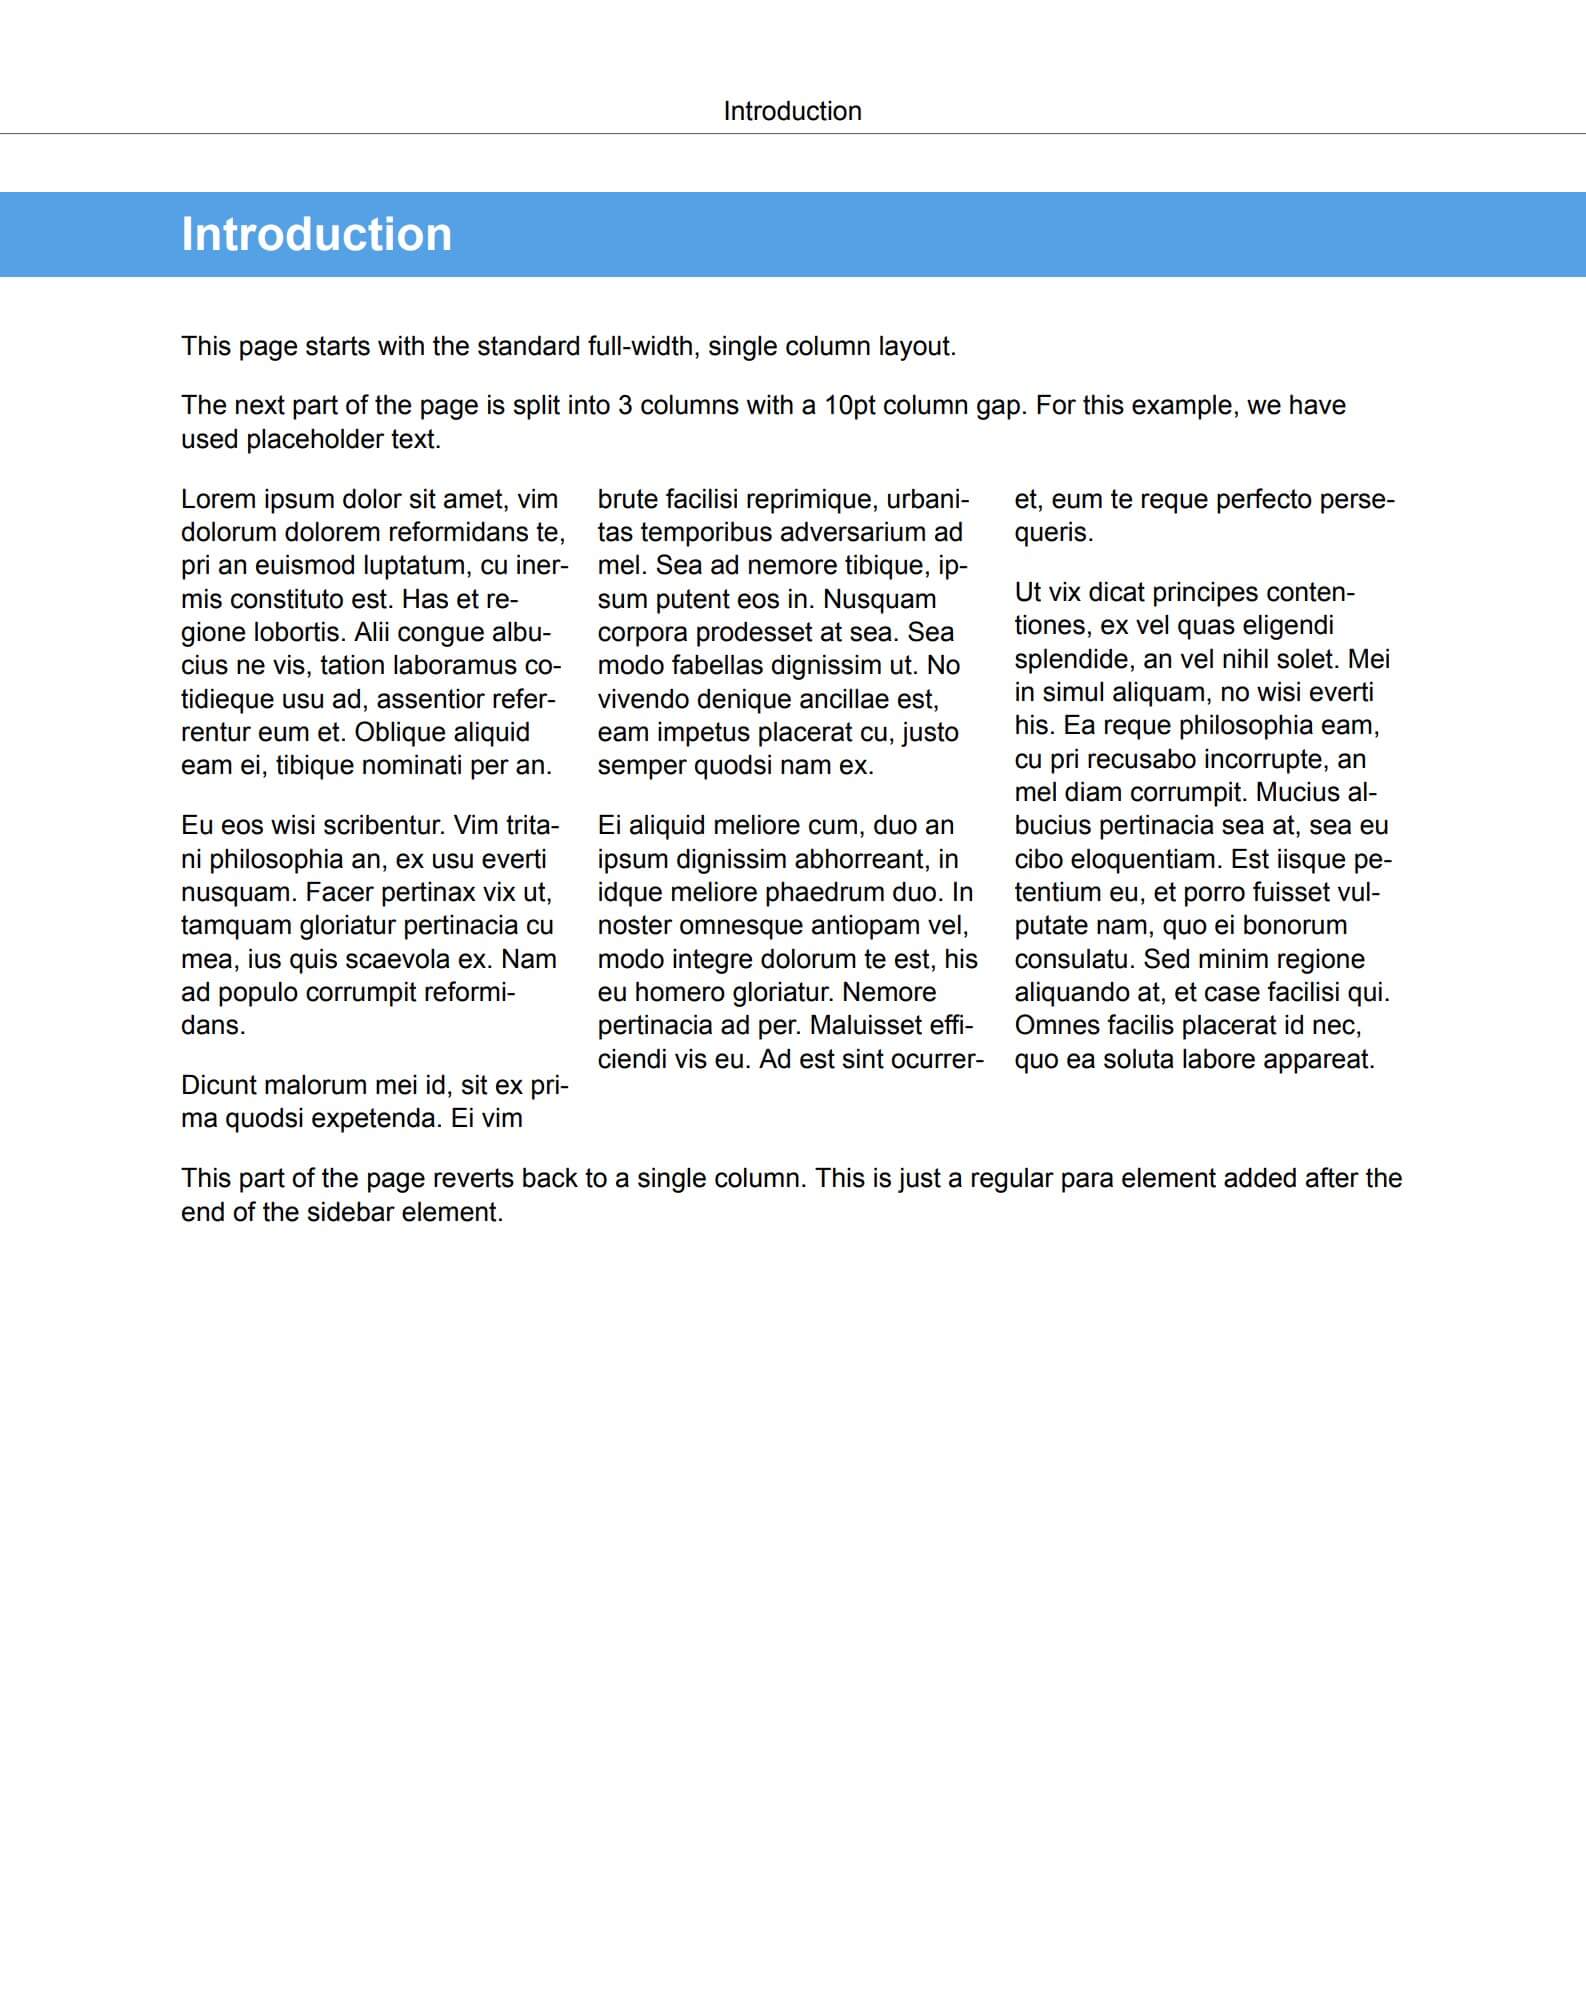
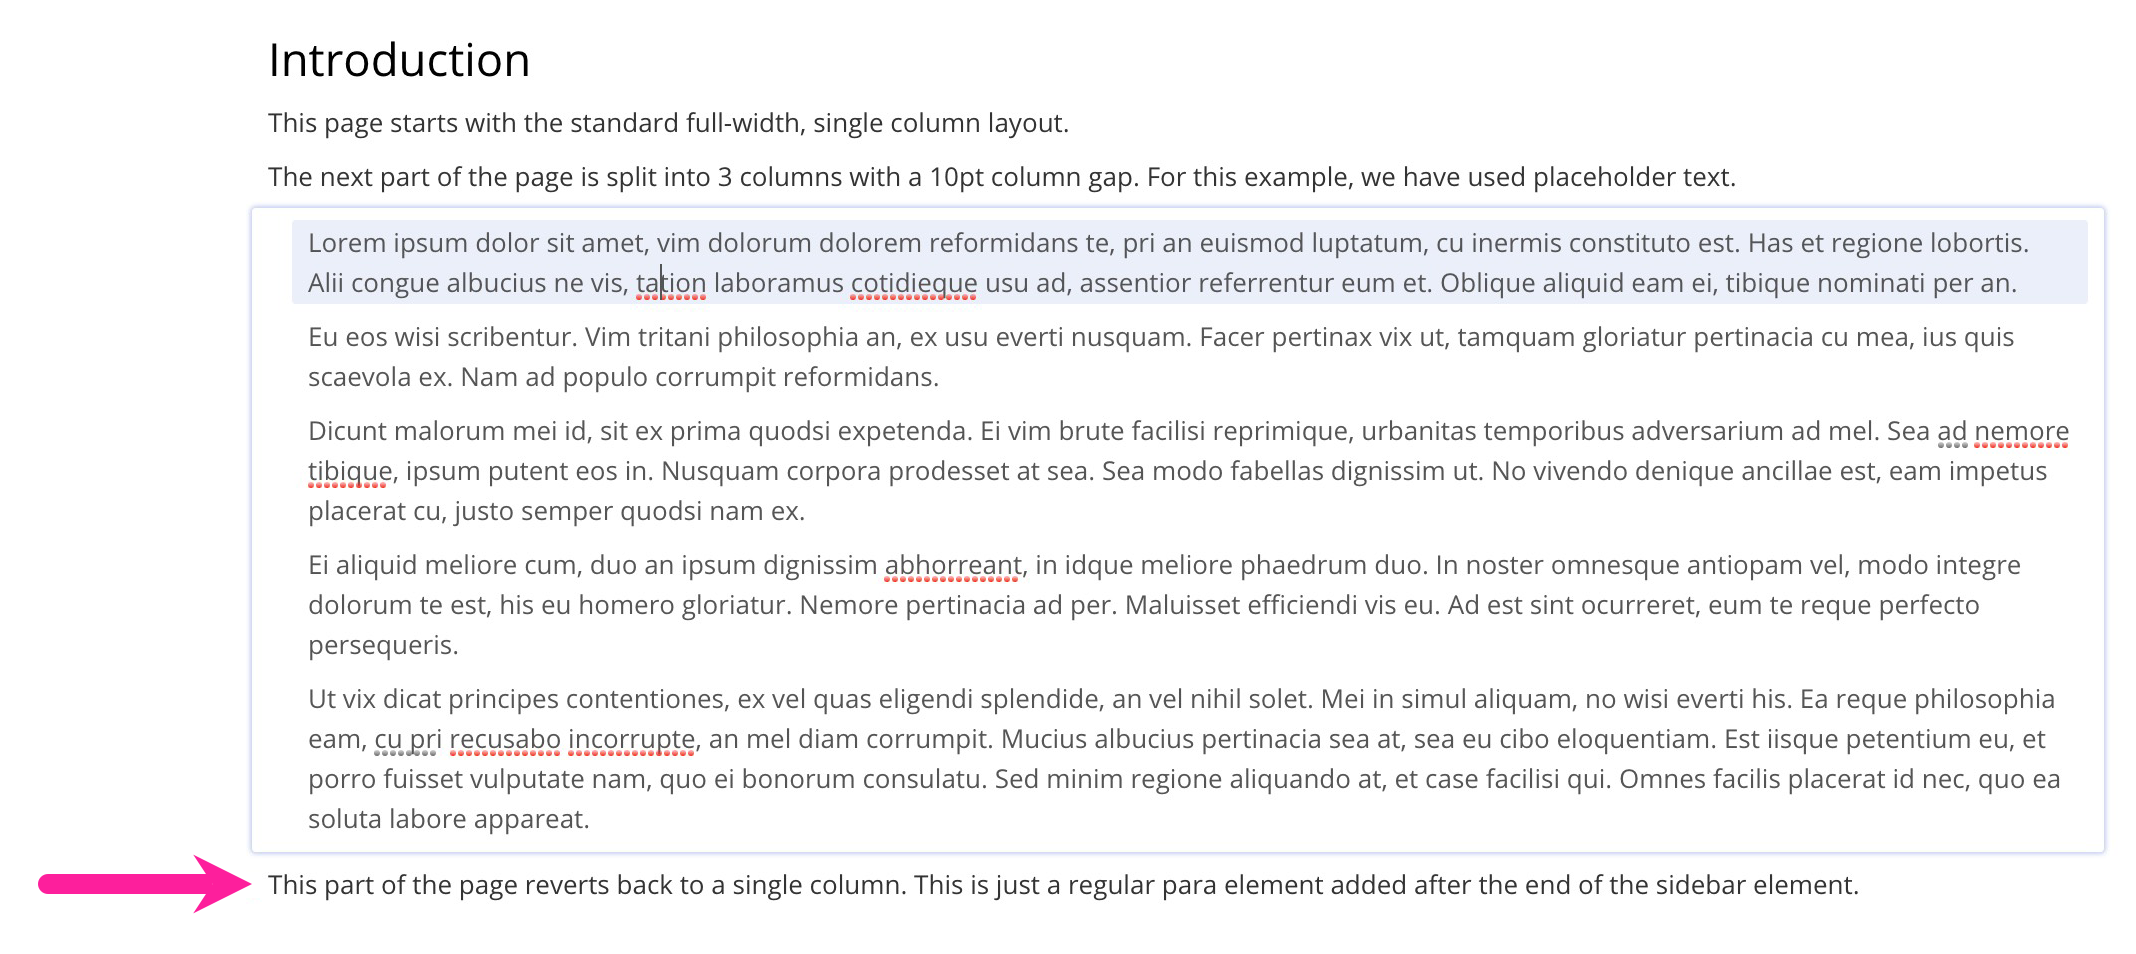
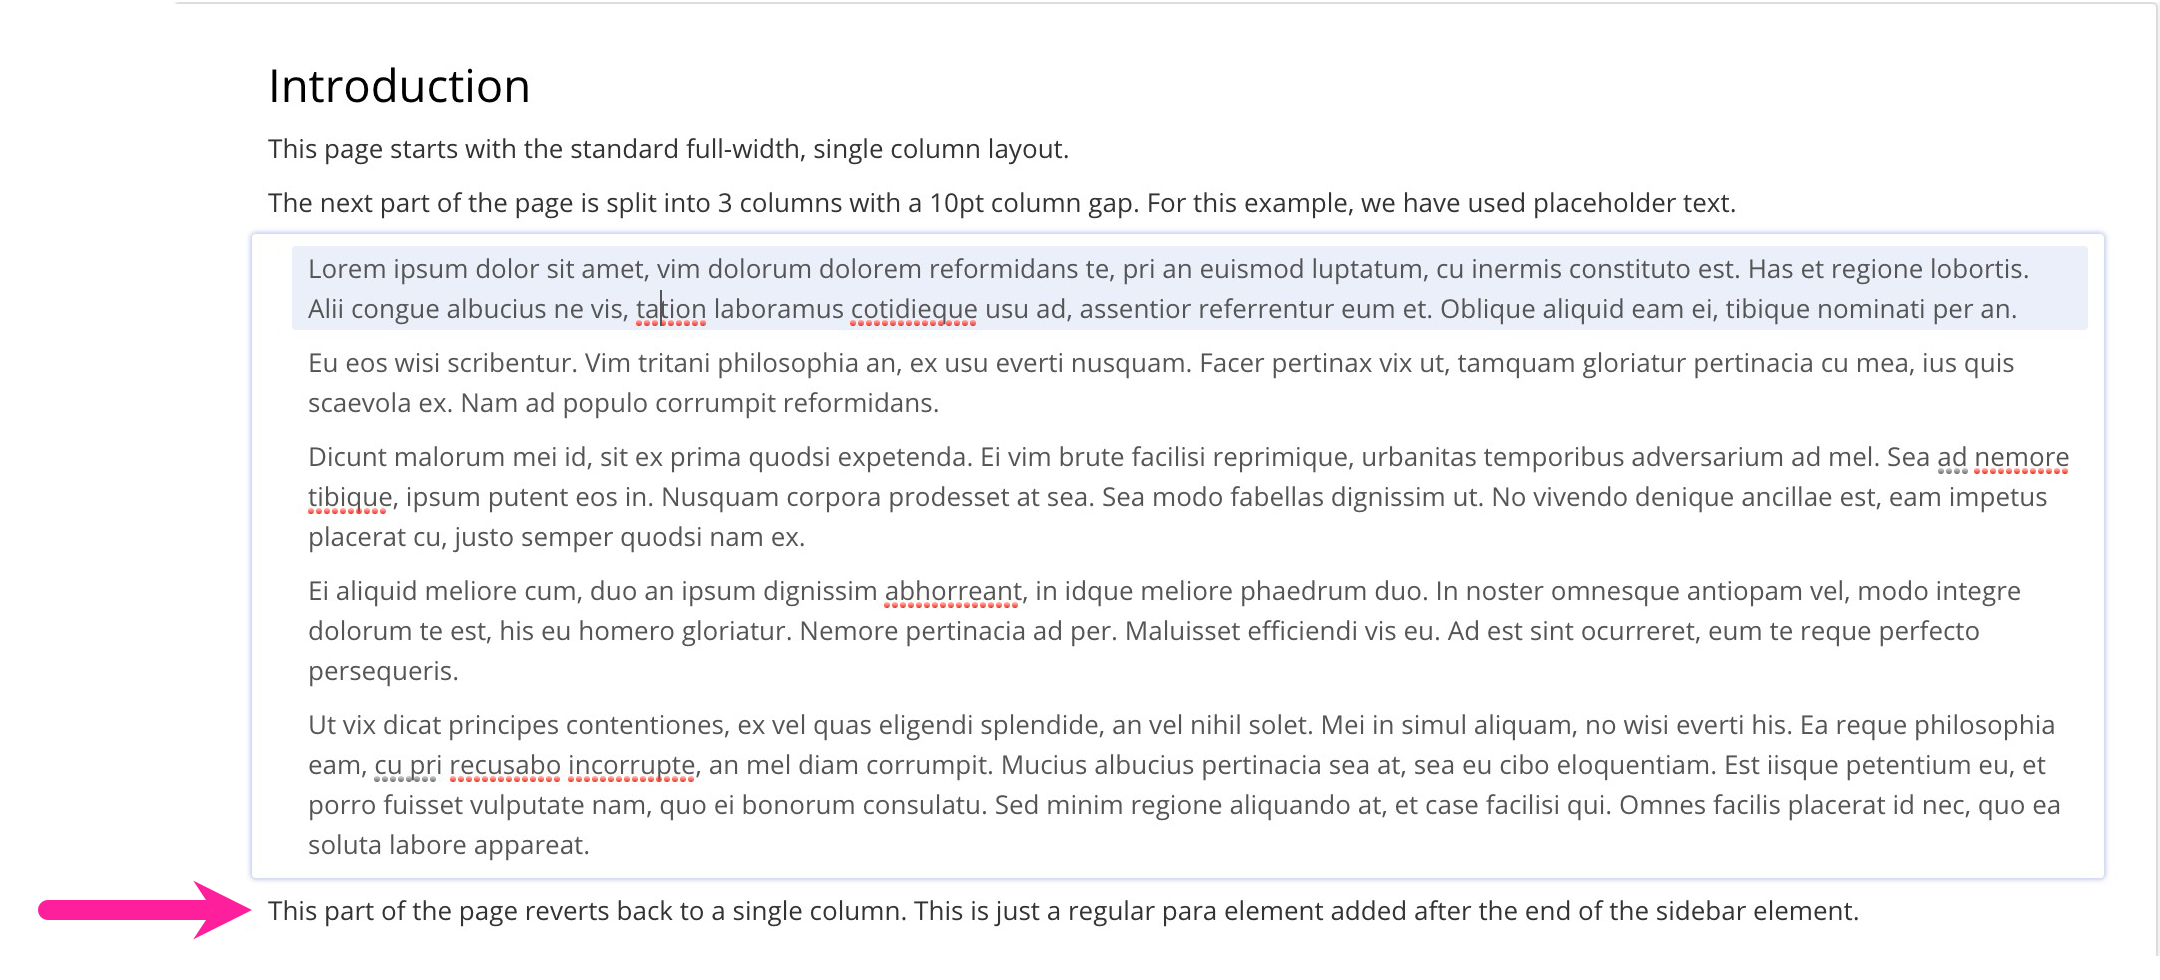
For example, you can use multiple sidebar elements in the same topic to create a page that starts as one column, then has three columns, and then switches back to one column.
 |
Important
Only use the sidebar element to create multiple columns in a topic. Do not use it for single-column, full-width content as this structure is unnecessary.
For single-column, full-width content, you can add the elements you need without using a sidebar.
To enable multi-columns for all pages in a PDF:
Select Layout in the top menu.
Paligo displays a list of Layouts. The list is empty if there are no custom Layouts in your Paligo instance.
Select the Layout you want to update or Create a Layout.
Tip
You can copy the URL of the Layout Editor and paste it into a new tab in your browser. This can be useful if you frequently switch between your Paligo content and the Layout settings.
Select General in the sidebar.
Select Page in the sidebar.
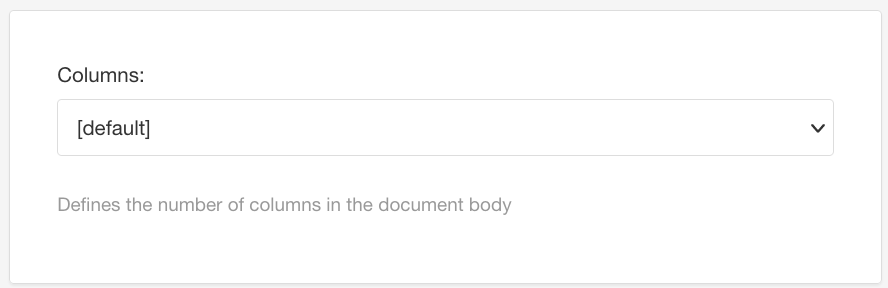
Set the number of Columns. You can choose 1, 2, 3, or 4.
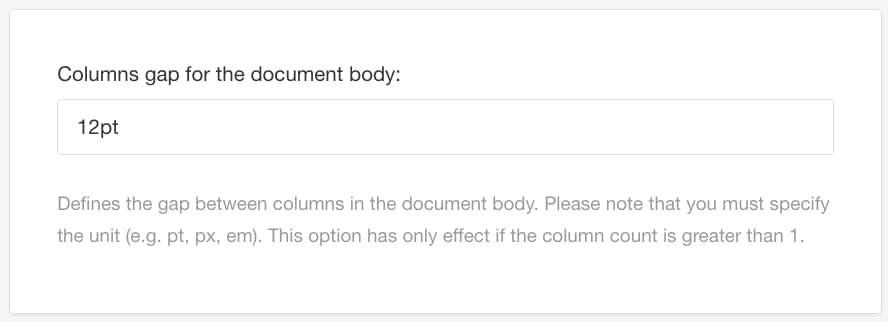
Set the Columns gap for the document body.
This is the amount of space between each column. Make sure you include the value and the units of measurement, for example, 12pt.
Select Save.
When you publish with this layout, Paligo creates a PDF that uses your chosen column settings for all of the body content.
Tip
To set up multi-columns for a specific page, or sequence of pages, see Create Multi-Columns in Topic (PDF).
For PDF outputs, you can set your pages to have multiple columns. You can either enable it for all topics (Enable Multi-Columns (PDF)) or create multi-columns in individual topics.
Tip
Also see Flow Text Around an Image and Level Text and Image.
To create a multi-column in individual topics:
Select the topic or component in the Content Manager to open it in the Editor.
Alternatively, you can Create a Topic and edit that.
Position the cursor where you want the multiple columns to begin.
A valid position for a
sidebaris after a paragraph, image, list, table, or admonition (note, warning, caution).Press Alt + Enter ⏎ (Windows) or Command ⌘ + Enter ⏎ (Mac) to display the Element Context Menu.
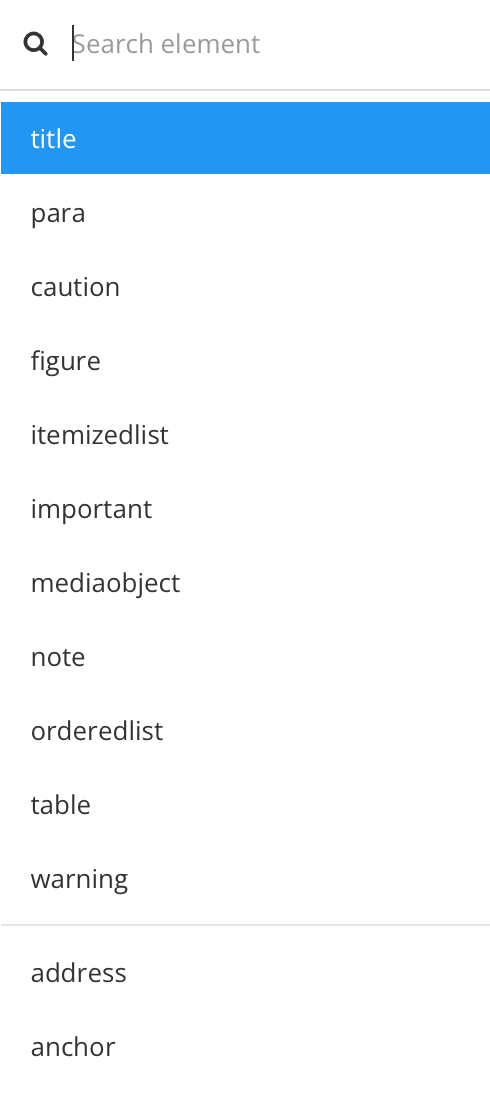
Enter sidebar and select it from the menu.
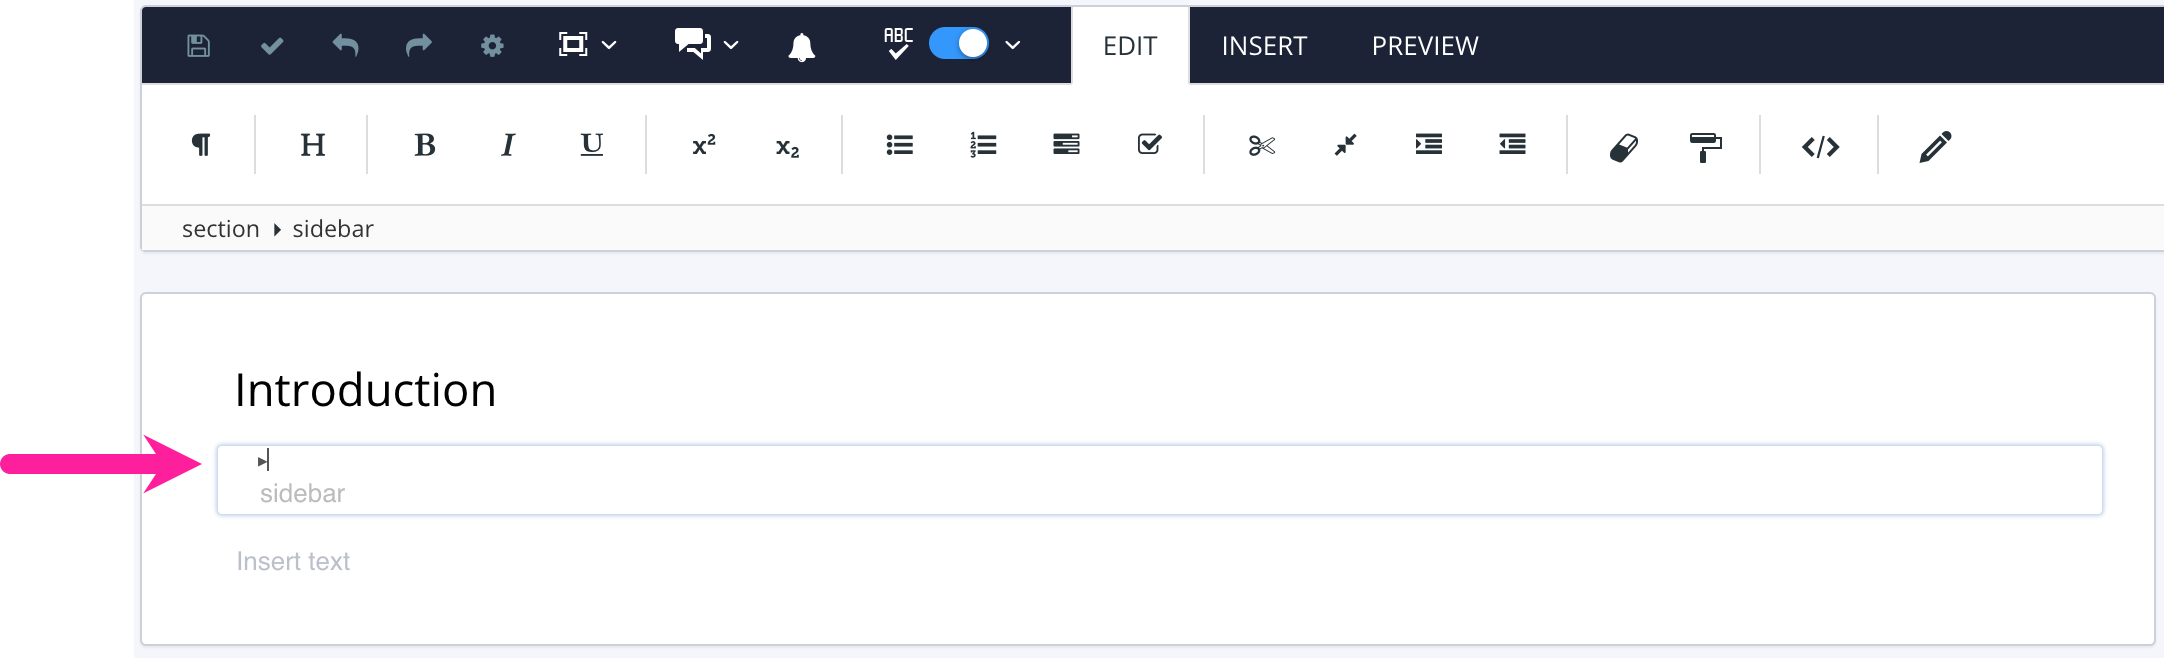
Paligo adds a sidebar to your topic. It has a box around it to show that it is a sidebar rather than the regular topic content.
Position the cursor inside the
sidebarbox.Select the
sidebarelement in the Element Structure Menu and choose Go to element.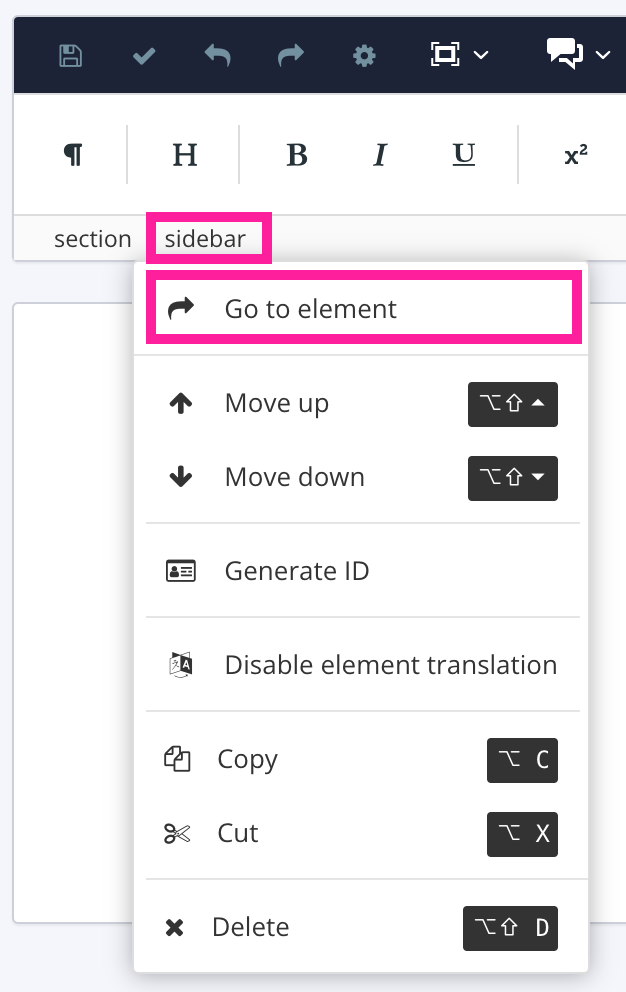
Add the
roleattribute in the Element Attributes Panel and set the value to the number of columns and spacing between them.In this example, the number of columns to 3 and the column spacing to 10pt.
column-count: 3; column-gap: 10pt
Note
The Paligo editor does not show the multiple columns. You can see them if you Preview a Topic as PDF or About Publishing as PDF.
In the sidebar, add the content that you want to appear in the columns.
You can add many types of content here, but you will need to allow enough space for scaling the content. Text will flow into the columns automatically, but images and tables will scale to fit as best as possible.
Images scale down proportionally, but at smaller sizes may be less useful to readers.
Tables scale down too, but can only scale down so far. If the table columns and spacing are too large for the available space, the table will break across the columns.
Note
The content in a topic will flow automatically into the space available in the columns.
The flow of content has to be automatic as this is part of the "content is separate from formatting" idea with XML. If you were able to add a manual column break, it may look correct for one language but could be completely inappropriate when a different language is used.
To add content without columns, place the cursor after the sidebar box. This content will use the full width of the topic.
Select Save.

There are settings in the Layout Editor to add the word draft, a watermark and background images for PDF output.
To enable drafts and watermarks:
Select Layout in the top menu.
Paligo displays a list of Layouts. The list is empty if there are no custom Layouts in your Paligo instance.
Select the Layout you want to update or Create a Layout.
Tip
You can copy the URL of the Layout Editor and paste it into a new tab in your browser. This can be useful if you frequently switch between your Paligo content and the Layout settings.
Select General in the sidebar.
Select Draft and watermark in the sidebar.
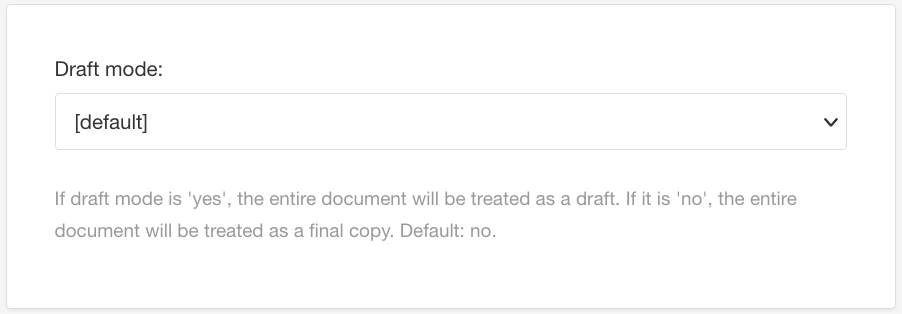
Select Yes in Draft mode.
PDFs that you publish using this layout will use the draft and watermark settings. They will also have the word "draft" in the header.
Select No to disable the draft and watermark settings..
Tip
We recommend that you have a "main" layout with all features you need.
Create a separate "draft" layout, based on the "main" layout, for the draft options, see Copy a Layout (Duplicate).
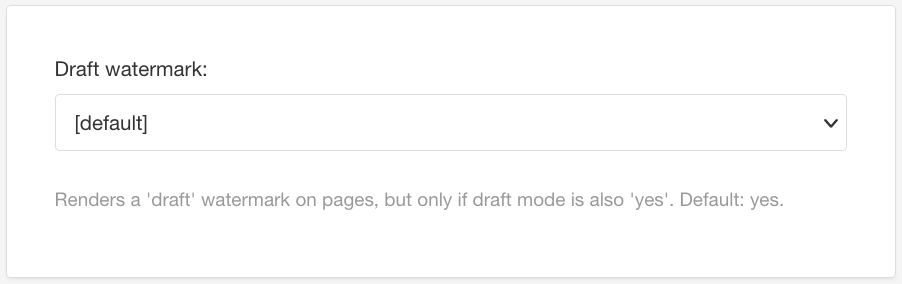
Use the Draft watermark setting to add the word "Draft" as a diagonal water mark across the pages.
Yes to add the watermark
No to exclude the watermark
Use the Show Comments to include or exclude comments in the
remarkelement added by Paligo authors (or contributors) in the PDF:Yes to include remark element comments.
No to exlude remark element comments.
Note
It has no effect on the comments that are added for reviews or contributions.
Select Upload to add an image to the background of your PDF pages in Background PDF for all pages.

The image must be saved as a PDF. It will appear in the background on all pages, underneath any other visible objects. The image can be fully-covered or partially-covered by background images that you set on individual covers.
Tip
Try to use an image that gives good contrast with the text on the page, otherwise the text may become difficult to read.
For example, if you have dark text, then a light-colored image will work best.
Select Upload to add a watermark image to your PDF pages in Watermark PDF for all pages.
The image must be saved as a PDF. The image will appear on all pages.
Tip
This setting works best for images that only show the contours (outline) or are partly transparent. You will need to add the translucent effect in an image editor before saving it as a PDF.
Select Save.
When you publish using this PDF layout, Paligo will create a PDF that uses the draft and watermark settings you have applied.
Here are some examples of outputs with draft and watermark settings in place.
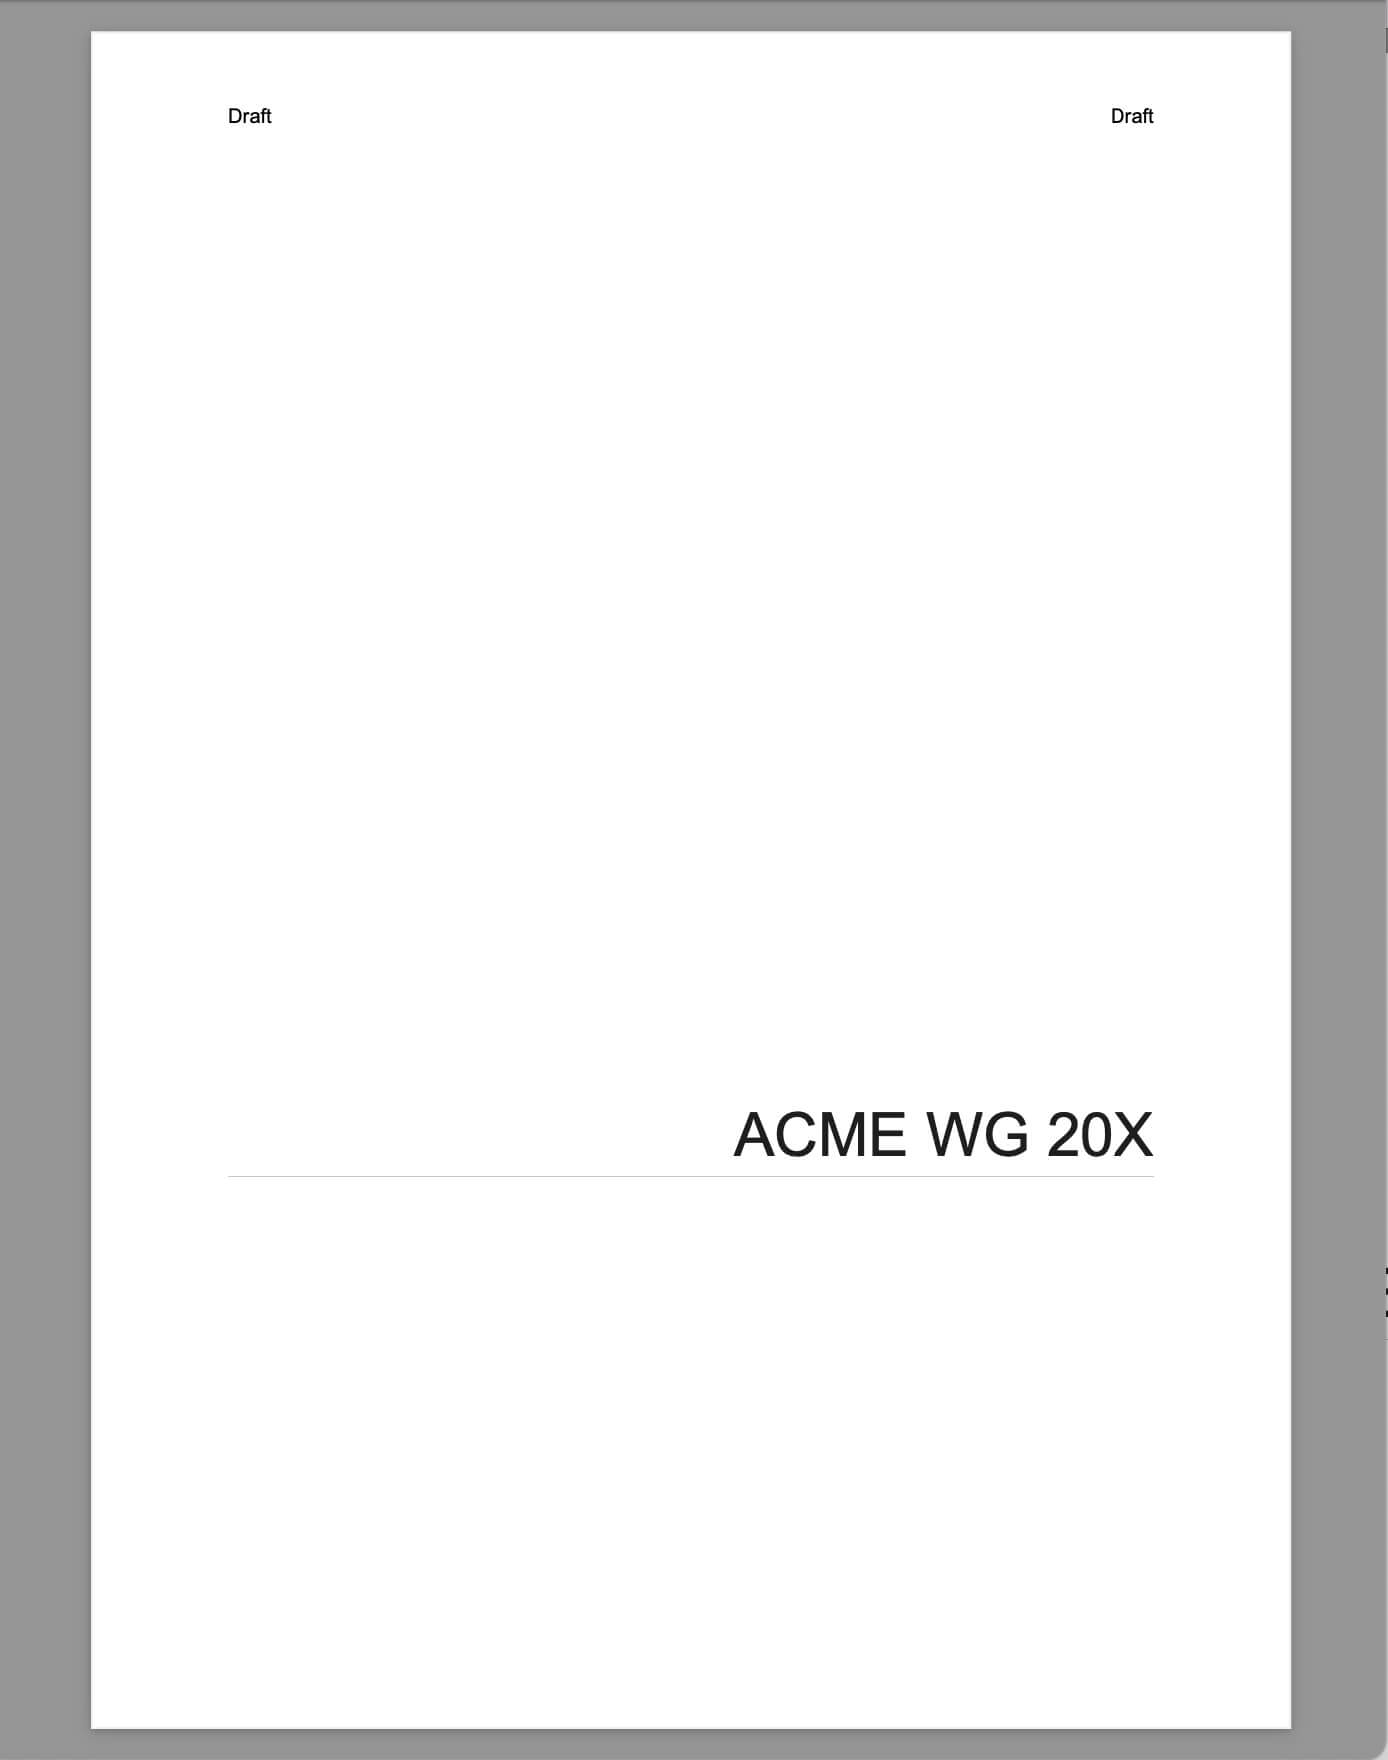 |
Draft mode = yes, Draft watermark = no, no background or watermark images
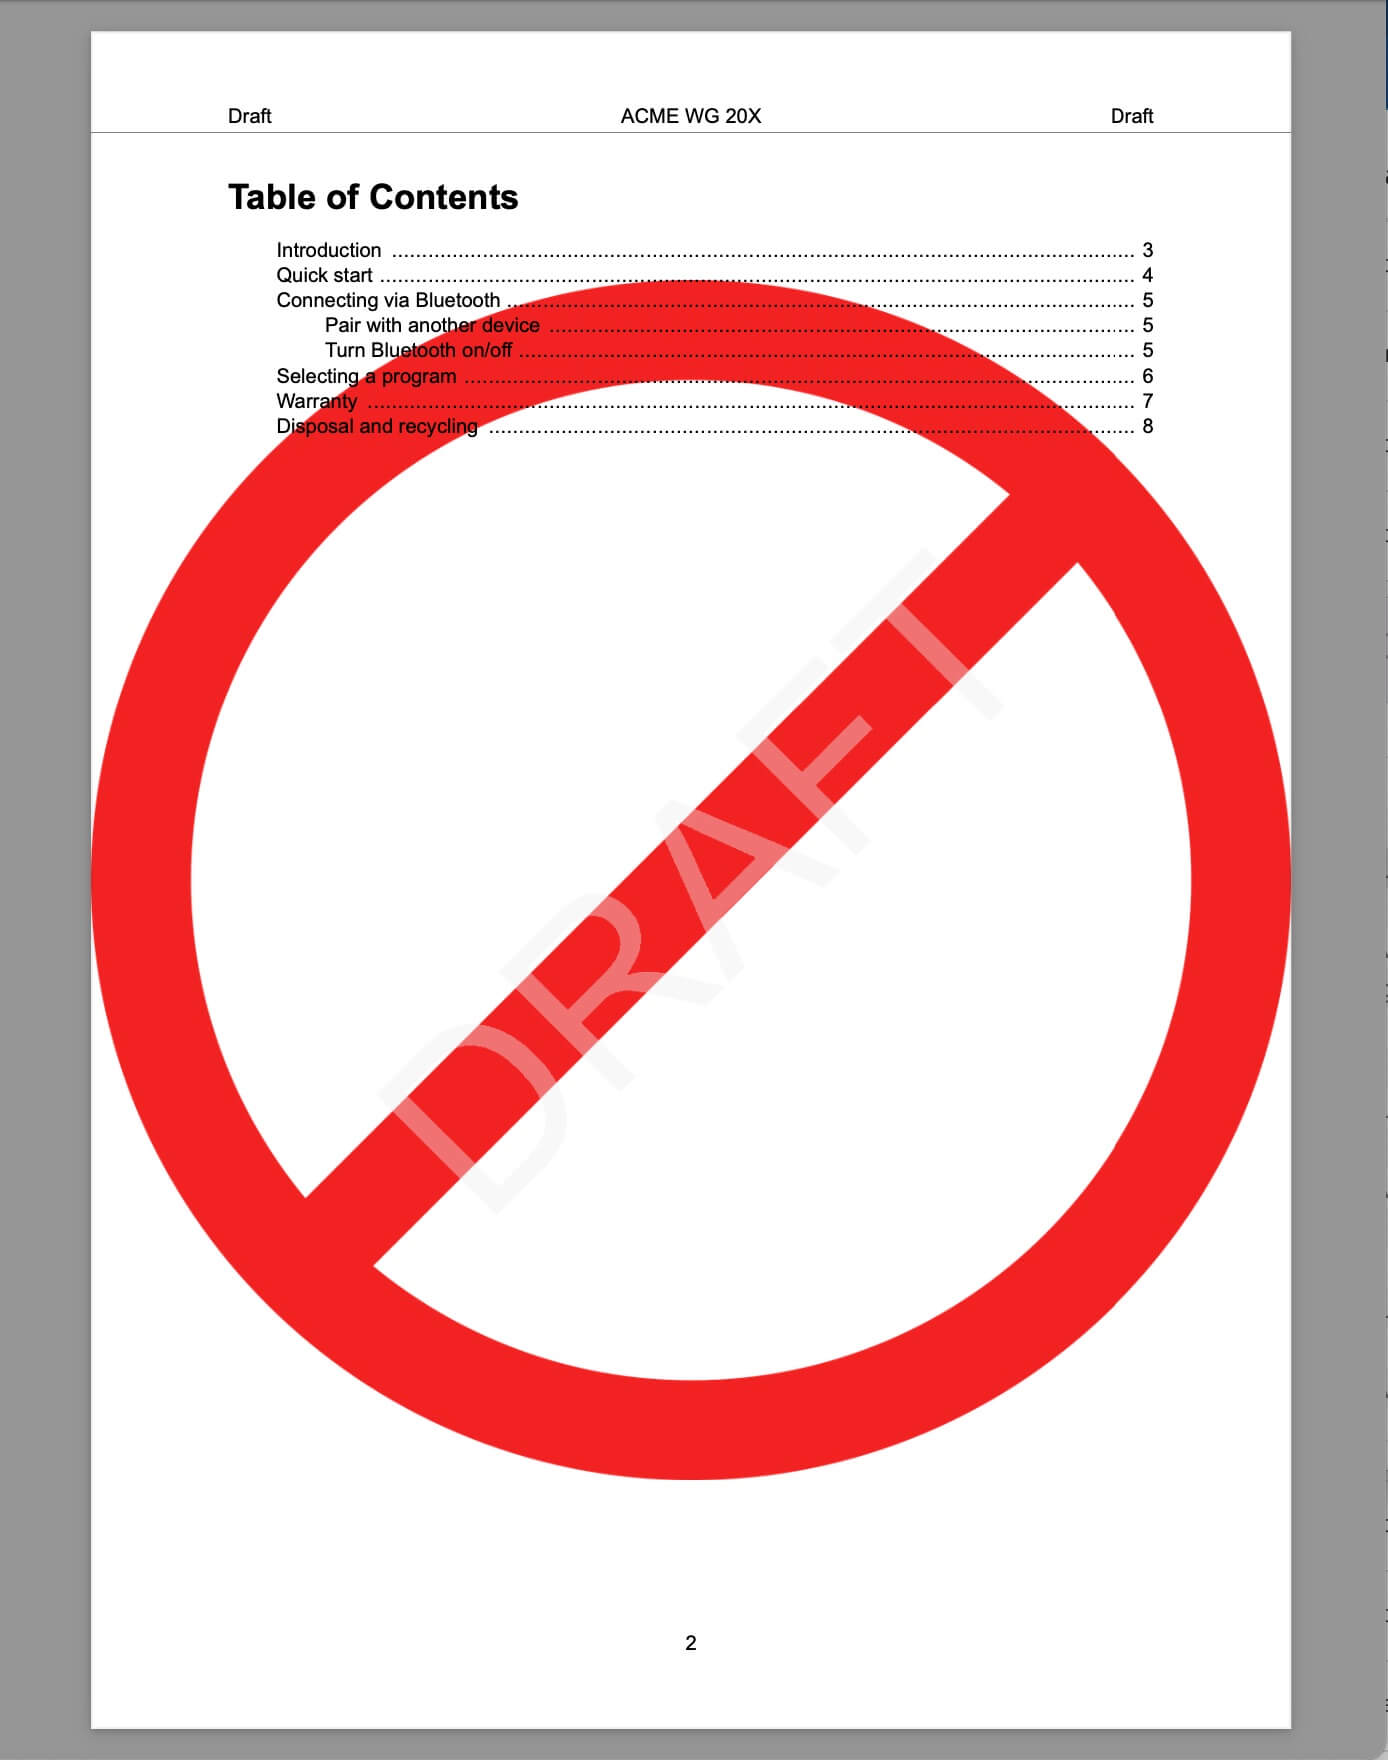 |
Draft mode = yes, Draft watermark = yes, background image = red stop sign, no watermark image
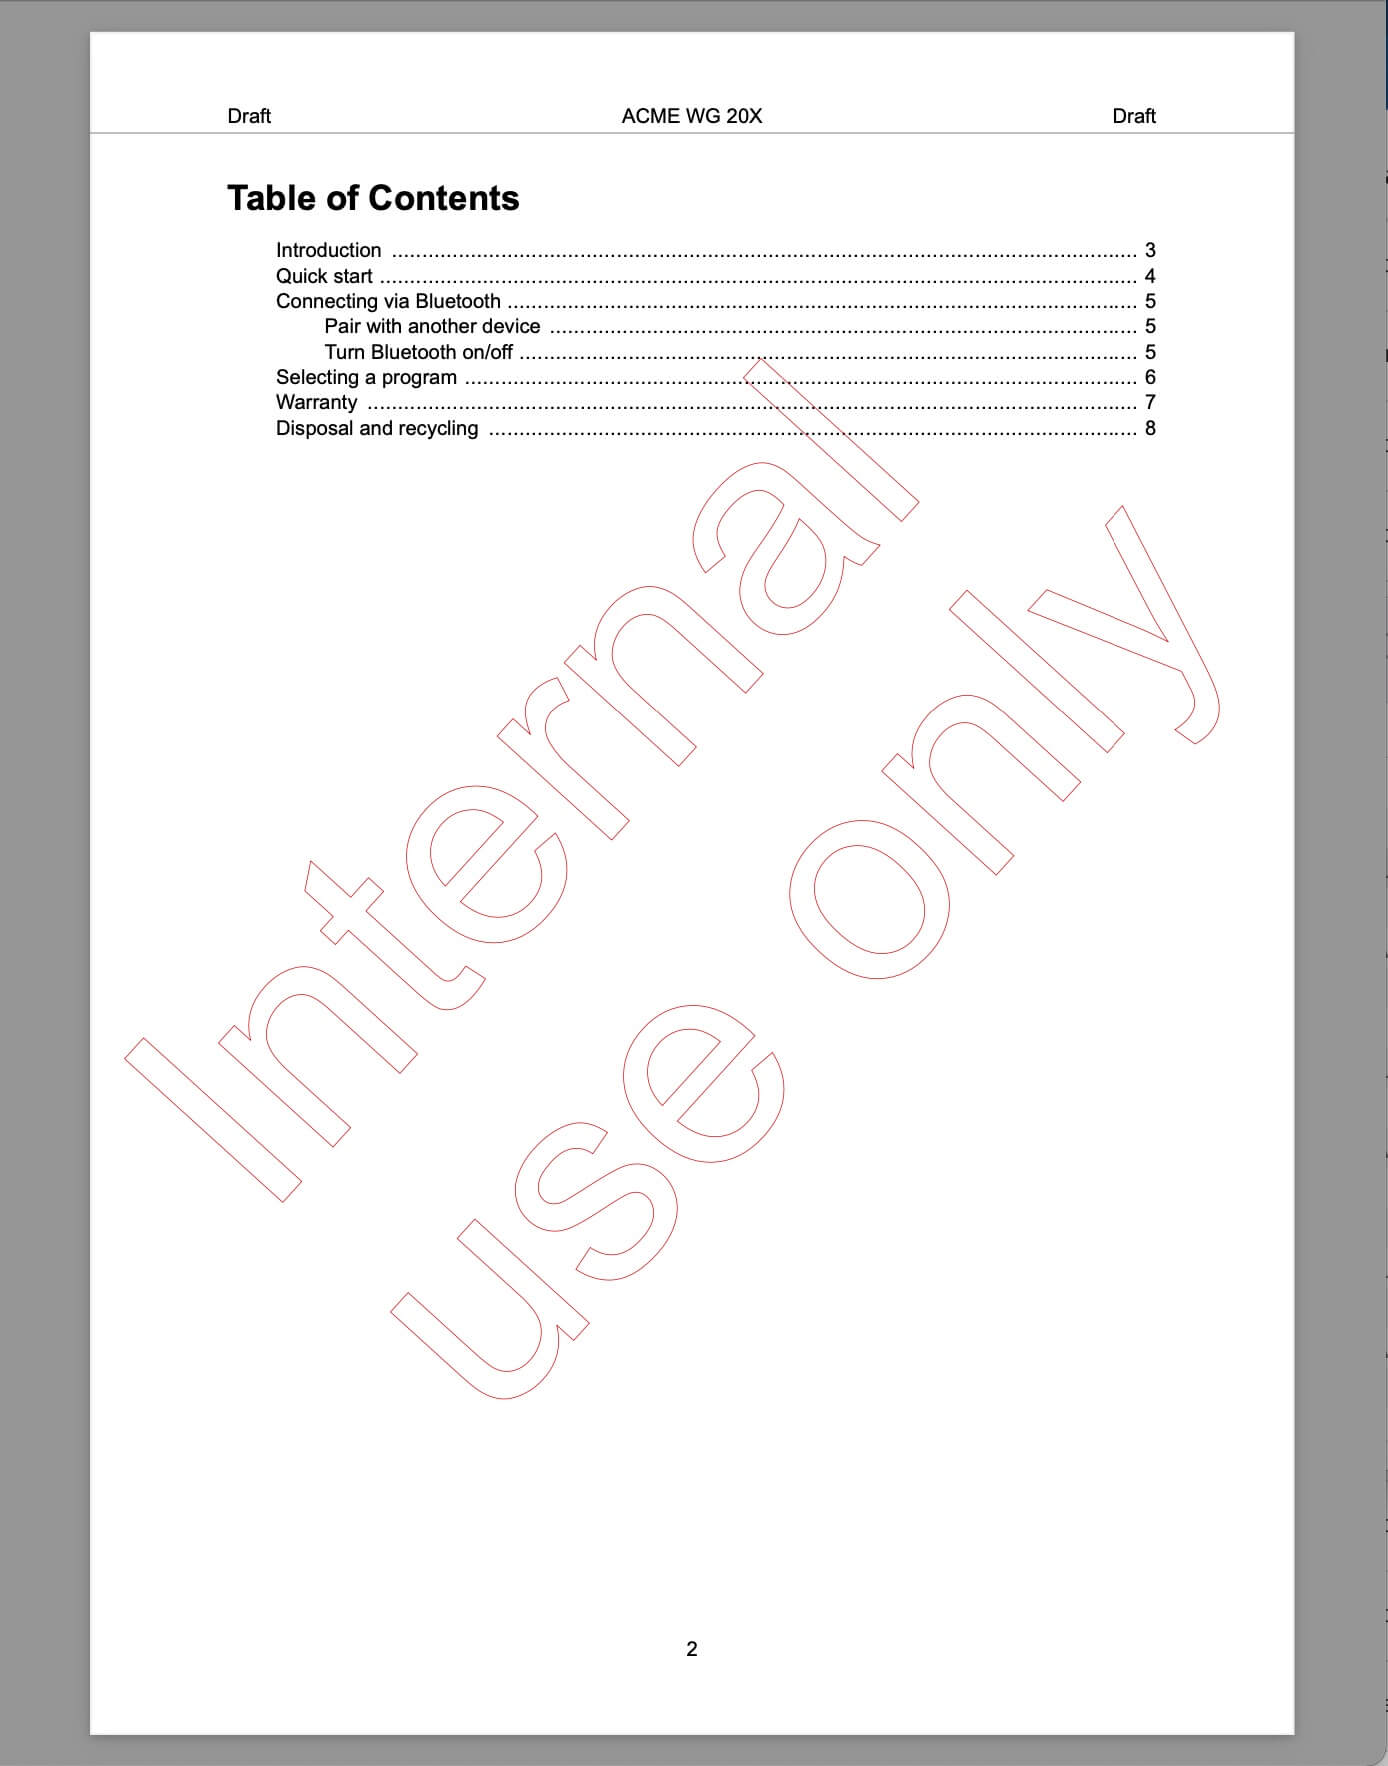 |
Draft mode = yes, Draft watermark = no, no background image, watermark image = contour 'internal use only'
There are two ways to rotate pages for PDF outputs. You can rotate:
All pages in a PDF, see Set Page Orientation (PDF).
A sequence of pages in a PDF for:
Regular topics and index topics, a sequence is all of the content nested inside a top-level
sectionelement. A top-level topic is a topic that is at the top level of a publication's "table of contents" structure and is not a descendant of another topic.Appendix topics, the sequence is all content nested inside the
appendixelement.
Important
You can only use the rotate feature with top-level topics. If you set the role attribute to rotate on a lower-level section element, it will have no effect.
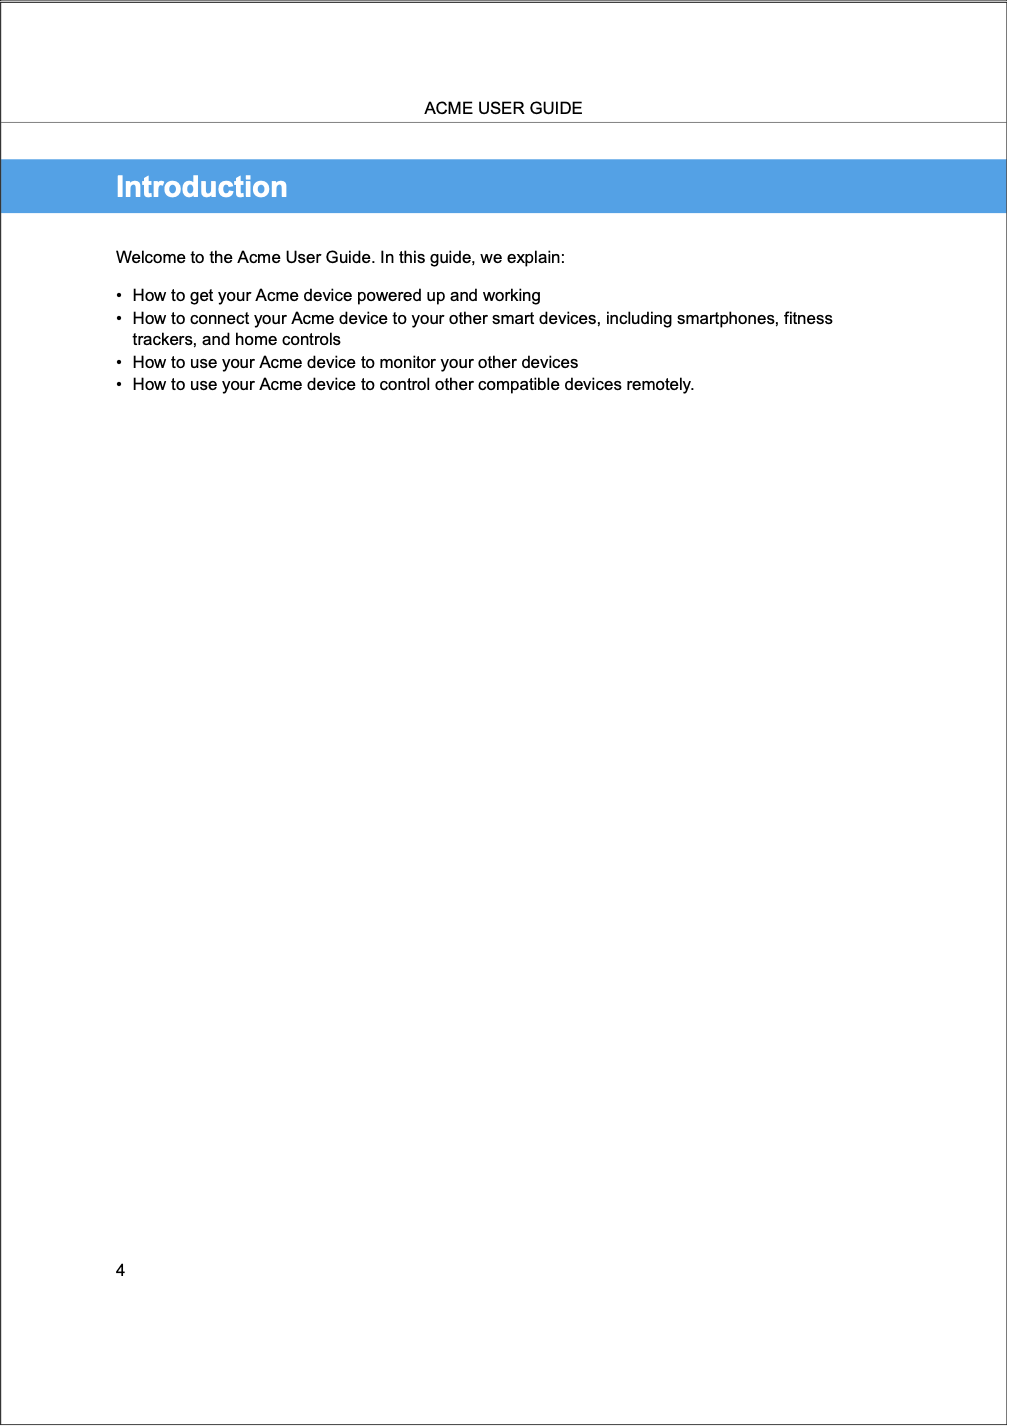
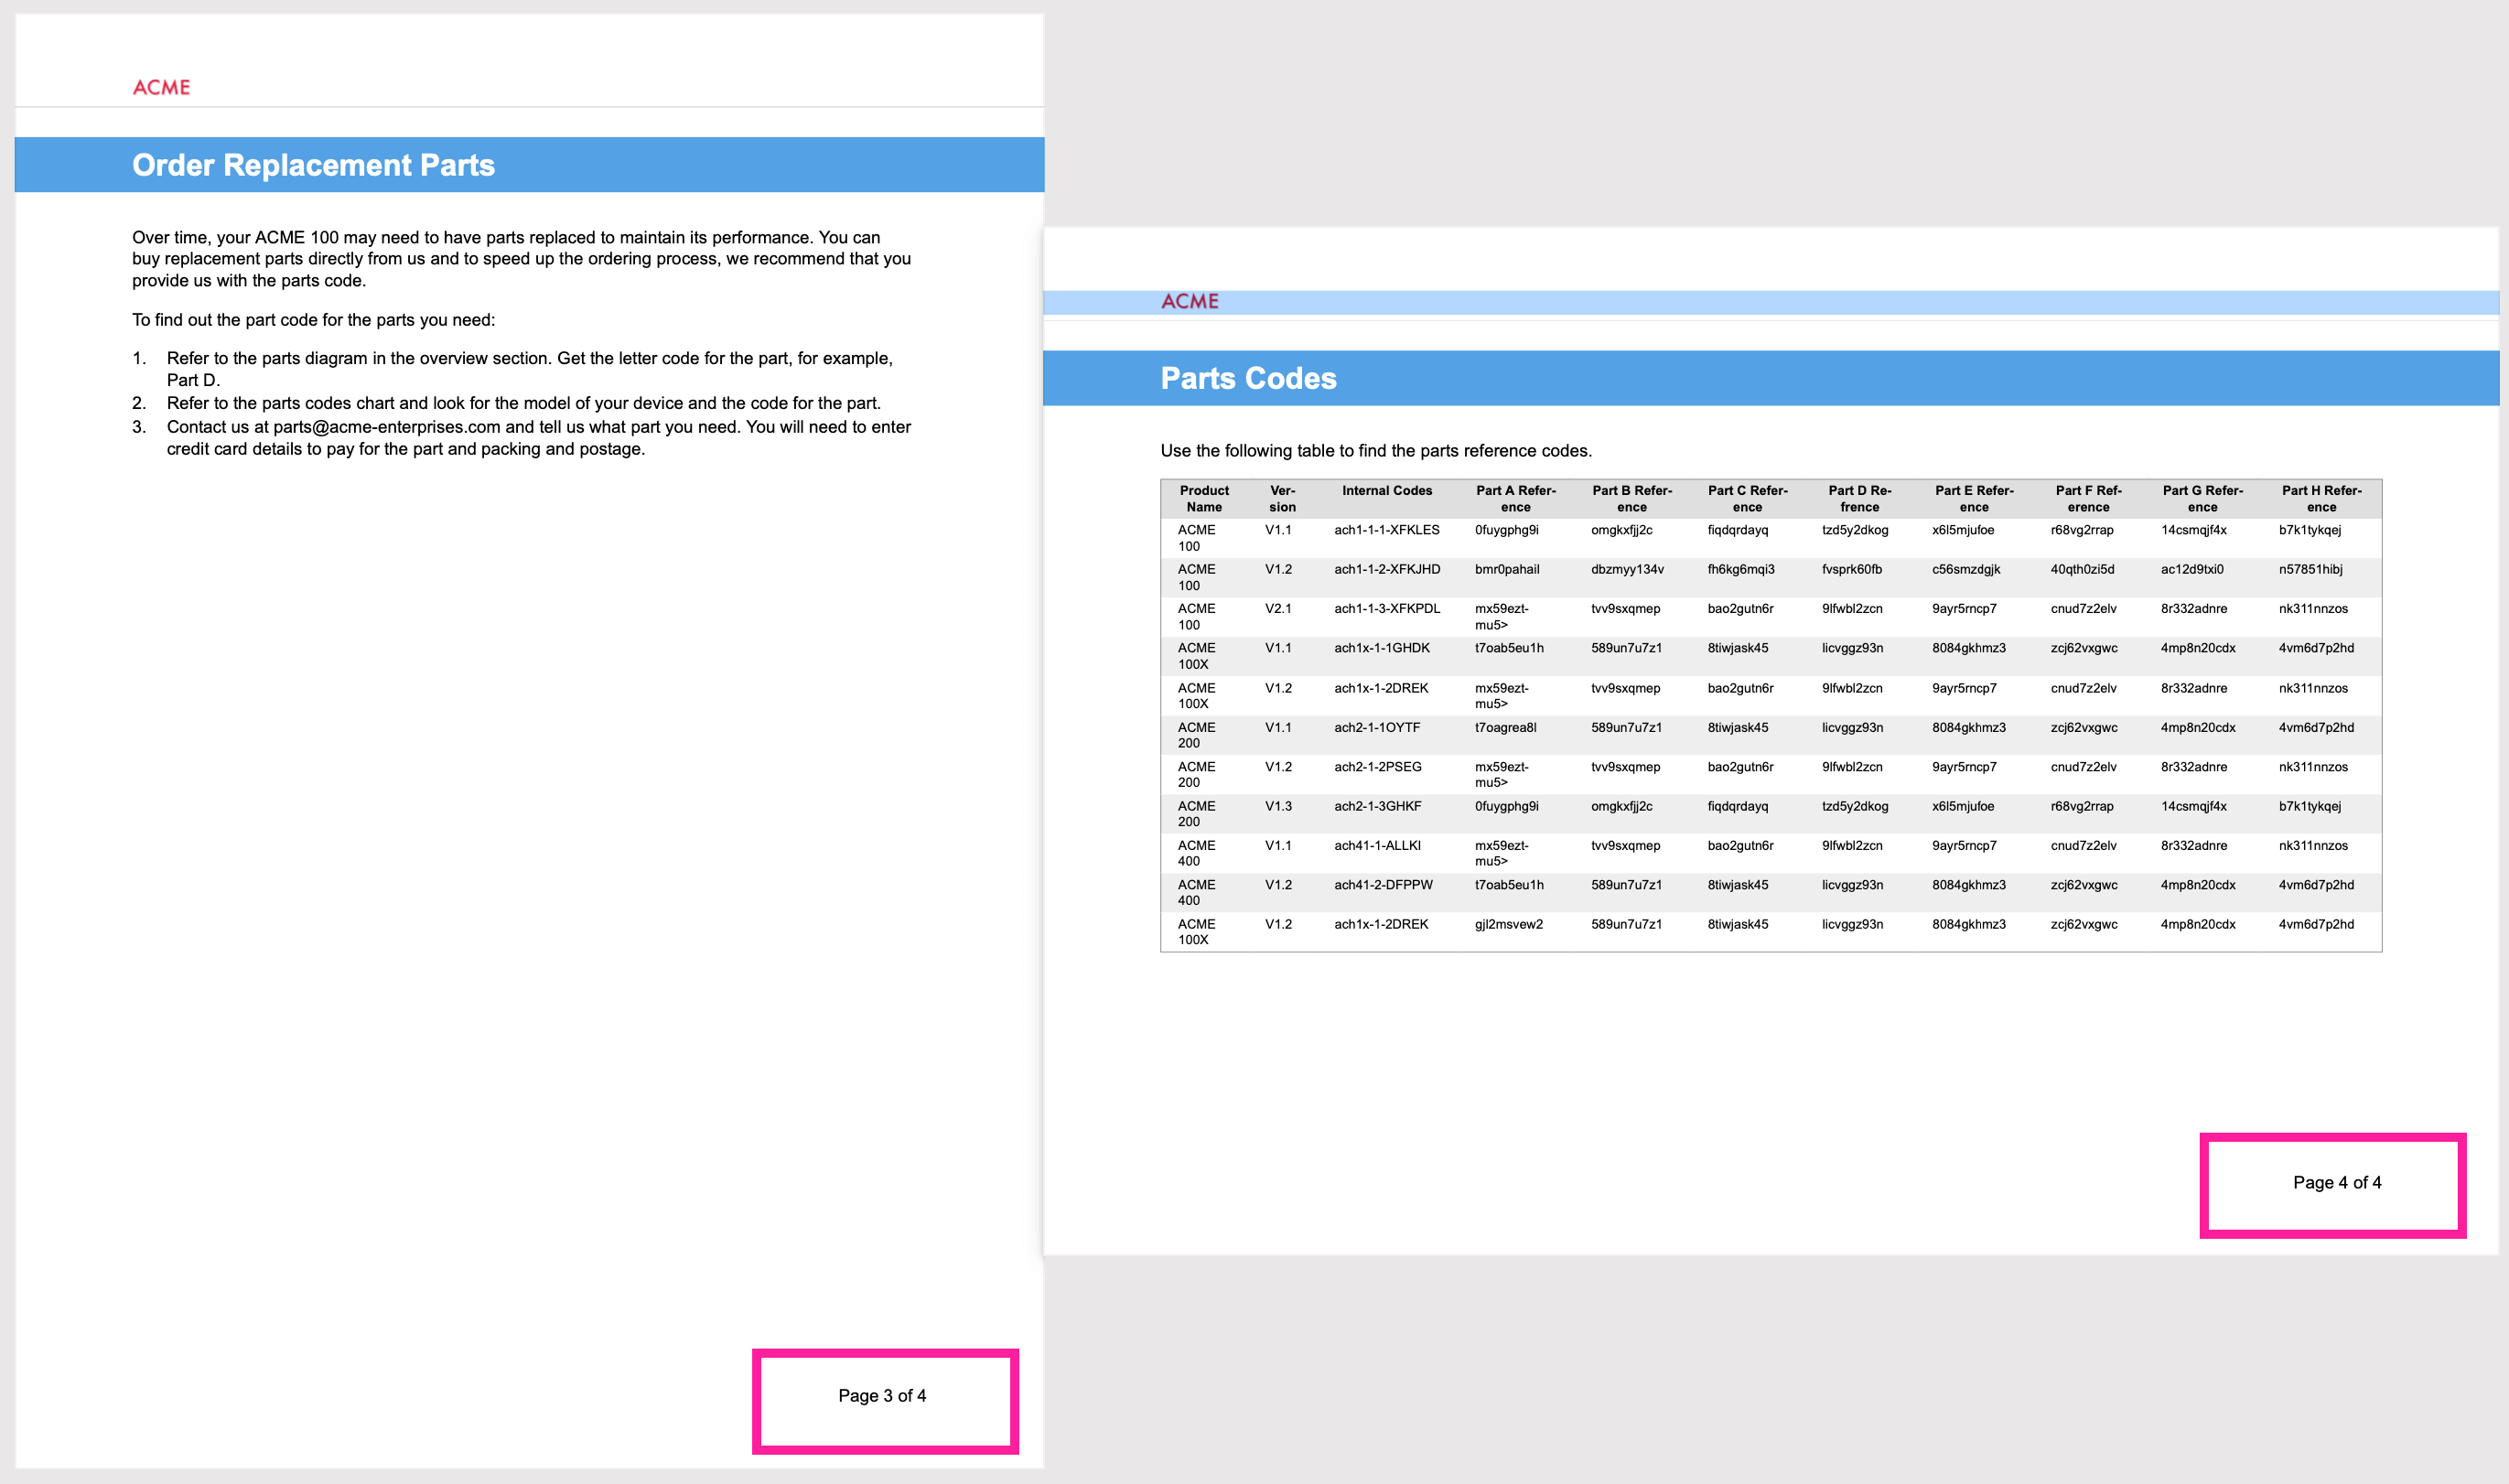
In the following image, page 3 of the document is set to portrait orientation (default) and page 4 is landscape. The topic for page 4 has a role attribute on the section element with the value set to rotate.
 |
To rotate the content in a section or appendix in a top-level topic:
Select the topic or component in the Content Manager to open it in the Editor.
Alternatively, you can Create a Topic and edit that.
Select the the top level element (either the
sectionor theappendixelement in the Element Structure Menu and choose Go to element.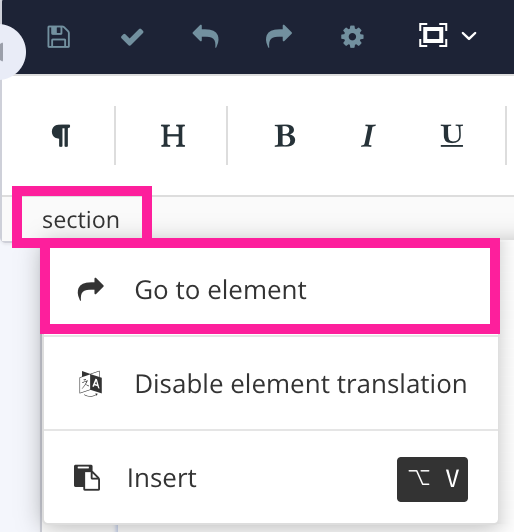

To the left - For regular topics and index topics, select the
sectionelement. To the right - For appendix topics, select theappendixelement.Add the
roleattribute in the Element Attributes Panel and set the value torotate.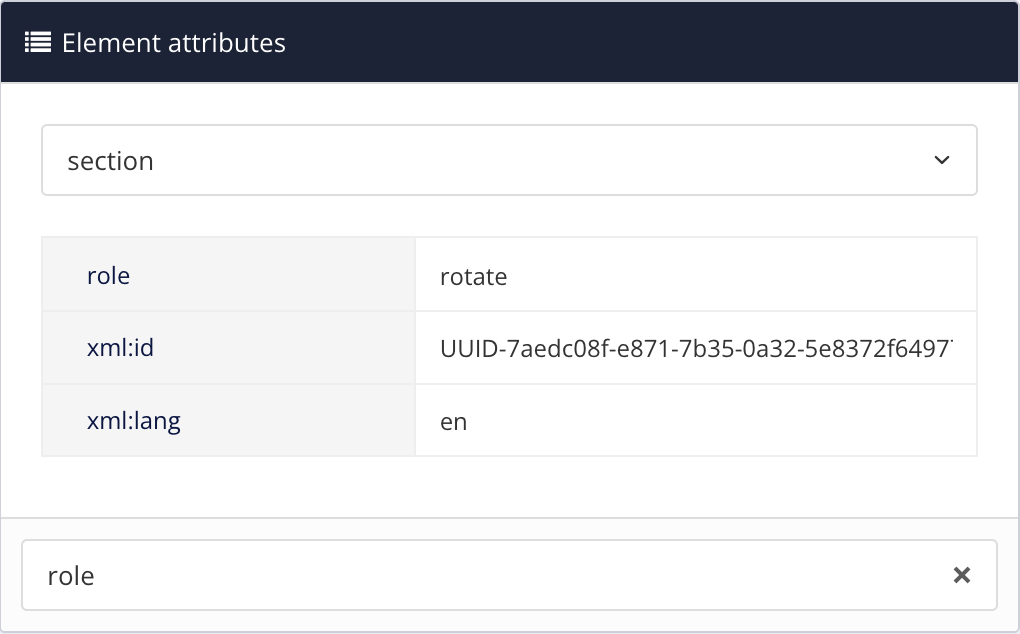
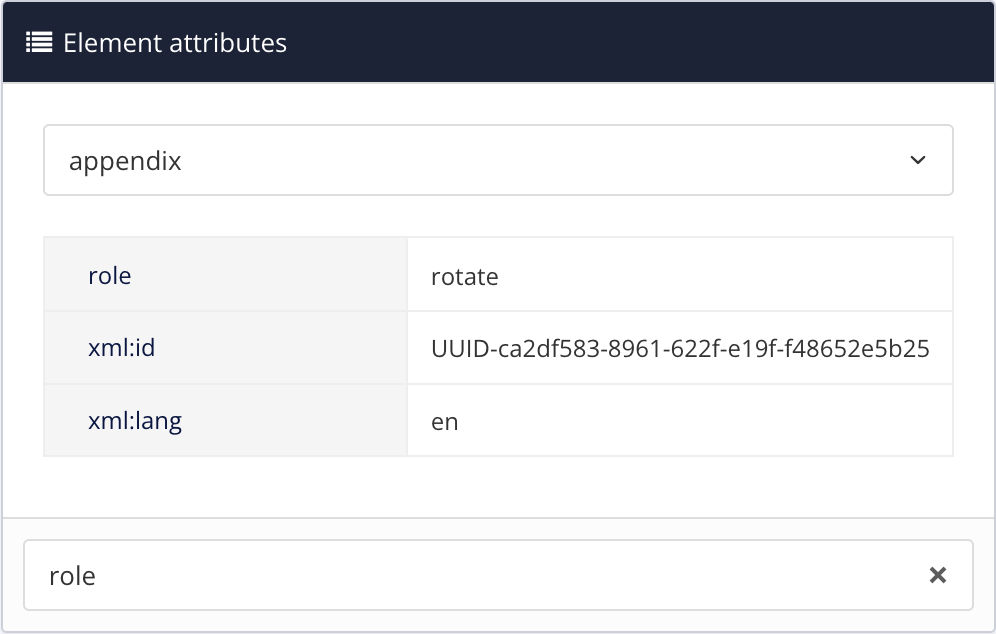
To the left - The role attribute added to a section element. To the right - The role attribute added to an appendix element.
Select Save.
When you publish the topic as part of a publication, Paligo will rotate the page(s) that contain the content of that topic.
Each page for PDFs consists of various margins and regions that you can adjust to meet your requirements.
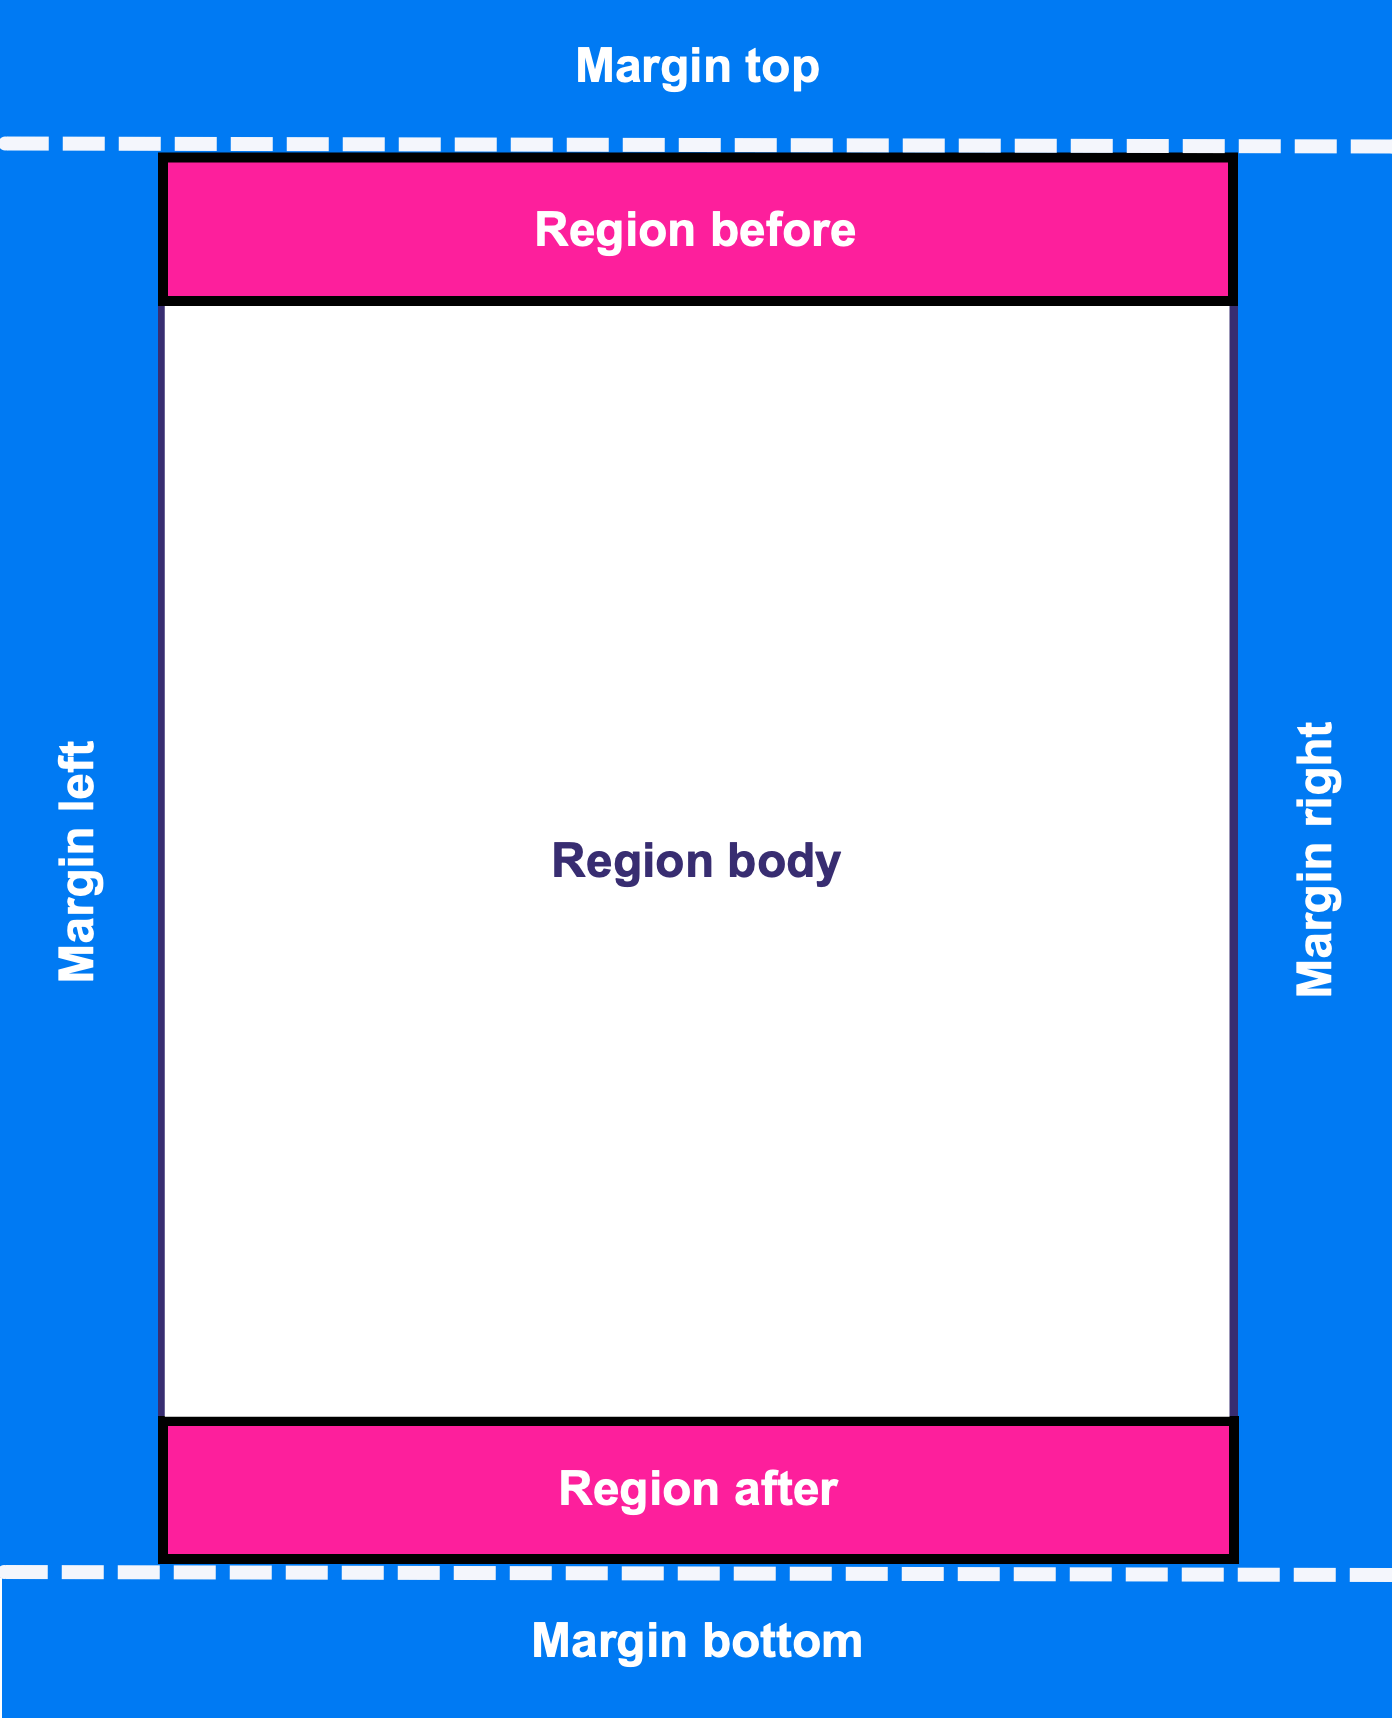 |
Margin top is the space between the top of the header and the top of the physical page.
Margin left is the space between the left edge of the page and the region start area.
Margin right is the space between the right edge of the page and the region end area.
Margin bottom is the space between the bottom of the physical page and the bottom of the footer.
Region before is the space above the body content. Paligo uses this area for the header.
Region body is the body content.
Region after is an area below the body content. Paligo uses this area for the footer.
Set the page margins and spacing. There are settings for each of the margins and regions. When you define a margin, enter the value and the units of measurement (for example 24mm)
Tip
To learn more about the margins and regions, which use XSL-FO, see w3schools.com. But note that Paligo does not use region-start or region-end.
To change the page margins for a PDF output:
Select Layout in the top menu.
Paligo displays a list of Layouts. The list is empty if there are no custom Layouts in your Paligo instance.
Select the Layout you want to update or Create a Layout.
Tip
You can copy the URL of the Layout Editor and paste it into a new tab in your browser. This can be useful if you frequently switch between your Paligo content and the Layout settings.
Select General in the sidebar.
Select Page Margins in the sidebar.
Adjust the page margins for top and bottom:
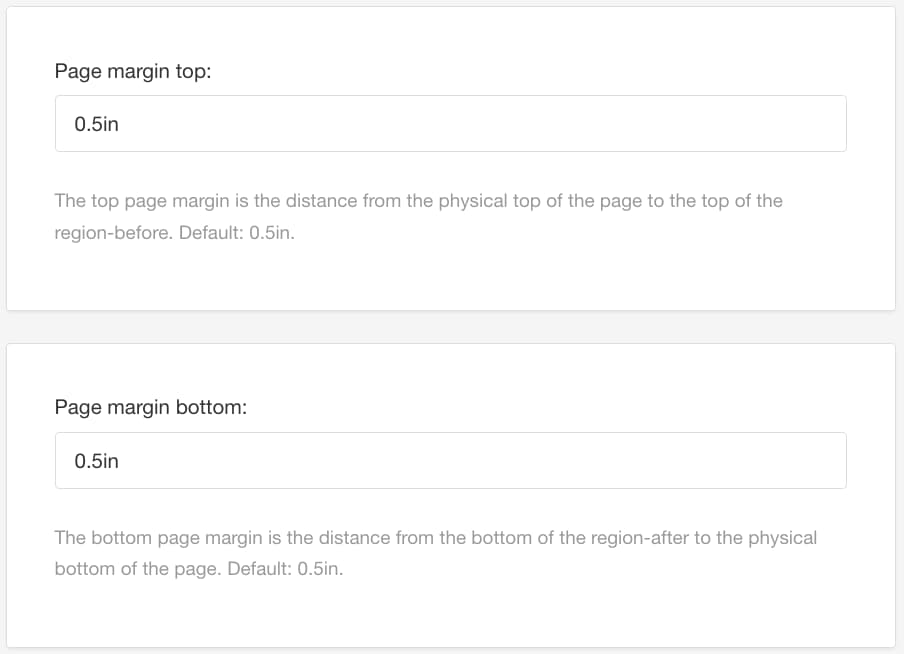
Page margin top - Set the space between the top of the physical page and the top of the header ("region before" area).
Page margin bottom - Set the space between the bottom of the physical page and the bottom of the footer ("region after" area).
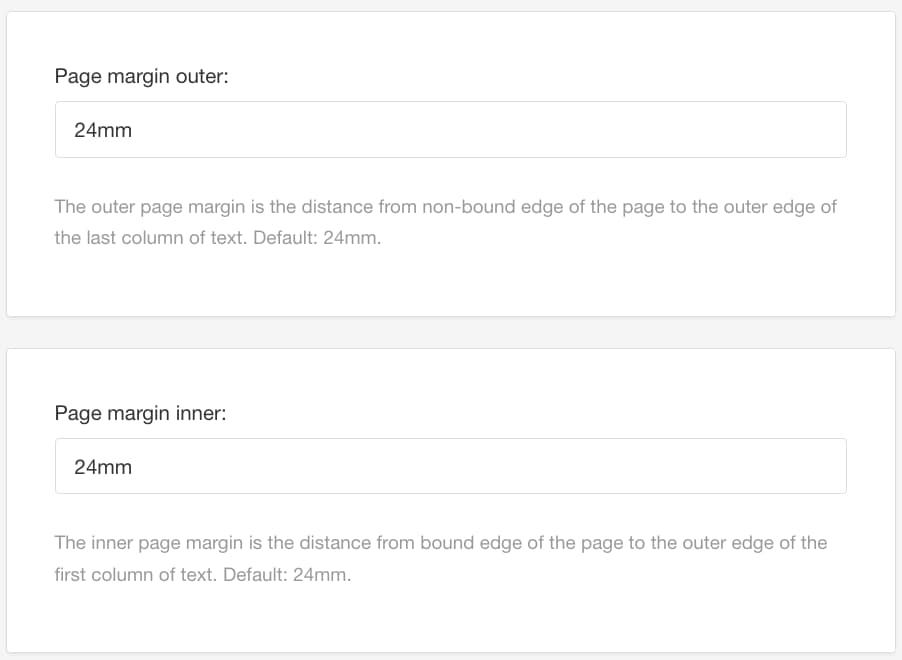
Adjust the page margins for outer and inner:
Page margin outer - Set the margin on the outer edge of the page.
Page margin inner - Set the margin on the inner edge of the page. This is the binding edge where the pages would be connected to the spine of the book if they were printed as a physical document.
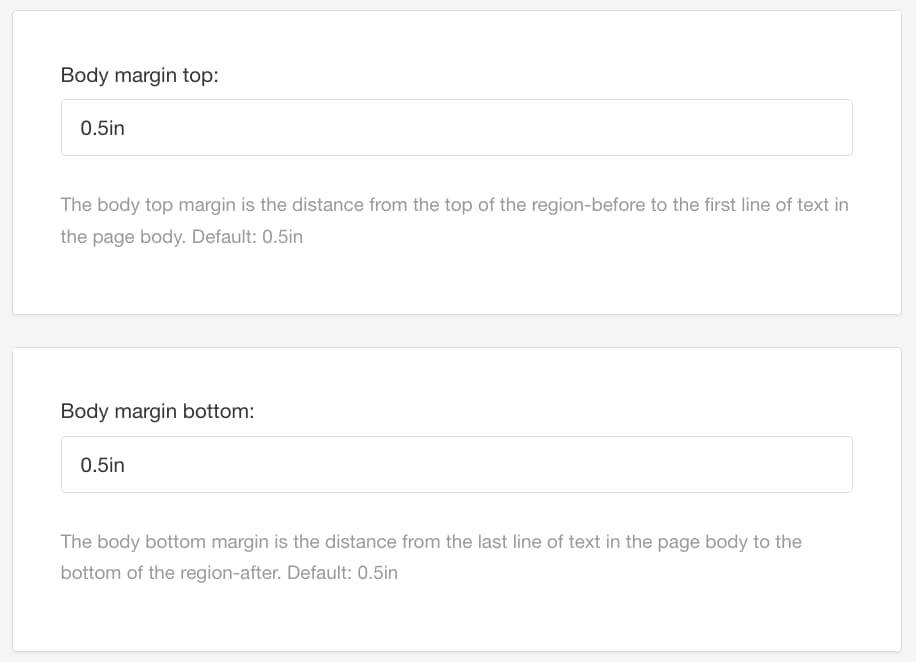
Adjust the body margin for top and bottom:
Body margin top - Set the distance from the top of the "region body" section to the top of the "region before" section (the header section).
Body margin bottom - Set the distance from the bottom of the "region body" section to the bottom of the "region after" section (the footer section).
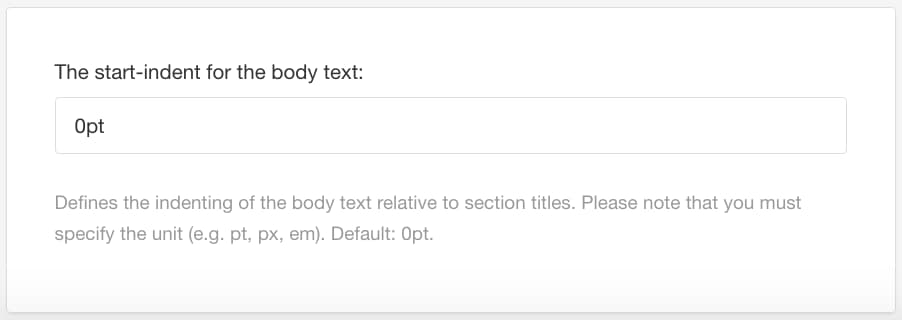
Set an additional left margin for the body content in The start-indent for the body text.
This has the effect of indenting your content from the start of the title, by an amount of your choice.
Select Save.
When you publish with this PDF layout, Paligo applies your choices.
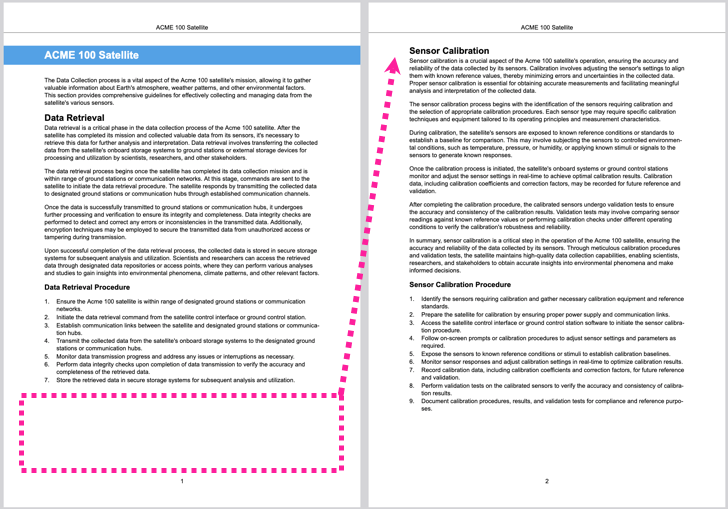
Use page breaks to control how Paligo allows content to flow from one page to the next. They are only relevant to printed outputs, such as PDF, and do not apply to digital formats such as HTML or HTML5.
Paligo handles page breaks automatically during the publishing process. It uses a set of default rules for page breaks, which make sure that certain elements are kept together. For example, titles are always kept on the same page as the next element, which is usually the first paragraph of a topic.
But there may be times when you want page breaks to be handled differently. For those situations, we recommend that you use the PDF Layout to set:
These are breaks that only apply to topics when the content is too large to fit on a single page.
These are breaks that apply to all Level 1 topics and/or all Level 2 topics. With these, the idea is that you apply page breaks consistently to all topics at the top level or second level in your publication structure.
It is also possible to set Hard Page Breaks, which are fixed breaks that always occur, no matter where the topic appears. We recommend that you avoid using hard breaks and use soft page breaks and section page breaks instead. But you may prefer to use hard page breaks in certain circumstances, and Paligo does support that.
Soft page breaks allow you to control how elements break across the end of a page or column. For example, you can set example elements to always remain intact, so that the entire example is shown on a single page and cannot break across two pages.
During publishing, Paligo will apply soft page breaks automatically, but these may not match your requirements. For greater control, you can use your PDF Layout to set your own soft page breaks. The PDF Layout has Keep-together options which let you choose page break preferences for most of the commonly used elements.
Note
Industry best practice is to rely on the Layout settings for controlling your page breaks. But be aware that it is also possible to use keep-together attributes to apply page breaks on specific elements. These attributes are intended for use only in exceptional circumstances, where you need a particular element to break across a page differently.
Set Page Break Rules in the PDF Layout
To use the PDF Layout settings to define the page break rules:
Select Layout and then select the PDF Layout you are going to use for publishing. Alternatively, you can create a new PDF Layout (see Create a Layout).
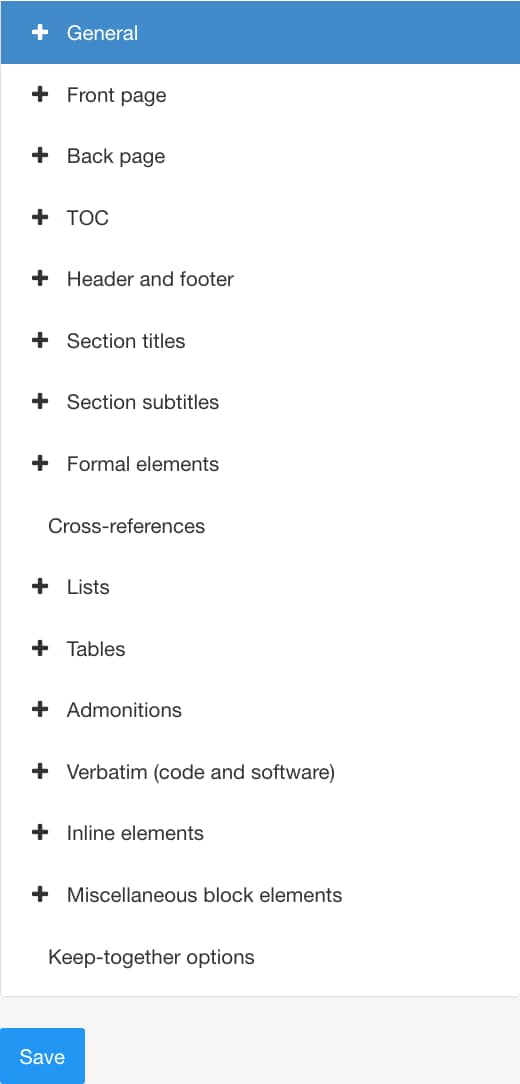
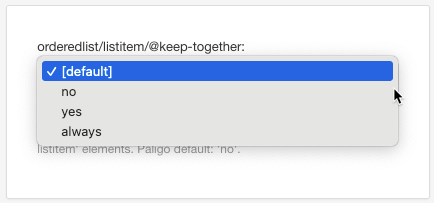
Select Keep-together options.
The Keep-together options include settings for a range of commonly used elements. For example, para/@keep-together is for setting the rules for paragraph elements, table/@keep-together is for table elements, tr/@keep-together is for table rows and so on.
Use the settings to control what happens to each type of element if it cannot fit at the end of a page or column. Choose from:
Yes - Paligo will try to keep the element together, on one page. This may result in a page break before the element, so that the start of the element is on the next page.
No - Paligo will allow an element to break across a page. The first part of the element will be on one page and, if there is no space for the rest of the element, the second part is moved to the next page.
Always - Paligo will force the element into the available space. This can result in the element crossing into the footer and may even go beyond the page boundary.
Default to inherit the value for this setting from the base Layout. The base Layout is either a built-in Layout provided by Paligo or another custom Layout, see Layout Relationships - Base, New, Duplicate.
For an example that shows the effect of a keep-together page break, see Example Soft Page Breaks.
Repeat the previous step for each setting, as required.
Select Save.
When you publish with this Layout, Paligo will apply the keep-together rules you have set.
Note
If there are any elements that have keep-together attributes, those attribute settings will take priority over the Layout settings (see Set Page Breaks with "keep-with" Attributes).
Set Page Breaks with "keep-with" Attributes
We strongly recommend that you use the PDF Layout settings to control the page breaks in your content. This keeps formatting and content separate, which is an important concept in Paligo. But in certain situations, you may need an element to break differently. In those exceptional cases, it is possible to use the keep-together and keep-with-next attributes to apply different soft page breaks.
Position the cursor in the element that you want to control.
If content consists of several nested elements, you should select the outermost element. For example, an image has
mediaobject>imageobject>imagedataand you should apply the attribute setting to themediaobjectelement.Select the element in the Element Structure Menu and choose Go to element.
In the Element Attributes Panel, select Add attribute and then add the element you want to use:
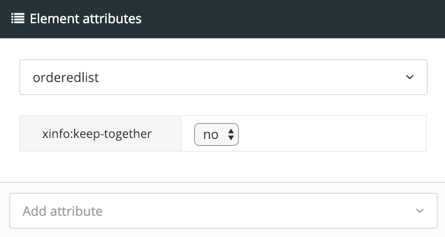
xinfo:keep-togetherThis attribute lets you control how the element breaks on to the next page.
Set the attribute value to yes to start the element on a new page (if the element does not fit on the current page). Set the value to no to allow the element to break across pages. This is the default setting.
xinfo:keep-with-nextThis attribute lets you control whether an element stays on the same page as the next element.
Set the attribute value to yes to make the element appear on the same page as the next element in the content. Set the value to no to allow the element and the next element to be on different pages.
For examples that show how the
keep-togetherandkeep-with-nextattributes affect the output, see Example Soft Page Breaks.Select Save.
When you publish your content to PDF, Paligo will apply the page break attributes you have set. These will take priority over the settings in your PDF Layout.
Example Soft Page Breaks
The following examples show the effects of keep-together and keep-with-next soft page breaks.
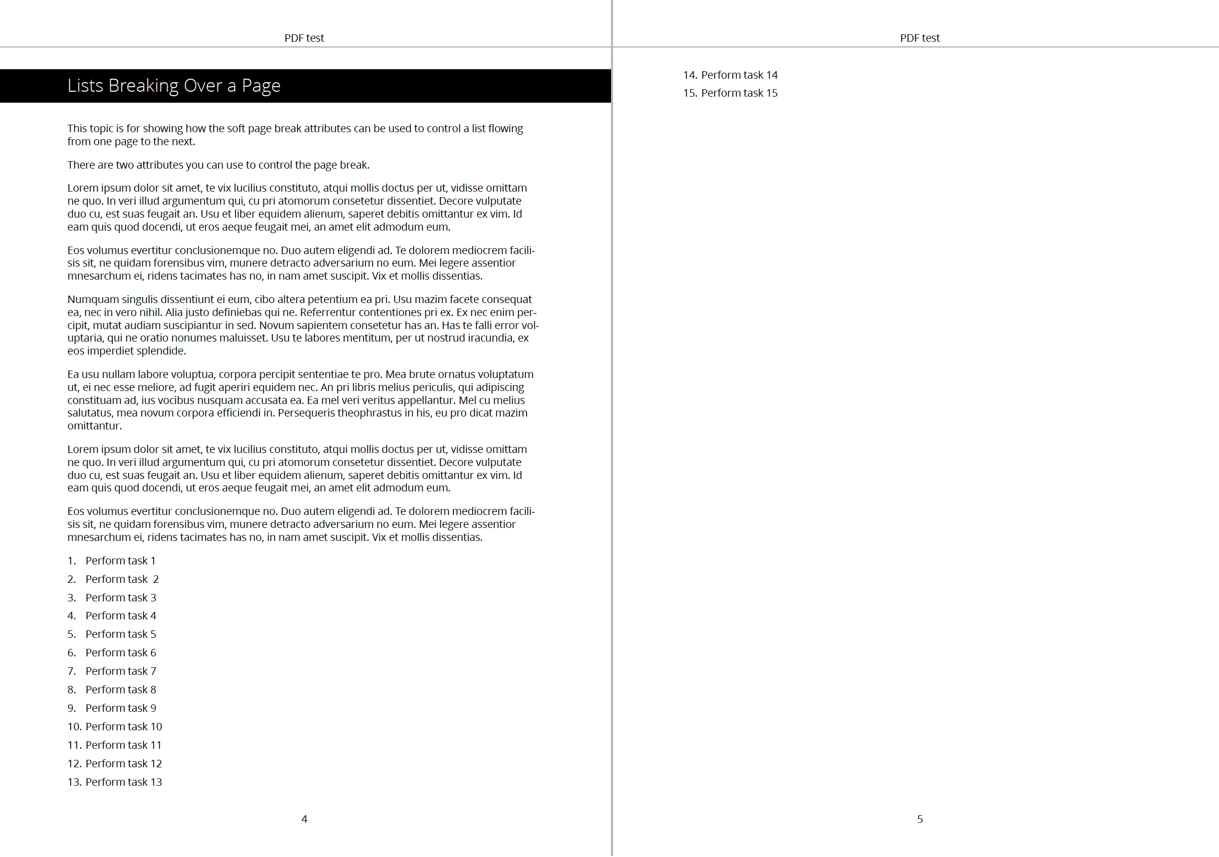
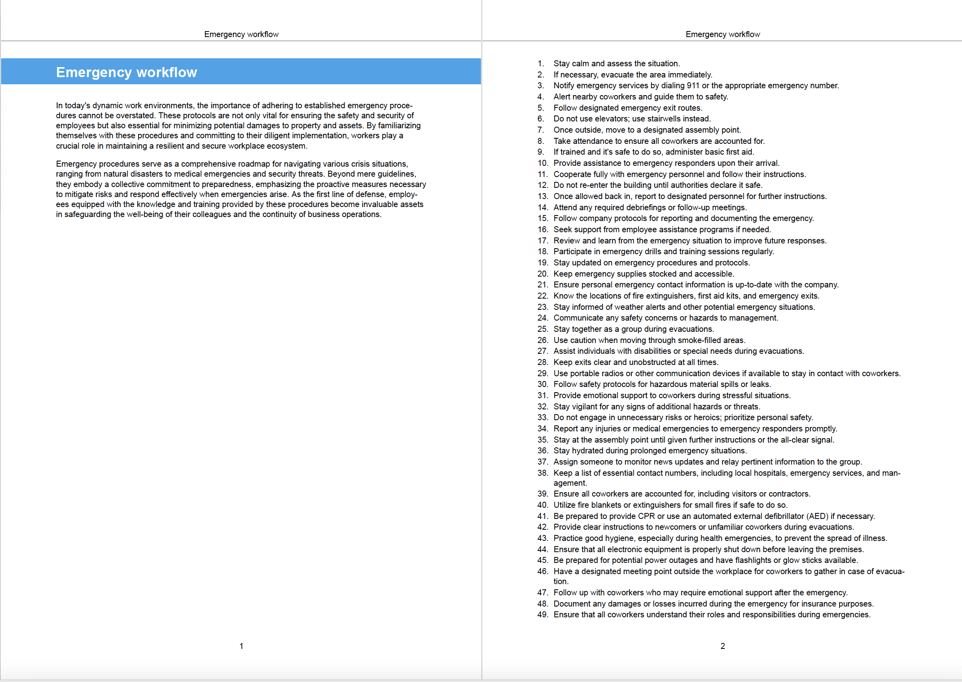
Let's say you have a numbered list (orderedlist) on page 4 and it flows onto page 5. When you publish to PDF, if the list is too large to fit on a single page, it will flow across as many pages as needed. This is because, in the PDF Layout, orderedlist/keep-together is set to No by default.
You edit your PDF Layout, go to the Keep-together Options and set orderedlist/@keep-together to Yes. When you publish with the Layout, the list will start on page 5 (if it is too long to fit on page 5, it will flow to page 6).
Caution
Do not use the value "always" as this could cause the list to continue beyond the page border.
orderedlist/@keep-together set to No
orderedlist/@keep-together set to Yes
Note
You could achieve the same effect with an xinfo:keep-together attribute, but it is better to manage the page breaks on the Layout wherever possible.
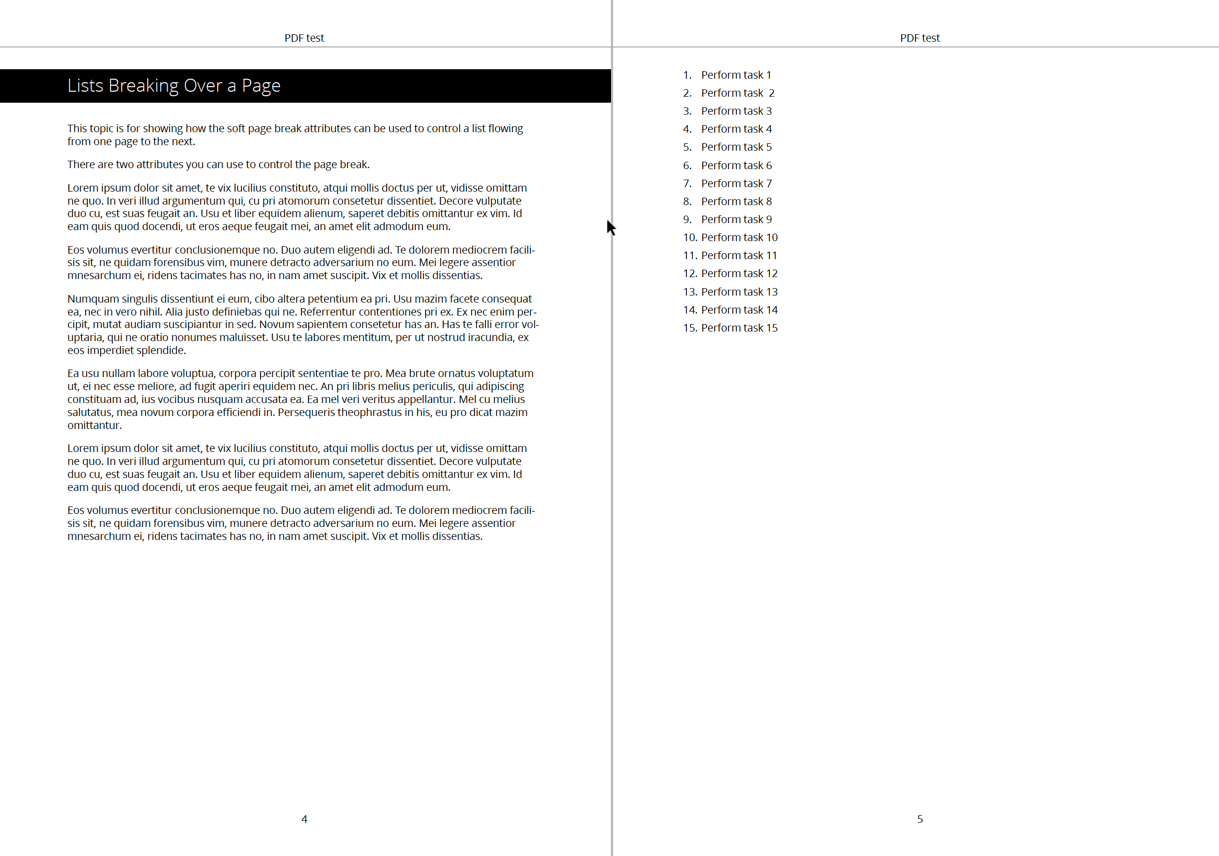
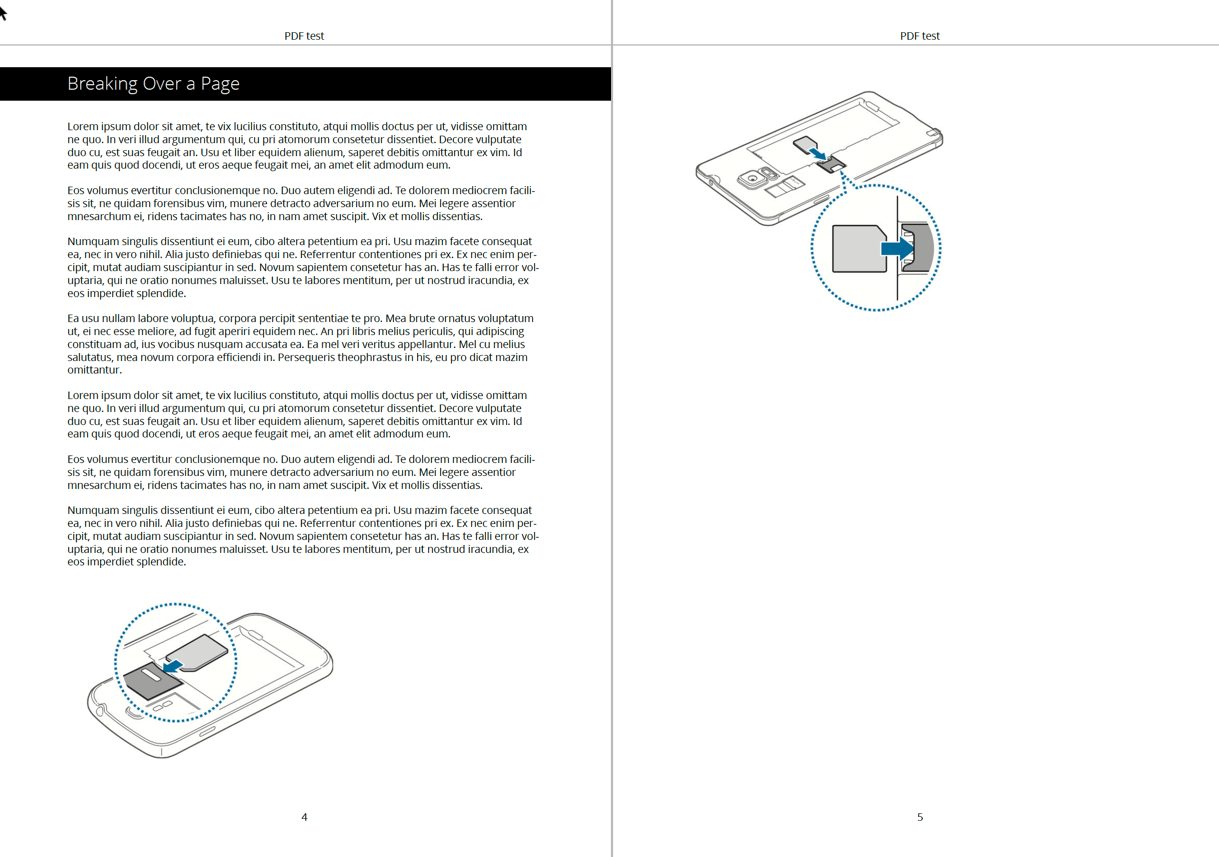
Another scenario is if the list is too long to fit on an otherwise empty page. In this situation:
orderedlist/@keep-together set to No results in the list starting in the flow of the other text and continuing on to the following page(s).
orderedlist/@keep-together set to Yes results in the list starting on the next page after the previous text. It will then continue on to the following pages. This can sometimes cause large gaps on pages.
orderedlist/@keep-together set to No
orderedlist/@keep-together set to Yes. Note that the list starts on the next page and will continue on to further pages.
Let's say you have a document that has an image immediately followed by another image. The images are mediaobject elements. When you publish to PDF, the first image is on page 4 and the second image is on page 5, but you want both images to display on the same page. To do this, you set the xinfo:keep-with-next attribute for the first mediaobject element to yes. This tells Paligo to keep the first mediaobject element with the element that follows it.
xinfo:keep-with-next attribute set to no.
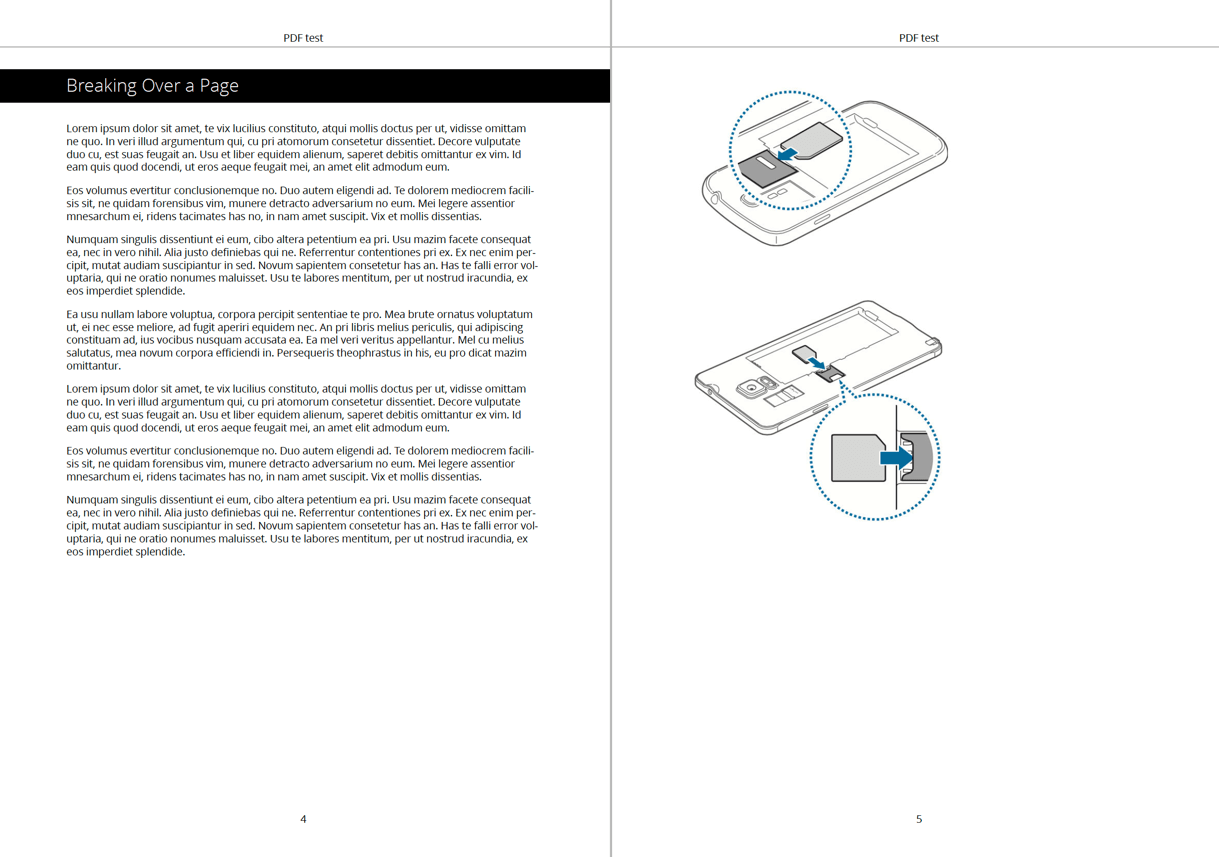
xinfo:keep-with-next attribute set to yes.
Note
If you use the xinfo:keep-with-next attribute on a paragraph element, Paligo will keep the last two lines of the paragraph on the same page as the next element. (This is because the default setting for orphans is 2 lines).
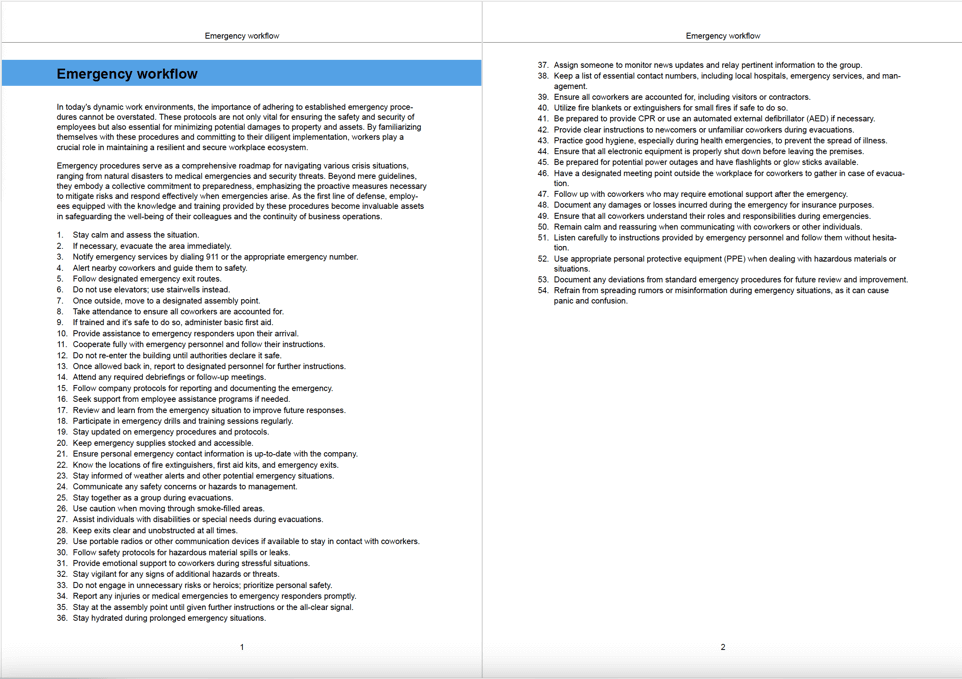
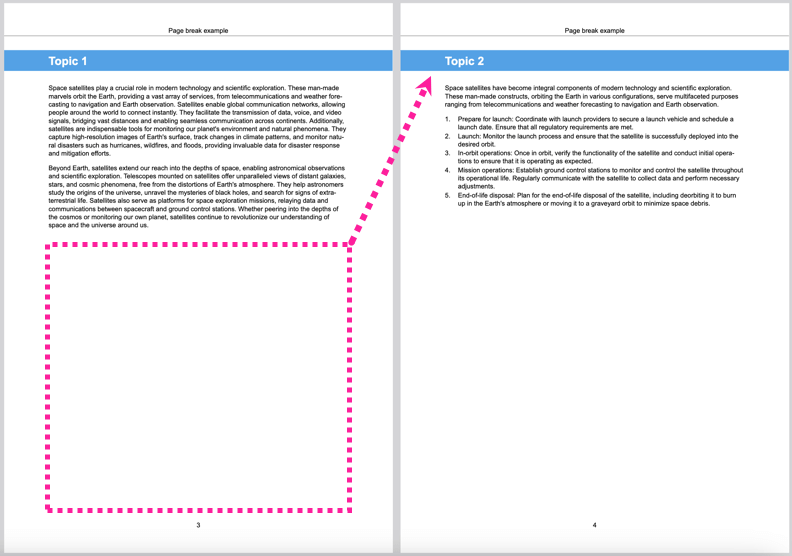
If the sections in your PDF are insufficiently spaced out, it can make your document look cluttered and make it more difficult to read. One way to resolve this issue is to use section page breaks. These are forced page breaks that appear before or after sections that are positioned at level 1 or level 2 in your publication structure. By having these sections on separate pages, it can mean there is extra white space between your sections, making the document easier on the eye.
For example, here is a double-page spread with no section breaks in place. Level 2 sections can break across the page and the next Level 2 section can be on the same page as the previous one.
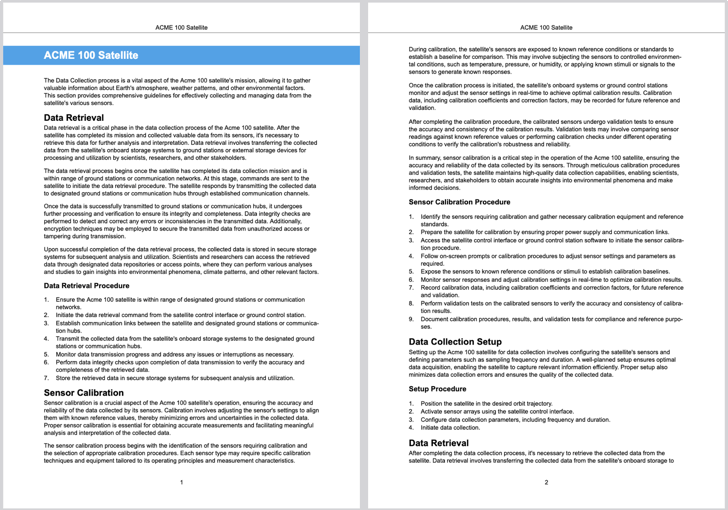 |
With a "Page break after section" in place, the second Level 2 section is pushed on to the next page. This creates more white space at the end of the previous Level 2 section.
 |
To apply (or remove) section breaks to all sections at level 1 or level 2 in the publication structure:
Select Layout and then select the PDF Layout you are going to use for publishing. Alternatively, you can create a new PDF Layout (see Create a Layout).
Expand Section Titles in the sidebar.
Select Level 1 or Level 2, depending on the level you want to control.
To control breaks immediately before your sections, use Ensure a page break before the section:
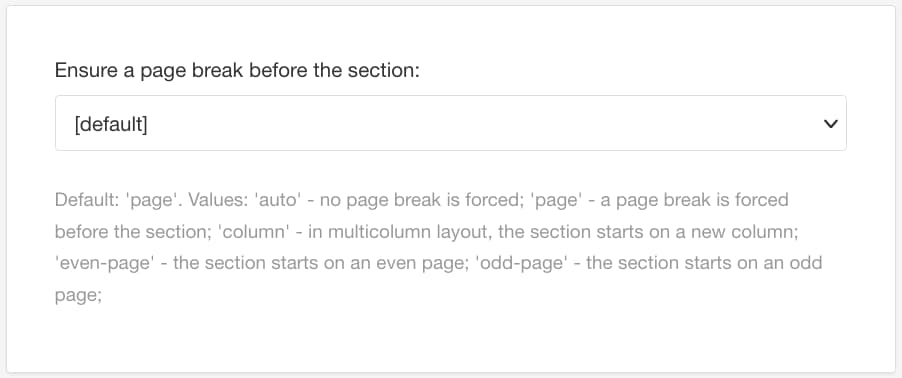
Choose:
Auto - For no page breaks before sections at this level*. Default for Level 2.
Column - In a multi-column layout, each section at this level will start in a new column.
Page - To add a page break before each section at this level*. Default for Level 1, if single-sided.
Even-page - Each section at this level* will start on an even-numbered page.
Odd-page - Each section at this level* will start on an odd-numbered page. Default for Level 1, if double-sided.
* Where the level is 1 or 2, depending on whether you are editing the Level 1 or Level 2 settings.
To control breaks after your sections, use Ensure a page break after the section:
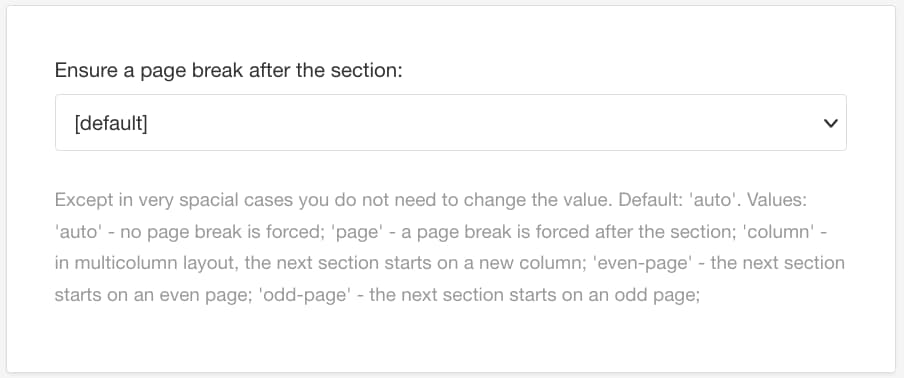
Important
Normally, we recommend that you do not change this setting. Instead, use the setting Ensure a page break before the section.
Choose:
Auto - For no page breaks after your sections. Default.
Column - In a multi-column layout, the next section at the same level* will start in a new column.
Page - To add a page break after each section at this level*.
Even-page - The next section at the same level* will start on an even page.
Odd-page - The next section at the same level* will start on an odd page.
* Where the level is 1 or 2, depending on whether you are editing the Level 1 or Level 2 settings.
Select Save.
Note
By default, Paligo adds blank pages in double-sided documents to satisfy break requirements. If needed, this feature can be deactivated, see Include or Exclude Blank Pages (PDF).
A hard page break is a fixed break that you can apply to a topic (the topic's section element, specifically). When in place, it forces the entire topic to appear on a new page, even if there is enough space to fit it on the previous page.
 |
Important
Hard page breaks are always in a fixed position. The page breaks always happen at that point, no matter where the topic is used. This can be a problem if you reuse a topic in multiple publications or if you translate your content. In those situations, the fixed page break can occur in an awkward position or may result in large amounts of white space.
We recommend that you avoid Hard Page Breaks and use Soft Page Breaks and Section Page Breaks instead.
If you really want to use a hard page break, the following steps explain how to do it. But be aware that it will cause the topic to always start on a new page, no matter where it is used.
Select the topic or component in the Content Manager to open it in the Editor.
Alternatively, you can Create a Topic and edit that.
Select the
sectionelement in the Element Structure Menu.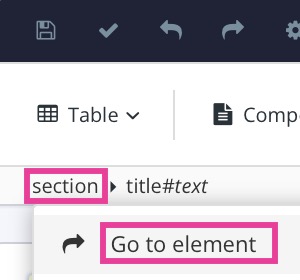
Select Go to element.
Add the
xinfo:pagebreakattribute in the Element Attributes Panel.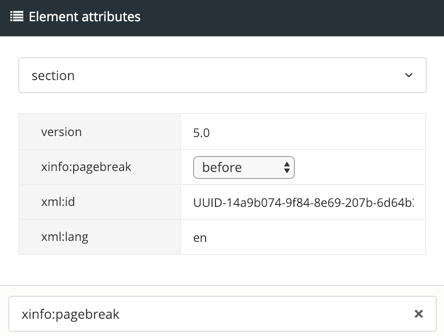
Set the value to before. This will add a hard page break before the selected section.
There are other options for the attribute, but "before" is the most commonly used.
Select Save.
Repeat this procedure for every topic that you want to have a hard page break before it.
Note
The xinfo:pagebreak attribute does exist on other elements, but is only supported to allow potential customization.