Section Title and Heading Styling (PDF)
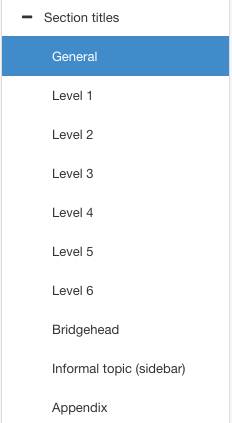
Use your PDF Layout's Section titles settings to style the section headings for your PDFs. The Section titles category has subcategories for:
General, which are settings that apply to all section titles (as long as the equivalent settings in the other subcategories are set to default).
These include settings for section numbering, section depth, fonts, and appendix labels.
Level 1 to Level 6 and these contain settings for each heading level.
Any settings here take priority over the same settings in the General category. For example, if you set the font style to Italic in General and normal in Level 1, all Level 1 headings will use a normal font style.
Bridgehead for styling the title in any bridgehead elements in your content
Informal topic (sidebar) for styling a title that appears in an informal topic. Informal topics do not have title elements by default, but it is possible (and valid) to add one.
Appendix for styling headings in an appendix topic.
We recommend that you start by setting up the General styles. You can then use the other settings as needed, for example, use Level 1 - Level 6 to style your headings and leave the default settings for Bridgehead, Informal topic and Appendix if your documents don't use those.
Note
To set up numbering for headings, see Manage Section Numbering (PDF).
Set the General Styles for All Section Headings
PDF Layouts have a General set of styles that you can use to style all section headings at once. This saves time if you want most section headings to use the same settings.
Paligo will apply a General setting if:
The equivalent setting in the Level 1 - Level 6, Bridgehead, Informal topic (sidebar) or Appendix sections is set to default (or blank where appropriate)
The equivalent setting in the base Layout is also set to default (or blank where appropriate)
If you want particular headings to have different styling, you can make those choices in the Level, Bridgehead, Informal topic (sidebar) and Appendix categories. The styles you set in those will take priority over the General styles.
To set the General styles for section titles:
Select Layout in the top menu.

Paligo displays a list of Layouts. The list is empty if there are no custom Layouts in your Paligo instance.
Select the PDF Layout you are going to use for publishing. Alternatively, create a new one (see Create a Layout).
Select Section titles.
Select General.
Use Font weight for section titles to set the thickness of the characters.
Use Font style for section titles to add or remove emphasis styling from the text. Choose Normal for regular text, Italic for forward leaning text, or Backslant for backwards-leaning text.
Note
Using Backslant can produce poor results, as many fonts do not support it as a separate outline.
Use Color for section titles to apply a custom color to the text in the title.
Clear the Use default color checkbox to select a color of your own choice.
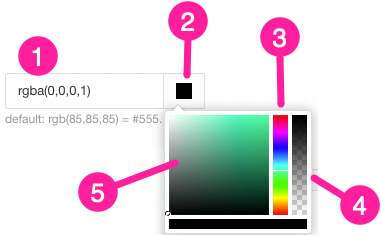
Set the color either by:
Entering an RGBA code for the color you want (1).
Selecting the Color square to display the color selector (2).
Choose the color with the spectrum bar (3).
Control the transparency with the opacity bar (4).
Choose the color shade with the main color panel (5).
Set the Capitalization for section titles. This controls whether characters are shown in upper case, lower case, or a combination of the two.
Set the Letter spacing for section titles. This is the amount of horizontal spacing between each letter.
To increase the amount of spacing, enter:
A relative amount and units of measurement, for example, 0.2rem
An absolute amount and units of measurement, for example, 1px
To decrease the amount of spacing, enter a negative relative or absolute amount, for example, -1px.
Use Section numbering to turn numbering for section headings on or off.
Choose a heading depth from 1 to 8. Alternatively, select Default to inherit the value from the base Layout (see Layout Relationships - Base, New, Duplicate).
Enabled (on)
Disabled (off)
Default to inherit the value for this setting from the base Layout. The base Layout is either a built-in Layout provided by Paligo or another custom Layout, see Layout Relationships - Base, New, Duplicate.
Note
If you want to use appendix section labeling, you must also have Section numbering set to Enabled.
For more information on section numbering, see Manage Section Numbering (PDF).
Use Appendix section labeling to control whether section headings in your appendices get the label of the appendix and a number.
Choose from:
Enabled (on)
Disabled (off)
Default to inherit the value for this setting from the base Layout. The base Layout is either a built-in Layout provided by Paligo or another custom Layout, see Layout Relationships - Base, New, Duplicate.
Note
For this setting to work, you must also have Section numbering set to Enabled and a suitable Section numbering maximum depth set.
For more details, see Appendix Labels on Subsections.
Use Section numbering maximum depth to control how many heading levels use section numbering.
Choose a heading depth from 1 to 8. Alternatively, select Default to inherit the value from the base Layout (see Layout Relationships - Base, New, Duplicate).
For more information on section numbering, see Manage Section Numbering (PDF).
Select Save.
Style Titles (Levels 1-6)
Use the PDF Layout's Level 1, 2, 3, 4, 5, and 6 settings to style your section titles. For example, you could style the level 1 headings to be in bold with a black font and blue background and level 2 headings to have a white background with a smaller, regular thickness, blue font.
The PDF Layout has a Section titles category. Inside that, you can find settings for each section level from Level 1 to Level 6. There are many options for styling the font, spacing, color and more.
Note
The Section titles category also has General settings that apply to all levels (see Set the General Styles for All Section Headings). But your choices for the individual levels take priority over the General settings.
To style the titles for the various section levels:
Select Layout in the top menu.
Paligo displays a list of Layouts. The list is empty if there are no custom Layouts in your Paligo instance.
Select the PDF Layout you are going to use for publishing. Alternatively, create a new one (see Create a Layout).
Select Section titles.
Select the level that you want to style. For example, to style titles that appear at level 3 in the structure, select Level 3.
Use the Set the font size for level <n> titles setting to control the size of the lettering.
Use Font weight for level <n> titles to set the thickness of the characters.
Use Font style for level <n> titles to add or remove emphasis styling from the text. Choose Normal for regular text, Italic for forward leaning text, or Backslant for backwards-leaning text.
Note
Using Backslant can produce poor results, as many fonts do not support it as a separate outline.
Set the Font variant for level <n> titles to Normal for regular sized, mixed case letters or Small-caps for smaller, upper-case letters.
Use Set Color for level <n> titles to apply a custom color to the text in the title.
Clear the Use default color checkbox to select a color of your own choice.
Set the color either by:
Entering an RGBA code for the color you want (1).
Selecting the Color square to display the color selector (2).
Choose the color with the spectrum bar (3).
Control the transparency with the opacity bar (4).
Choose the color shade with the main color panel (5).
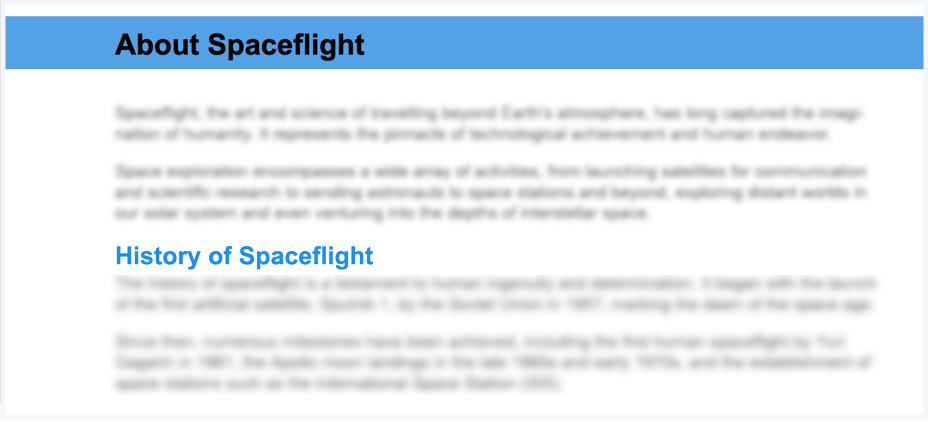
Use Set background color for level <n> titles to apply a custom color behind the text in the title.
For example, in the image shown, the text color is set to black and the background color is set to a shade of light blue.

As with the Set color for level <n> titles option, clear the Use default color checkbox to set a color of your own choice. Use the color selector to choose the color.
Set the Line height for level <n> titles. The line height is the amount of space between lines of text in the title.
Enter one of these:
An absolute value with the units of measurement, for example, 14pt
A relative value, such as 0.8em or 80%
normal. Sets the distance between the baselines of adjacent lines in the same paragraph to 120% of the font size.
Leave the field blank to inherit this value from the base Layout (see Layout Relationships - Base, New, Duplicate).
Use Font-family for level <n> titles to choose the typeface for the text.
Use the Ensure a page break settings to control how a title will break on to a new page.
Ensure a page break before the section inserts a page break before the title.
Ensure a page break after the section inserts a page break after the title.
This option is only intended for special cases where there is a specific need to have the content that follows a title on the next page. In most cases, leave this set to 'auto'.
Ignore the Background color for chapter titles setting. Use the Set background color for level 1 titles setting instead.
Background color for chapter titles only remains in Paligo so that we can support long-term customers who may have used it previously.
Set the Capitalization for level <n> titles. This controls whether characters are shown in upper case, lower case, or a combination of the two.
Set the Letter spacing for level <n> titles. This is the amount of horizontal spacing between each letter.
To increase the amount of spacing, enter:
A relative amount and units of measurement, for example, 0.2rem
An absolute amount and units of measurement, for example, 1px
To decrease the amount of spacing, enter a negative relative or absolute amount, for example, -1px.
Set the Alignment for section level <n> titles.
Choose from:
Set the Bottom margin for level <n> titles. This is the amount of space between the bottom of the title block and the top of the next block of content (typically a
para).Enter an amount, relative to the font size. Do not include any units of measurement. For example, enter 3.0 to have the margin 3× the font size of the title text.
Select Save.
You have now styled the title for one level of headings. Repeat the same steps for the other levels.