Embed Swagger OpenAPI for Zendesk
If you have Swagger OpenAPI content online, you can use Paligo to present that content in Zendesk. To make this work, you create a topic in Paligo and add a link to your Swagger OpenAPI content. Then you publish the topic to Zendesk where the topic is presented as an article. The article contains an embedded "live" version of your Swagger OpenAPI content.
 |
Tip
Paligo also supports Embed Swagger OpenAPI outputs and you can also Import Swagger OpenAPI.
The first part of the process is to add a link to your Swagger OpenAPI content to a topic in Paligo, and then publish it to Zendesk. To publish to Zendesk, your Paligo instance has to be set up to connect to your Zendesk. To find out more about setting up the Paligo-to-Zendesk connection, see Connect Paligo to Zendesk.
When your Paligo instance is set up to connect to Zendesk, you can add the link to a topic and publish it:
Create a Topic that will contain the embedded Swagger content.
Select the
sectionelement in the Element Structure Menu.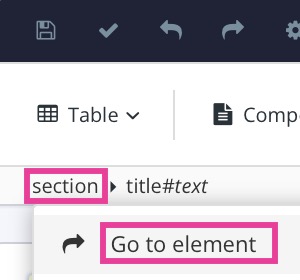
Select Go to element.
Add
roleattribute in the Element Attributes Panel with the valueswagger-topic.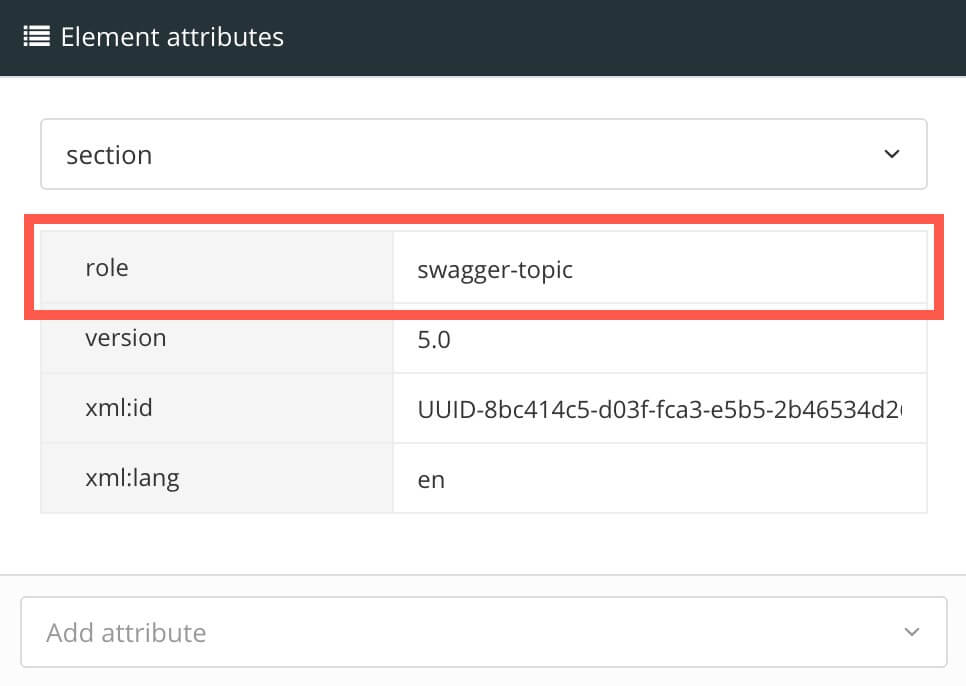
In the topic add a
paraelement (or use an existing emptyparaelement).Press Alt + Enter ⏎ (Windows) or Command ⌘ + Enter ⏎ (Mac) to display the Element Context Menu.
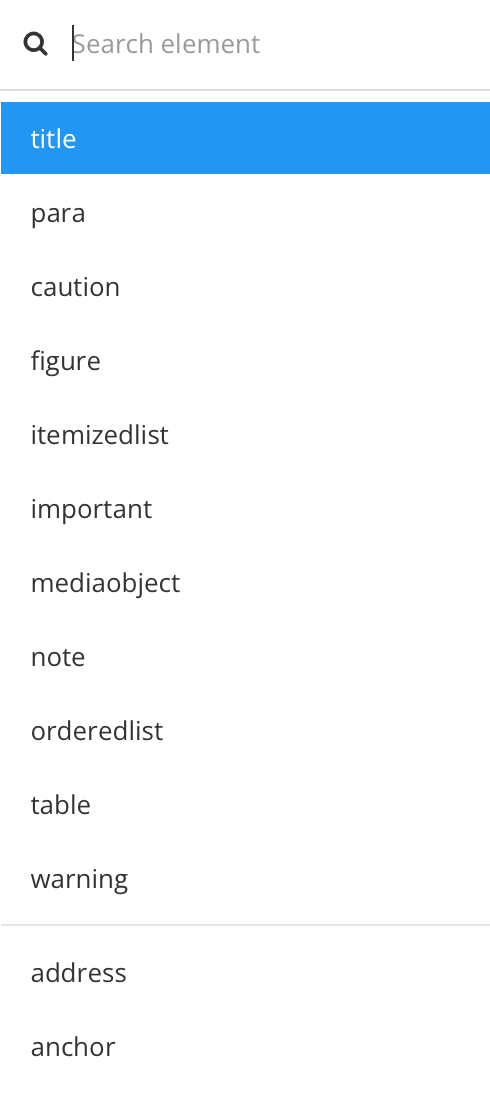
Enter
linkand select it from the list.
Select the
linkelement in Element Structure Menu.Add these attributes in Element Attributes Panel
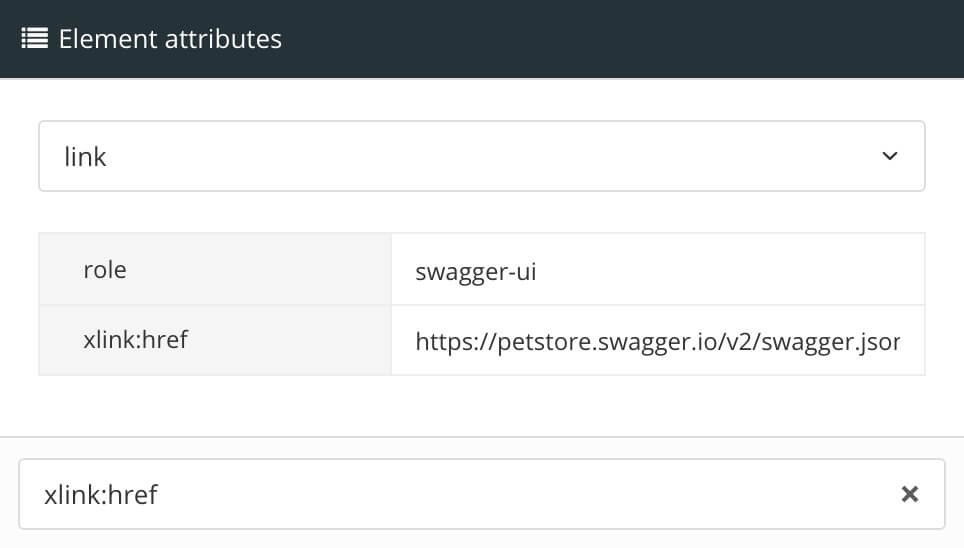
roleand set its value toswagger-uixlink:hrefand set its value to the URL of the JSON or YAML file of your Swagger content.Tip
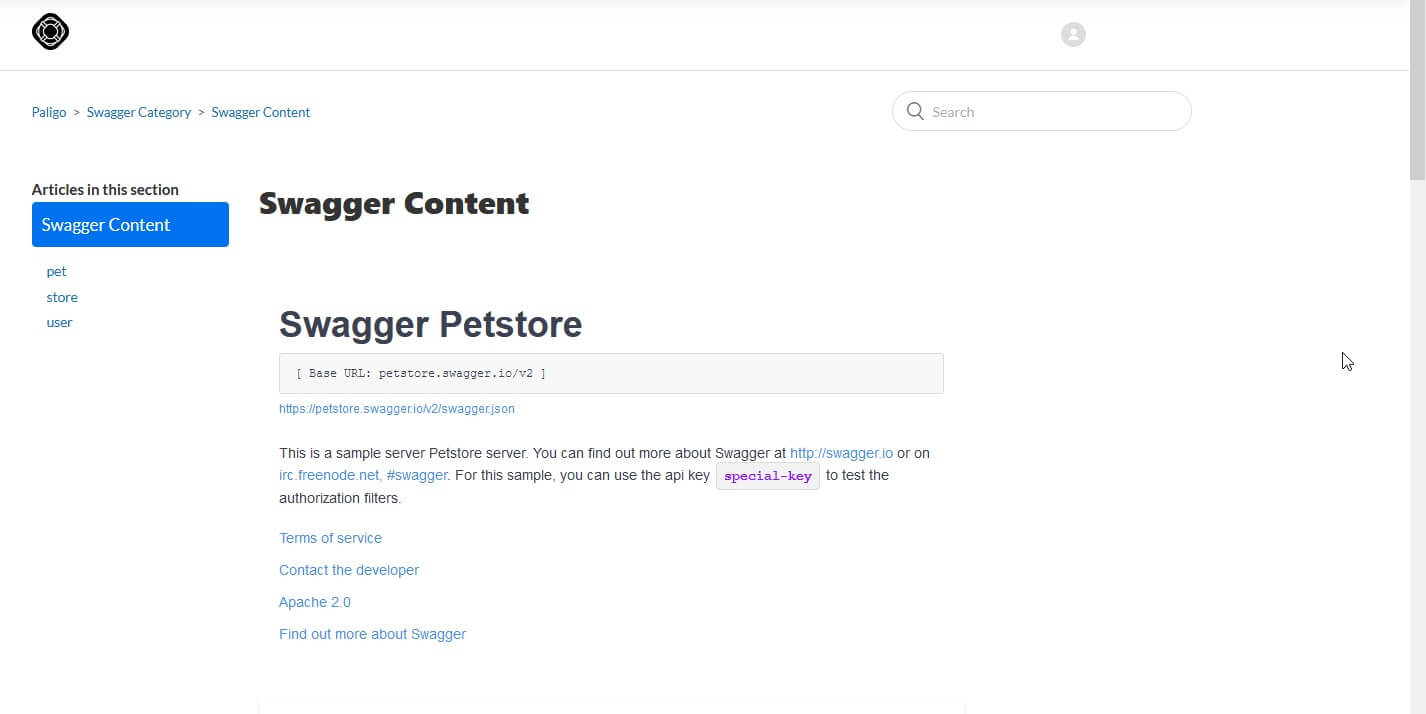
If you don't have your Swagger content available yet, but want to test the integration, you can use the standard Swagger "Pet Store" example, using the URL https://petstore.swagger.io/v2/swagger.json.
Select Save.

Add the topic to a publication and then publish it using a Zendesk layout, see Publish to Zendesk.
When you publish, the content is "pushed" to Zendesk and a zip file is downloaded in your browser.
You will need the zip file for the next part of the process, which is Set Zendesk to Show Swagger OpenAPI Content from Paligo .
When you have Set Paligo to Publish Swagger OpenAPI to Zendesk , you can set up Zendesk to show the embedded content:
Log in to your Zendesk as an administrator.
Select Settings (cog icon) and then in the Knowledge settings category, look for the Security section. Check the Display unsafe content box.
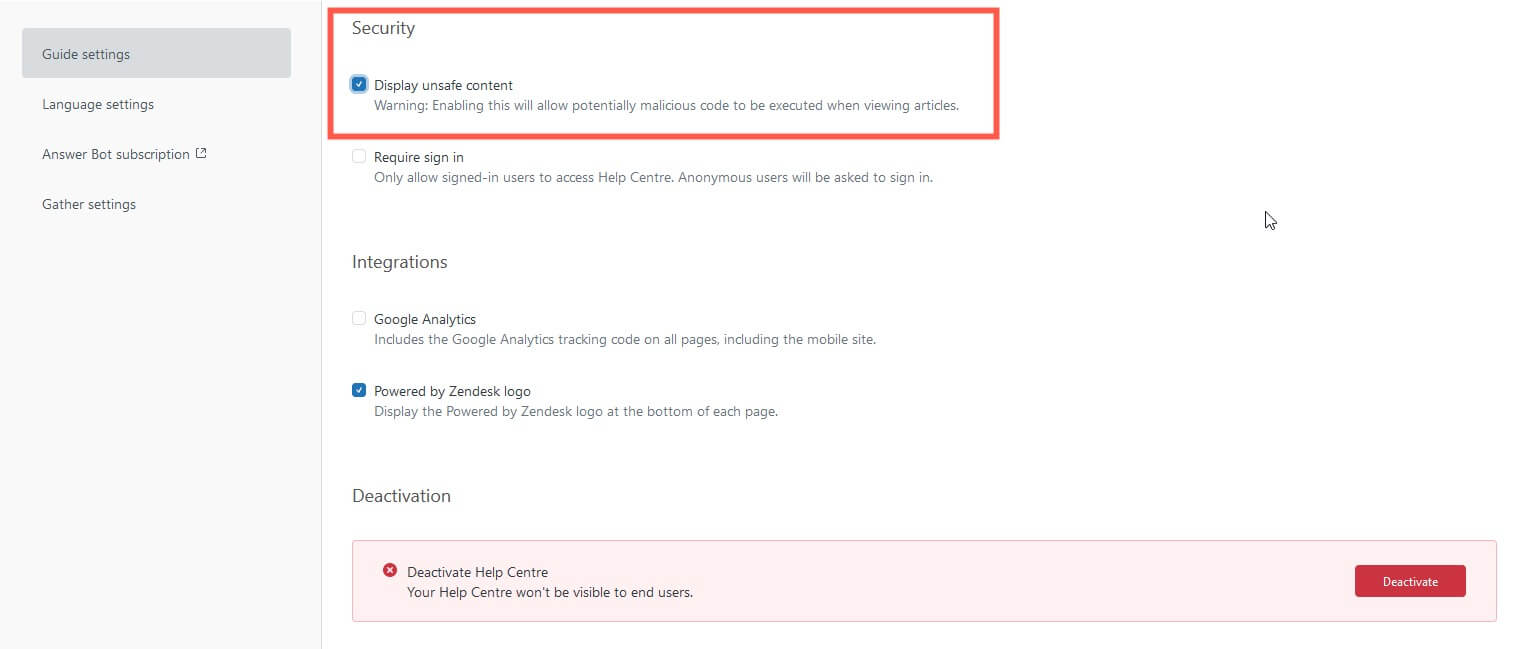
Zendesk provides a warning that enabling this feature means potentially malicious code could be run when viewing articles. This is your choice to make, but the Display unsafe content feature has to be enabled for javascript to work, and javascript is needed to embed the Swagger / Open API content. (The feature also has to be enabled even if you just want to show video in your Zendesk articles.)
Select Update at the top of the page to confirm.
Select Customize Design (eye icon) and then select your Zendesk theme to view the theme settings.
Select Edit Code .
Open the Assets folder.
Unzip the zip file that downloaded in your browser when you published from Paligo to Zendesk (the last step in Set Paligo to Publish Swagger OpenAPI to Zendesk).
Find the JS > Zendesk folder and the CSS > Zendesk folder in the downloaded package. These contain the CSS and javascript files you need to add to your Zendesk assets. You can ignore the other files in the downloaded package.
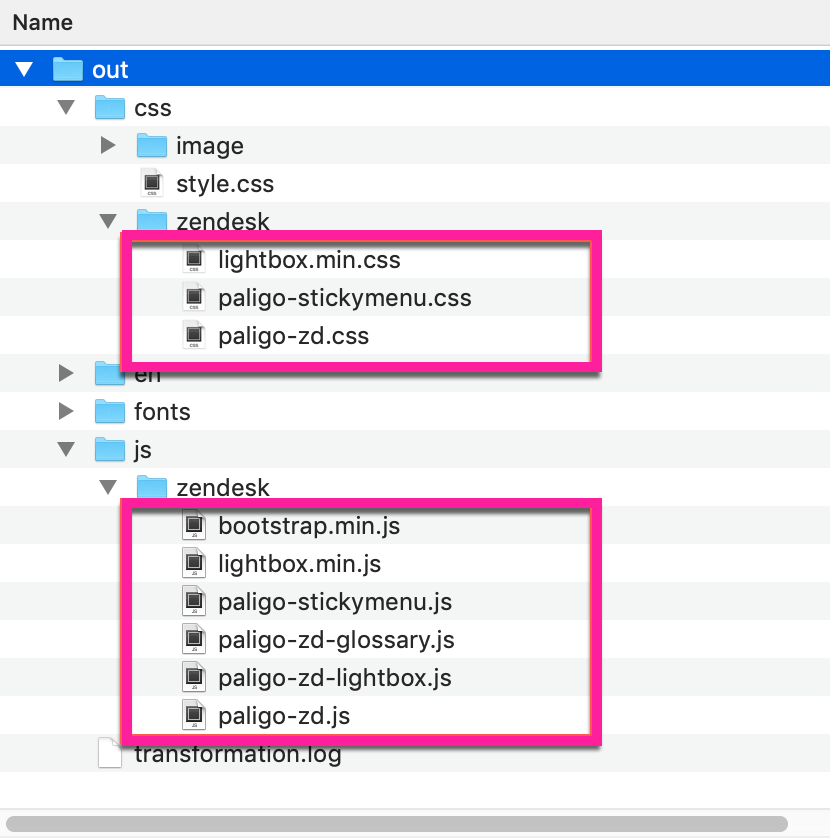
Add or drag and drop the files from the two Zendesk folders into the Assets in Zendesk.
In the Zendesk theme, open the Templates folder and then select document_head.hbs.
The document_head.hbs should already contain references to the asset files from when you first set up in the Paligo-to-Zendesk connection. They should look something like this (the exact content may depend on what else you have there and if you have chosen to use all provided Paligo assets or not):
<script src="{{asset 'bootstrap.min.js'}}"></script>
<script src="{{asset 'lightbox.min.js'}}"></script>
<script src="{{asset 'paligo-zd-lightbox.js'}}"></script>
<script src="{{asset 'paligo-stickymenu.js'}}"></script>
<script src="{{asset 'paligo-zd-glossary-3.js'}}"></script>
<script src="{{asset 'paligo-zd.js'}}"></script>
<link href="https://maxcdn.bootstrapcdn.com/font-awesome/4.7.0/css/font-awesome.min.css" rel="stylesheet"/>
<link href="{{asset 'lightbox.min.css'}}" rel="stylesheet"/>
<link href="{{asset 'paligo-zd.css'}}" rel="stylesheet" type="text/css" />
<link href="{{asset 'paligo-stickymenu.css'}}" rel="stylesheet" type="text/css" />
Note
The references use the Zendesk curly brackets syntax to refer to uploaded assets.
If your
document_head.hbsdoes not contain these references, add them.You should also add the following code, which is for the swagger content:
<link id="swaggercss" rel="stylesheet" type="text/css" href="https://cdnjs.cloudflare.com/ajax/libs/swagger-ui/3.24.2/swagger-ui.css" />

<script src="https://cdnjs.cloudflare.com/ajax/libs/js-yaml/3.13.1/js-yaml.min.js"></script>
<script src="{{asset 'paligo-swagger.js'}}"></script>
Select Publish.
Your Zendesk is now set to show Swagger content. In Paligo, you can publish the topic with the Swagger link and set the output to Zendesk. The topic is mapped to an article in Zendesk, and that article shows the Swagger/Open API content that is the "target" of the link.