Borders on Selected Images Only (HTML)
If you only want to apply borders to specific images, follow these steps:
Open a topic that contains the image and then select the image.
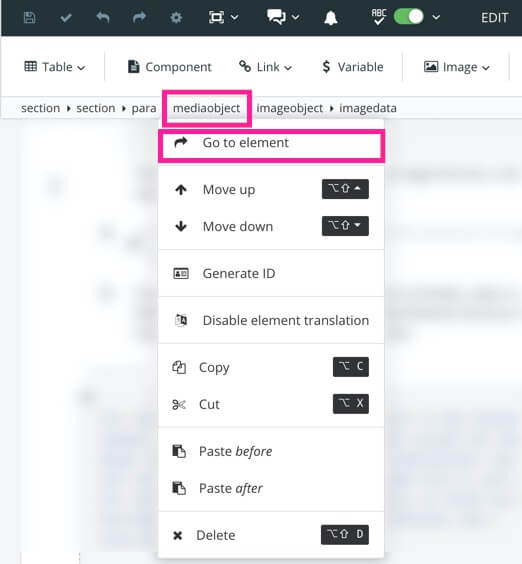
Select the
parentelement for the content that you want to style in the Element Structure Menu.For a block image, the element is
mediaobjectFor an inline image, the element is
inlinemediaobjectFor a figure, the element is
figureFor an informal figure, the element is
informalfigure
Select Go to element.

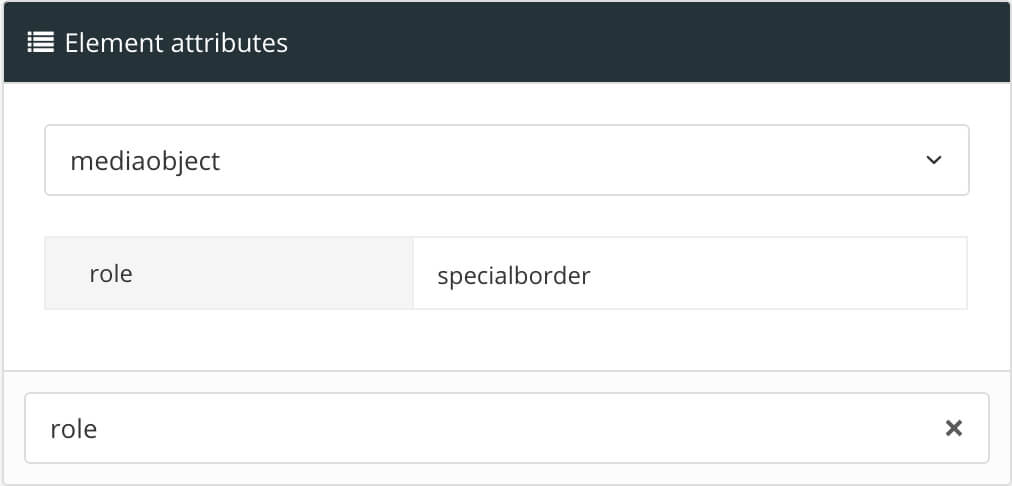
Add the
roleattribute in the Element Attributes Panel and give the attribute a name as value.We recommend that you use a name that is easy to recognize, for example,
specialborder.
Select Save.

Use a code or text editor to create a CSS file. Give it a suitable name and save it with the
.cssextension.If you already use a custom CSS for your layout, you should edit that CSS file instead.
To add borders that will only be used by images that have the defined role, add this code to your CSS:
.specialborder img {
	border: 3px dotted #FF1493; padding:1em;
}
Where:
specialborderis the name of the value you gave to the role attribute in step 4.Note
You can change the border style and color to meet your own requirements. The values used here are just examples.
Save your CSS and Upload Customized CSS.
When you publish with that layout, the CSS styles will be applied to your published output.