Export a Translation Package
To send content to a translation service, you will need a translation package. Paligo creates translation packages automatically as part of the export process. Each translation package contains the content to be translated, with the exception of images and variables.
The following is not included the translation package:
Images must be sent separately to the translation service, see Translate Images.
Variables must be sent separately to the translation service as a Variable set . Make sure that the variables are translatable variables.
To export a translation:
Select the
foldercontaining the topic or publication to be translated in Content Manager.
If the content is not in a folder, select the top-level folder Documents.


Paligo opens the Resource View.
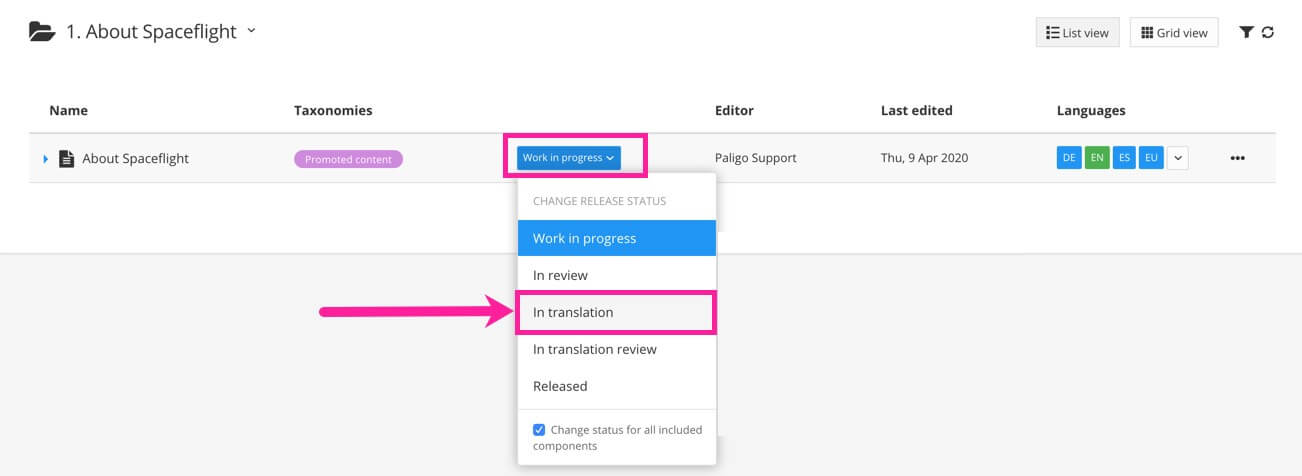
Change the topic or publication status to In translation.
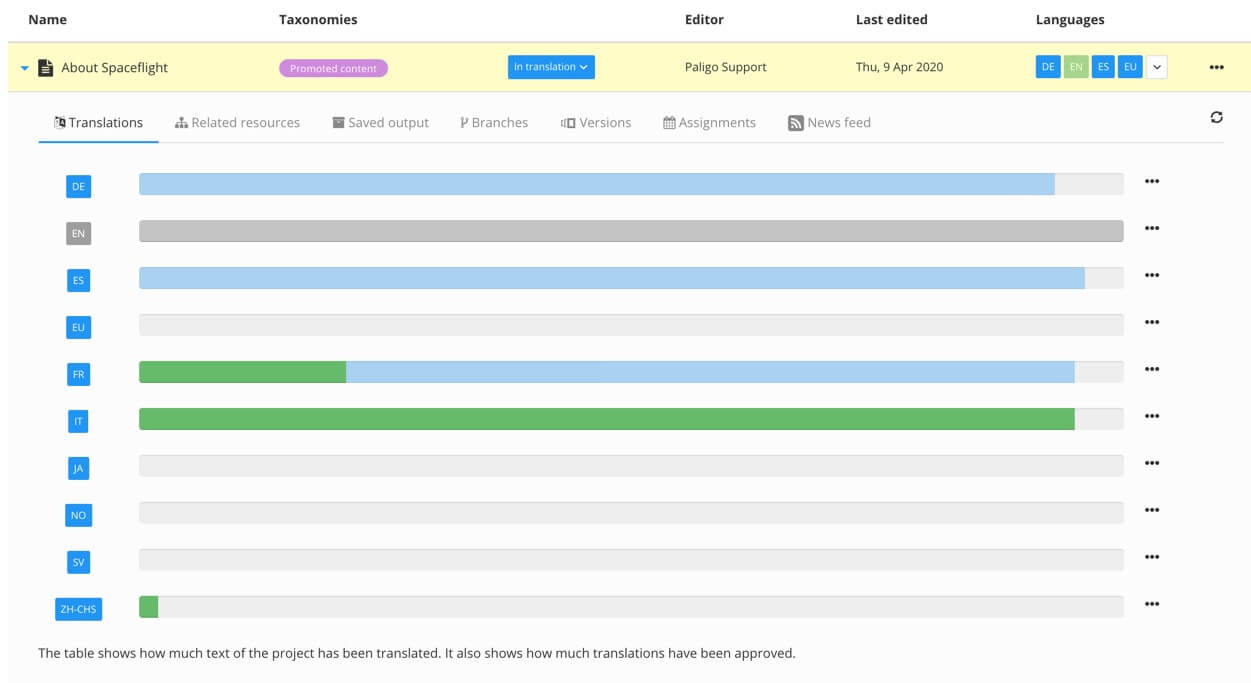
Expand the entry for the publication or topic to see the details and then select the Translations tab.
Tip
Select Show incomplete topics to see a list of topics (in a publication) that are not fully translated.
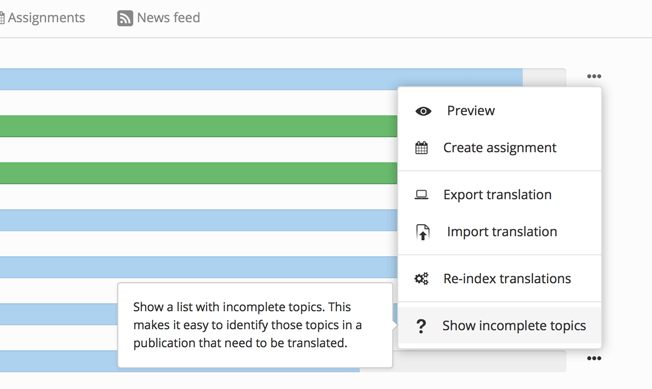
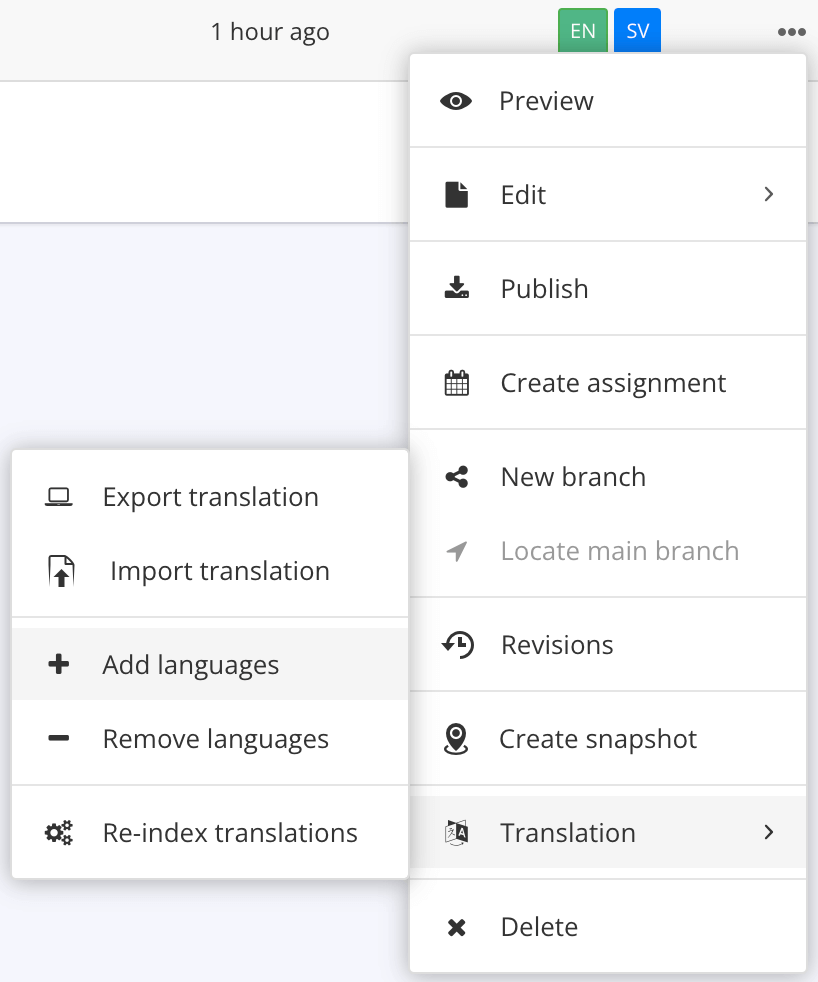
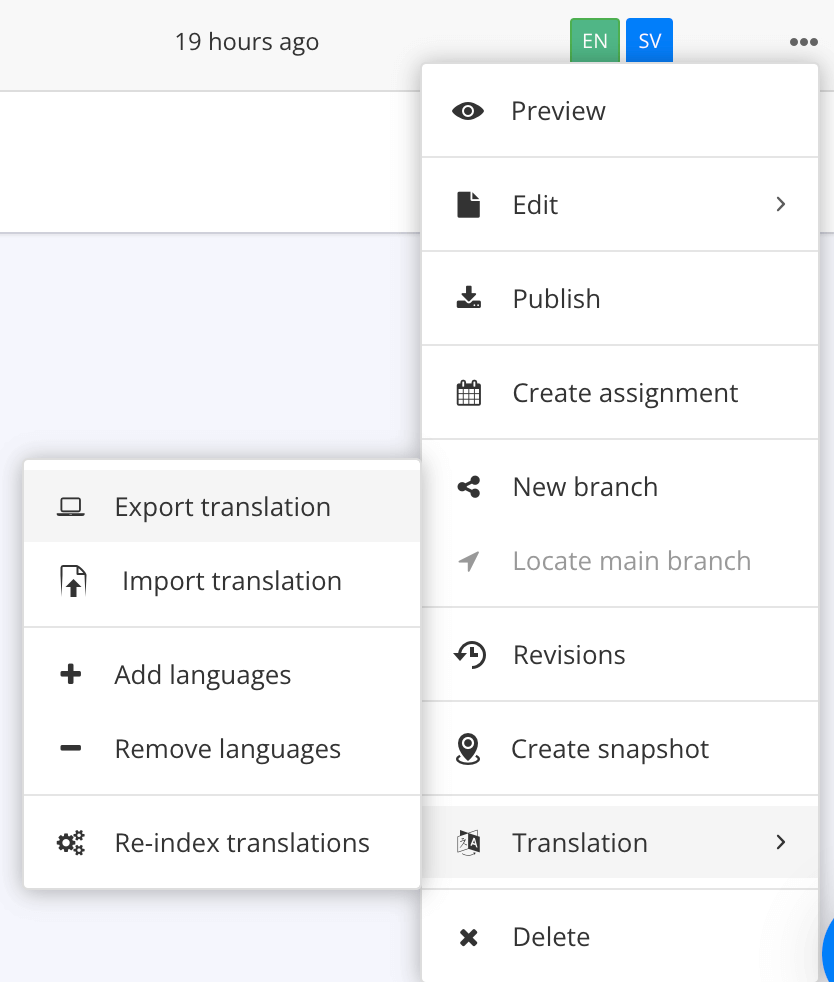
Select the Dotted Menu (...) for the topic or publication.
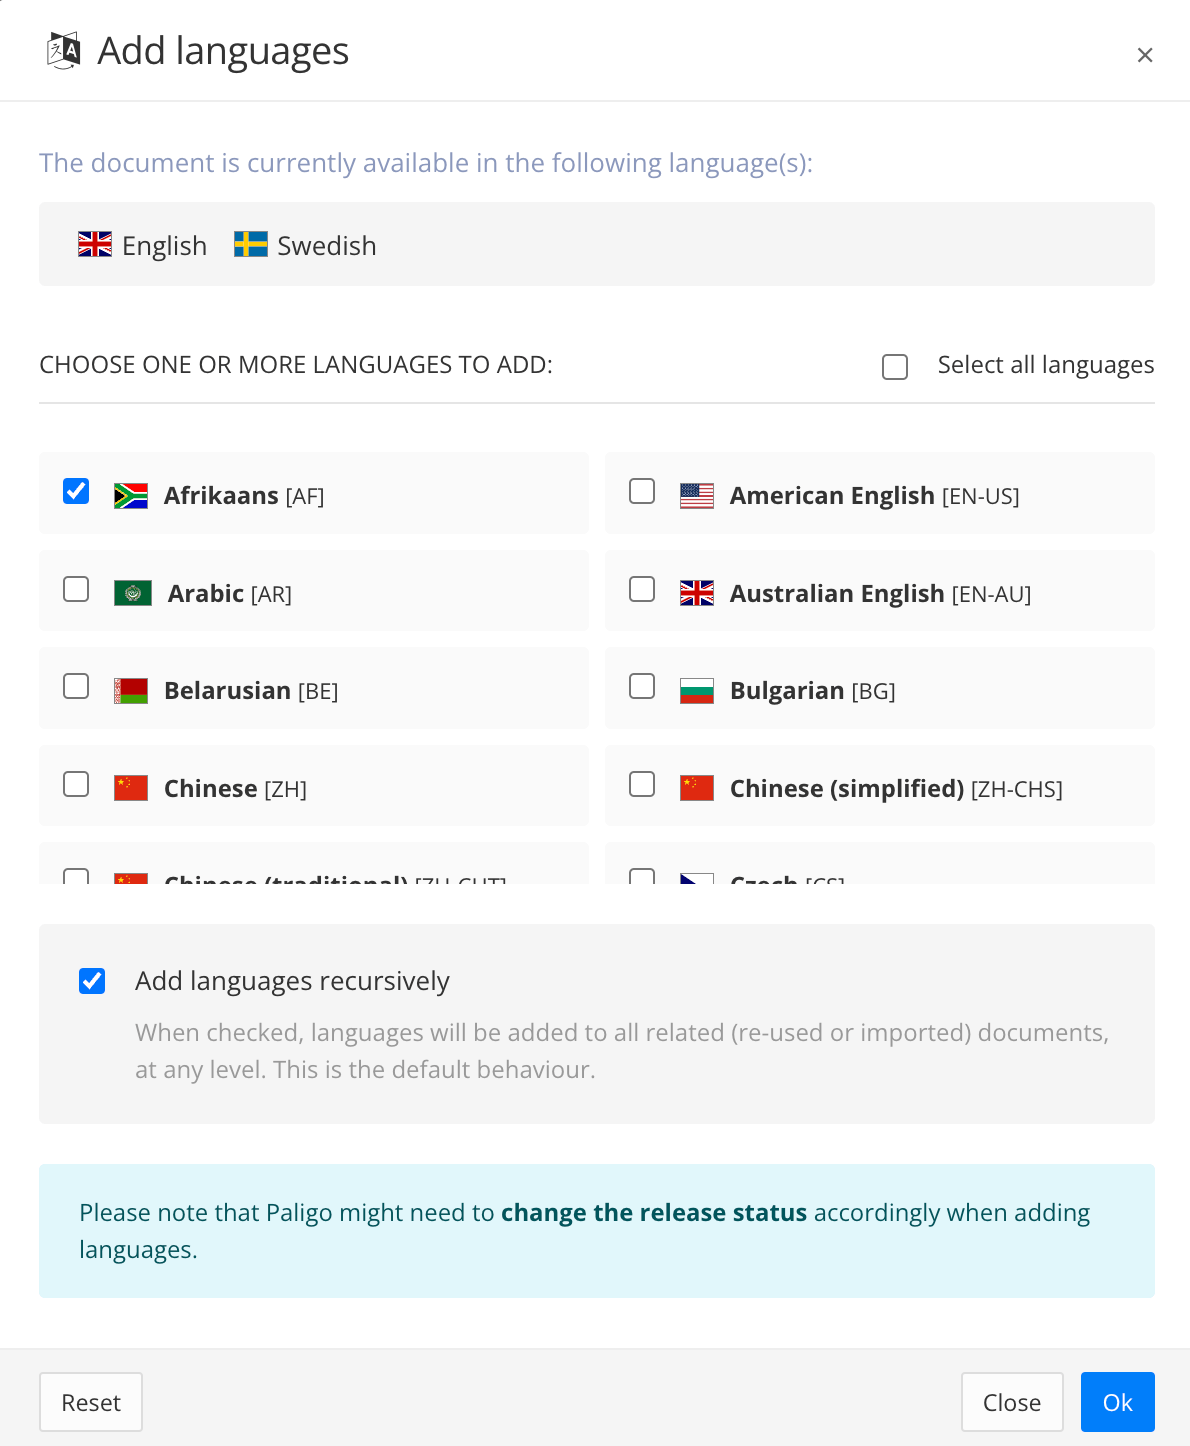
If needed, select Translation and choose Add languages.

Check the boxes for any languages you want to add to the topic.
Select OK.
Select Translation and choose Export translation.

Select the language or languages in the Translate to field.
You can only select languages that have already been added to the topic.

Important
When using Phrase, it is important to choose languages that are available for the target project.
If you choose unavailable languages, the export will fail and exclude the unavailable languages from the translation package. The translation package (with the available languages) will be exported to Phrase and Paligo will display the following message:
Error sending to Phrase: TargetLangs must match project settings.
Choose a Document format.

XLIFFis the most commonly used format for translations.A variant XLIFF formatthat is required by some translation tools.POis a format that is often used to translate web contentPhraseis for sending content to the integrated translation service.To use this, the function must be activated, see Connect Paligo to Phrase.
Semantixis for sending content to the integrated translation service.To use this, the function must be activated, see Connect Paligo to Semantix.
Choose a Project from the dropdown menu.
This feature is optional and is only available for the Phrase integration.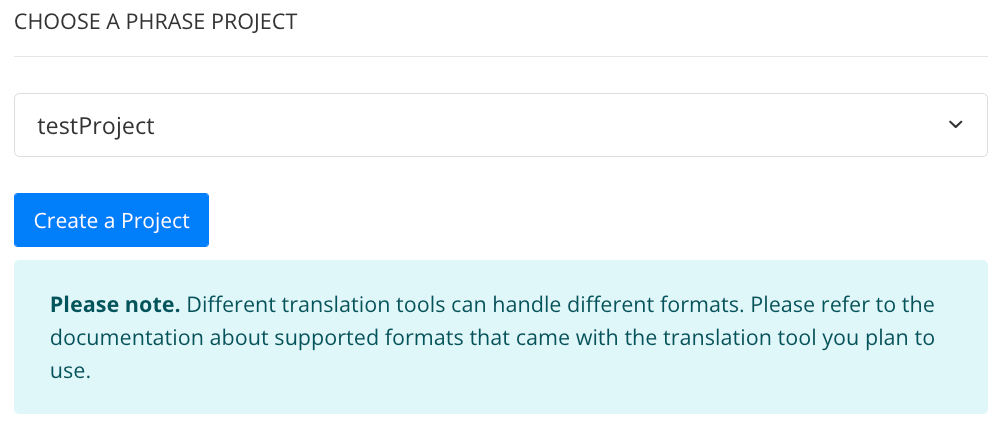
To add a new project:
Source language and target language is already set according to the template.
Select Create a Project.
Select a Template from the dropdown menu.
To create new templates, see Project Template TMS in the official Phrase documentation.
Name the project.
Add a Due date (optional).
Select Create.
Note
In Phrase, there are global file import settings that are available from the Settings menu. But these are not used for Paligo translations. Instead, you have to apply settings to a project template.
To set up a project with your preferred settings, create a new template in Phrase with the required settings. Next, create a new project based on the new template. Then, in Paligo, select the new project in the integration settings (see Connect Paligo to Phrase).
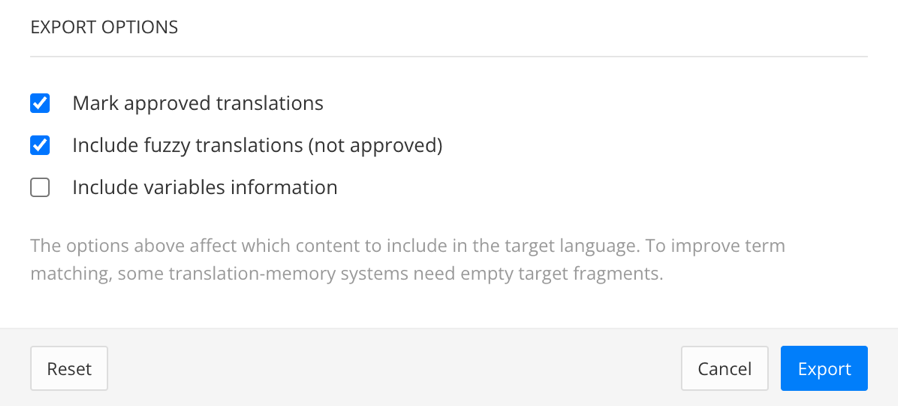
Choose your Export Options:
Include a due date
This feature is optional and is only available for the Phrase integration.
Check the box Due date to add a due date for the project (if not already added in the project). Use the calender to select a date.

Mark approved translations - Recommended
We recommend that you check the Mark approved translations box to avoid unnecessary translation costs. When it is checked, Paligo gives the "final" state to any translations that have already been approved. The "final" state indicates to translation services that they can ignore this content. The translation service must have the Translation Software Settings for this to work.
Clear the box to give previously approved translations the state
needs translation. The translation service will regard the content as new and it will be re-translated.Include fuzzy translations
Use this function to set
unapprovedtranslations to have stateneeds review translationin the translation package. Unapproved translations are often for content that has previously been translated and approved, but the source language content has now changed. The changes mean the translation is no longer approved.Clear this box to set unapproved translations to have state
needs translationin the translation package. The translation service will regard the content as new and it will be re-translated.In most cases, Paligo recommends to clear the box Include fuzzy translations because the translation software will often segment content differently than Paligo.
Include variables information
Use to control whether Paligo adds XLIFF comments containing information about any variables in your content. The variable information can be useful to translators, as they may need to reorder the sentence structure in other languages. This can be easier if they know what type of variable is used, for example, a product name.
Check the box to include the variable name and variable set name in the XLIFF translation file. Paligo will add the variable information inside an XLIFF comment.
Clear the box if you do not want to include XLIFF comments with information about the names of variables and variable sets.
Select Export.
Paligo produces the translation packages as a
zip filethat downloads in your browser (even if a translation integration is used).Manually send the translation package to the translation service (if not using a translation integration).
Note
In the Semantix portal, the translation project manager will receive a quote for the translation. Once the quote is accepted the translation service will be provided.
The returned translation package must be imported to Paligo (even if a translation integration is used), see Import a Translation Package .
Tip
It is also possible to use the Translation View to export translation files.
Select the topic or publication to be translated in Content Manager.
Select the Dotted Menu (...) for the topic or publication.
Select Edit and choose Translate.
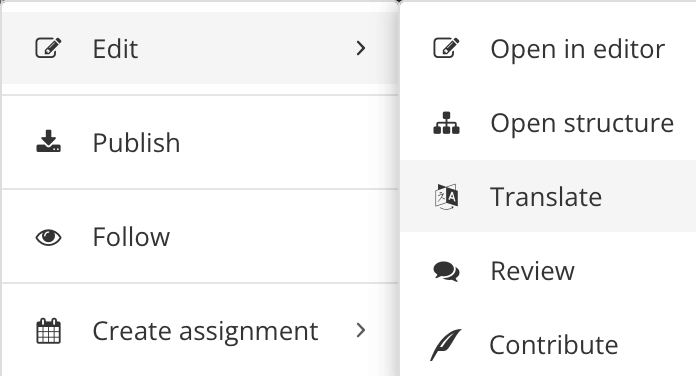
This will open the Translation View.
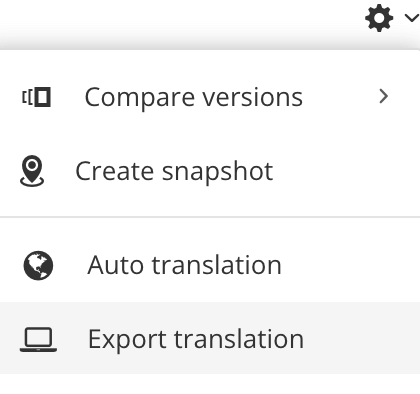
Select the Cog.

Select Export translation.
If you are not using a translation integration, you will need to send the package to your translation service manually. When the translation service returns the translation, you will need to import it back into Paligo.
If your Paligo instance is set up to use a translation integration, such as Phrase, Paligo sends the translation package automatically when you export. When the translation work is complete, it is sent back to Paligo and you can import it.
Note
We recommend that you notify the translation service when you send a translation package. Also, ask them to notify you when they send the translation back.
Paligo cannot send automatic notifications to translation systems. Similarly, they are unable to send notifications to Paligo.