Adjust Image Size
When you About Publishing the content, the images will be sized based on added attributes and values. You can Preview a Topic to see what the sizing will look like in your different outputs.
Note
Depending on the type of software used to generate .svg images, setting width values for .svg images in PDF output can be problematic. In some cases this is caused by the omission of width and height attributes on the root svg element of the image.
Check the image's raw XML code to see if the
widthandheightattributes are included.If they are not, add them to the root element. Take the values from the
viewBoxattribute as the values for thewidthandheightattributes.Example: svg XML without
widthandheightattributes.<?xml version="1.0" encoding="UTF-8"?> <svg xmlns="http://www.w3.org/2000/svg" xmlns:link="http://www.w3.org/1999/xlink" id="Layer_1" data-name="Layer_1" viewBox="0 0 258 429">
After correction:
<?xml version="1.0" encoding="UTF-8"?>
<svg xmlns="http://www.w3.org/2000/svg" xmlns:link="http://www.w3.org/1999/xlink" id="Layer_1" data-name="Layer_1" viewBox="0 0 258 429" width="258" height="429">
Note
Do not use units for the width and height values.
Typically, you should only set the width or contentwidth of an image. The depth or contentdepth (height) will automatically be calculated, to keep the image dimensions as the original image file. If you set both width and depth the smallest of the two values is used, and the image is scaled accordingly.
There are several other attributes to control width and height. If you want to learn more about the possibilities, see DocBook image sizing reference.
For HTML5 output, you can combine the features Thumbnail Images and Lightbox for Images to get small image versions that are enlarged when selected.
Tip
To keep the SVG functionality in HTML and HTML5:
Add the
formatattribute in Element Attributes Panel and select svg in the dropdown menu.Use
contentwidthandcontentdepthinstead of width and depth.
 |
To set the image sizing attributes:
Select the topic or component in the Content Manager to open it in the Editor.
Alternatively, you can Create a Topic and edit that.
Select the image that you want to size.
Select the
imagedatain Element Structure Menu and choose Go to element.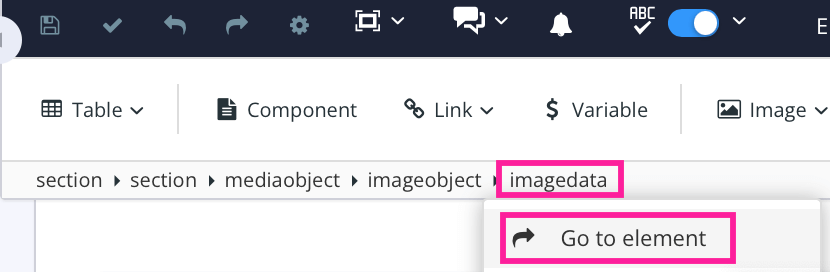
Add the
widthorcontentwidthattribute in the Element Attributes Panel.Set its value to the desired width in combination with any of the Measurement Units for Image Sizing.
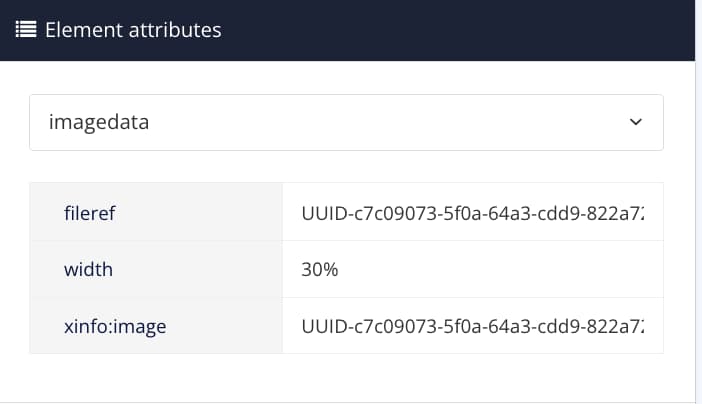
By default, if no measurement unit is specified, the sizes are in pixels (px).
Select Save.
