Add Tables
In Contributor Editor you can add tables and edit existing tables. The instruction below shows how to add tables and available settings.
Select the assignment in the Assignments Panel.
The view that opens varies, depending on the Assignment Types.
Tip
For alternative ways to open an assignment, see Different Ways to Open Assignments.
Position the cursor where you want to add the table.
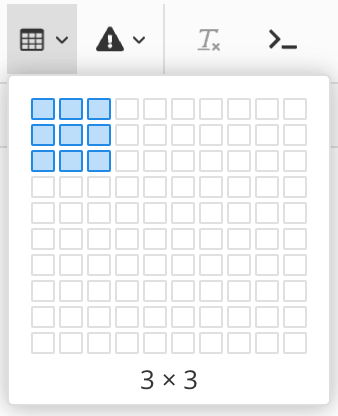
Select Insert table and choose the number of rows and columns in the Contributor Editor Toolbar.

Tip
You can add more rows and columns later if needed.
Select the part (or parts) of the table to be formatted (row, cell, column) to open the table options.
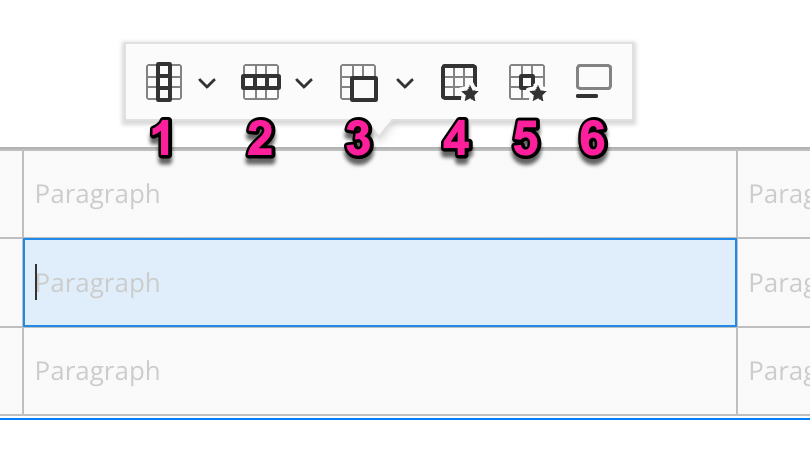
Column - Make header column, add, delete and select column.
Row - Make header row, add, delete and select row.
Merge cells - Merge cell up, down, right and left. Split cell vertically or horizontally.
Adjust table width.
Cell properties .
Adjust the cell width in the Dimensions field. This sets the width for the column the cell is in. Width can be set in percentages or pixels; percentages is the default unit.
Adjust the horizontal and vertical alignment of the text in the cell with the Table cell text alignment settings.
Toggle the table caption
Delete the table
To delete the table, hover over the table and select the blue square in the left corner and press Backspace on your keyboard, or using the formatting menu, select the delete icon (number 7 above).

Select Save.
