Set Up a Header Table
The PDF Layout has General header settings for setting up and styling the header table in your PDF outputs.
Select Layout in the top menu.

Paligo displays a list of Layouts. The list is empty if there are no custom Layouts in your Paligo instance.
Select the Layout you want to update or Create a Layout.
Tip
You can copy the URL of the Layout Editor and paste it into a new tab in your browser. This can be useful if you frequently switch between your Paligo content and the Layout settings.
Select Header and Footer and then Page header.
Select General in the Page header category.
Set the widths of the header columns in the Page header table relative column widths field.
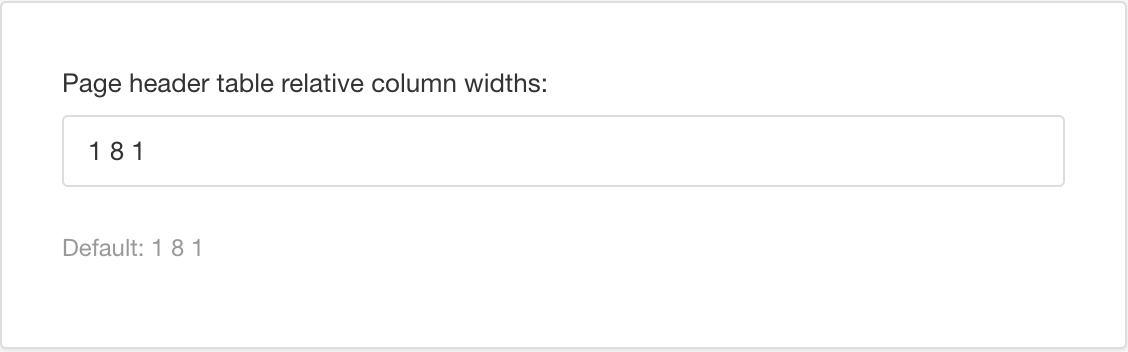
By default, the three columns are set to 1 8 1, which means that the left column is 10% of the header width, the center column is 80%, and the right column is 10%. Change the values to the widths you need. For example, if you set the value to 3 5 2, the left column would be 30% width, the center column 50%, and the right column 20%.
The table has to have three columns. If you need more columns, it may be possible to achieve through a customization project. Contact customer support for more details.
Note
If you are publishing a double-sided document, the verso (even-numbered) pages get the same header columns, except that they are mirrored. This means on a verso page, the first value is for the right cell and the last value is for the left cell.
Set the minimum height of the header table in the Page header table height field.
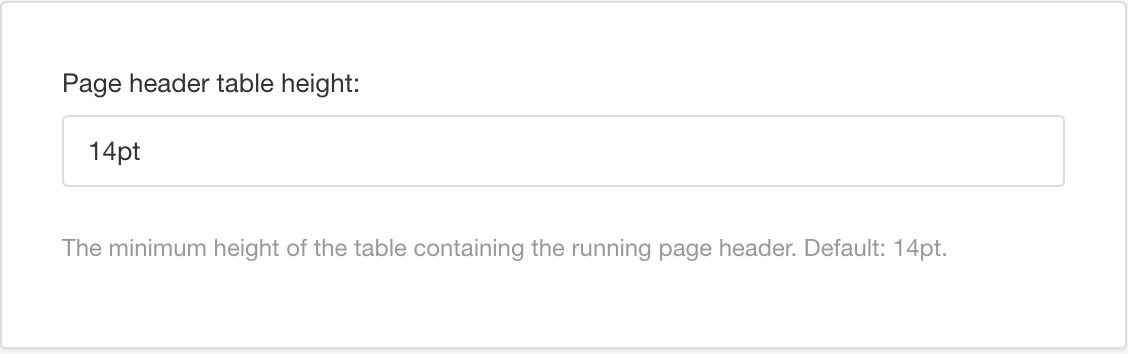
The default is 14pt. When you enter a value, make sure to include the units of measurement, for example, pt.
Set the border styling in the Page header table cell border field.
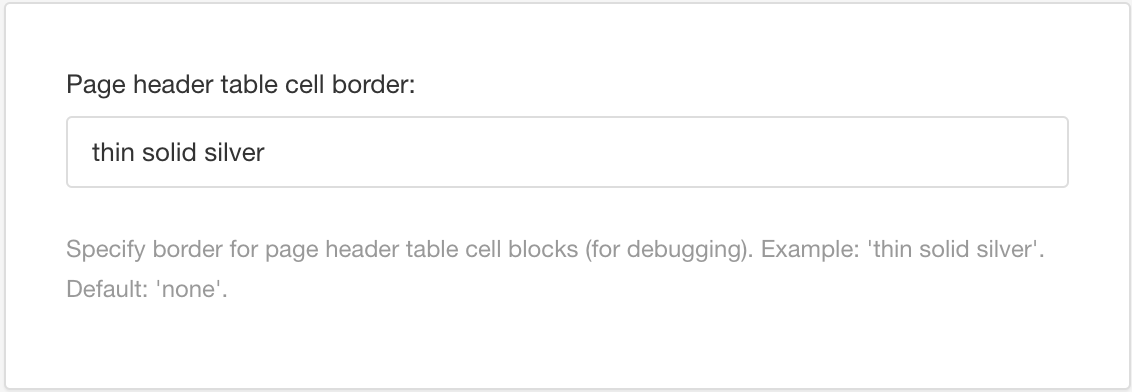
Having a visible border can be useful when you are setting up your PDFs. It makes it easier to judge the spacing and positioning. But in most cases, authors remove the border before publishing a finished document.
To add a border, enter the thickness, style, and color of the line, for example: thin solid silver. You can use:
Thickness: thin, medium, thick, or an exact value, such as 3pt
Style: none, hidden, dotted, dashed, solid, double, groove, ridge, inset, outset
Color: color name, RGB value or hex value.
Use the following settings to style the header font:
Page header font family
Choose the typeface for the text in the cells.
Page header font size
Set the size of the text in the cells.
Include the units of measurement, for example, pt or mm.
Page header font weight
Set the thickness of the text in the cells.
Page header font style
Use to set the text in the cells to italic, backslant (leaning backwards), or normal.
Page header font variant
Choose the variation of the chosen font. You can choose normal or small-caps (all letters are small and upper-case).
Page header font color
Use to set the color of the text in the cells. You can check the box to use the default color or you can clear the box and choose a different color. Enter an RGB value or select the color block to display a color selector.
Page header line height
Set the height of each line of text in the cells. You need to include the units of measurement too, for example, px, pt, em.
Page header capitalization
Set the text in the page header cells to be shown in all full-size capital letters, all lowercase letters, or capitalized (first letter capital, other letters lowercase).
Note
If you have set the Page header font variant to small caps:
The capitalized option sets upper case letters to be full-size capitals. The other letters will be shown as reduced height capital letters (small caps).

Example of capitalized and small caps used at the same time.
The lowercase option has no effect.
Use the following settings to control the spacing and positioning:
Page header letter-spacing
Define the amount of spacing between the letters of the text in the cells.
Include the units of measurement, for example, pt or mm.
Page header table vertical alignment
Choose from:
Auto - Sets the content to have the same baseline. This looks similar to vertically aligning content to the bottom of the cells.
Before - Vertically align the content to the top.
Center - Vertically align the content to the middle.
After - Vertically align the content to the bottom.
Note
If your alignment choices appear to have no effect, try increasing the height of the header table (see step 6). At smaller table heights, the difference between the alignments can be negligible.
Select Save.
You have now defined the General values for the header table. Next, you should define what content appears in the header table.