Custom domains
In most cases when you are publishing content (especially when it is meant for public consumption), you will want to serve that content from one of your own corporate domains or subdomains. Nexus provides a way to link your projects to specific domains or subdomains you own. This does not mean that the Nexus URL is replaced, but rather that content can be accessed through an additional URL. The Nexus project URL remains active.
Linking a Nexus project to a custom domain involves configuring the DNS records for your (sub-)domain so that Paligo can authenticate with your provider and connect your project to the new DNS record. Once the correct DNS (CNAME) records have been created and verified, your (sub-)domain will act as an alias for the Nexus URL. Anything published to the Nexus URL is mirrored on your configured custom domain.
Every DNS hosting service has its own set of configuration files and parameters to configure your DNS records (e.g. Cloudflare; or Amazon Cloudfront. Please refer to your hosting service's help pages to learn more about configuring DNS records. The instructions below only concern configuration in Paligo.
Note
In order to configure custom domains, you need to have access to your DNS-provider's (hosting company) configuration pages.
Select Nexus in the top menu. You are presented with the list of current Nexus projects.

Access the project you want to configure by selecting it in the list.
Select the Portal tab.
In the Custom domains section, select the Add a domain button
 .
.In the Domain text field, enter the (sub-)domain you want to add.
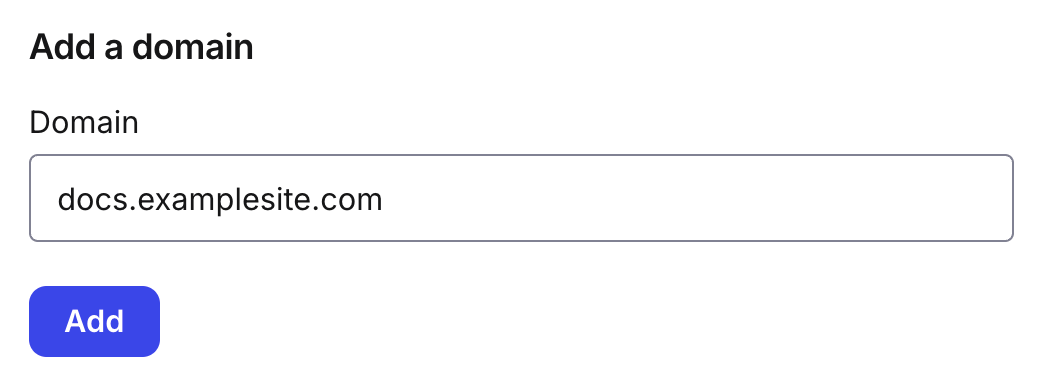
Select Add
 .
.The system will now generate DNS validation records for your chosen domain. Once these are generated, they will be displayed beneath your domain. There will be two validation records: one for authenticating with your DNS-service (1), to check whether you own the domain you have indicated, and one for linking the project with your domain (2).
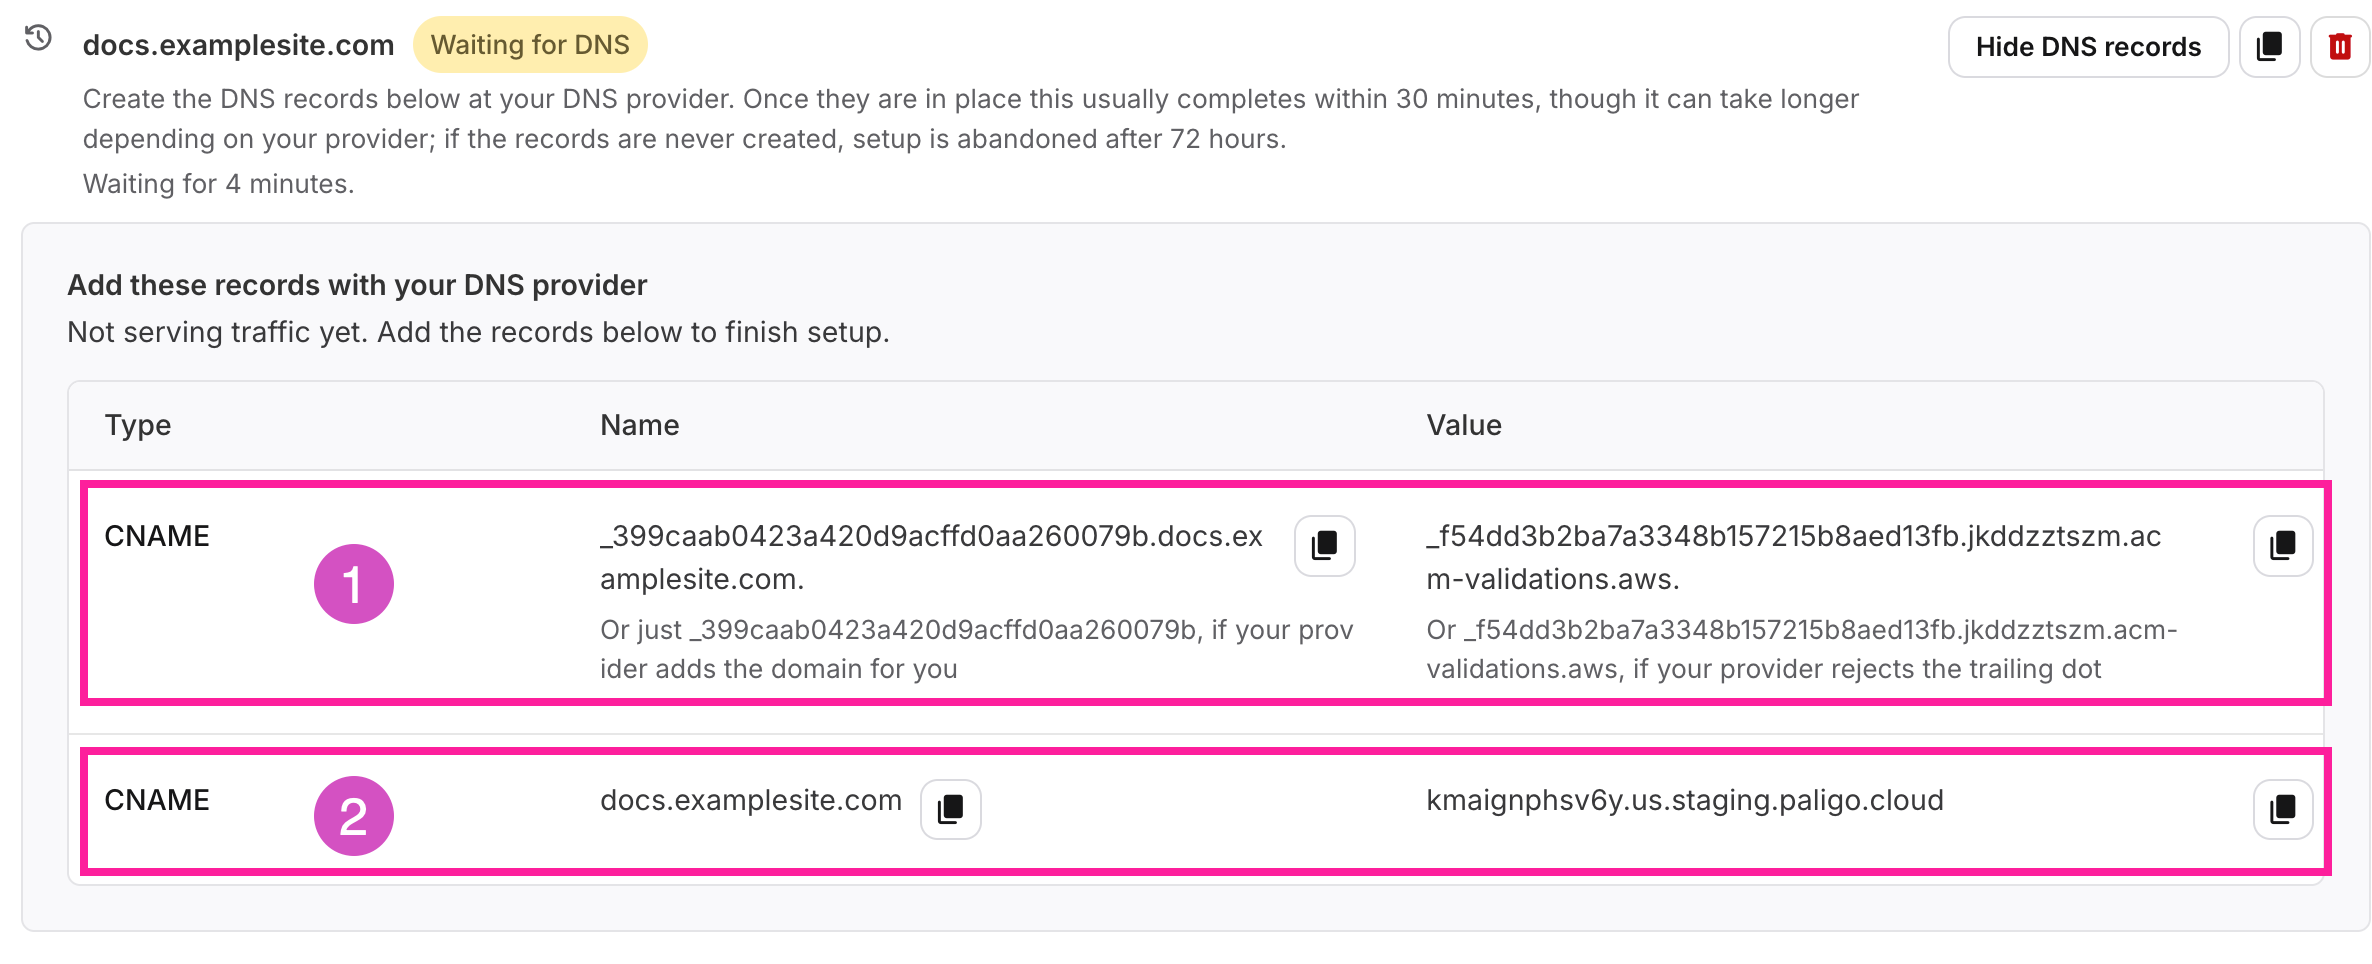
In your provider's DNS configuration, create two separate DNS records (type CNAME). Use the Copy button to copy the values to the clipboard.
The first one using the name and value for authentication.
Note
The name and value generated by Paligo both end in a trailing period. Note that some providers do not allow these parameters to end in a period. For those, please remove the period at the end.
The second one using the name and value for linking the domain.
Note
You can link multiple custom domains to the same Nexus project.
You can remove a custom domain from a project at any time.
Note
This does not make any changes to any DNS records you have created with your provider. These need to be removed separately.
Select Nexus in the top menu. You are presented with the list of current Nexus projects.
Access the project you want to configure by selecting it in the list.
Select the Portal tab.
In the Custom domains section. select the Remove button
 for the custom domain you want to remove.
In the confirmation dialog, select the Remove domain button
 .
.