[en] Set the Default Styles for Images (PDF)
[en] To set the default styling for images in PDF outputs, use the Images settings on the PDF Layout. There are settings for defining the default size, alignment, padding, and border for images.
Wichtig
[en] The default image styles only apply to images in a PDF if those images do not already have styling in place.
[en] When you edit a topic, you can select the imagedata element for each image and add:
-
[en] A
widthorcontentwidthattribute that sets a width value (see Bildgrößenbestimmung). This takes priority over the default width setting in the PDF Layout. -
[en] An
alignattribute and value (see Ein Bild ausrichten). This takes priority over the default alignment setting in the PDF Layout. -
[en] A
roleelement that defines a border, border-radius, and padding in the value (see Rahmen nur auf ausgewählten Bildern (PDF). Therolevalues take priority over the default border, border radius, and padding settings in the PDF Layout.
-
Wählen Sie im oberen Menü Layout aus.
Paligo zeigt eine Liste von Layouts an. Die Liste ist leer, wenn keine benutzerdefinierten Layouts in Ihrer Paligo-Instanz vorhanden sind.
-
Wählen Sie das PDF-Layout, das Sie für die Veröffentlichung verwenden möchten. Alternativ können Sie auch ein neues erstellen (siehe Ein Layout erstellen).
-
[en] Select the General category and then select Images.
-
[en] Set the Default width for images. This sets the width of all images except those that have a
widthorcontentwidthattribute and value.[en] Either:
-
[en] Enter an absolute value and its units of measurement, for example, 288px.
-
[en] Leave the field blank or set its value to "none" to remove a default width value. Do not include the quotes.
[en] We have included an example that shows how the default width may be ignored for some images in your PDF output.
-
-
[en] Set the Default alignment for images. This alignment applies to any image that does not have an
alignattribute and value.[en] Choose from:
-
[en] Set the Default height for inline images. This height applies to any inline image that does not have a
widthattribute and value.[en] Enter the value and its units of measurement, for example, 2em.
-
[en] Set the Default border for images. This border will apply to all images unless they already have a border set in a
roleattribute.[en] Enter the border line thickness, style, and color, for example, 5pt solid crimson.
Sie formatieren die Linie mit den folgenden Werten:
-
Stärke
-
thin
-
medium
-
thick
-
Exakter Wert (auch „Länge“ genannt). Geben Sie einen Wert für die Breite einschließlich Maßeinheit ein, z. B.
3 pt.
-
-
Format
-
Farbe
-
Name der Farbe, z. B.
silver -
RGB-Wert, z. B.
rgb(192,192,192) -
Hex-Zahl, z. B.
#C0C0C0
-
-
-
[en] Set the Default border radius for images.
[en] This setting only applies to images that do not already have a border radius set in a
roleattribute. It defines the amount of curve on the corners of the border box. Set it to 0pt for no curves or enter a value and a unit of measurement to add curves. For example, you could use 10pt to give the border curved corners.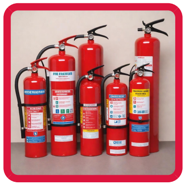
-
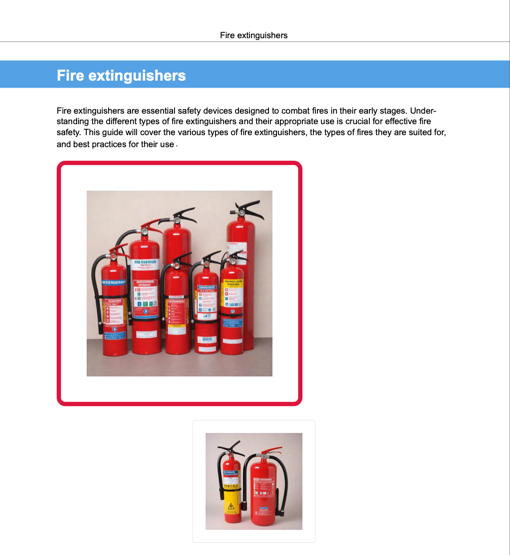
[en] Set the Default padding for images. This is the amount of space between the image and the border of the image container. It applies to all images except those that already have padding set in a
roleattribute. For example, in the following image, the white space between the photo's edges and the red border is the padding.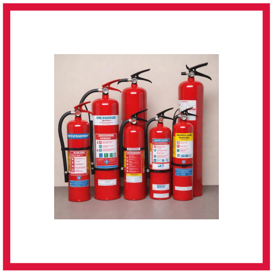
[en] Enter a value and its units of measurement, for example, 30pt.
-
Drücken Sie Speichern.
[en] Let's say you are editing a topic and you insert an image. You just insert the image and set its alt text (good practice!), but you do not set any attributes.
[en] You continue adding content to the topic and add another image. This time, you select the image's imagedata element and give the image these attributes:
-
[en]
widthwith a value of:150px -
[en]
alignwith a value of:center -
[en]
rolewith a value of:border: 0.25pt solid silver; border-radius: 3pt; padding: 15pt;
[en] You save the topic and then edit the PDF Layout. You open the General category and select the Images subcategory. There, you set:
-
[en] Default width for images to:
288px -
[en] Default alignment for images:
Start -
[en] Default border for images:
5pt solid crimson -
[en] Default border radius for images:
10pt -
[en] Default padding for images:
30pt
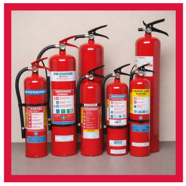
[en] You save the PDF Layout and then use it to publish. In the PDF output:
-
[en] The first image uses the default settings from the PDF Layout, for example, it has a crimson border with 10pt radius.
-
[en] The second image uses its own settings, such as center alignment and silver border. These were set in the
roleattribute for the image and they take priority over the Layout settings.
 |
Anmerkung
[en] Paligo only ignores the Layout settings that are already defined in the role attribute. For example, let's say the second image's role attribute value was:
[en] border: 0.25pt solid silver; padding: 15pt;
[en] Note that it does not include the border-radius.
[en] This means Paligo will apply the border width, color, and padding from the image's role attribute. It will also apply the border-radius that is set in the Layout (as the role attribute does not have a border-radius specified).