Publikationsfilter anwenden
Wenn Sie Ihre Inhalte veröffentlichen, können Sie auswählen, welche Attribute filtern auf die Ausgabe angewendet werden sollen. Es wird empfohlen, für jedes Profiling-Attribut einen Profiling-Wert zu wählen (verfügbare Filterattribute). Es ist jedoch möglich, mehrere Werte für ein Profiling-Attribut auszuwählen. Der Filter funktioniert dann als ODER-Filter, bei dem Paligo Topics filtert, die einen der eingestellten Profiling-Werte enthalten.
Wählen Sie das gepunktete Menü (...) für das Topic oder die Publikation im Content Manager aus.
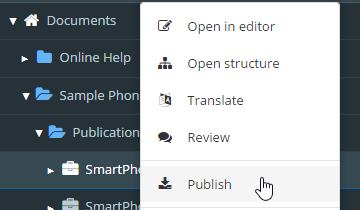
Wählen Sie Veröffentlichen aus.

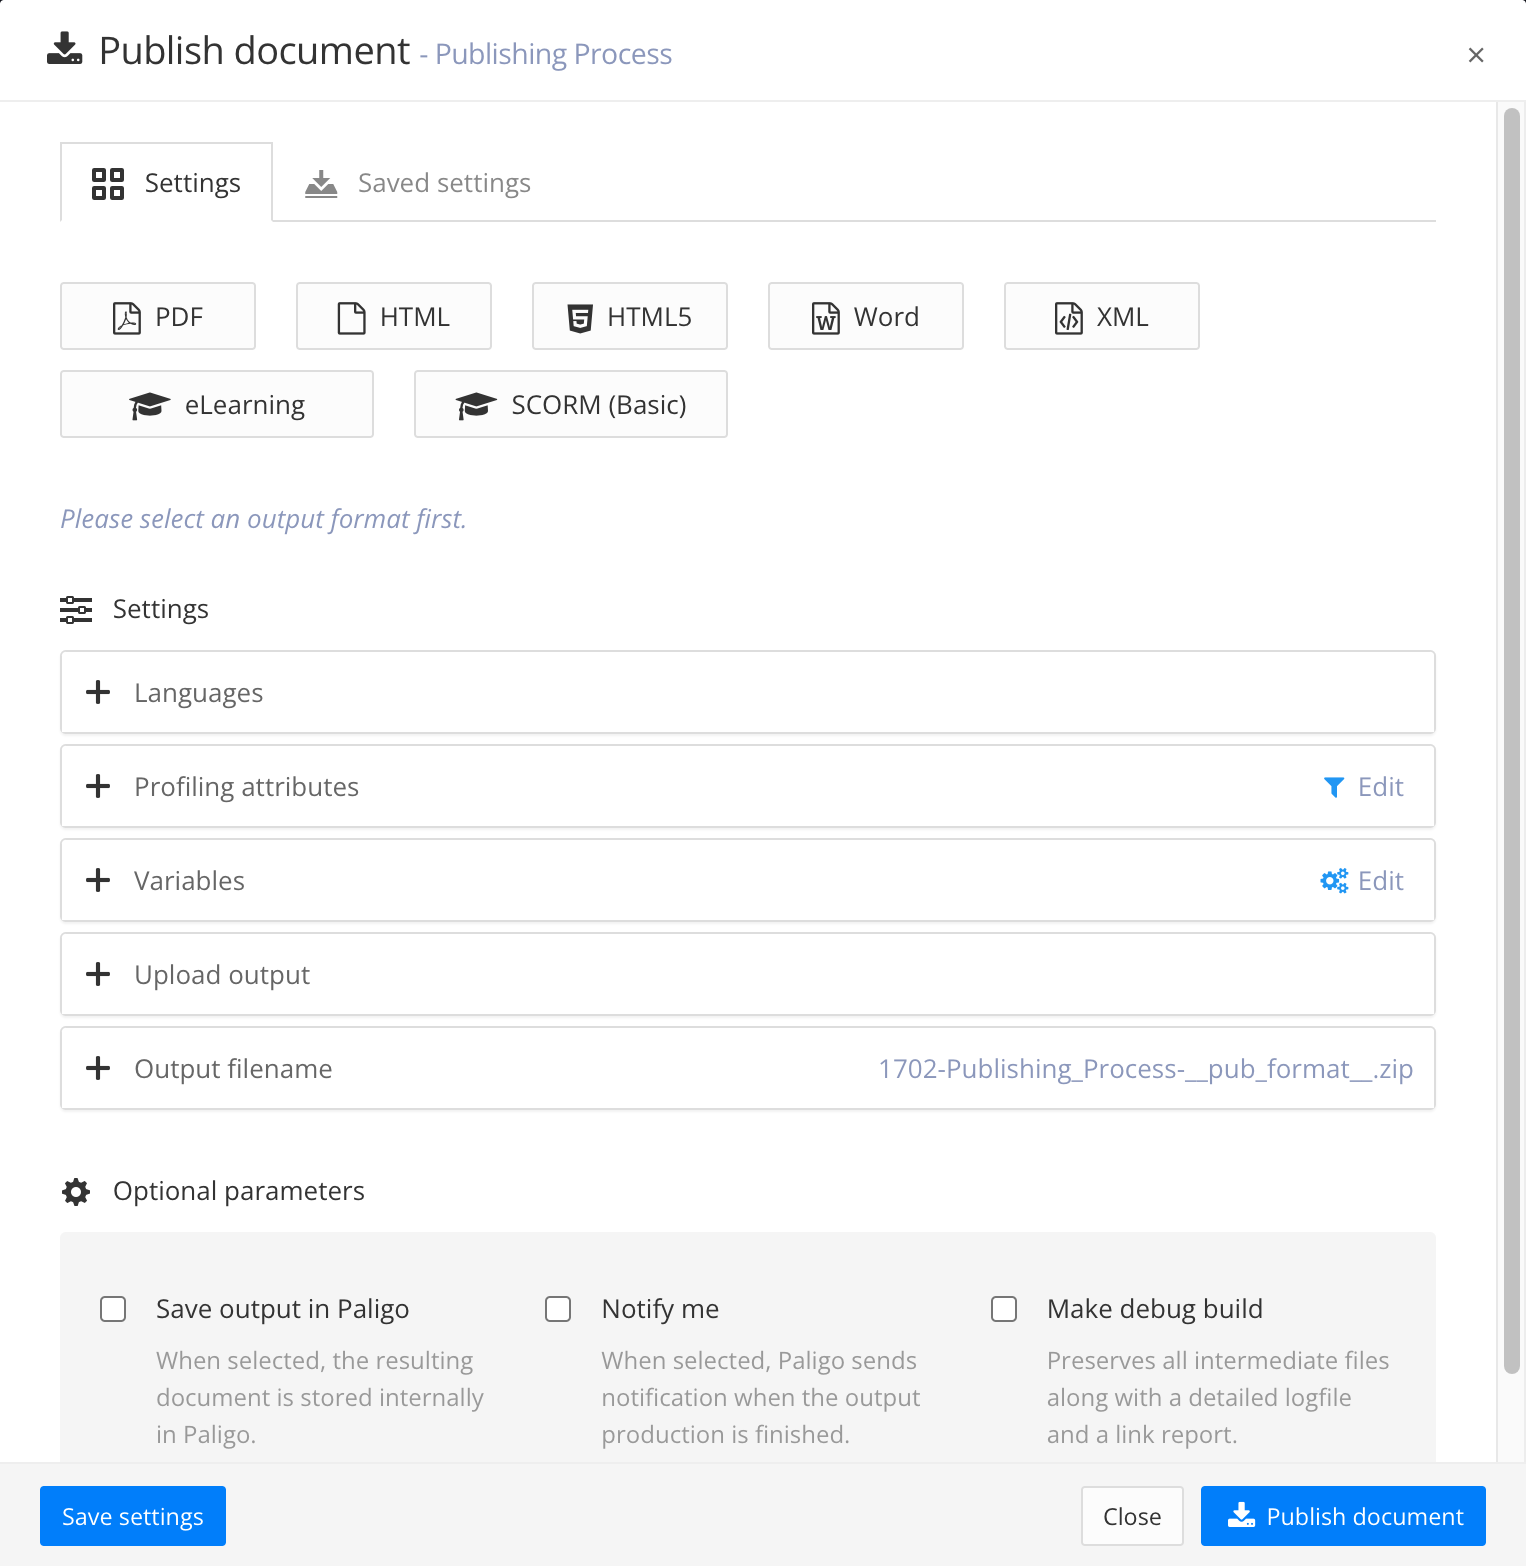
Paligo zeigt das Dialogfeld Dokument veröffentlichen an.
Wählen Sie einen Ausgabetyp (PDF, HTML, HTML5, Word, XML, eLearning oder SCORM).
Stellen Sie die Sprachen, Variablen und optionalen Parameter ein.
Tipp
Dies sind allgemeine Publikationseinstellungen, siehe Inhalte veröffentlichen.
Wählen Sie im Abschnitt Profiling-Attribute die Option Bearbeiten.

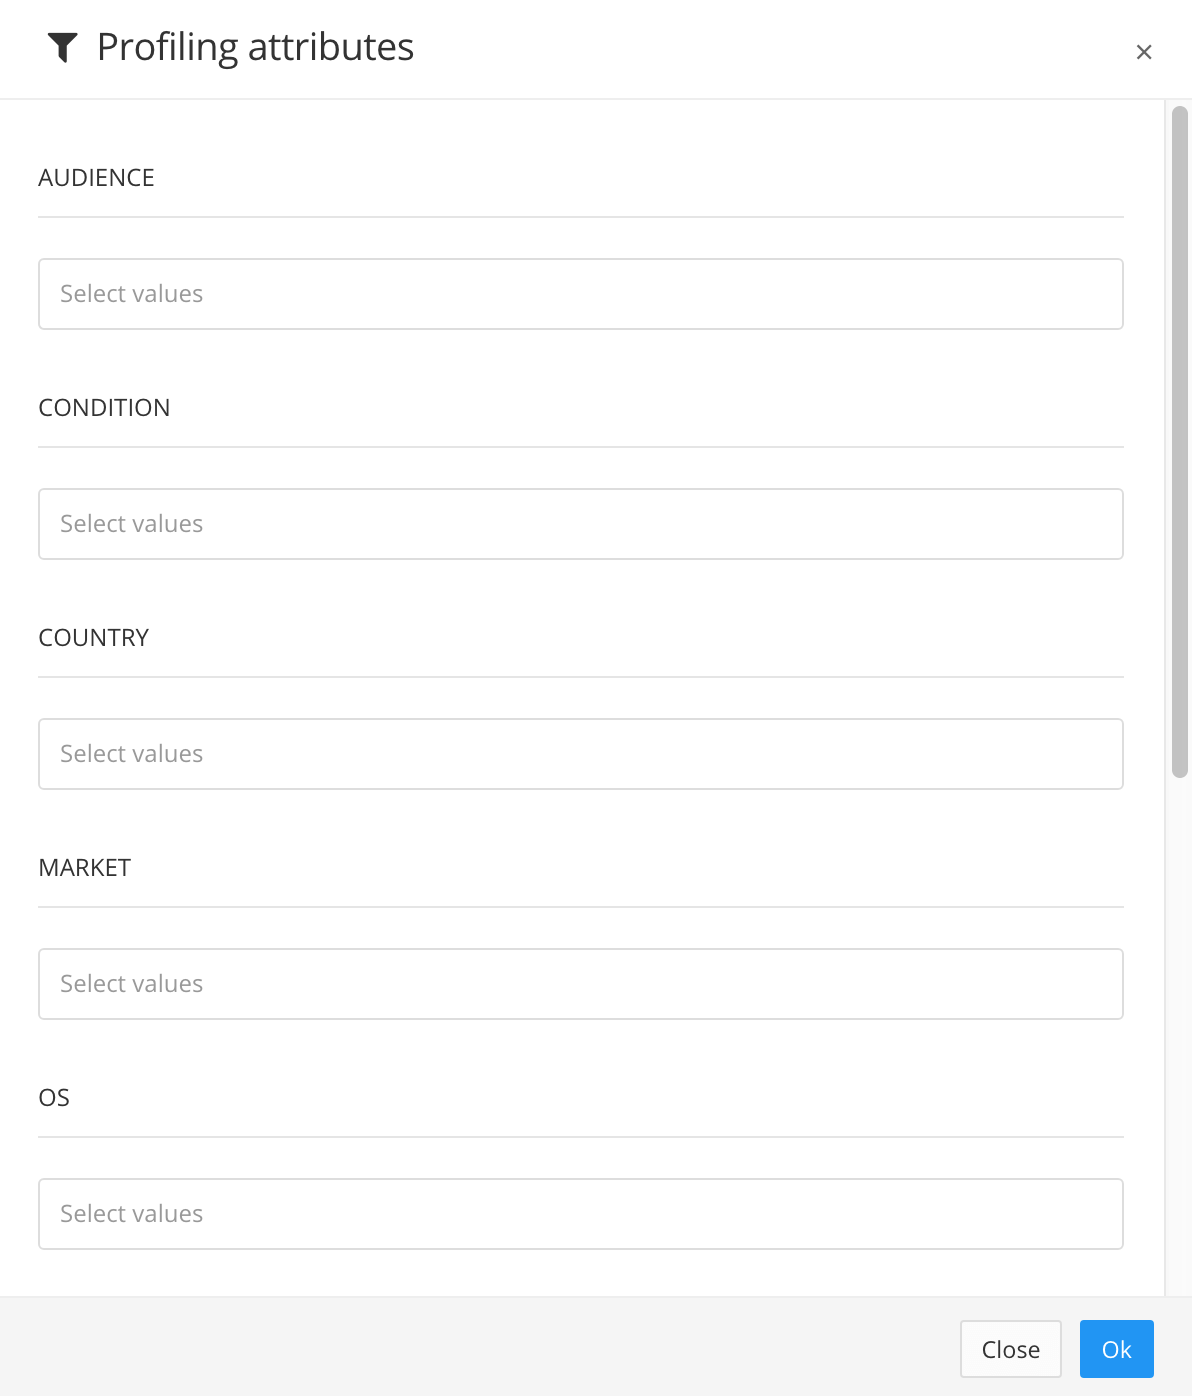
Das Dialogfeld Profilingattribute enthält ein Feld für alle verfügbaren Filterattribute.
Entscheiden Sie, welche Filterattribute Sie auf Ihre Publikation anwenden möchten. Wählen Sie dann für jedes Filterattribut, das Sie verwenden möchten, einen Filterwert aus dem Menü aus. Wenn Sie den benötigten Wert nicht sehen können, wurde der Wert wahrscheinlich noch nicht zu Paligo hinzugefügt. Informationen zum Hinzufügen eines Wertes finden Sie unter Filterwerte hinzufügen
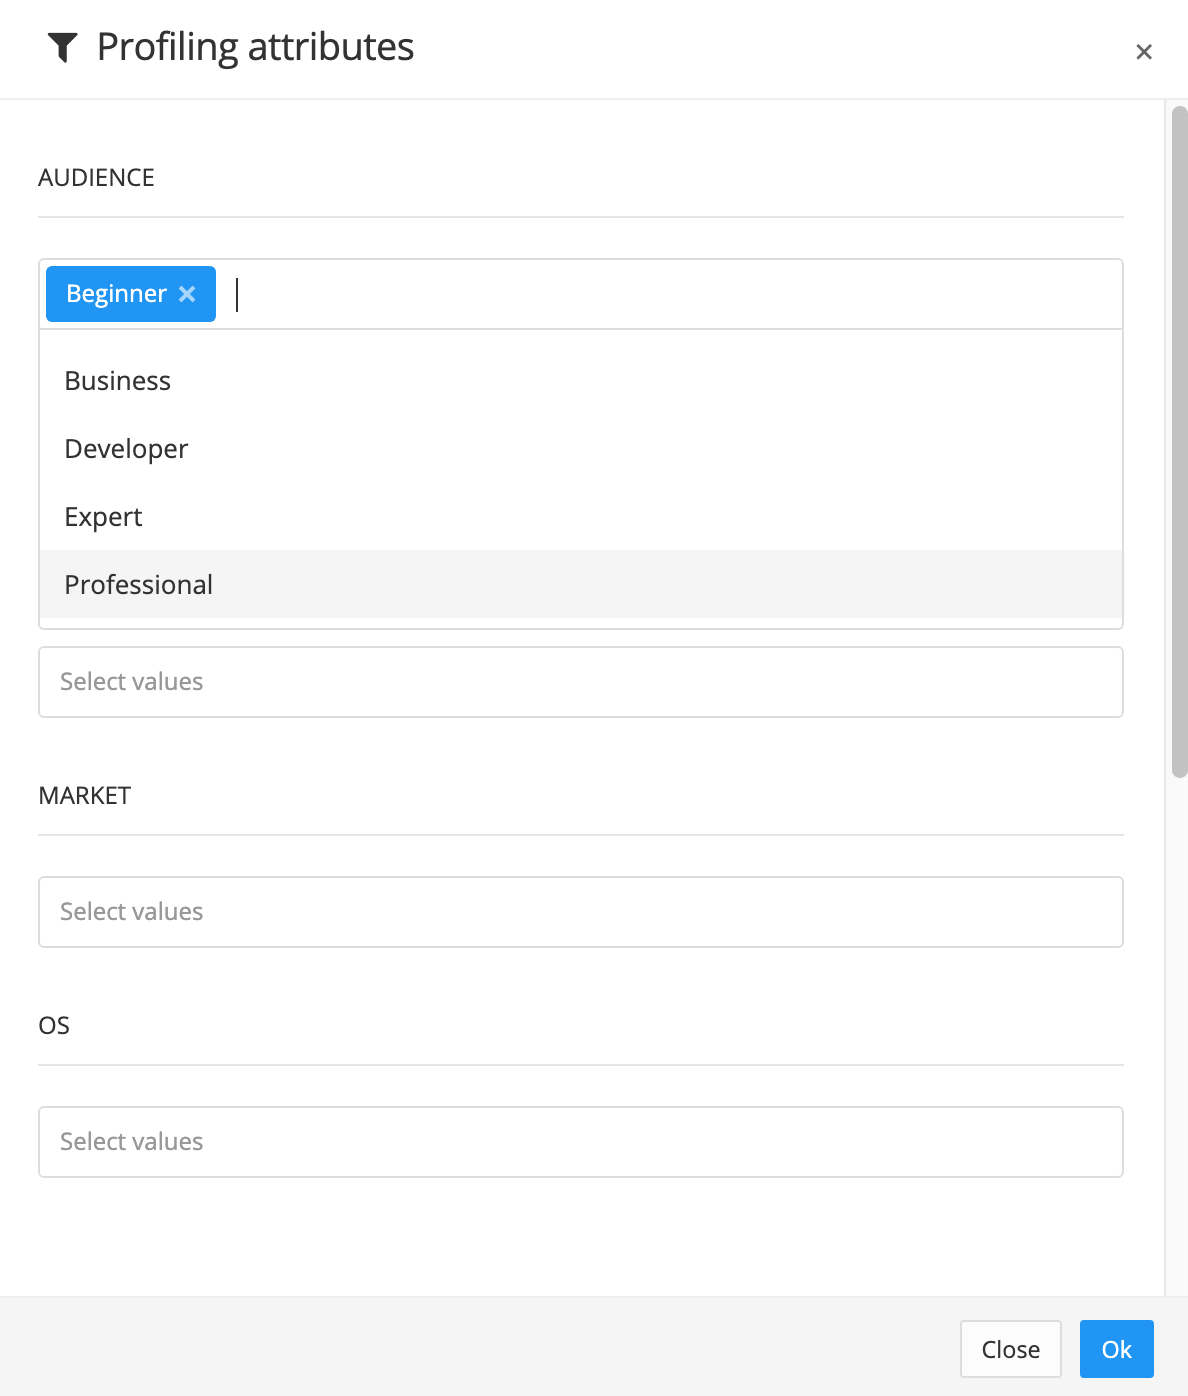
Beachten Sie beim Anwenden von Filterattributen und -werten, dass die Filterung unterschiedlich funktioniert, je nachdem, ob Sie einen einzelnen Wert oder mehrere Werte wählen.
Wenn Sie einen einzelnen Wert auswählen, wird Paligo:
Alle Inhalte einschließen, die das von Ihnen gewählte Filterattribut und Filterwert haben.
Alle Inhalte einschließen, die nicht das Filterattribut haben.
Alle Inhalte ausschließen, die das Filterattribut, aber einen anderen Wert haben.
Wenn Sie mehrere Werte auswählen, funktioniert der Filter als „ODER“-Filter. Paligo filtert dann wie folgt:
Alle Inhalte werden eingeschlossen, die das Filterattribut und alle Werte haben, die Sie für dieses Attribut ausgewählt haben
Alle Inhalte einschließen, die nicht das Filterattribut haben.
Alle Inhalte werden ausgeschlossen, die das Filterattribut haben, aber einen anderen Wert, als den von Ihnen definierten haben.
Beachten Sie auch, dass jedes Filterattribut separat behandelt wird. Die Auswahl eines Werts für ein Filterattribut bedeutet nicht, dass Paligo automatisch denselben Wert für andere Filterattribute anwendet.
Anmerkung
Lassen Sie die Felder leer, wenn Attribute nicht verwendet werden sollen. Wenn kein Attribut festgelegt ist, ignoriert Paligo diesen Filtertyp.
Wiederholen Sie die Schritte 5 und 6 für jedes Profiling-Attribut, das Sie anwenden möchten.
Klicken Sie auf OK.
Wählen Sie Dokument veröffentlichen aus, um Ihre Inhalte zu veröffentlichen.
Nehmen wir an, Sie haben ein Topic mit drei Absätzen:
Absatz für alle Benutzer geeignet. Dieser hat keinen Filter Zielgruppe.
Absatz nur für IT-Admins geeignet. Sie haben diesen mit einem Filterattribut audience und einem Filterwert vonIT admin markiert.
Absatz nur für Anfänger geeignet. Sie haben diesen mit einem Filterattribut audience und einem Filterwert von Novice markiert.
Schließlich werden Sie das Topic als Teil von drei verschiedenen Ausgaben veröffentlichen, eine für jedes unterschiedliche Publikum (alle, IT-Administratoren, Anfänger). Vorerst werden Sie es jedoch nur für IT-Admins veröffentlichen.
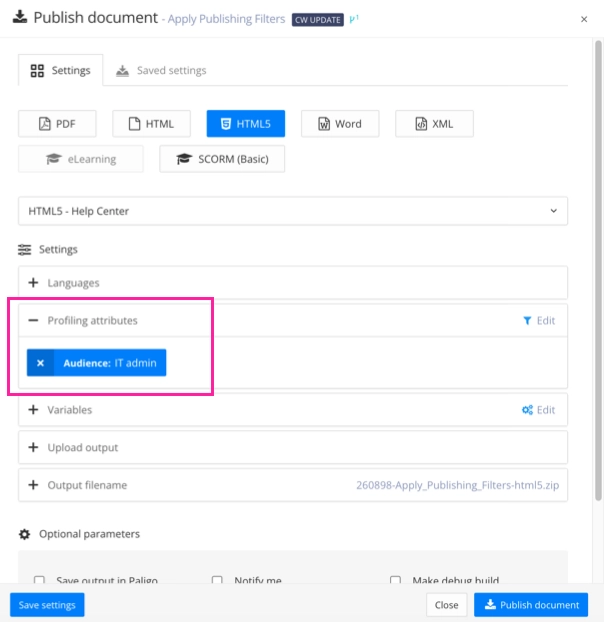
Sie starten den Veröffentlichungsprozess für die IT-Admin-Publikation. Bearbeiten Sie in den Veröffentlichungseinstellungen den Abschnitt Profiling-Attribute und wählen Sie Zielgruppe: IT admin.
 |
Wenn Paligo die Ausgabe generiert, passiert Folgendes:
Enthält den ersten Absatz, da er keinen Filter Zielgruppe hat.
Enthält den zweiten Absatz, da er den Filter Zielgruppe und den Filterwert IT admin hat.
Enthält den dritten Absatz, da er den Filter Zielgruppe aber keinen Filterwert IT admin hat.
Nehmen wir an, Sie haben einen Absatz, der nur für Kunden in Nordamerika und der EU gilt. Sie möchten den Absatz einbeziehen, wenn Sie in diesen Märkten veröffentlichen, aber ihn ausschließen, wenn Sie im Nahen Osten, Australien und anderen Märkten veröffentlichen. Hier benötigen Sie einen ODER-Filter, da der Inhalt angezeigt werden soll, wenn der Markt Nordamerika ODER die EU ist.
Zum Markieren des Absatzes:
Wählen Sie das Element
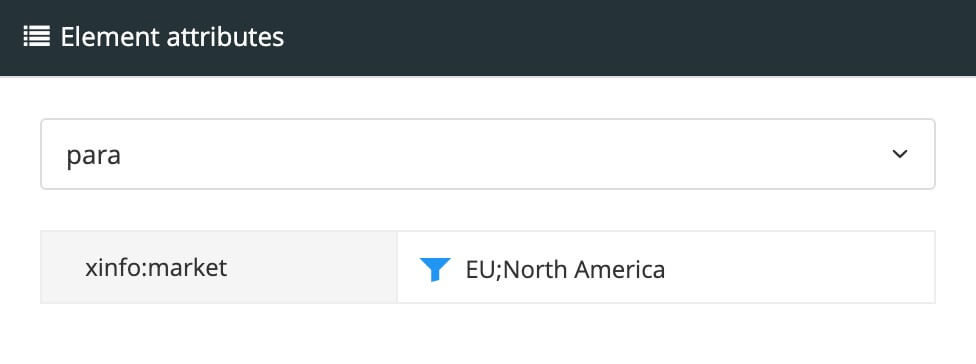
paraaus.Fügen Sie das Attribut
xinfo:marketim Panel „Elementattribute“ hinzu.Stellen Sie den Attributwert ein.
 |
Wenn Sie den Inhalt veröffentlichen, können Sie die Filter für die Publikation auswählen.
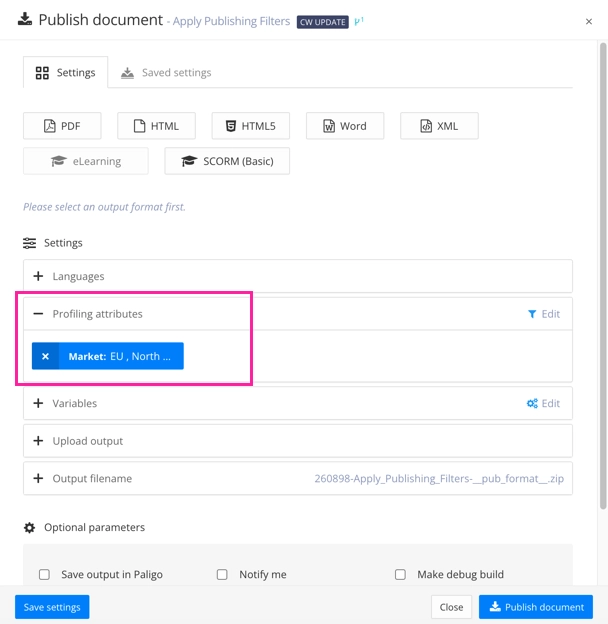 |
Wenn Sie den Marktfilter der Publikation auf Nordamerika, EU oder sowohl Nordamerika als auch EU einstellen, wird der gefilterte Absatz einbezogen.
Wenn Sie den Marktfilter der Publikation auf eine andere Region einstellen, wie z. B. Australien, wird der gefilterte Absatz ausgeschlossen.
Wenn Sie für die Publikation keinen Marktfilter setzen, wird der gefilterte Absatz mit einbezogen. Er wird nur dann von der Publikation ausgeschlossen, wenn der Marktfilter angewendet wird und der Wert für den Marktfilter nicht Nordamerika oder EU entspricht.
Die Filterung von Paligo ist inklusive, d. h., wenn Sie einen Filter einstellen, teilen Sie Paligo mit, welche Inhalte Sie in die Ausgabe aufnehmen möchten. Es kann jedoch vorkommen, dass Sie bestimmte Inhalte ausschließen möchten, anstatt sie einzubeziehen. Richten Sie für diese Situationen Filterwerte ein für:
Wenn Sie beispielsweise einen Absatz in den nordamerikanischen und EU-Markt aufnehmen möchten, ihn aber im asiatischen Markt ausschließen möchten, benötigen Sie drei Filterwerte: Nordamerika, EU und Asien.
Wenn Sie dann veröffentlichen, können Sie Paligo mitteilen, welche Inhalte enthalten sein sollen. Durch die Aufnahme einer Bedingung schließen Sie die anderen möglichen Bedingungen automatisch aus.
Anmerkung
Es kann eine Weile dauern, bis Sie sich mit der „integrativen“ Filterstrategie vertraut gemacht haben, wenn Sie neu im Bereich des Filterns sind oder wenn Sie aus einer anderen Umgebung kommen, in der Sie Filter sowohl für das Einbeziehen als auch für das gezielte Ausschließen verwendet haben. Aber wenn Sie erst einmal die Idee verstanden haben, ist die integrative Strategie sehr wirkungsvoll, da sie genau das Gleiche erreichen kann, aber mit einer viel saubereren Struktur, so dass Sie eine robustere langfristige Lösung haben.
Nehmen wir an, Sie haben drei Arten von Benutzern: Administratoren, Ingenieure und Bediener. Sie haben einen Absatz, den Sie für die Ingenieure und Bediener einbeziehen möchten, aber für die Administratoren ausschließen möchten. Um dies einzurichten, müssen Sie:
Wählen Sie das Element
paraaus.Fügen Sie Attribut
Zielgruppehinzu.Wählen Sie den Wert für das Zielgruppenattribut und erstellen Sie diese Werte: „Administratoren“, „Ingenieure“, „Bediener“.
Beachten Sie, dass es wichtig ist, Werte für die Bereiche zu erstellen, in denen der Inhalt enthalten sein soll, und auch für die Bereiche, in denen er ausgeschlossen werden soll.
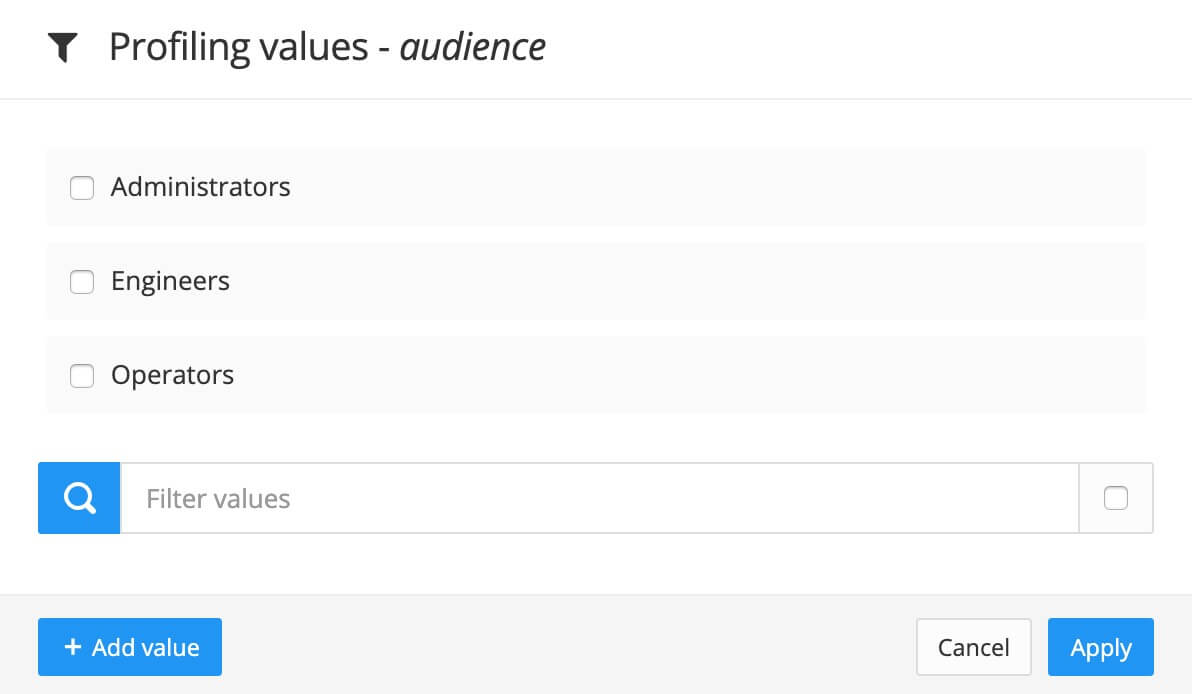
Stellen Sie den Wert des Zielgruppenattributs auf „Ingenieure“ und „Bediener“ ein.
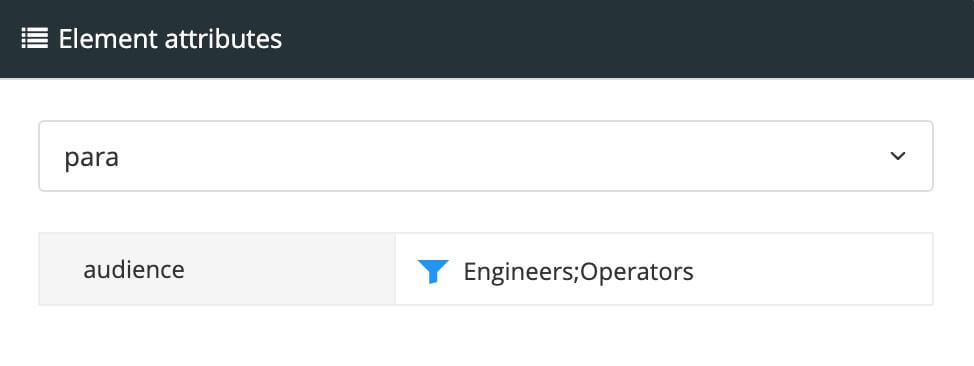
Wenn Sie den Inhalt veröffentlichen, können Sie die Filter für die Publikation auswählen.
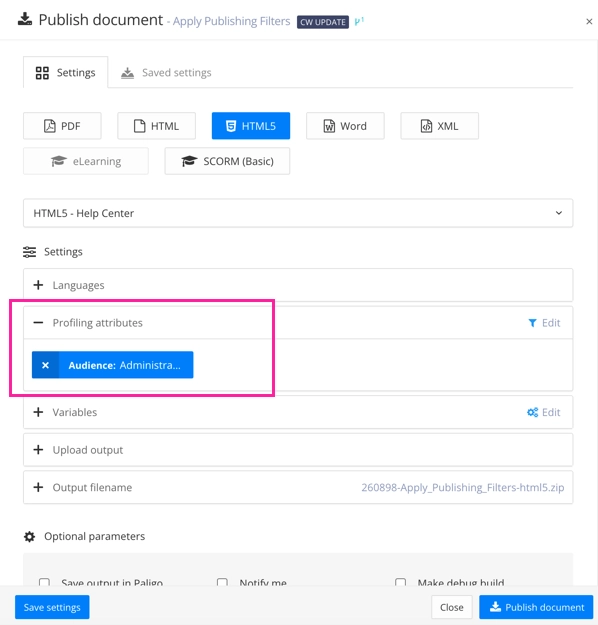 |
Die veröffentlichte Ausgabe wird dann Folgendes enthalten:
Alle Inhalte, die einen Zielgruppenfilter mit dem Wert „Administratoren“ haben. Der von Ihnen markierte Absatz hat einen Zielgruppenfilter mit dem Wert „Ingenieure“ und „Bediener“ und wird daher nicht in die veröffentlichte Ausgabe aufgenommen.
Der von Ihnen markierte Absatz verfügt über einen Zielgruppenfilter mit einem Wert für „Ingenieure“ und „Bediener“. Folglich wird es nicht in die veröffentlichte Ausgabe aufgenommen.
Alle Inhalte, die keinen Zielgruppenfilter haben