Publikationsfilter anwenden
Wenn Sie Ihre Inhalte veröffentlichen, können Sie auswählen, welche Attribute filtern auf die Ausgabe angewendet werden sollen. Es wird empfohlen, für jedes Profiling-Attribut einen Profiling-Wert zu
wählen (verfügbare Filterattribute). Es ist jedoch möglich, mehrere Werte für ein Profiling-Attribut auszuwählen. Der Filter funktioniert dann als ODER-Filter, bei dem Paligo Topics filtert, die einen der eingestellten Profiling-Werte enthalten.
[en] If you choose a single value, Paligo will:
-
[en] Include any content that has the filter attribute and the value you defined (for that filter attribute)
-
[en] Include any content that does not have the filter attribute
-
[en] Exclude any content that has the filter attribute, but with a different value.
[en] If you choose multiple values, the filter works as an OR filter. Paligo will then filter like this:
-
[en] Include any content that has the filter attribute and any of the values you defined (for that filter attribute)
-
[en] Include any content that does not have the filter attribute
-
[en] Exclude any content that has the filter attribute, but with a different value to the ones you defined.
[en] When you apply filtering, it is important to understand the "inclusive" filter behavior we have described. Also, be aware that each filter attribute is handled separately. Choosing a value for one filter attribute does not mean Paligo automatically applies the same value for other filter attributes. The example at the end of this article shows how you can include and exclude content with filters.
So wenden Sie Publikationsfilter an:
-
Wählen Sie das gepunktete Menü (...) für das Topic oder die Publikation im Content Manager aus.

-
Wählen Sie Veröffentlichen aus.

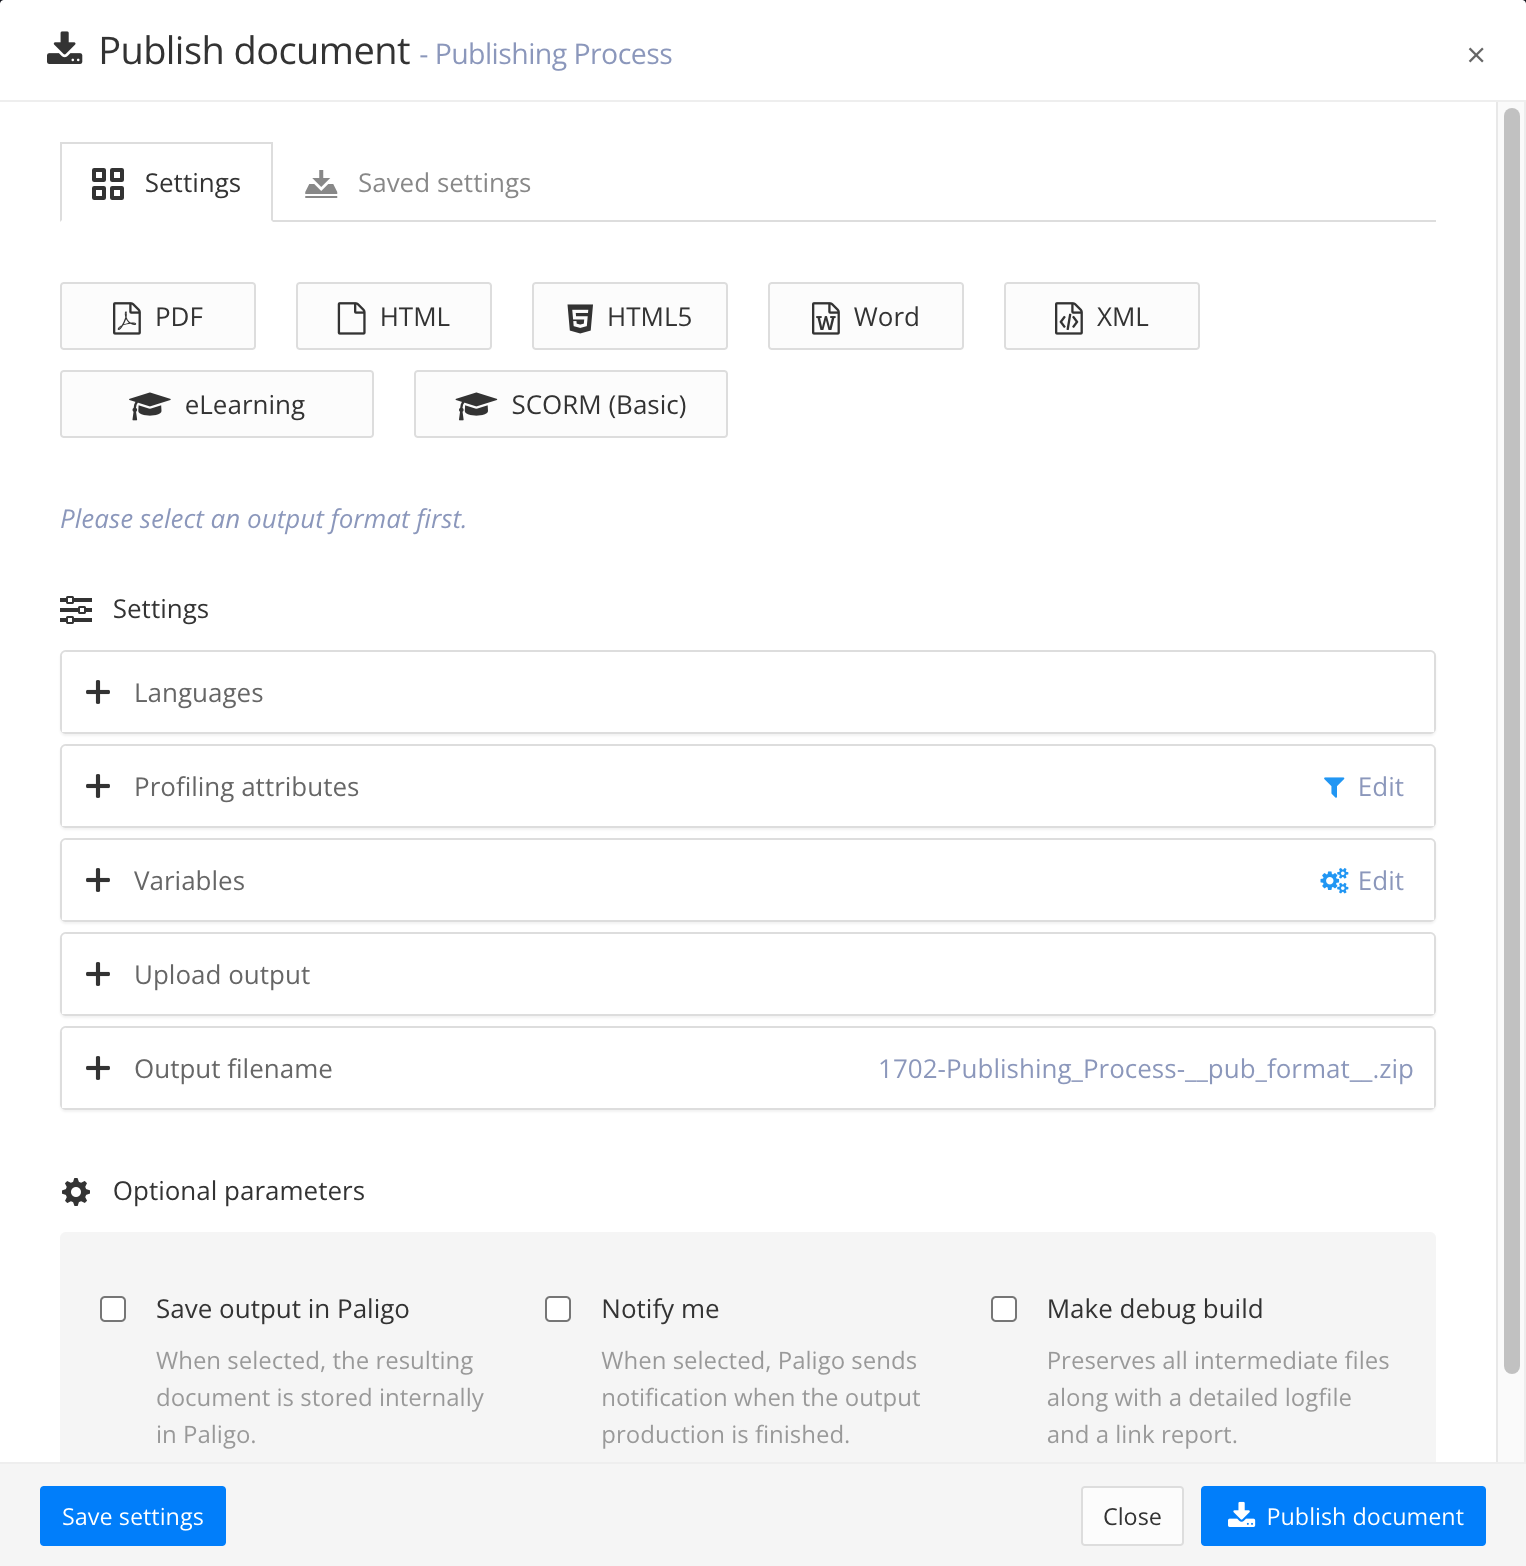
Paligo zeigt das Dialogfeld Dokument veröffentlichen an.
-
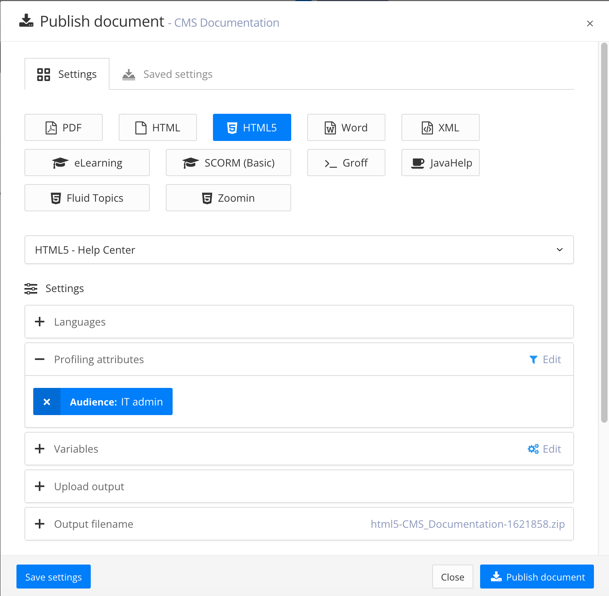
Wählen Sie einen Ausgabetyp (PDF, HTML, HTML5, Word, XML, eLearning oder SCORM).
-
Stellen Sie die Sprachen, Variablen und optionalen Parameter ein.
Tipp
Dies sind allgemeine Publikationseinstellungen, siehe Inhalte veröffentlichen.
-
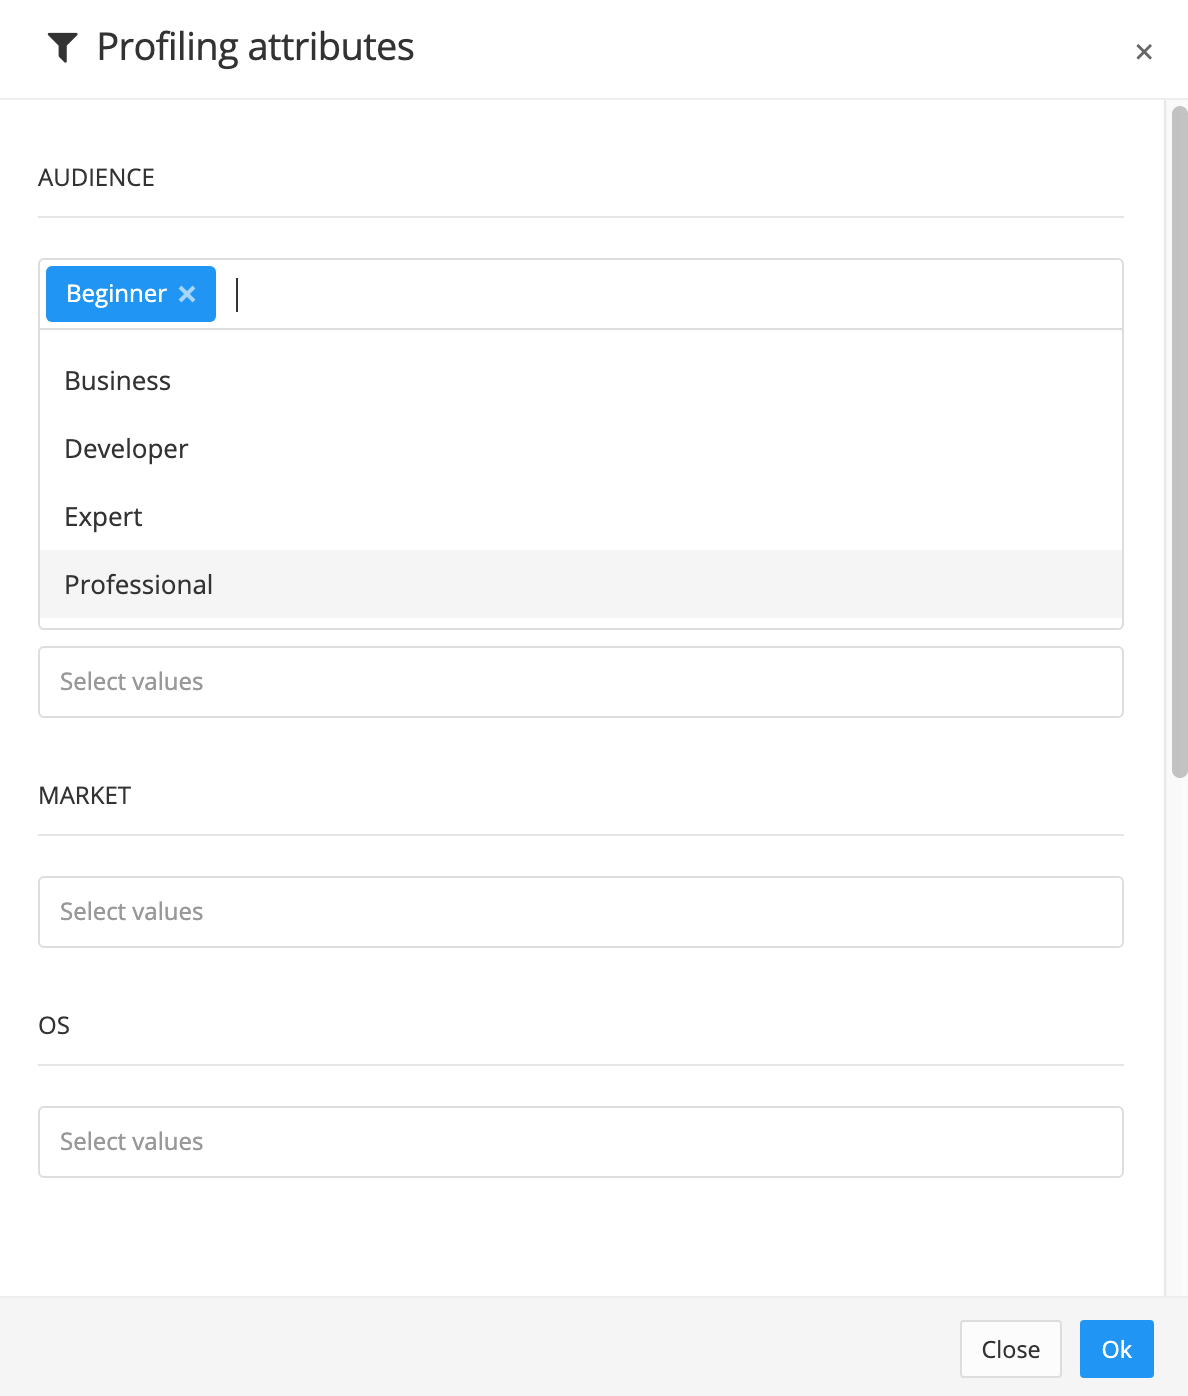
Wählen Sie im Abschnitt Profiling-Attribute die Option Bearbeiten.

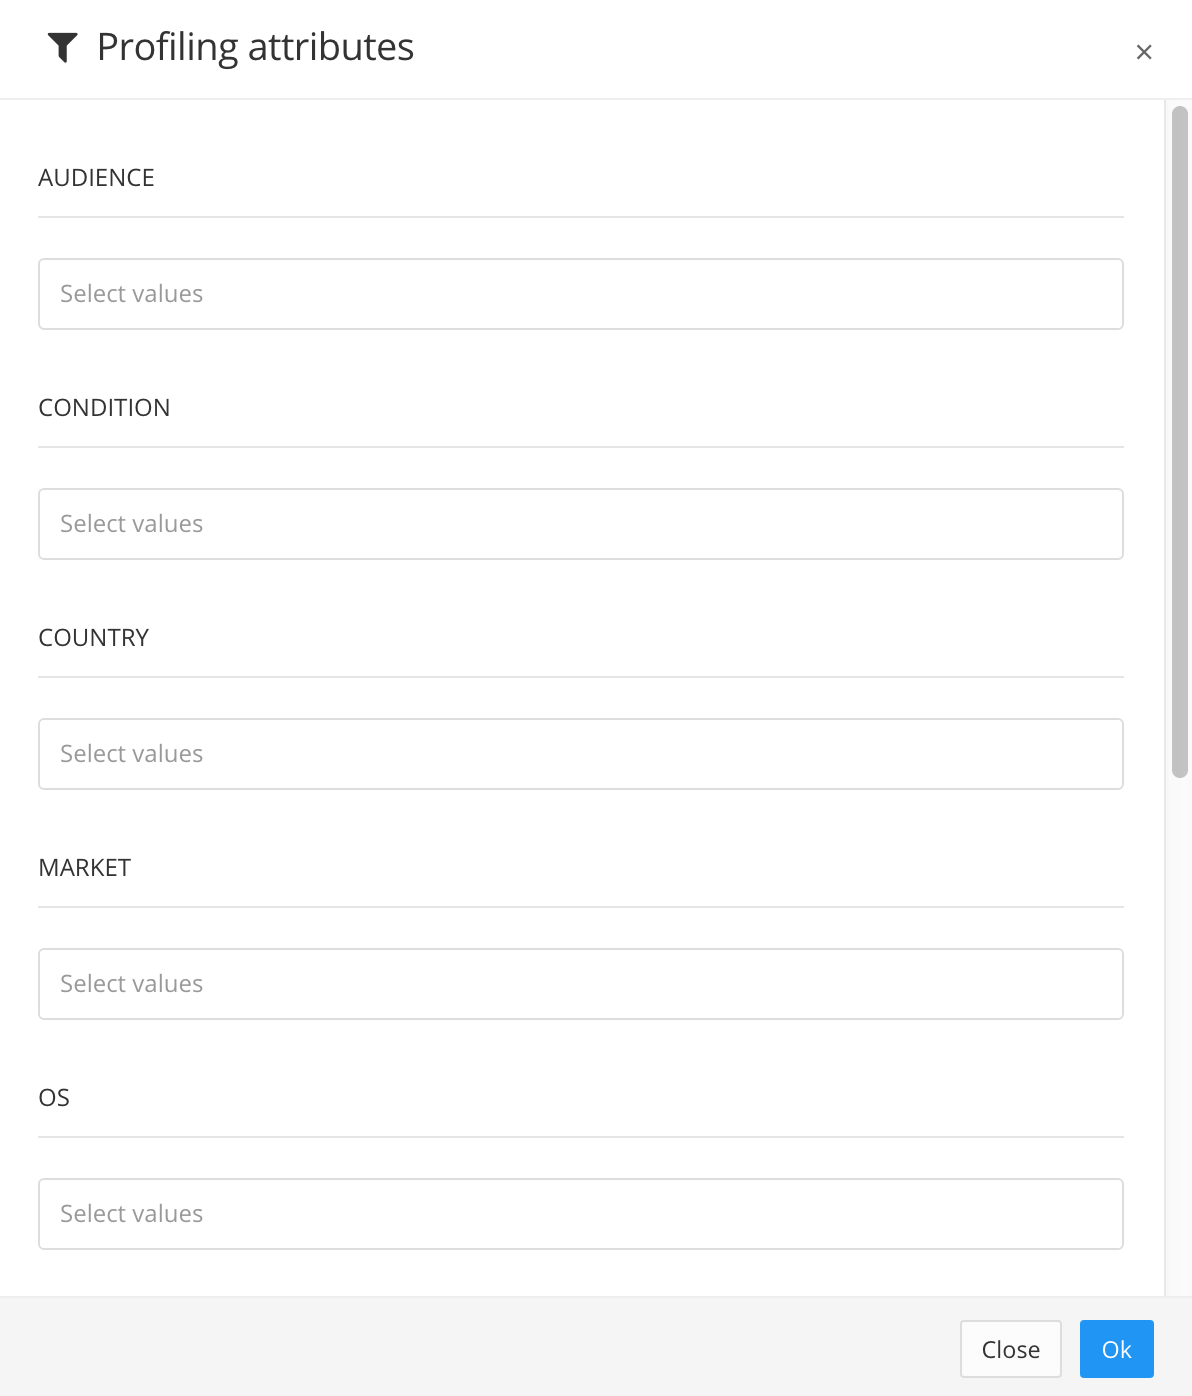
Das Dialogfeld Profilingattribute enthält ein Feld für alle verfügbaren Filterattribute.
-
[en] Decide which filter attributes and values you want to apply to your publication. Then, for each filter that you want to use, select the profiling value from the menu.
Um weitere Profiling-Werte zu erstellen, siehe Profiling-Werte erstellen.
Anmerkung
Lassen Sie die Felder leer, wenn Attribute nicht verwendet werden sollen. Wenn kein Attribut festgelegt ist, ignoriert Paligo diesen Filtertyp.
-
Wiederholen Sie die Schritte 5 und 6 für jedes Profiling-Attribut, das Sie anwenden möchten.
-
Klicken Sie auf OK.
-
Wählen Sie Dokument veröffentlichen aus, um Ihre Inhalte zu veröffentlichen.
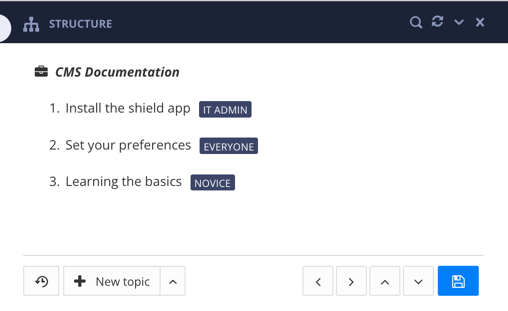
[en] Let's say you have a publication with these topics:
 |
-
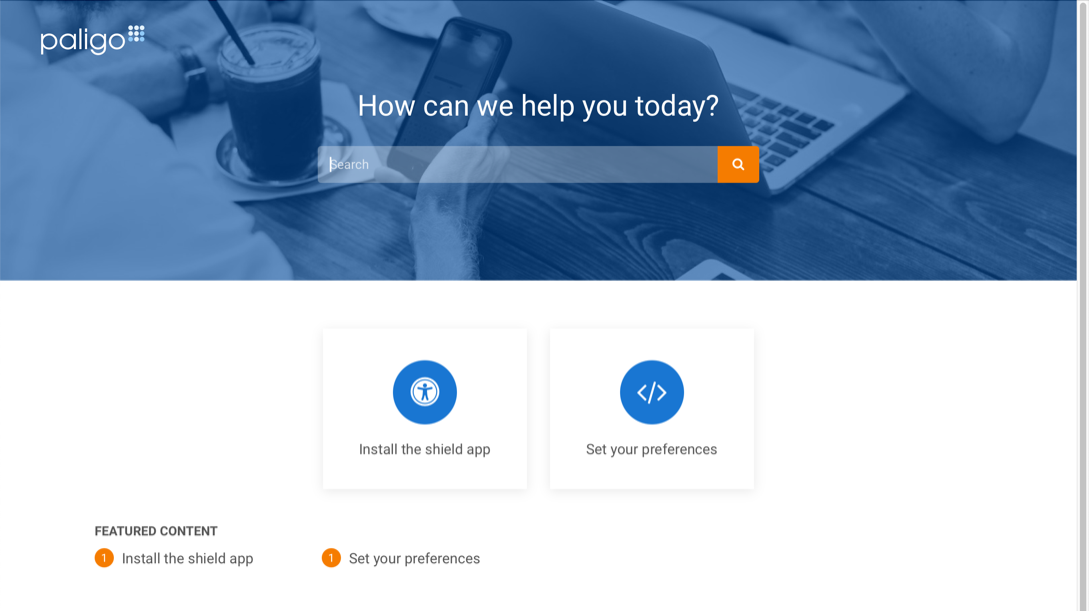
[en] Install the shield app
[en] This topic is only for IT admin users.
-
[en] Set your preferences
[en] This topic is suitable for all users.
-
[en] Learning the basics
[en] This topic is only for beginner users.
[en] You want to publish a help center designed for IT admin users. For this, you need to include "Install the shield app" and "Set your preferences" but exclude "Learning the basics". To make this possible,
you add the audience filter attribute to the section element in the appropriate topics, and set the values as follows:
-
[en] You give "Install the shield app" the
audienceattribute on thesectionelement. You set the attribute value to:IT admin(you add a value with this name).
-
[en] You leave "Set your preferences" with the default settings. It does not need an
audienceattribute as this content is suitable for all users. -
[en] You give "Learning the basics" the
audienceattribute and set its value toNovice. Again, you add a value with this name and the attribute is on thesectionelement.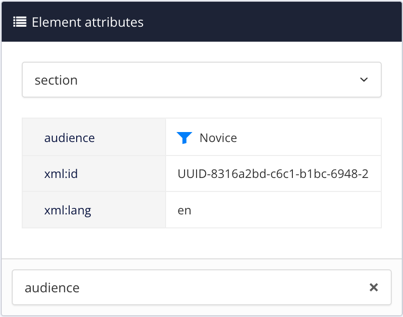
[en] You then publish your content. In the publishing settings, you apply the audience filter and you choose the IT admin
value.
 |
[en] When Paligo generates the output, it:
-
[en] Includes "Install the shield app" as it has audience:IT admin. You chose to use content that has the audience filter attribute with the admin value.
-
[en] Includes "Set your preferences" as this does not have the audience filter attribute. By default, Paligo includes any content that does not have the filter attributes you chose to use.
-
[en] Excludes "Learning the basics" as it has the filter attribute, but it does not have admin as the value. Instead it has novice, which does not match your filter criteria, and so the content is excluded.
 |