[en] Style Nongraphical Admonitions
[en] If you have set Paligo to generate nongraphical admonitions, it will apply the styling choices from the General settings and the Nongraphical settings. The General settings take priority over the Nongraphical settings.
[en] Here, we explain how to use the Nongraphical settings.
Anmerkung
[en] To learn how to set Paligo to generate nongraphical admonitions, see [en] Set the General Styles for Admonitions. That article also explains how to use the General settings.
[en] To set the Nongraphical styles:
-
Wählen Sie im oberen Menü Layout aus.
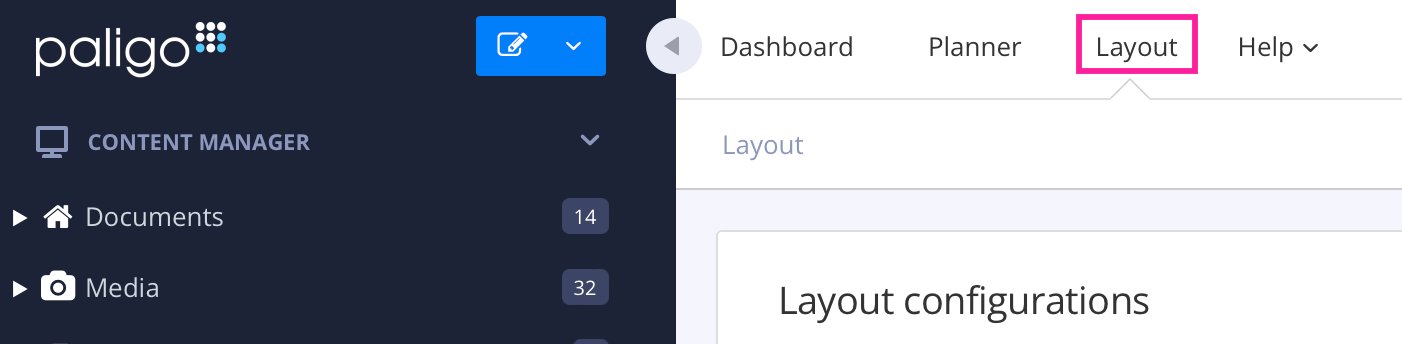
Paligo zeigt eine Liste von Layouts an. Die Liste ist leer, wenn keine benutzerdefinierten Layouts in Ihrer Paligo-Instanz vorhanden sind.
-
Wählen Sie das PDF-Layout, das Sie für die Veröffentlichung verwenden möchten. Alternativ können Sie auch ein neues erstellen (siehe Ein Layout erstellen).
-
[en] Select the Admonitions category and then select the Nongraphical subcategory.
-
[en] Choose whether Paligo should allow an admonition to have a user-defined title and an auto-generated title.
[en] In the General settings for admonitions, there is a Use auto-title in admonitions setting. When it is set to Activate, Paligo will generate automatic titles for your admonitions, such as "Note" and "Caution". The auto-generated titles will replace any existing titles, by default. But if you prefer, you can set Paligo to include both auto-generated titles and manually-added titles.

[en] Example of an admonition that has an auto-generated title (Caution) and a user-defined title (Risk of injury)
[en] Set the Allow both user-defined title and auto-generated title setting to:
-
[en] Enabled to allow a user-defined title and an auto-generated title
-
[en] Disabled to only allow one title. If Use auto-title in admonitions is set to Activate, Paligo will generate titles for your admonitions. Any existing titles are ignored.
-
Standard – um den Wert für diese Einstellung aus dem Basislayout zu übernehmen. Das Basislayout kann ein von Paligo bereitgestelltes integriertes Layout oder ein anderes kundenspezifisches Layout ein. Weitere Informationen finden Sie unter Layoutbeziehungen – Basis, Neu, Duplizieren.
-
-
Wählen Sie Hintergrundfarbe für grafische Mahnungen aus, um eine einzige Farbe für alle grafischen Mahnungen auszuwählen.
-
Deaktivieren Sie das Kontrollkästchen für Standardfarbe verwenden und wählen Sie eine Farbe Ihrer Wahl aus.
-
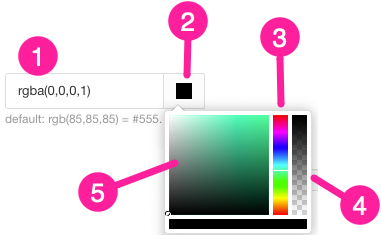
Sie können die Farbe wie folgt festlegen:
-
Eingabe eines RGBA-Codes für die gewünschte Farbe (1).
-
Auswahl des Farbquadrats zur Anzeige des Farb-Selektors (2).
-
Wählen Sie die Farbe aus, indem Sie den Spektrumbalken verwenden (3).
-
Legen Sie die Transparenz fest, indem Sie den Durchsichtigkeitsbalken verwenden (4).
-
Wählen Sie den Farbton aus, indem Sie die Hauptfarbpalette verwenden (5).
-
-
Anmerkung
Paligo verwendet die hier ausgewählte Farbe nur dann, wenn in der Kategorie Allgemein die Hintergrundfarben auf den Standard festgelegt sind.
[en] For example, let's say you select the General category and set Background color for 'Caution' to orange. You then go into the Nongraphical category and set Background color for graphical admonitions to blue. When you publish, your caution admonitions will have an orange background, as the General category takes priority over the Nongraphical category.
-
-
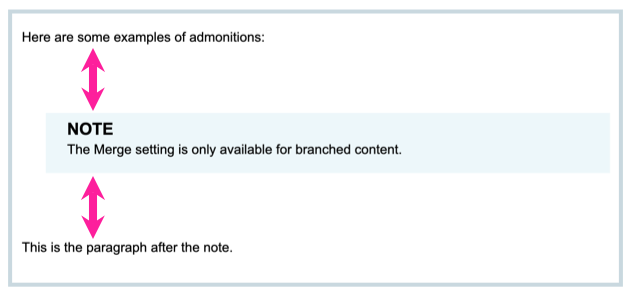
[en] Set the amount of space above (before) and below (after) the nongraphical admonitions.
-
[en] Space-before (optimum) for nongraphical admonitions
-
[en] Space-after (optimum) for nongraphical admonitions
[en] Enter an amount, relative to the body font size in the following fields. For example, 1.2. Do not include any units of measurement as the size is always relative to the body font size.
-
-
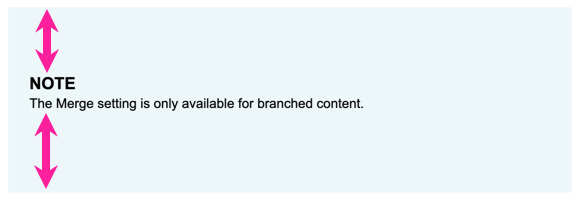
[en] Set the amount of padding for nongraphical admonitions. The padding is the internal margin between the content in the admonition and the boundaries of the admonition box.
[en] Enter an amount and the units of measurement in the following fields:
-
Padding oben für nicht grafische Mahnungen
Mit dieser Einstellung können Sie den Bereich oberhalb des Titels nicht grafischer Mahnungen festlegen. Dieser Bereich wird auf den Text angewendet, wenn kein Titel vorhanden ist.
-
Padding unten für nicht grafische Mahnungen
Mit dieser Einstellung können Sie den Bereich unterhalb des Texts nicht grafischer Mahnungen festlegen.
-
-
[en] Use the margin settings to set left and right indents for nongraphical admonitions. The margins apply to the admonitions as a whole, not the content inside it.

-
[en] Margin-left for nongraphical admonitions
[en] Sets the left-side indent for all nongraphical admonitions.
-
[en] Margin-right for nongraphical admonitions
[en] Sets the right-side indent for all nongraphical admonitions.
Geben Sie für beide Einstellungen einen Wert und dessen Maßeinheit ein, z. B. 2 cm. Berücksichtigen Sie bei der Festlegung des Randbereichs den verfügbaren Platz an der Seite in Ihrer PDF-Datei.
-
-
Drücken Sie Speichern.
[en] When you use this Layout to publish to PDF, Paligo will apply your chosen settings.